Editor’s note: This article was last updated by Muhammed Ali on 22 October 2024 to cover using MongoDB change streams to enable real-time data synchronization between microservices.
In early software development, applications were built as monolithic structures, tightly coupling all components into a single system. This approach makes even minor changes challenging, as any fault in one component can disrupt the entire system.
Today, we can avoid these issues by using microservices. Microservices allow us to develop each component independently, so faults in one part don’t impact the whole application. In this article, we’ll dive into microservices, demonstrate how to create a microservice with Node.js, and explore how this approach is reshaping software development.
To follow along, you’ll need:
A monolithic application is a single-tiered software where all components (e.g., books and users in a library management system) are interconnected and dependent on a single codebase. Any fault in one component affects the entire system.
Pros of monolithic architecture:
Cons of monolithic architecture:
Microservices architecture consists of small, autonomous services where each feature (e.g., payment, cart in an ecommerce store) operates independently with its own server and database. Applications built with this kind of architecture are loosely coupled, also referred to as distributed applications.
In the ecommerce store example, models for cart and customers would communicate with each other using APIs like REST. Because we’ll develop our store features independently from each other, if our system develops a fault, we can easily identify which feature to debug and avoid having to bring down the entire application.
Pros of microservices:
Cons of microservices:
Choosing a microservice architectural pattern comes with some challenges; one of these is service-to-service communication. Services are a loosely coupled part of an application that together contribute to the application’s overall performance.
To achieve effective performance, there has to be a means of communication between the microservices. In a microservice application, communication is made possible through an inter-service communication protocol like HTTP(s), gRPC, or message brokers.
Let’s review some of the ways in which services establish communication in a microservice architecture.
HTTP communication is a kind of synchronous communication pattern where a service is dependent on another to perform:
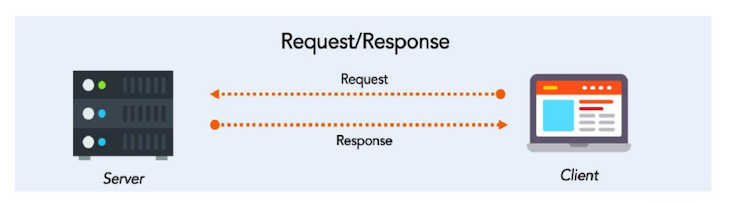
The image above represents the HTTP request-response cycle, where the client makes a request and waits for a response from the server-side application.
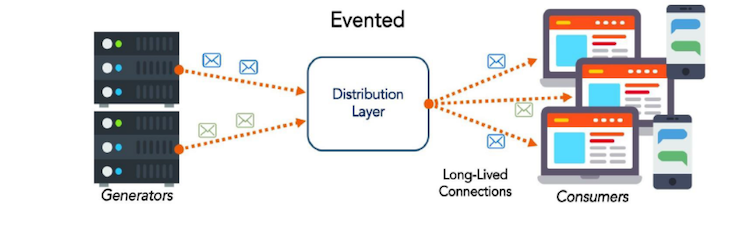
The event-driven communication pattern entails an interaction between a service provider and a service consumer. The service consumer requires a resource from an external source. It then performs some computations and relays the response to the client:
You can use any programming language to develop a microservice, like Java, C#, or Python, but Node.js is a good choice for a few reasons:
In this section, we’ll develop two microservices for a simple blog application using Node.js and MongoDB. One service will manage posts, while the other will handle comments.
We’ll also implement real-time communication between these services using MongoDB change streams, which enable you to listen to real-time data changes in your MongoDB collections. By using db.collection.watch(), you can react to data updates, inserts, or deletes as they occur. In our case, the comment microservice will notify the post microservice whenever a comment is added, and the post will update accordingly.
Prerequisites:
Create a new folder called blog and initialize a Node.js project:
npm init -y
npm install express mongoose cors
Then, create postService.js and commentService.js files in the blog folder. In the postService.js file, paste in the following code, which will handle the post microservice:
const express = require('express');
const mongoose = require('./db');
const PostSchema = new mongoose.Schema({
    title: String,
    content: String,
    comments: [
      {
        text: String,
        createdAt: { type: Date, default: Date.now },
      },
    ],
    createdAt: { type: Date, default: Date.now },
  });
const Post = mongoose.model('Post', PostSchema);
const app = express();
app.use(express.json());
// Listen to MongoDB Change Streams for the comments collection
mongoose.connection.once('open', () => {
    console.log('Post service connected to MongoDB');

    const changeStream = mongoose.connection.collection('comments').watch();

    changeStream.on('change', async (change) => {
      if (change.operationType === 'insert') {
        const comment = change.fullDocument;
        try {
          // Find the associated post and update its comments array
          await Post.findByIdAndUpdate(
            comment.postId,
            { $push: { comments: { text: comment.text, createdAt: comment.createdAt } } },
            { new: true }
          );
          console.log(`Updated post with new comment: ${comment.text}`);
        } catch (error) {
          console.error('Failed to update post with new comment:', error);
        }
      }
    });
  });
app.post('/posts', async (req, res) => {
  const post = new Post(req.body);
  await post.save();
  res.status(201).send(post);
});
app.get('/posts', async (req, res) => {
  const posts = await Post.find();
  res.send(posts);
});
app.listen(process.env.PORT, () => {
  console.log(`Post service running on port ${process.env.PORT}`);
});
The code defines a Post model with fields for the title, content, an array of comments, and timestamps. The application connects to MongoDB and establishes a change stream on the comments collection, listening for insert events to update the corresponding post’s comments array in real time.
Now, let’s create a file to handle the database (db.js) and paste in the following code:
const mongoose = require('mongoose');
require('dotenv').config();
mongoose.connect(process.env.MONGO_URI, {
  useNewUrlParser: true,
  useUnifiedTopology: true,
});
mongoose.connection.on('connected', () => {
  console.log('Connected to MongoDB');
});
module.exports = mongoose;
Next, create the .env file, which will contain the database URI and port:
MONGO_URI=mongodb://localhost:27017,localhost:27018,localhost:27019/test?replicaSet=rs0
PORT=4000
Next, paste the following code in the file for CommentService (commentService.js):
const express = require('express');
const mongoose = require('./db');
const CommentSchema = new mongoose.Schema({
  postId: mongoose.Schema.Types.ObjectId,
  text: String,
  createdAt: { type: Date, default: Date.now },
});
const Comment = mongoose.model('Comment', CommentSchema);
const app = express();
app.use(express.json());
app.post('/comments', async (req, res) => {
  const comment = new Comment(req.body);
  await comment.save();
  res.status(201).send(comment);
});
app.get('/comments/:postId', async (req, res) => {
  const comments = await Comment.find({ postId: req.params.postId });
  res.send(comments);
});
app.listen(4001, () => {
  console.log('Comment service running on port 4001');
});
The code above defines a CommentSchema that includes fields for postId, text, and createdAt, with postId being a reference to the ID of the related post. A Mongoose model named Comment is created based on this schema.
The Express app is configured to parse JSON requests and includes two routes: a POST route at /comments that saves a new comment to the database and responds with the created comment and a GET route at /comments/:postId that retrieves and returns all comments associated with a specified postId.
Now you can run each microservice in separate terminal/command line windows:
node commentService.js
node postService.js
On another terminal, run the following command to create a new post:
curl -X POST http://localhost:4000/posts \
-H "Content-Type: application/json" \
-d '{
  "title": "My First Post",
  "content": "This is the content of my first post."
}'
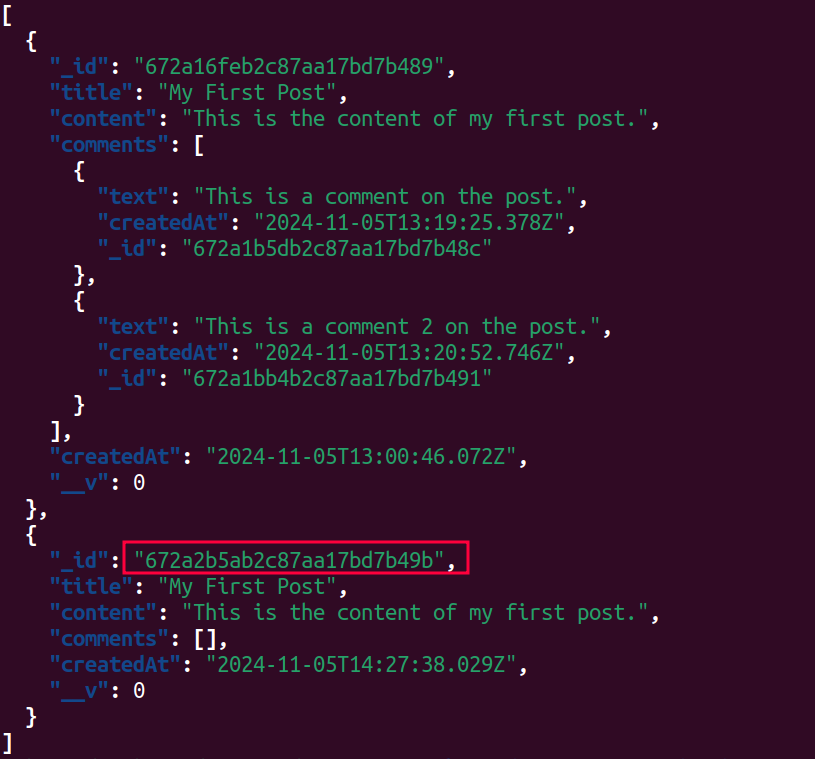
Now run the following command to check the list of posts and get the ID of the post you just created:
curl http://localhost:4000/posts
Now we can create a comment by attaching the associated post using its ID:
curl -X POST http://localhost:4001/comments \
-H "Content-Type: application/json" \
-d '{
  "postId": "672a2b5ab2c87aa17bd7b49b",
  "text": "This is a comment on the post."
}'
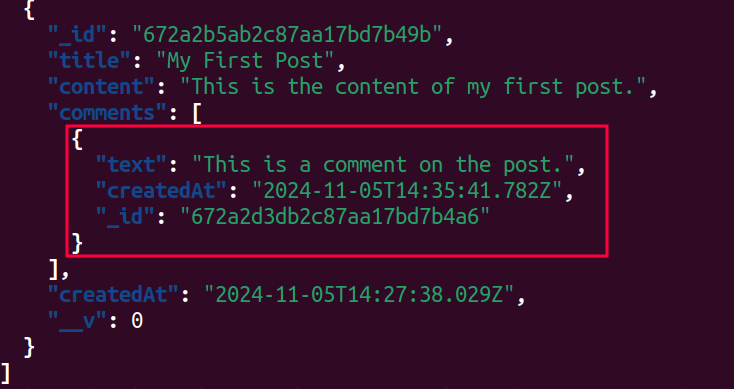
Now, when you check the post lists again, you should see the comment you just added:
In this guide, we explored the advantages of microservices over monolithic applications, especially for flexibility, scalability, and independent service management. We demonstrated how to build a simple microservice with Node.js, connecting two independent services — a posts service and a comments service — using MongoDB change streams for real-time updates.
Using Node.js’ event-driven architecture and MongoDB’s real-time capabilities, microservices can offer efficient, scalable solutions adaptable to complex applications.
We’d love to hear your experiences and insights on microservices in the comments below!
 Monitor failed and slow network requests in production
Deploying a Node-based web app or website is the easy part. Making sure your Node instance continues to serve resources to your app is where things get tougher. If you’re interested in ensuring requests to the backend or third-party services are successful, try LogRocket.

LogRocket lets you replay user sessions, eliminating guesswork around why bugs happen by showing exactly what users experienced. It captures console logs, errors, network requests, and pixel-perfect DOM recordings — compatible with all frameworks.
LogRocket's Galileo AI watches sessions for you, instantly identifying and explaining user struggles with automated monitoring of your entire product experience.
LogRocket instruments your app to record baseline performance timings such as page load time, time to first byte, slow network requests, and also logs Redux, NgRx, and Vuex actions/state. Start monitoring for free.
Would you be interested in joining LogRocket's developer community?
Join LogRocket’s Content Advisory Board. You’ll help inform the type of content we create and get access to exclusive meetups, social accreditation, and swag.
Sign up now
Discover how to use Gemini CLI, Google’s new open-source AI agent that brings Gemini directly to your terminal.

This article explores several proven patterns for writing safer, cleaner, and more readable code in React and TypeScript.

A breakdown of the wrapper and container CSS classes, how they’re used in real-world code, and when it makes sense to use one over the other.

This guide walks you through creating a web UI for an AI agent that browses, clicks, and extracts info from websites powered by Stagehand and Gemini.


9 Replies to "Building microservices with Node.js"
Bro, you should attach your website and linkedin profile to your page. That way people can reach you with opportunties.
Thank you very much for this, I will try to include at least a social media link.
Toi bad the most important part is not described. How do multiples microservice interact with each other. For exemple you call an endpoint this endpoint retreive data and call 2 other micro services that have coupled data in another db
Sorry about this, there is an existing article that explain communication between microservices here on logRocket blog, you can please read up here https://blog.logrocket.com/methods-for-microservice-communication/
Thank you.
For a Node.js article, this felt pretty dated and out of touch. I guess my biggest gripe is that you’re promoting the use of request (which has been deprecated for a while now) but also some of the conventions used aren’t exactly the best. I also wish you’d explain microservices more in depth. Just some constructive criticism
The code snippets are all with mistakes. I don’t know why, but LogRocket has all the best tutorials to start with but with a lot of mistakes. This is very bad
Hi John, thank you for the comment, do you mind pointing out the mistake?
In the server.js file, the line app.use(express.static(“client”)) should be removed. It is not needed in this code snippet and will cause an error.
In the weather.js file, the line weatherRoute.get(“/”, (req, res)=>{res.sendFile(__dirname, + “index.html”)} will cause an error because __dirname is a path, and res.sendFile expects a file path as its first argument, but it is being concatenated with a string “index.html”. It should be like this res.sendFile(__dirname + “/index.html”)
In the weather.js file, the line const appiKey = “Your API Key” is hardcoded and it should be replaced with a valid API key otherwise the application will not work as expected.
In the weather.js file, the line const url = “https://api.openweathermap.org/data/2.5/weather?q=”+ city + “&appid=”+appiKey+”&units=”+unit+”” should use encodeURI function to encode the url parameters, to avoid any issues with special characters or spaces in the parameters.
youre the real chad saved my day thank you broo