React Native is an amazing library for developers looking to build mobile apps with speed. It provides an efficient way of displaying information to the frontend. But before displaying API data, the application has to first inform the user that the data is on its way.

One way to do so is to leverage the power of animations. Thus, it can also give your UI a more vibrant feel.
For example, what do you think gives a better impression? Rendering a piece of text:
Or using a vivid animation:

In the React Native world, a multitude of libraries exists to help you get up and running. In this guide, we will use lottie-react-native and react-native-animatable. This is because they are an absolute breeze to use and well maintained.
Let’s say that you built a breathtaking graphic using Adobe After Effects and want to render it in your app. But, this is one major flaw: Adobe does not allow you to do that.
This is where lottie-react-native comes in. It allows developers to render their animations without recreating them via code. It only requires a few lines of code to work, thus letting you focus on more important parts of the project.
To install it in your app, run the following terminal commands:
npm i lottie-react-native
npm i [email protected]
You can use your own animations by exporting them with the Bodymovin plugin. But for this guide, we will use the LottieFiles directory. It includes a ton of free animations that you can import in your project.
In this article, I will use the Sleeping Cat animation.
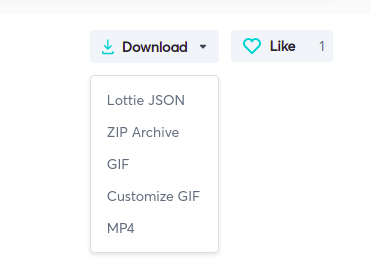
To use your desired animation in your application, first download it in JSON format like so:
Next, move this into the assets folder.
To use Lottie, write the following code:
import React from "react";
import { StyleSheet, View, Text } from "react-native";
import LottieView from "lottie-react-native";
import { useState } from "react";
export default function SimpleLottie() {
  return (
    <View>
      <LottieView
        source={require("./assets/67834-ssssttt-shut-up-the-cat-is-sleeping.json")}
        style={styles.animation}
        autoPlay
      />
    </View>
  );
}
const styles = StyleSheet.create({
  animation: {
    width: 100,
    height: 100,
  },
});
The LottieView component holds our animation config. Here, the source prop tells the location of our asset. Moreover, the autoPlay prop tells Lottie to run the animation on startup.
To render SimpleLottie, write the following code in App.js:
//further code removed..
import SimpleLottie from "./SimpleLottie";
export default function App() {
  return (
    <View style={styles.container}>
      <SimpleLottie />
      <StatusBar style="auto" />
    </View>
  );
}
//...

We can even perform conditional rendering on our SimpleLottie component. This will simulate loading functionality:
const [show, setShow] = useState(false);

useEffect(() => {
  setTimeout(() => setShow(true), 3000);
}, []);

return (
  <View style={styles.container}>
    {show ?<Text>Finished loading!</Text> : <SimpleLottie /> }
    <StatusBar style="auto" />
  </View>
);
In this block of code, we told React to reverse the value of the show Hook after 3 seconds. This will render the Text on the screen.

Here, the plan is to show data from Coffee API. While the data is loading, React will display the loading graphic.
Create a file called DataDisplay.js. This component will be useful in displaying list items. Here, write the following code:
import React from "react";
import { StyleSheet, SafeAreaView, FlatList, Text, View } from "react-native";
export default function DataDisplay({ data }) {
  const Item = ({ title }) => (
    <View style={styles.item}>
      <Text>{title}</Text>
    </View>
  );
  const renderItem = ({ item }) => <Item title={item.title} />;
  return (
    <SafeAreaView>
      <FlatList
        data={data}
        renderItem={renderItem}
        keyExtractor={(item) => item.id.toString()}
      />
    </SafeAreaView>
  );
}
const styles = StyleSheet.create({
  item: {
    backgroundColor: "yellow",
    padding: 20,
    marginVertical: 8,
  },
});
A few inferences from this code:
Item component and renderItem function. They will work together to render each individual element in the arrayFlatList component to render the listNext, alter your App.js file like so:
export default function App() {
  const [data, setData] = useState(null);
  const fetchData = async () => {
    const resp = await fetch("https://api.sampleapis.com/coffee/hot");
    const data = await resp.json();
    setData(data);
  };
  useEffect(() => {
    fetchData();
  }, []);
  return (
    <View style={styles.container}>
      {data ? <DataDisplay data={data} /> : <SimpleLottie />}
      <StatusBar style="auto" />
    </View>
  );
}
In the above block of code, we told React to fetch data from the API and store the response into the data Hook. After that, React checks whether the response has loaded (data has a value).
If true, the API data is shown. Otherwise, React Native renders the SimpleLottie animation.
This will be the output:

The react-native-animatable library allows the developer to create their own transitions and animations through the declarative API. This is suitable for loaders and splash screens.
Run the following terminal command to get the package:
npm install react-native-animatable
Create a file called SimpleAnimatable.js. Here, write the following block of code:
import * as Animatable from "react-native-animatable";
import React from "react";

export default function SimpleAnimatable() {
  return (
    <Animatable.View>
      <Animatable.Text
        animation="bounce"
        iterationCount={"infinite"}
        direction="normal"
      >
        Loading..
      </Animatable.Text>
    </Animatable.View>
  );
}
Let’s dissect this code piece by piece.
Animatable.View component allows our custom component to have animation functionalityText element will have bounce-like behavior. Moreover, we’ve also set the iterationCount property to infinite . This makes the animation loop foreverThis will be the output:

You can even get a “flash-like” animation like so:
<Animatable.Text
   animation="flash"
//....

This step should be straightforward. You can simply use conditional rendering:
{data ? <DataDisplay data={data} /> : <SimpleAnimatable />}
In this article, we covered two common strategies for building animations in React Native. In my own projects, I use Lottie because it is rock solid and extremely easy to use.
Furthermore, Lottie includes an imperative API which allows for more granular control over the chosen animation.
Thank you so much for reading!

LogRocket's Galileo AI watches sessions for you and and surfaces the technical and usability issues holding back your React Native apps.
LogRocket also helps you increase conversion rates and product usage by showing you exactly how users are interacting with your app. LogRocket's product analytics features surface the reasons why users don't complete a particular flow or don't adopt a new feature.
Start proactively monitoring your React Native apps — try LogRocket for free.
Would you be interested in joining LogRocket's developer community?
Join LogRocket’s Content Advisory Board. You’ll help inform the type of content we create and get access to exclusive meetups, social accreditation, and swag.
Sign up now
A breakdown of the wrapper and container CSS classes, how they’re used in real-world code, and when it makes sense to use one over the other.

This guide walks you through creating a web UI for an AI agent that browses, clicks, and extracts info from websites powered by Stagehand and Gemini.

This guide explores how to use Anthropic’s Claude 4 models, including Opus 4 and Sonnet 4, to build AI-powered applications.

Which AI frontend dev tool reigns supreme in July 2025? Check out our power rankings and use our interactive comparison tool to find out.


