Tic-Tac-Toe is one of the oldest and most popular board games in the world. We can play Tic-Tac-Toe with our friends physically using boards, pebbles, sticks, etc., but we can also play the game with our friends on a web browser. In this tutorial, we’ll build a Tic-Tac-Toe game from scratch using React Hooks, learning how to program a computer to play against us.

You can see the full code for the TicTacToe game at the GitHub repository. Let’s get started!
TicTacToe componentTic-Tac-Toe is played on a 3×3 grid. The player who has the first move is X. The player who plays second is O. The first player to occupy three spaces in a row, column, or diagonal wins. There is no rule as to who goes first, however, a popular convention for deciding who starts is to roll a dice or flip a coin.
Tic-Tac-Toe gameplay can easily lead to a draw, in which case the players have to restart the game. In the next sections, we’ll learn how to implement the Tic-Tac-Toe game logic in the browser.
We’ll need the latest version of Node.js, Yarn, or npm installed on our machine. Keep in mind that npm comes bundled with Node.js, but if you’re using Yarn, you can install the latest version by running the command below:
npm i -g yarn
We can download the latest version of Next.js from https://nodejs.org/download.
We’ll use Yarn to scaffold our Next.js project. Run the command below from any folder on your computer:
yarn create next-app tictactoe
cd tictactoe
In the pages folder, we’ll create a folder called components, which will house our game. We’ll create a TicTacToe component in this folder as follows:
mkdir components

mkdir components/TicTacToe

touch components/TicTacToe/index.js components/TicTacToe/TicTacToe.module.css
components/TicTacToe/index.js contains the game and its logic, while components/TicTacToe/TicTacToe.module.css: contains the game styling.
Go into the styles/Home.module.css file and paste the following code:
.container {
  padding: 0 2rem;
}

.main {
  min-height: 100vh;
  flex: 1;
  display: flex;
  flex-direction: column;
  justify-content: center;
  align-items: center;
}
Next, we’ll go into the pages/index.js and paste the following code:
import Head from "next/head";
import styles from "../styles/Home.module.css";
import TicTacToe from "../components/TicTacToe";

export default function Home() {
  return (
    <div className={styles.container}>
      <Head>
        <title>Tic Tac Toe game</title>
        <meta name="description" content="Generated by create next app" />
        <link rel="icon" href="/favicon.ico" />
        <style>
          @import url('https://fonts.googleapis.com/css2?family=Indie+Flower');
        </style>
      </Head>

      <main className={styles.main}>
        <TicTacToe />
      </main>
    </div>
  );
}
The Home component will load on every route of our project. Notice that we imported our TicTacToe component and the stylesheet Home.module.css.
Inside the Home component, we set up a Head. Inside this Head, we have title and meta tags. We also have a style tag to load the font. We load the Indie Flower font to display the X and O on the board. Lastly, in the main tag, we render the TicTacToe component.
TicTacToe componentLet’s move to the TicTacToe component. Our board will be a square of 3×3 cells, and players will compete inside the cells. To define our board, we’ll use a multi-dimensional array:
[
  ["", "", ""],
  ["", "", ""],
  ["", "", ""],
];
The first dimension is the row, and the second dimension is the column. The rows and columns are numbered from 0 to 2. The first row is 0, the second row is 1, and the third row is 2. The first column is 0, the second column is 1, and the third column is 2.
The first row is the top row, the second row is the middle row, and the third row is the bottom row. The first column is the left column, the second column is the middle column, and the third column is the right column.
We’ll draw the board on the DOM from this array. The first cell is in the first row and the first column, the second cell is in the first row and second column, and the third cell is in the first row and third column. It follows this pattern until the last cell.
First, we import the React library and the styles from the TicTacToe.module.css file:
// TickTacToe/index.js
import styles from "./TicTacToe.module.css";
import { useEffect, useState } from "react";
Next, we’ll create an object that will hold the name and symbol of each player in the game. For this tutorial, it’ll be us against the computer:
// TickTacToe/index.js
// previous code here

const players = {
  CPU: {
    SYM: "O",
    NAME: "CPU",
  },
  HUMAN: {
    SYM: "X",
    NAME: "You",
  },
};
The players object holds the name and symbol of the players. CPU is the name of the computer, and O is the symbol of the computer. You is the name of the human, and X is the symbol of the human.
Next, we’ll create a function sleep, which we’ll use to simulate computer thinking:
// TickTacToe/index.js
// previous code here

function sleep(milliseconds) {
  const date = Date.now();
  let currentDate = null;
  do {
    currentDate = Date.now();
  } while (currentDate - date < milliseconds);
}
The code above will wait for the specified number of milliseconds before releasing the CPU.
Now, we create the TicTacToe component:
// TickTacToe/TicTacToe.js
//  previous code here

export default function TicTacToe() {}
To hold the board, we create a useState Hook. We’ll create additional Hooks to hold the turn and the winner:
// TickTacToe/TicTacToe.js
// previous code here
export default function TicTacToe() {
  const [board, setBoard] = useState([
    ["", "", ""],
    ["", "", ""],
    ["", "", ""],
  ]);
  const [isCPUNext, setIsCPUNext] = useState(false);
  const [winner, setWinner] = useState(null);
}
board state: Holds the multi-dimensional array of the boardsetBoard function: Sets the boardisCPUNext state: Holds the turn of the playersetIsCPUNext function: Sets the turnwinner state: Holds the winner of the gamesetWinner function: Sets the winnerNext, we render the UI as follows:
// TickTacToe/TicTacToe.js
// previous code here
export default function TicTacToe() {
  // code here

  return (
    <div className={styles.container}>
      <div className={styles.col}>
        <span onClick={() => playFn(0, 0)} className={styles.cell}>
          {board\[0\][0]}
        </span>
        <span onClick={() => playFn(0, 1)} className={styles.cell}>
          {board\[0\][1]}
        </span>
        <span onClick={() => playFn(0, 2)} className={styles.cell}>
          {board\[0\][2]}
        </span>
      </div>
      <div className={styles.col}>
        <span onClick={() => playFn(1, 0)} className={styles.cell}>
          {board\[1\][0]}
        </span>
        <span onClick={() => playFn(1, 1)} className={styles.cell}>
          {board\[1\][1]}
        </span>
        <span onClick={() => playFn(1, 2)} className={styles.cell}>
          {board\[1\][2]}
        </span>
      </div>
      <div className={styles.col}>
        <span onClick={() => playFn(2, 0)} className={styles.cell}>
          {board\[2\][0]}
        </span>
        <span onClick={() => playFn(2, 1)} className={styles.cell}>
          {board\[2\][1]}
        </span>
        <span onClick={() => playFn(2, 2)} className={styles.cell}>
          {board\[2\][2]}
        </span>
      </div>
    </div>
  );
}
In the code above, we have a container that encloses each cell and the cols. Each col is a row of the board. Each cell is a cell of the board. When a cell is clicked, the playFn function will be called.
See that in the first cell, we displayed the value, thereby getting the first array in the board array and the first element in the array. Likewise, we did the same for the second cell and eventually the rest of the cells.
We also called the playFn function with the appropriate index of the array in the board and the index in that same array, enabling us to capture wherein the board we will place the symbol.
However, we’re missing a few things. For example, we need to indicate whose turn it is, display the winner of the game, and add a button to play again when the game is over:
// TickTacToe/TicTacToe.js
// previous code here
export default function TicTacToe() {
  // code here
  return;
  <div>
    <div>{!winner && displayTurn()}</div>
    {/** previous JSX code here **/}
    {winner && <h2>{displayWinner()}</h2>}
    {winner && (
      <button className={styles.video_game_button} onClick={playAgainFn}>
        Play Again
      </button>
    )}
  </div>;
}
We’ll create the function playFn. When a user clicks on it, it will play the game:
function playFn(arrayIndex, index) {
  if (isCPUNext) return;
  if (winner) return;
  board\[arrayIndex\][index] = players?.HUMAN?.SYM;
  setBoard((board) => [...board]);
  checkWinner();
  setIsCPUNext(true);
}
The playFn function will check if the game is over. If it is, it will display the winner. If not, it will check if the player is next. If it is, it will set the player’s symbol to the particular index of the array in the board array and call the setBoard function to set the board state. Then, it will call the checkWinner function to check if the game is over. Finally, it will set isCPUNext to true.
Next, we’ll set up a useEffect Hook:
useEffect(() => {
  if (winner) return;
  if (isCPUNext) {
    cPUPlay();
  }
}, [isCPUNext]);
This useEffect Hook runs once the component is mounted, checking if the game is over. If it is, it will return. If it is not, it will check if the CPU is next. If it is, it will call the cPUPlay function to play the game.
Next, we’ll create the cPUPlay function:
function cPUPlay() {
  if (winner) return;
  sleep(1000);

  const cPUMove = getCPUTurn();

  board\[cPUMove.arrayIndex\][cPUMove.index] = players?.CPU?.SYM;

  setBoard((board) => [...board]);
  checkWinner();
  setIsCPUNext(false);
}
The cPUPlay function checks if the game is over. If it is, it will return. If it is not, it will call sleep for 10 seconds, then call the getCPUTurn function to get the CPU’s move. It will set the CPU’s symbol to the particular index of the array in the board array and call the setBoard function to set the board state. Then, it will call the checkWinner function to check if the game is over. Finally, it will set the isCPUNext to false.
Next, we’ll create the getCPUTurn function, which will return the CPU’s move:
function getCPUTurn() {
  const emptyIndexes = [];
  board.forEach((row, arrayIndex) => {
    row.forEach((cell, index) => {
      if (cell === "") {
        emptyIndexes.push({ arrayIndex, index });
      }
    });
  });
  const randomIndex = Math.floor(Math.random() * emptyIndexes.length);
  return emptyIndexes[randomIndex];
}
This function will loop through the board array and find all the empty cells, then, it will randomly select one of the empty cells.
Next, we’ll create the checkWinner function, which will check if the game is over. If it is, it will return. If it is not, it will check if the player or the CPU has won. If the player has won, it will set the winner state to HUMAN. If the CPU has won, it will set the winner state to CPU. If it is a draw, it will set the winner state to draw. If it is not a draw, it will return:
function checkWinner() {
  // check same row
  for (let index = 0; index < board.length; index++) {
    const row = board[index];
    if (row.every((cell) => cell === players?.CPU?.SYM)) {
      setWinner(players?.CPU?.NAME);
      return;
    } else if (row.every((cell) => cell === players?.HUMAN?.SYM)) {
      setWinner(players?.HUMAN?.NAME);
      return;
    }
  }

  // check same column
  for (let i = 0; i < 3; i++) {
    const column = board.map((row) => row[i]);
    if (column.every((cell) => cell === players?.CPU?.SYM)) {
      setWinner(players?.CPU?.NAME);
      return;
    } else if (column.every((cell) => cell === players?.HUMAN?.SYM)) {
      setWinner(players?.HUMAN?.NAME);
      return;
    }
  }

  // check same diagonal
  const diagonal1 = \[board[0\][0], board\[1\][1], board\[2\][2]];
  const diagonal2 = \[board[0\][2], board\[1\][1], board\[2\][0]];
  if (diagonal1.every((cell) => cell === players?.CPU?.SYM)) {
    setWinner(players?.CPU?.NAME);
    return;
  } else if (diagonal1.every((cell) => cell === players?.HUMAN?.SYM)) {
    setWinner(players?.HUMAN?.NAME);
    return;
  } else if (diagonal2.every((cell) => cell === players?.CPU?.SYM)) {
    setWinner(players?.CPU?.NAME);
    return;
  } else if (diagonal2.every((cell) => cell === players?.HUMAN?.SYM)) {
    setWinner(players?.HUMAN?.NAME);
    return;
  } else if (board.flat().every((cell) => cell !== "")) {
    setWinner("draw");
    return;
  } else {
    setWinner(null);
    return;
  }
}
The code is quite simple. It loops through the board array and checks if the same row, column, or diagonal has the same symbol. If it does, it will set the winner state to the player’s name. The game is a draw if all the boards are filled with no matching symbols found. It will then set the winner state to draw.
Let’s create the displayWinner function:
function displayWinner() {
  if (winner === "draw") {
    return "It's a draw!";
  } else if (winner) {
    return `${winner} won!`;
  }
}
If the winner state is draw, it will return It's a draw!. If the winner state is not draw, it will return ${winner} won!. Now, we’ll create the displayTurn function:
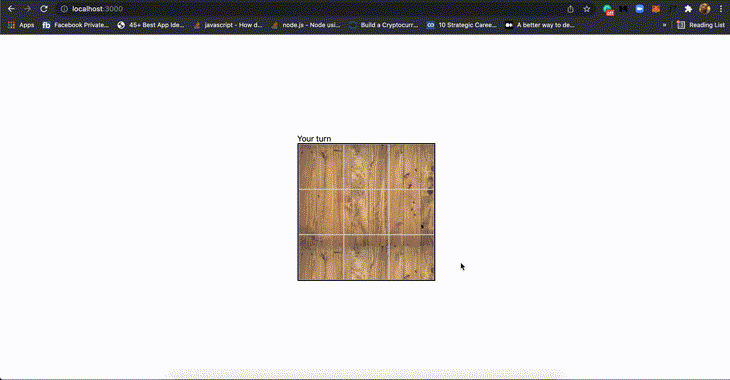
function displayTurn() {
  if (isCPUNext) {
    return "CPU's turn";
  } else {
    return "Your turn";
  }
}
The displayTurn function will check if the CPU is next. If it is, it will return CPU's turn. If it is not, it will return Your turn.
We’ll create the playAgainFn function:
function playAgainFn() {
  setBoard([
    ["", "", ""],
    ["", "", ""],
    ["", "", ""],
  ]);
  setWinner(null);
  setIsCPUNext(false);
}
This function will set the board state to the initial board state and set the winner state to null. Then, it will set the isCPUNext state to false.
Open the TicTacToe.module.css file and add the following styles:
.container {
  display: flex;
  flex-direction: column;
  background-image: url(https://i.imgur.com/OVBsgc1.jpg);
  border: 2px solid black;
  font-family: "Indie Flower", cursive;
}

.col {
  display: flex;
}

.cell {
  width: 89px;
  height: 89px;
  border: 1px solid lightgray;
  text-align: center;
  display: flex;
  justify-content: center;
  align-items: center;
  font-size: xxx-large;
  text-transform: capitalize;
  cursor: pointer;
  color: white;
  font-weight: 900;
}

.video_game_button {
  text-shadow: 1px 1px pink, -1px -1px maroon;

  line-height: 1.5em;
  text-align: center;
  display: inline-block;
  width: 4.5em;
  height: 4.5em;
  border-radius: 50%;
  background-color: red;
  box-shadow: 0 0.2em maroon;
  color: red;
  margin: 5px;
  background-color: red;
  background-image: linear-gradient(left top, pink 3%, red 22%, maroon 99%);
  cursor: pointer;
  padding-left: 5px;
}

.video_game_button:active {
  box-shadow: none;
  position: relative;
  top: 0.2em;
}
In this tutorial, we explained how Tic-Tac-Toe is played. Then, we scaffolded a Next.js project, going on to show how we can code and play a Tic-Tac-Toe game on our computer.
Our computer gameplay has minimal or arcane logic. It would be nice to spice up the logic so the computer can think and play like a human being. We can also make the game more fun by adding some fun features like a chat, a leaderboard, and a game history.
I can’t wait to see what you come up with! Happy coding!
Install LogRocket via npm or script tag. LogRocket.init() must be called client-side, not
server-side
$ npm i --save logrocket

// Code:

import LogRocket from 'logrocket';
LogRocket.init('app/id');
// Add to your HTML:

<script src="https://cdn.lr-ingest.com/LogRocket.min.js"></script>
<script>window.LogRocket && window.LogRocket.init('app/id');</script>

Learn how to use Skybridge, an open-source React framework, to build and deploy cross-platform AI apps and interactive UI widgets for ChatGPT, Claude, and MCP clients from a single codebase.

Learn how to set up Meilisearch, index documents, and build keyword, semantic, and hybrid search with AI-powered retrieval.

Compare pnpm and npm across security defaults, disk usage, dependency strictness, and workspace policy to decide which package manager fits your project.

I migrated 20 production-style components from Tailwind to StyleX. Here’s what the data showed about LOC, CSS bundle size, build time, and type safety.
Would you be interested in joining LogRocket's developer community?
Join LogRocket’s Content Advisory Board. You’ll help inform the type of content we create and get access to exclusive meetups, social accreditation, and swag.
Sign up now

