Shopify is a platform that enables businesses to create online stores and applications. An online store is critical to ecommerce businesses. The store needs to be efficient and built to serve the user. Shopify is one of the preferred platforms for the development of ecommerce applications.
Benefits of using Shopify range from a high-grade user experience to great frontend design. Shopify also provides great marketing strategies. In this article, our focus will be on building a Node.js application that works with Shopify.
Jump ahead:
Third-party developers develop a large portion of Shopify apps that serve to extend the base functionality of Shopify. With third-party applications, integrating new features into Shopify is super easy and they allow us to extend the merchant experience. With Shopify, we can create an amazing shopping experience for our customers.
There’s almost no limit to what we can do with third-party apps. Merchants can access and interact with our application within the Shopify admin dashboard.
Integrating with Shopify is possible in a few different ways:
Shopify accepts two types of applications:
Let’s set up our TypeScript and Node.js project.
The requirements for setting up this type of application are as follows:
Create a folder to hold our project:
mkdir shopifyNode
cd shopifyNode
Using Yarn and the -y flag, we set up our package.json, which will approve all defaults during creation.
yarn init -y
Now, add TypeScript as a development dependency:
yarn add typescript
Once the installation of TypeScript completes, we gain access to the command line TypeScript compiler through the tsc command.
TypeScript possesses different kinds of types. We will install the DefinitelyTyped type definition in this application.
yarn add --dev @types/node
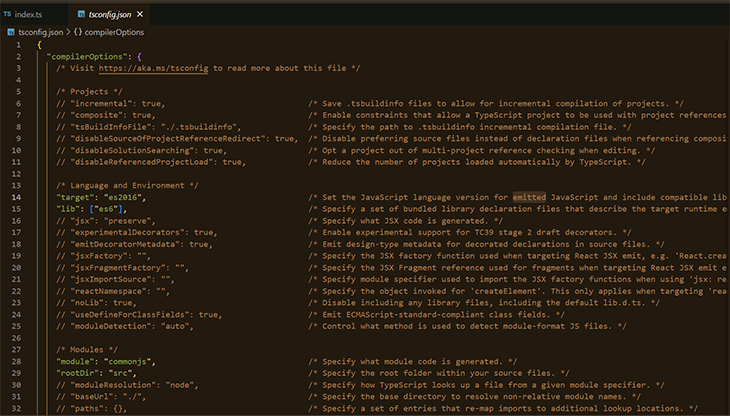
Let’s create a tsconfig.json to hold the options for our TypeScript compiler. Let’s create tsconfig using the command line.
npx tsc --init --rootDir src --outDir build --esModuleInterop --resolveJsonModule --lib es6 --module commonjs --allowJs true --noImplicitAny true
Let’s break down the code above:
rootDir: This is the location in which TypeScript looks for the project code. In our case, it’s configured to the src folderoutDir: The code output from the compiler, which gets stored in the build/ folderesModuleInterop: This handles the module system in our application. An example of module systems include AMD, SystemJS, ES Modules, etc.; for this application, we are setting CommonJS to true because it is the main module system for Node.js appsresolveModule: Enables JSON in our TypeScript applicationlib: Adds ambient types to our project and enables the application to rely on features from different ECMA Script versions. With this, we can use testing libraries, the DOM API, and ES 2015 langauge features — all of which gets compiled to ES 2009module: CommonJS, standard module system for Node.jsallowjs: Converts our JavaScript project to TypeScript. With this, .js files are usable with .ts filesnoImplicitAny: Every type needs to have a specific type or be explicitly defined as anyOnce completed, the tsconfig.json file should look like the image below:
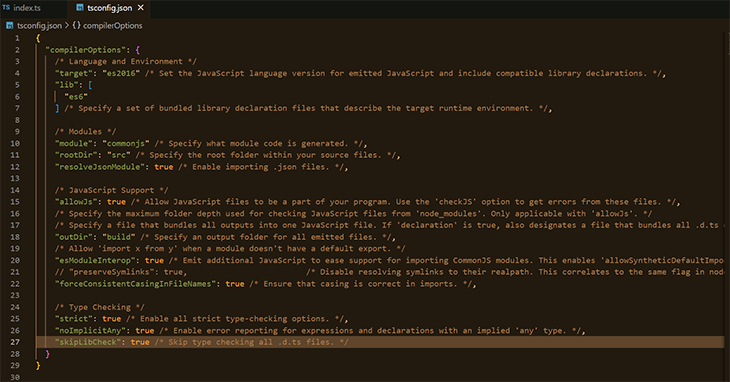
Clean out the comments that aren’t needed:
Finally, create the src folder and create an index TypeScript file.
mkdir src
touch src/index.ts
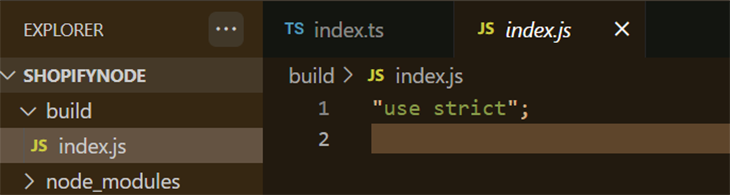
To compile, we rely on the tsc command using npx. tsc reads the tsconfig.json in the current directory and applies the configuration. The TypeScript compiler generates the compiled JavaScript code.
npx tsx
Once this command runs in the build folder, it creates an index.js file. Our first TypeScript file!
Our application will have cold reloading enabled, which in turn enables faster development times when developing locally. Implementing cold reloading in our application relies on a couple of packages:
Ts-node: Runs TypeScript code without waiting for compilationyarn add ts-node nodemon
Add a nodemon.json config:
touch nodemon.json
Paste the code block into the nodemon.json file:
{
  "watch": ["src"],
  "ext": ".ts,.js",
  "ignore": [],
  "exec": "ts-node ./src/index.ts"
}
In our package.json, add a script to manage nodemon:
"scripts": {
    "start:dev": "nodemon",
  },
When yarn run start:dev runs, nodemon starts our application using ts-node in the ./src/index.ts. It looks for changes to .ts and .js files with /src.
In the index.ts file, let’s start building our application.
code index.ts
Let’s import the necessary dependencies and initialize our application.
const crypto = require("crypto");
const nonce = require("nonce");
const request = require("request-promise");
const querystring = require("querystring");
const cookie = require("cookie");
const express = require("express");

const app = express(); // initialize application
app.listen(3434, () => console.log("Application listening on port 3434!"));
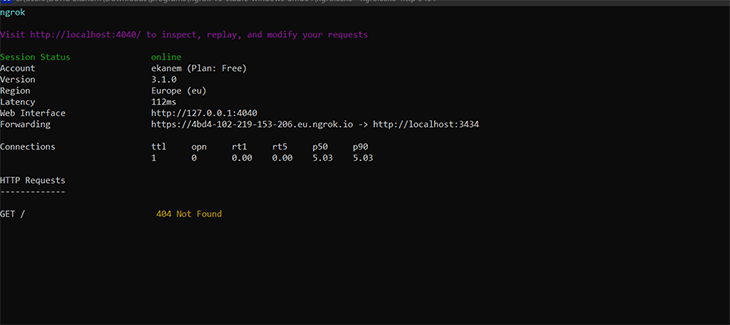
ngrok enables us to host our local server and make it publicly available. Once ngrok is downloaded, install and open it. A terminal window should fire up; input the following command to host the server with ngrok.
ngrok http 3434
You should then see this:
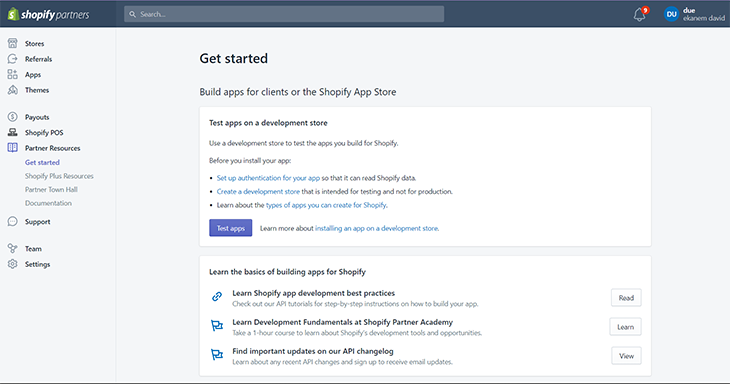
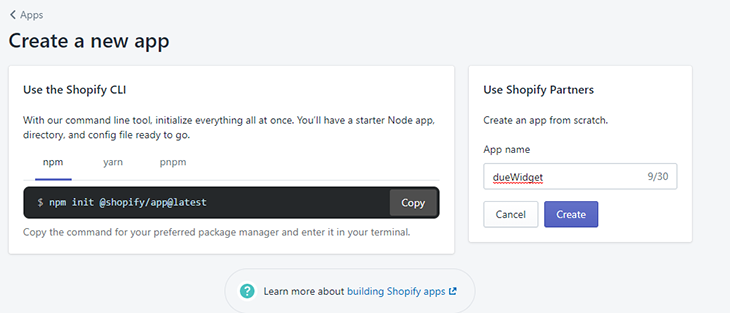
Navigate to the Shopify Partners dashboard.
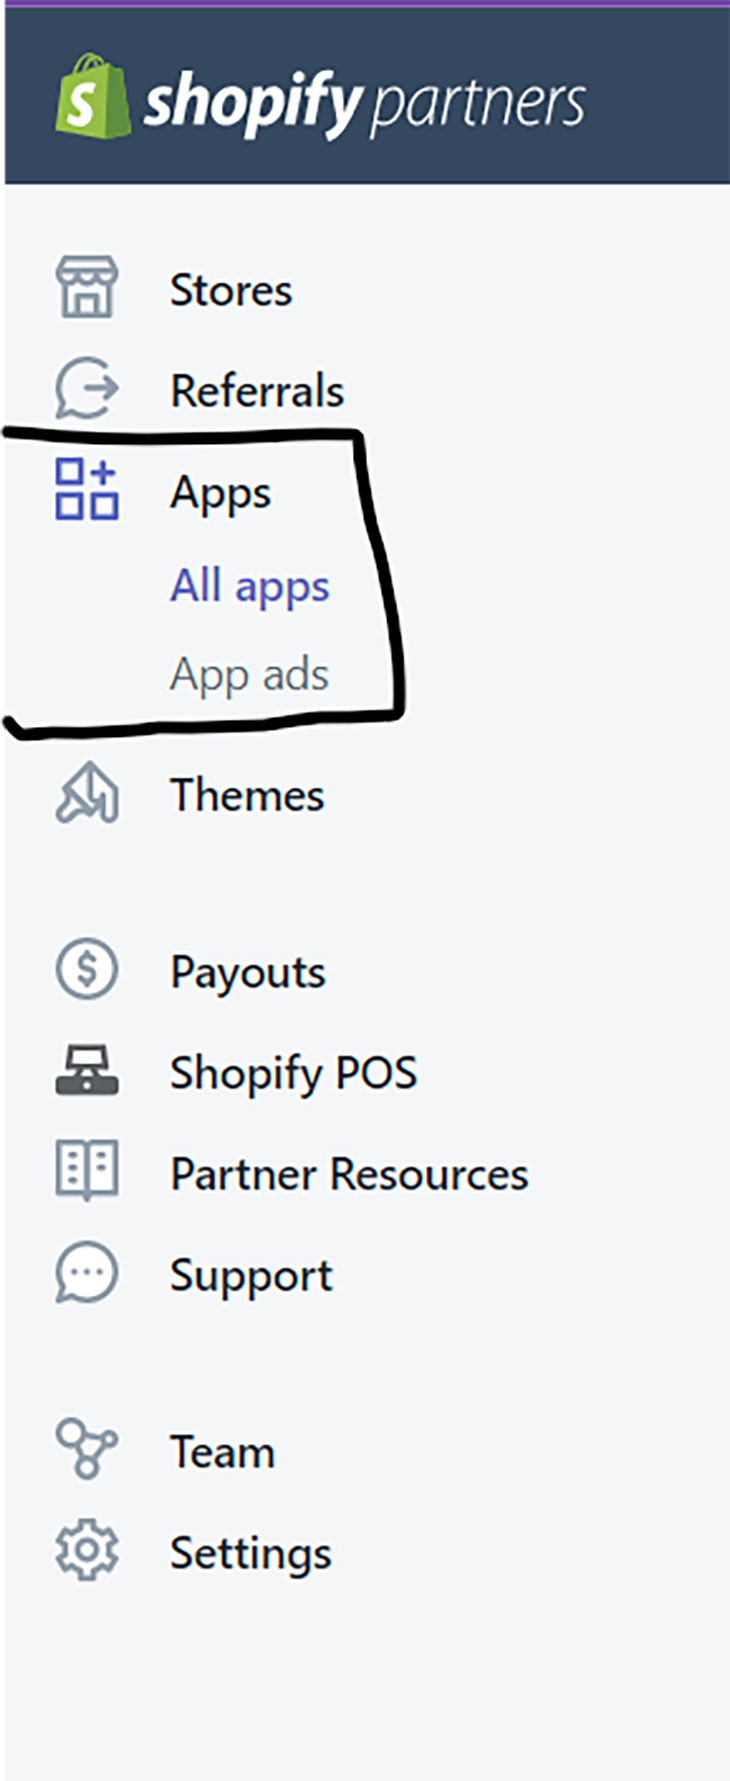
Click the Apps tab:
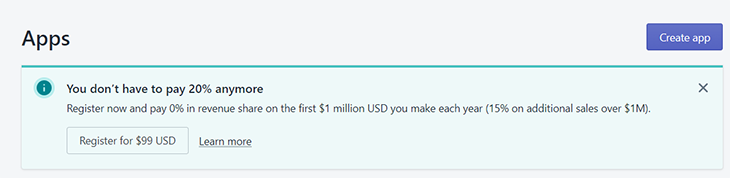
Click the Create app button:
You’ll be prompted to decide how to create the application. You can use either the Shopify CLI or create the app manually. Input your desired name; for this article, our name is dueWidget. Click the Create button.
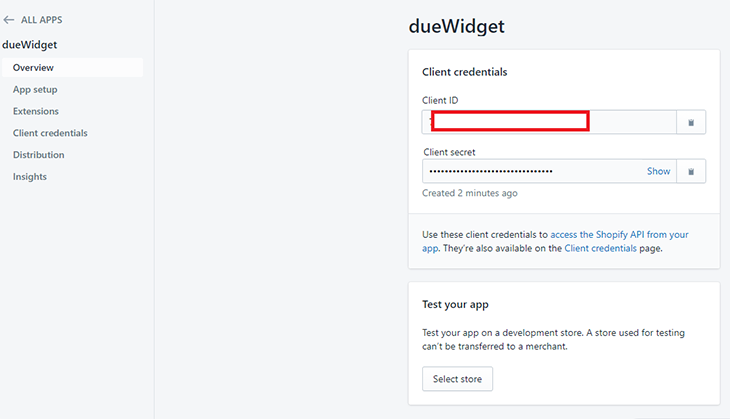
Once we click the Create button, the CLIENT ID and CLIENT SECRET are displayed. We’ll need these details to authenticate our application.
In the navigation tab, click App setup.
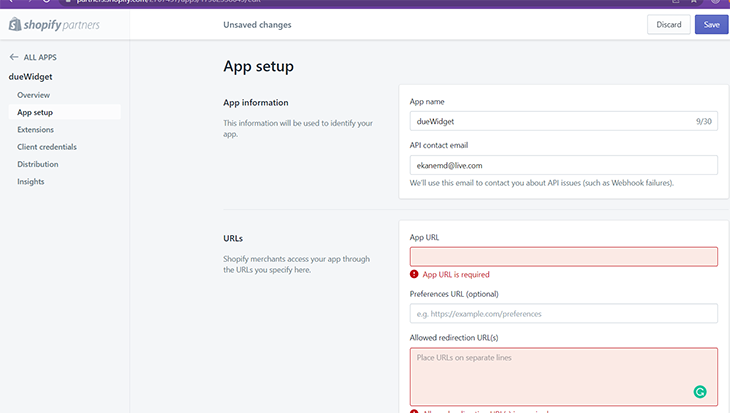
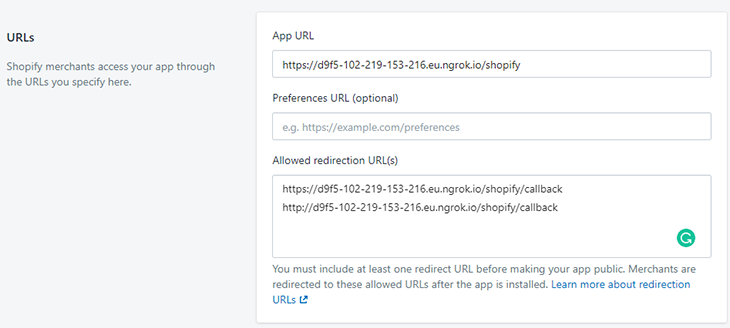
In the section under URLs, copy the generated ngrok URL and paste it into App URL and Redirection URL. The URL in my console is https://d9f5-102-219-153-216.eu.ngrok.io/.
Append /shopify to the ngrok URL to give us access to the user-route. The App URL is the URL we redirect merchants to once they click our app listing.
The Redirection URL works to redirect the merchant once they enable the application. We add a /callback to identify it.
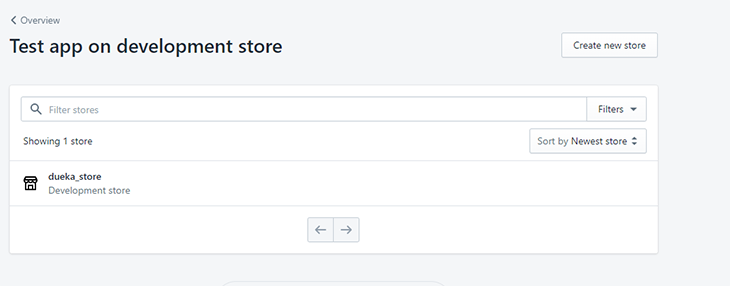
Save, return to the Overview section, then go to the Test your app section and click the Select store button. Here, we’ll connect our application to the development store.
The link to creating the development store is in the Requirements section above.
With that all set up, let’s run back to our IDE and continue developing our application inside the index.ts file.
Using a terminal window, open the index.ts file, and create an environment variable and gitignore file in the root project directory. The env file enables us to securely store our secrets, and the gitignore prevents us from deploying unwanted files to Git.
code index.ts
touch .env .gitignore
code .gitignore
Add the line below into the .gitignore file:
.env
Using a terminal window, open the .env file:
code .env
The details from the image below are what’s needed. The Client ID represents your SHOPIFY_API_KEY. The Client Secret represents your SHOPIFY_API_SECRET.
SHOPIFY_API_KEY= //YOUR CLIENT ID FROM SHOPIFY APP OVER PAGE
SHOPIFY_API_SECRET=//YOUR CLIENT SECRET FROM SHOPIFY APP OVER PAGE
The details can be found in the Application Overview page of our Shopify application dashboard.
In the index.ts file, let’s continue writing our code.
We are going to define two endpoints in our application:
/shopify route: This receives the name of the shop in the request and creates a nonce to manage state. The nonce authenticates that the request to the callback URL is from Shopify/shopify/callback route: Handles the callback from Shopify. Once we are certain that the request emanated from Shopify, the user is redirectedCopy the code block below and paste it into your index.ts file:
const PORT = 3342;
const apiKey = process.env.SHOPIFY_API_KEY;
const apiSecret = process.env.SHOPIFY_API_SECRET;
const scopes = "write_products";
const forwardingAddress = "https://1649-102-88-34-8.eu.ngrok.io"; // our ngrok url

// set the url, to the url used in the APP URL
app.get("/shopify", (req: any, res: any) => {
  const shopName = req.query.shop;
  if (shopName) {
    // use nonce to set a parameter called state
    // the nonce is random string that would be set
    // it would be received on the request
    // the callback from shopify would echo the state
    // the two states would be compared
    // if they match, we are sure the request came from shopify
    // if they don't match, they request is being spoofed
    // this would throw an error
    const shopState = nonce();
    // shopify callback redirect
    const redirectURL = forwardingAddress + "/shopify/callback";

    // install url for app install
    const installUrl =
      "https://" +
      shopName +
      "/admin/oauth/authorize?client_id=" +
      apiKey +
      "&scope=" +
      scopes +
      "&state=" +
      shopState +
      "&redirect_uri=" +
      redirectURL;

    // in a production app, the cookie should be encrypted
    // but, for the purpose of this application, we won't do that
    res.cookie("state", shopState);
    // redirect the user to the installUrl
    res.redirect(installUrl);
  } else {
    return res.status(400).send('Missing "Shop Name" parameter!!');
  }
});
The callback URL redirects the user. This route checks whether or not the state stored in the cookie is from Shopify. If it is, we generate a hash and use it for HMAC validation. If this validation fails, the URL install fails.
If HMAC validation is true, the application installation in the development store is successful.
app.get("/shopify/callback", (req: any, res: any) => {
  const { shop, hmac, code, shopState } = req.query;
  const stateCookie = cookie.parse(req.headers.cookie).shopState;

  if (shopState !== stateCookie) {
    return res.status(400).send("request origin cannot be found");
  }

  if (shop && hmac && code) {
    const Map = Object.assign({}, req.query);
    delete Map["hmac"];
    delete Map["signature"];

    const message = querystring.stringify(Map);
    const providedHmac = Buffer.from(hmac, "utf-8");
    const generatedHash = Buffer.from(
      crypto
        .createHmac("sha256", process.env.SHOPIFY_API_SECRET)
        .update(message)
        .digest("hex"),
      "utf-8"
    );
    let hashEquals = false;
    try {
      hashEquals = crypto.timingSafeEqual(generatedHash, providedHmac);
    } catch (e) {
      hashEquals = false;
    }
    if (!hashEquals) {
      return res.status(400).send("HMAC validation failed");
    }
    const accessTokenRequestUrl =
      "https://" + shop + "/admin/oauth/access_token";
    const accessTokenPayload = {
      client_id: process.env.SHOPIFY_API_KEY,
      client_secret: process.env.SHOPIFY_API_SECRET,
      code,
    };
    request
      .post(accessTokenRequestUrl, { json: accessTokenPayload })

      .then((accessTokenResponse: any) => {
        const accessToken = accessTokenResponse.access_token;

        const apiRequestURL = `https:// + ${shop} + /admin/shop.json`;

        const apiRequestHeaders = {
          "X-Shopify-Access-Token": accessToken,
        };

        request
          .get(apiRequestURL, { headers: apiRequestHeaders })

          .then((apiResponse: any) => {
            res.end(apiResponse);
          })

          .catch((error: any) => {
            res.status(error.statusCode).send(error.error.error_description);
          });
      })

      .catch((error: any) => {
        res.status(error.statusCode).send(error.error.error_description);
      });
  } else {
    return res.status(400).send("required parameter missing");
  }
});

app.listen(PORT, () => console.log(`Application listening on port ${PORT}`));
It’s time to test our application. The URL to be used is:
https://5235-102-88-62-59.eu.ngrok.io/shopify?shop=duetestapplicationstore.myshopify.com/
This URL can be sent to prospective merchants to install our application in their Shopify store.
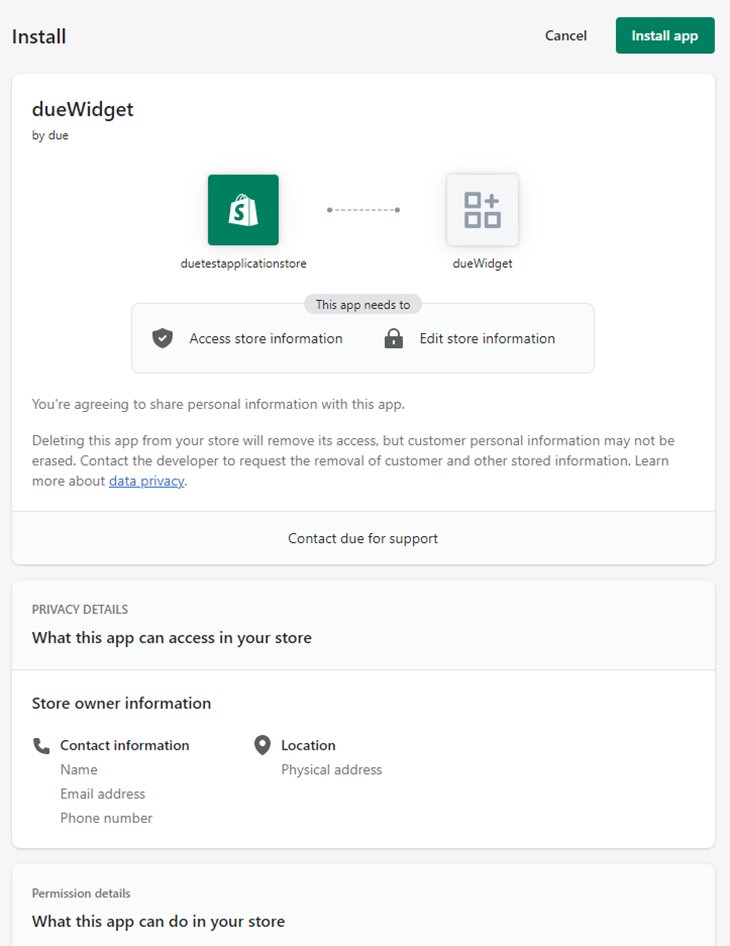
You’ll be redirected to the installation screen. Click the Install App button. If the installation is successful, the app will be displayed in the Application Overview page.
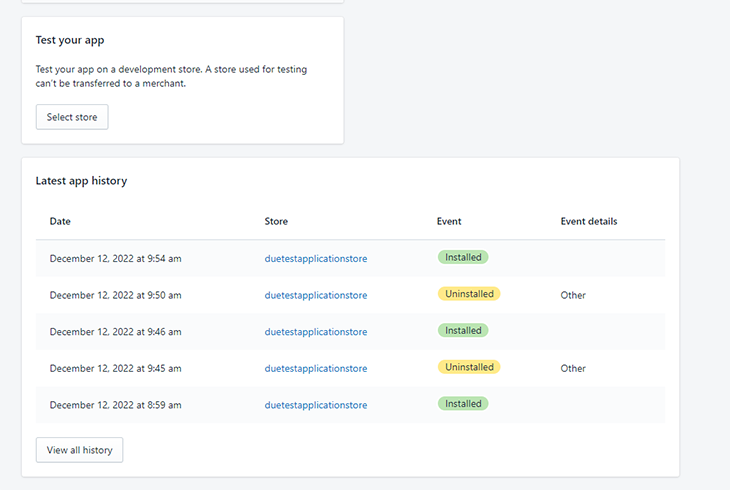
The application installation is successful. Our application is successfully integrated with the duetestapplication store that we created. If we return to our development store, we should see our application under the Apps section.
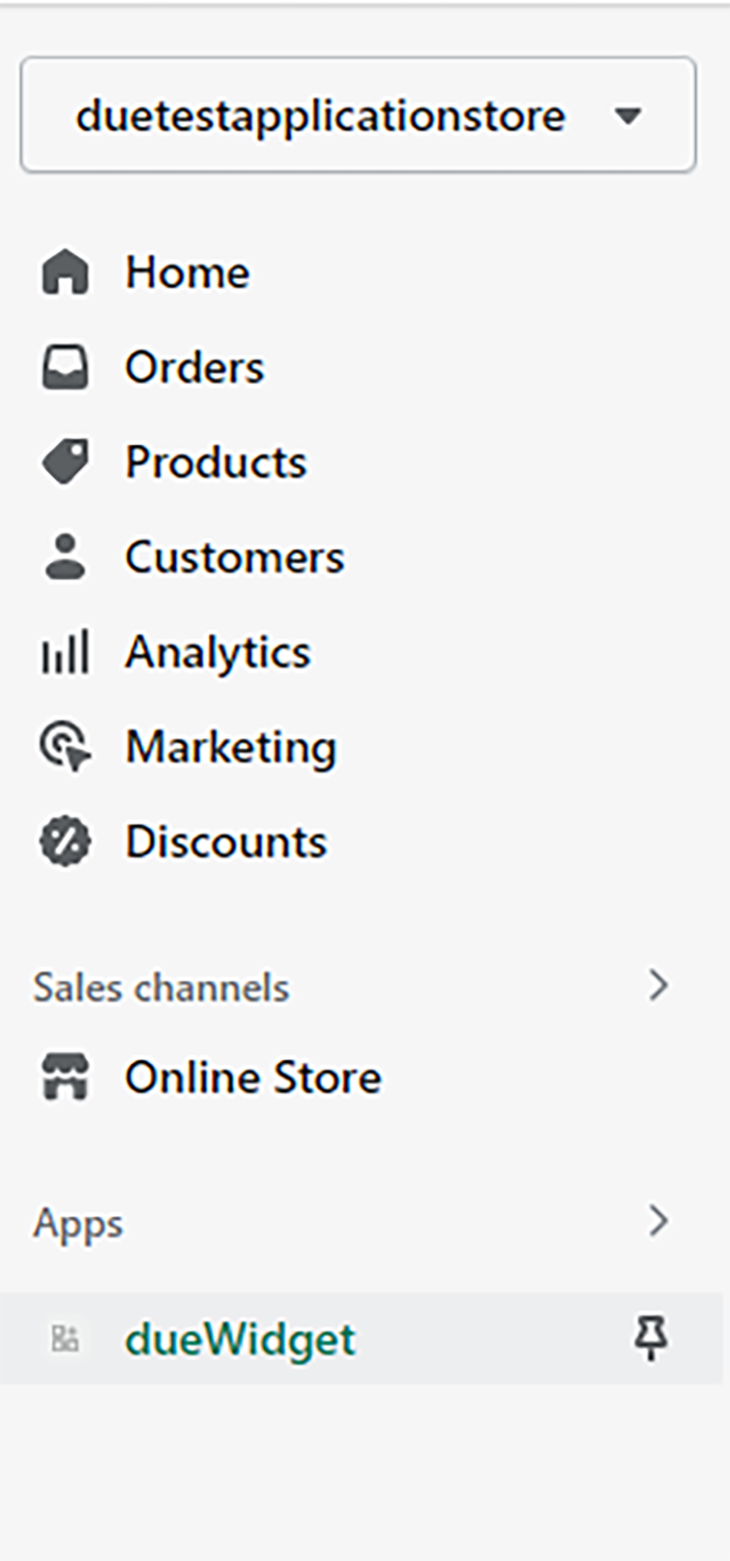
Click dueWidget to see the functionality of our application.
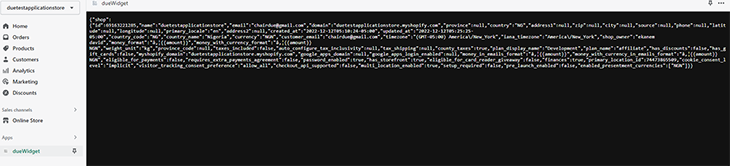
Our application works as intended, enabling us to read information about our store.
There are various other ways that we can extend our application. In developing our application, we added the ability to write_products under scopes, which allows us to add products to our Shopify store.
In this article, we learned how to set up a development store on Shopify and make use of the Shopify API to retrieve data. We also learned how to create a Node.js application and host our server with ngrok.
Then, we connected our application to our development store and used it to retrieve details about the store. The steps outlined in this article enable developers to build applications for Shopify using Node and enables merchants to extend the functionality of their stores.
There are many more functionalities that can be implemented, ranging from adding products to our store, etc. Try out some of them to see what your Shopify store can do for you!
LogRocket lets you replay user sessions, eliminating guesswork around why users don't convert by showing exactly what users experienced. It captures console logs, errors, network requests, and pixel-perfect DOM recordings — compatible with all frameworks.
LogRocket's Galileo AI watches sessions for you, instantly identifying and explaining user struggles with automated monitoring of your entire product experience.
Start proactively monitoring your ecommerce apps — try LogRocket for free.

Learn how to build smooth staggered animations in CSS using modern features like sibling-index(), complete with practical examples, fallbacks, and accessibility tips.

Compare the top AI development tools and models of July 2026. View updated rankings, feature breakdowns, and find the best fit for you.

Learn how to detect unused and ghost dependencies in JavaScript projects using Knip, a project-level linter that keeps your dependency graph accurate.

Learn how Storybook MCP enables AI agents to understand your component library, generate accurate UI, and validate code using documentation, stories, and automated tests.
Hey there, want to help make our blog better?
Join LogRocket’s Content Advisory Board. You’ll help inform the type of content we create and get access to exclusive meetups, social accreditation, and swag.
Sign up now

