React Native is a popular JavaScript framework that enables developers to build native mobile applications for Android and iOS platforms. In this article, we’ll discuss how to use React Native and Plaid to build a mobile application that allows users to manage their financial accounts and track their spending.

We’ll demonstrate how to set up a React Native development environment and how to integrate Plaid’s APIs and features into a React Native app. Whether you are a beginner or an experienced developer, this article will provide you with the knowledge and resources you need to get started with React Native and Plaid.
To follow along with this article, you’ll need the following:
To begin, create a project folder. In this case, we’ll name it RNPlaidExample:
mkdir RNPlaidExample
# To create a RNPlaidExample directory
cd RNPlaidExample
Next, cd into the project directory and install the React Native project by running the following command:
npx react-native init ReactNativeApp
# navigate to project directory
cd ReactNativeApp
This command will create a new React Native project for our Plaid application.
N.B., we’re using React Native v0.70.6 in this article
Next, add the following dependencies in order to integrate the Plaid SDK with the React Native application:
yarn add react-native-plaid-link-sdk
N.B., we’re using react-native-plaid-link-sd v8.0.1 in this article; see GitHub for more details about its version compatibility
Now, use one of the following commands in the terminal to run your iOS or Android application:
# To run the iOS app
npx react-native run-ios


# To run the Android's app
npx react-native run-android
Both commands launch Metro (the JavaScript bundler for React Native), create the app, and launch it in a simulator (iOS) or emulator (Android).
In order to complete the setup for an iOS application, run the following command:
cd ios && pod install
Next, follow these steps to ensure the project is configured correctly in Xcode:
ReactNativeApp file in Xcodeapplinks:localhost:3000/ in the Domain field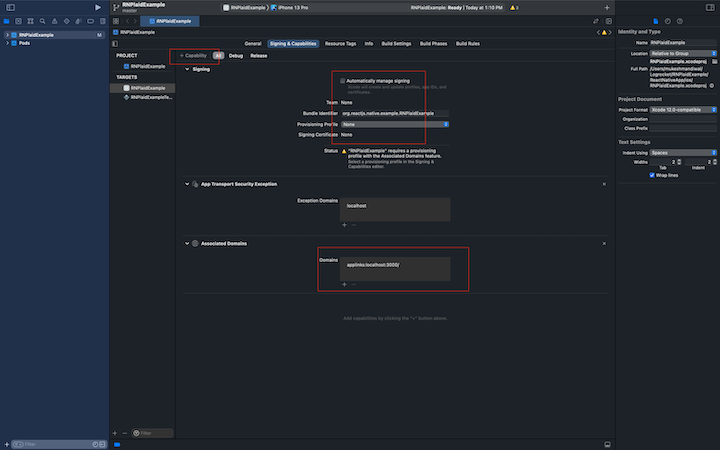
No changes are required to configure the Plaid SDK for Android.
The Plaid client_id and secret key keys are required in order to configure the Sandbox environment for the backend.
Start by creating a Plaid account (if you don’t already have one). Then, open the Plaid dashboard and select Keys from the left navigation. Next, copy the information from the client_id and Sandbox fields. We’ll use these keys later in our backend Sandbox configuration:
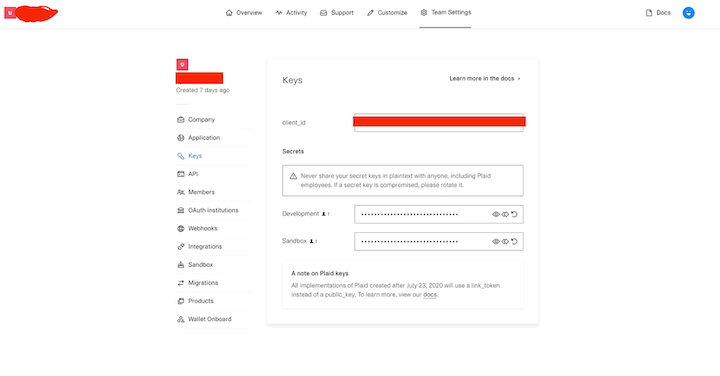
N.B., please remember not to share secret keys with anyone, as that would provide access to your Plaid account; if a secret key is compromised, update it by clicking the refresh symbol
Next, we’ll need to create and set up a redirect URI in our Plaid dashboard. Go to API in the left navigation and specify localhost:3000/ as the Redirect URI and also add the Android package name as shown below:
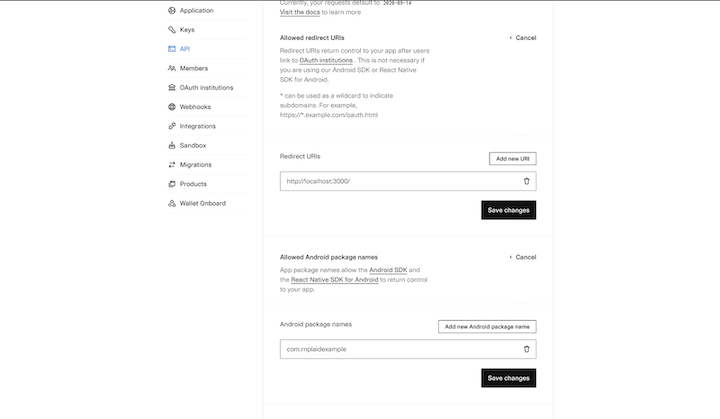
N.B., the redirect URI must use HTTPS. The only exception is the Plaid sandbox where, for testing purposes, redirect URIs pointing to localhost may use< HTTP. See the official docs for more details about the redirect URI
Next, we’ll need to set up a backend sandbox so that we can test our app. Create a new folder, backend, under the RNPlaidExample project folder. We’ll use the Plaid Quickstart repository to create a sandbox environment for the backend.
The Plaid QuickStart repository supports multiple backend languages. In this tutorial, we’ll use Node.js directly as the backend, however, you could use Docker instead.
Set up environment variables by making a .env file in the backend folder, like so:
cp .env.example .env
Next, copy the .env.example content to the .env file and add the PLAID_CLIENT_ID and PLAID_SECRET without strings. Follow the steps outlined in the previous section to obtain the client ID and secret from the Plaid dashboard:
# Get your Plaid API keys from the dashboard: https://dashboard.plaid.com/team/keys
PLAID_CLIENT_ID=
PLAID_SECRET=

PLAID_ENV=sandbox
PLAID_PRODUCTS=auth,transactions
PLAID_COUNTRY_CODES=US,CA

# For sandbox, set PLAID_REDIRECT_URI to 'http://localhost:3000/'

PLAID_REDIRECT_URI=http://localhost:3000/
Now, start the backend server by running the below command once the environment variables have been set up. It will launch and run on http://localhost:8080/:
yarn start
>
Now that the backend sandbox is up and running, it’s time to set up the Plaid Link flow.
Plaid Link is used to connect user financial accounts (or a sandbox) to the Plaid API. In our tutorial, we’ll use Plaid Link to set up a flow to display a wallet’s transaction history and balance.
Start by navigating to the React Native app folder, ReactNativeApp, from the project folder.
To access most of the Plaid API endpoints, you’ll need an access token:
const createLinkToken = React.useCallback(async () => {
    await fetch(`http://${address}:8080/api/create_link_token`, {
      method: 'POST',
      headers: {
        'Content-Type': 'application/json',
      },
    })
      .then(response => response.json())
      .then(data => {
        setLinkToken(data.link_token);
      })
      .catch(err => {
        console.log(err);
      });
  }, [setLinkToken]);
  React.useEffect(() => {
    if (linkToken == null) {
      createLinkToken();
    }
  }, [linkToken]);
In the above code, the api/create_link_token API endpoint is used to obtain a link_token. This link_token is used to configure and initialize the PlaidLink flow, like so:
 <PlaidLink
          tokenConfig={{
            token: linkToken,
            noLoadingState: false,
          }}
          onSuccess={async success => {
            await fetch(`http://${address}:8080/api/set_access_token`, {
              method: 'POST',
              headers: {
                'Content-Type': 'application/json',
              },
              body: JSON.stringify({public_token: success.publicToken}),
            })
              .then(response => response.json())
              .then(data => {
                dispatch({
                  type: 'SET_STATE',
                  accessToken: data.access_token,
                  itemId: data.item_id,
                });
              })
              .catch(err => {
                console.log(err);
              });
            navigation.navigate('WalletDetails');
          }}
          onExit={response => {
            console.log(response);
          }}><PlaidLink/>
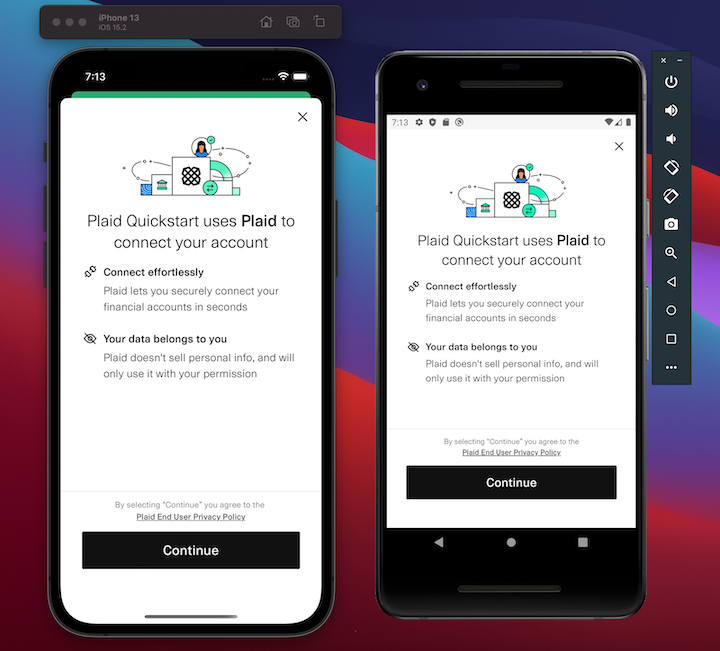
To launch the Plaid SDK, we’ll add the UI to our homepage and initialize the Plaid SDK flow using the above code:
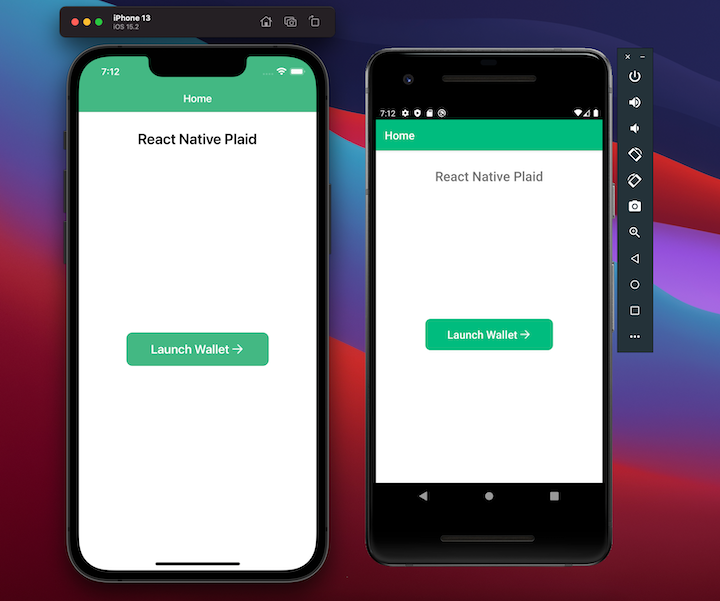
When you click the Launch Wallet button, the Plaid SDK opens and the payment flow is initiated, as shown below for both iOS and Android:
Here’s the message you’ll receive following a successful PlaidLink flow:
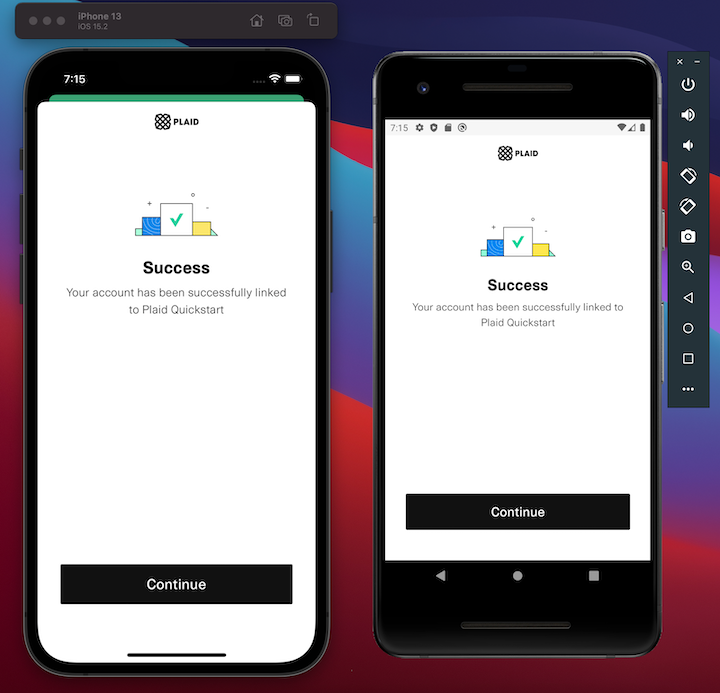
Once the user successfully completes the Payment Link flow, a new public token will be returned by PlaidLink via the onSuccess callback. This public_token is used to exchange the access_token. It can then be used to call other endpoints of the Plaid API to obtain information such as balance and transactions:
onSuccess={async success => {
            await fetch(`http://${address}:8080/api/set_access_token`, {
              method: 'POST',
              headers: {
                'Content-Type': 'application/json',
              },
              body: JSON.stringify({public_token: success.publicToken}),
            })
              .then(response => response.json())
              .then(data => {
                dispatch({
                  type: 'SET_STATE',
                  accessToken: data.access_token,
                  itemId: data.item_id,
                });plaidli
              })
              .catch(err => {
                console.log(err);
              });
In order to use this exchanged access token in other API requests and obtain information about items, wallets, and asset balances, we set it in our global state via a global context Provider which is already configured.
Following the successful callback of the PlaidLink SDK flow, the user is redirected to the WalletDetails screen, as shown below for iOS and Android:
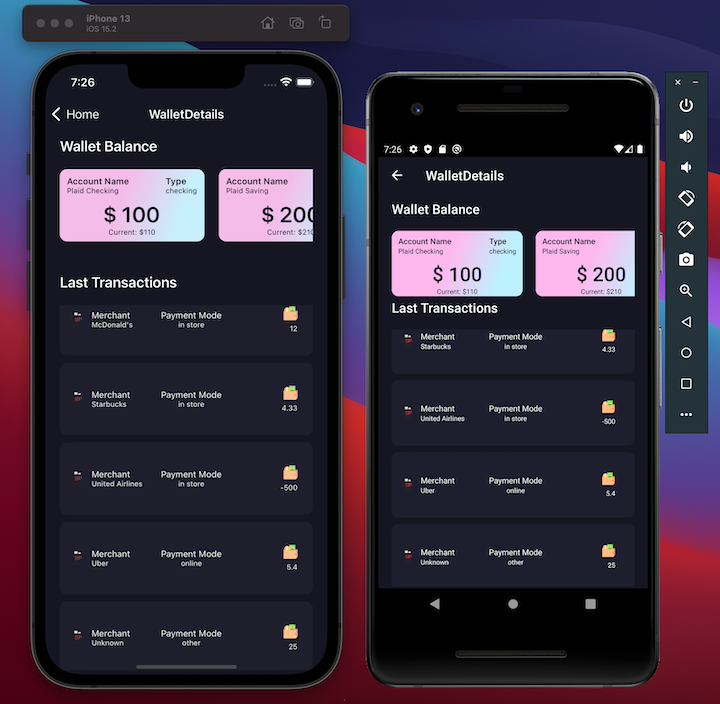
We communicate with the /api/balance API endpoint to acquire balance information and with the api/transaction API endpoint to get the last transaction history:
const getBalance = React.useCallback(async () => {
    await fetch(`http://${address}:8080/api/balance`, {
      method: 'GET',
      headers: {
        'Content-Type': 'application/json',
        access_token: accessToken,
      },
    })
      .then(response => response.json())
      .then(data => {
        setData(data);
      })
      .catch(err => {
        console.log(err);
      });
  });
 const getTransactions = React.useCallback(async () => {
    await fetch(`http://${address}:8080/api/transactions`, {
      method: 'GET',
      headers: {
        'Content-Type': 'application/json',
        access_token: accessToken,
      },
    })
      .then(response => response.json())
      .then(data => {
        setTransactionData(data);
      })
      .catch(err => {
        console.log(err);
      });
  });
To learn more about additional Plaid API endpoints, visit the official documentation.
In this article, we covered how to set up Plaid for a React Native application, create a sandbox environment for the backend, and define environment variables. We also demonstrated how to create a public link token to access the majority of API endpoint data.
As our example, we used Plaid and React Native to build a fintech app for both iOS and Android. We launched a Plaid Link flow to display the wallet’s balance and most recent transaction history. The source code used in this article is available on GitHub.
I hope you find this article helpful for creating a Plaid app using React Native. If you have further questions, please let me know in the comments below.

LogRocket's Galileo AI watches sessions for you and and surfaces the technical and usability issues holding back your React Native apps.
LogRocket also helps you increase conversion rates and product usage by showing you exactly how users are interacting with your app. LogRocket's product analytics features surface the reasons why users don't complete a particular flow or don't adopt a new feature.
Start proactively monitoring your React Native apps — try LogRocket for free.
Would you be interested in joining LogRocket's developer community?
Join LogRocket’s Content Advisory Board. You’ll help inform the type of content we create and get access to exclusive meetups, social accreditation, and swag.
Sign up now
This guide walks you through creating a web UI for an AI agent that browses, clicks, and extracts info from websites powered by Stagehand and Gemini.

This guide explores how to use Anthropic’s Claude 4 models, including Opus 4 and Sonnet 4, to build AI-powered applications.

Which AI frontend dev tool reigns supreme in July 2025? Check out our power rankings and use our interactive comparison tool to find out.

Learn how OpenAPI can automate API client generation to save time, reduce bugs, and streamline how your frontend app talks to backend APIs.


