Chrome extensions are packed with features that are very handy for making your work a little easier. Plasmo, a relatively new framework, helps to build chrome extensions with ease using React!

Yes, that means you can use React’s component-based development to build Chrome extensions efficiently and fast! Sounds good, right?
In this article, we’ll be taking a look at how you can use Plasmo to build a Chrome extension with React.
Here’s what we’ll cover:
To follow along, refer to this repo, and visit the Plasmo docs for more integration guides.
Spin up the terminal, move to your project folder and initialize a new Plasmo project by doing the following:
npm x plasmo init
Or simply set up Plasmo with Next.js using this repo.
I’m a huge Next.js fan, hence I’ll be using it in this tutorial. Go ahead and install the following dependencies:
npm install next@latest
You will now have a similar setup to the following image:
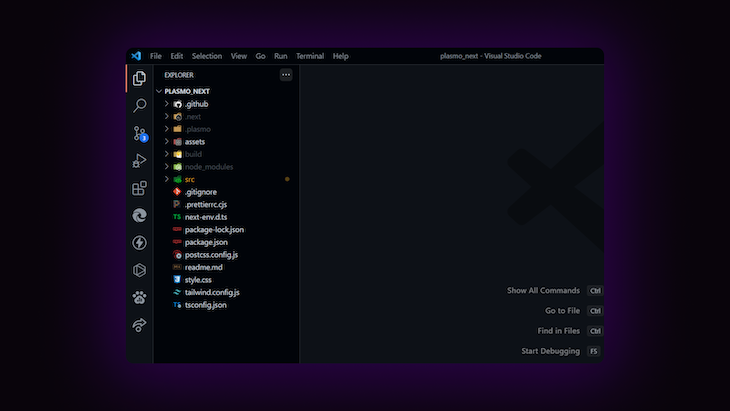
Some things to keep in mind while using Plasmo:
src directoryNext, let’s set up Tailwind CSS in the project.
Install the following dev dependencies required for Tailwind CSS:
npm install autoprefixer postcss tailwindcss --save-dev
Next up, run the init command to generate the tailwind.config.js and postcss.config.js files.
npx tailwindcss init -p
In the tailwind.config.js file, add the following path to the content property:
module.exports = {
  content: ["./**/*.{ts,tsx}"],
  theme: {
    extend: {}
  },
  plugins: []
}
Then, create a new styles.css file and add the @tailwind directives to it.
@tailwind base;
@tailwind components;
@tailwind utilities;
With that done, add the import to this file in the ./src/components/main.tsx file.
import "../../style.css"

export function Main ({ name = "Extension" }) {...
}
(Note: If you ever get stuck, you can follow the Tailwind CSS integration guide for Next.js here)
With a little help from Tailwind CSS, let’s build out the frontend of our Chrome extension.
Let’s first make a layout for our Chrome extension that will wrap around the Main component.
Create a new file in ./src/components/layouts/Container.tsx:
function Container ({ children }) {
  return (
    <div>{chidlren}</div>
  );
}

export default Container;
Let’s greet the user when they spin up the extension:
function greeting() {
  const time = new Date().getHours()
  if (time < 12) {
    return "Good Morning!"
  }
  if (time < 18) {
    return "Good Afternoon!"
  }
  return "Good Evening!"
}
Add this to the Container component as follows…
return (
  <div>
    <div>
      <p>{greeting()}</p>
    </div>
    {children}
  </div>
)
…and a pinch of CSS✨
return (
  <div
    style={{
      padding: "40px 20px",
      // add gradient
      background: "linear-gradient(to top, #BADBFB , #FFFFFF )"
    }}
  >
    // body
  </div>
);
Now, wrap this Container wrapper around main.tsx.
With that done, now let’s set up the development environment for Plasmo, so that you see your changes in real-time, just like how you would make changes to a website during development.
First, head to chrome://extensions and switch to Developer mode.

(Note: I’m using the Brave browser here, which uses the Chromium web browser under the hood, so the process will be the same for normal Chrome browsers, too.
Click on Load unpacked and go to your project directory, then select the build/chrome-mv3-dev folder. To view the extension, click on the puzzle logo near your Extensions section and select the Plasmo project.
(Note: If you get stuck, check out the Plasmo Docs here)
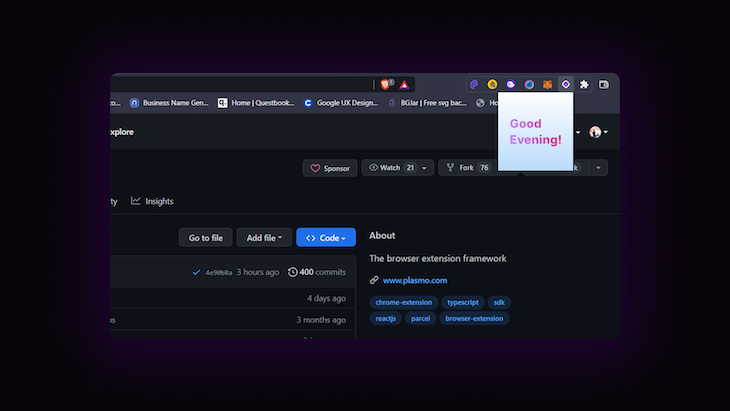
Your extension should now look something like this:
With that done, let’s set up the part for entering tasks and displaying them. In main.tsx, let’s add an input field for entering the tasks and a button for adding them.
To start with, add two states — one for capturing input from the text box, and the other one to keep track of the tasks.
import { useState } from "react";

export function Main ( ) {
  const [data, setData] = useState("");

  const [tasks, setTasks] = useState([]);

  return (
    <Container>
      {...stuff}
    </Container>
  )
}
Now, inside Container, add the following:
return (
  <Container>
    <div>
      <input
        className="rounded-md my-3 p-2 border-2 border-gray-300"
        onChange={(e) => setData(e.target.value)}
        value={data}
        placeholder="Add new task"
      />
    </div>
  <Container/>
);
If you now log data onto the console, you should be able to see the input data.
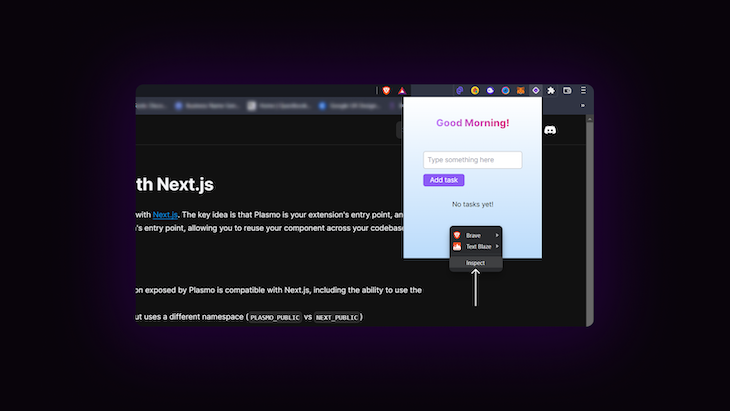
To inspect the application on Chrome DevTools, right-click on the desired extension:
With that done, let’s add a button for saving the state of the current tasks.
<button type="submit" onClick={submitHandler} className="button-blue">
  Add task
</button>
Make a new function for the onClick event:
function submitHandler () {
  // ...stuff
  console.log(data);
}
For now, we will simply log the current value of the data onto the console.
Next, let’s build the component to display the tasks. Make a new component called Tasks.tsx. As props, pass data, and setData — this will be useful while displaying the tasks and removing them.
In Tasks.tsx, for now, let’s just display a random list of tasks.
{data?.length !== 0 ? (
  data?.map((task, index) => (
    <div
      className={...styles}
      key={index}
    >
      <p>{task}</p>

      <button
        aria-label="Remove task"
        type="button"
        <TrashIcon className="w-10 h-10 pr-1" />
      </button>
    </div>
  ))
  ) : (
  <p className="mx-auto w-fit my-8">No tasks yet!</p>
)}
(Note: To refer to the styles, visit this repo at GitHub. The icons used here are from react-icons)
You can add some dummy data for tasks and see if the component works as expected.
Now, let’s add the basic functionality of adding and removing tasks.
First, let’s work on the submitHandler we defined earlier on the button. Whenever the user adds a task, we want the previous tasks to remain, and also to clear the input field.
async function submitHandler() {
  setTasks([...tasks, data]);
  setData("");
}
Now, in the Tasks.tsx, we have passed two props (namely the data and the setTasks function). The tasks should be displayed now whenever you add any new task.
What’s remaining is the removeTask function, which is bound to the trash-icon in each task.
Inside the removeTask function:
function removeTask () {
  setTasks(
    data.filter(
      (task: string, i: number) => i !== index
    )
  );
}
What this piece of code basically does is filter through the data array containing the tasks and returns only the tasks that do not match the index of the task to be removed; then it sets the current tasks using the setTasks function.
Until now, we were able to enter new tasks and view them, but if you close the extension or hot-reload the development server, the tasks disappear. The best solution for this is adding local storage support to your extension.
Plasmo provides an in-built solution for this, called @plasmohq/storage. Install it using the following:
npm install @plasmohq/storage
We’ll fetch tasks from localStorage, if there are any present.
import { Storage } from "@plasmohq/storage";
import { useEffect } from "react";

const storage = new Storage();

export function Main () {
  // ...code

  useEffect(() => {
     // fetch tasks from the local storage
      storage.get("tasks").then(
        (tasks) => setTasks(tasks || []),
        // if there are no tasks, set an empty array
        // this usually gets triggered if the method fails or returns an error
        () => setTasks([])
      )},
    // run once on mount
    []
  );
}
Inside the useEffect, we use the storage.get() method to check for any saved fields, with the field tasks. If tasks is present, we set the tasks state. We can even trigger another callback here if the promise is rejected, hence setting the tasks array as empty.
With that done, now we’ll add a task to local storage when the user clicks the submit button.
Inside the submitHanlder:
async function submitHanlder () {
  setTasks([...tasks, data]);
  setData("");

  // save to local storage
  await storage.set("tasks", [...tasks, data]);
}
Here, using the storage.set() method, the current list of tasks is fed into the localStorage under the key tasks.
With that done, the extension should now be able to persist tasks, even if the extension hot-reloads during development or if the extension is closed and re-opened.
Again, we can use the storage.set() method to remove the specific task.
Inside the removeTask() function, make the following changes:
function removeTask(index: number) {
  setTasks(data.filter((task: string, i: number) => i !== index));

  // remove from local storage
  storage.set(
    "tasks",
    data.filter((task: string, i: number) => i !== index)
  )
}
The same logic we used previously is applied while removing the specific task from the localStorage.
(Note: To read more about @plasmohq/storage, visit the Plasmo Docs)
And, finally, we have successfully built an extension using React and Plasmo that can keep track of your tasks. You can add more new cool features of your own, and try to ship one to the Chrome Store!
Plasmo is a great framework to build extensions with; especially if you’re just starting out and have a bit of experience with React.
The documentation I have linked in this article is beginner-friendly and contains pretty much everything you need to get started with Plasmo.
Plasmo is still under active development, so be aware that you can encounter bugs and other problems. Make sure you join Plasmo’s official Discord Server if you are stuck anywhere or have any suggestions for upcoming versions, and of course feel free to leave your thoughts in the comments section below.
Install LogRocket via npm or script tag. LogRocket.init() must be called client-side, not
server-side
$ npm i --save logrocket

// Code:

import LogRocket from 'logrocket';
LogRocket.init('app/id');
// Add to your HTML:

<script src="https://cdn.lr-ingest.com/LogRocket.min.js"></script>
<script>window.LogRocket && window.LogRocket.init('app/id');</script>

Discover how React Fiber works under the hood. Learn how React builds the DOM, handles concurrent rendering, and works alongside React 19 features and the new React Compiler.

Learn how to use Skybridge, an open-source React framework, to build and deploy cross-platform AI apps and interactive UI widgets for ChatGPT, Claude, and MCP clients from a single codebase.

Learn how to set up Meilisearch, index documents, and build keyword, semantic, and hybrid search with AI-powered retrieval.

Compare pnpm and npm across security defaults, disk usage, dependency strictness, and workspace policy to decide which package manager fits your project.
Would you be interested in joining LogRocket's developer community?
Join LogRocket’s Content Advisory Board. You’ll help inform the type of content we create and get access to exclusive meetups, social accreditation, and swag.
Sign up now

