Editor’s note: This article was last updated by Abiodun Solomon on 24 April 2023 to include information about authentication using the parent() function, and the set, get, and delete SvelteKit cookies methods. For more information, check out SvelteKit Auth with AWS Cognito.

Authentication is an essential part of any application that makes certain functions available only to certain users. The two main methods for authentication in web applications are cookies and tokens, which are usually JSON Web Tokens (JWTs). In this tutorial, we will create a Svelte app using SvelteKit that implements a cookie for authentication.
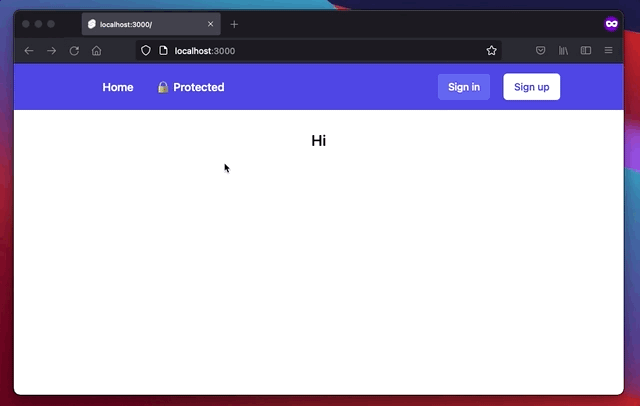
Our app will provide the basic functions required for authentication: sign in, sign up, sign out, and access to some user data in the frontend. This is what the final app will look like:
Jump ahead:
parent() functionSvelteKit is to Svelte what Next.js is to React. SvelteKit is a framework for building web applications of all sizes, with a beautiful development experience and flexible file system–based routing.
SvelteKit extends Svelte with some functionality that we will use in this tutorial: file system–based routing, endpoints (server-side functions), and hooks.
Cookies, also known as HTTP cookies, are small text files that websites store on a user’s computer or mobile device. These files contain data related to the user’s browsing activity on that website, such as login information, preferences, and shopping cart contents.
Cookies can be either “session cookies” or “persistent cookies.” Session cookies are temporary and deleted when the user closes their browser, while persistent cookies remain on the user’s device until they expire or are deleted by the user.
SvelteKit’s cookies have a new method for a cookie header, and also removed the getSession property, which returns the data that was set in user session. With this new concept, it’s now much easier to work with cookies compared to adding payload manually to the request header. This update comes with a set of flexible methods, including set, get, and delete.
set methodThis method is used to set cookies in the Set-Cookie header and define options as needed, making the cookies available for recurring usage. To use the set method, you need to provide name , value, and option — option is optional. These config options allow us to specify various options that help ensure security and restriction to the cookie data:
cookies.set('sessionId', "[email protected]", {
  httpOnly: true,
  sameSite: 'strict',
  secure: false,
  path: '/',
  maxAge: 60 * 60 * 24 * 7
});

// name: sessionId
// value: [email protected]
// options: {...}
This is a quick overview of the cookie options we pass to the serialize function, which returns the string to describe the cookie. You can read about the details on MDN’s Using HTTP cookies:
path: Defines which paths the cookie will be sent alongside the request. By setting the path to /, the cookie will be sent alongside each request (also our requests to /api/**)httpOnly: Prevents JS in the client from accessing that cookie. document.cookie will not contain that cookie. This is a security setting and should be your default. Without setting it to true, malicious JS (also from browser extensions) can read session_id, send it somewhere, and be logged in with your sessionsameSite = strict: Sets the Same-Site attribute in the cookie. By setting it to strict, the cookie is only sent to the site where it originated. This prevents CSRFsecure: This is another security feature. By setting secure = true, the client will only send the cookie alongside the request if https:// is used. It prevents an attacker from using a man-in-the-middle attack and reading the cookie while being sentmax-age: This sets the max-age attribute in the cookie. If the specified duration is over (one week, in our example), the client (the browser) will not send the cookie alongside the request anymore, and will delete it. This makes the cookie a “permanent” cookie rather than a “session” cookie. Remember the common Keep me logged in checkbox? By enabling that checkbox, the server will set the max-age (or Expires) attribute in the cookie. The user will keep the session and therefore stay logged in for one weekget methodThis method is used to get cookie data that was previously set with cookies.set, or from the request headers. The get method takes two parameters: name and options, though options is optional:
cookies.get('session');
delete methodThis method is used to delete a cookie from the browser. Deleting a cookie removes the data and the expiry period attached to that cookie. This method takes two parameters: name and options; again, options is optional:
await cookies.delete('session', {path: '/'});
parent() functionThe parent() function is used to return props data from various load functions, then combine them together as one object. Additionally, the load function is used to return data from the server/client to the Svelte template:
//src/routes/+layout.server.js
export const load = async ({ request, locals, cookies }) => {
    return {
        user: locals.user,
        welcome_message: "welcome back",
    };
};
The +page.js is executed on the client side while the other files with .server.js are executed on the backend:
//src/routes/+page.js
export const load = async ({ parent }) => {
    const { user, welcome_message } = await parent();
    return {
        user: user,
        message: welcome_message
    };
};
Okay, now let’s go ahead and build our project. All the code can be found on GitHub.
First, we’ll initialize the SvelteKit project. For this tutorial, we’ll use JavaScript instead of TypeScript:
npm create svelte@latest sveltekit-auth
# ✔ Which Svelte app template? › Skeleton project
# ✔ Use TypeScript? … No
# ✔ Add ESLint for code linting? … Yes
# ✔ Add Prettier for code formatting? … Yes
cd sveltekit-auth
npm install
Let’s add Tailwind for some basic styling. We’ll also use the Tailwind forms plugin, which provides some basic styling for our forms:
npx svelte-add@latest tailwindcss
In order to use Tailwind, we have to add a directories pattern to match the content object in the Tailwind CSS config './src/**/*.{html,js,svelte,ts}' :
// tailwind.config.js
const config = {
    purge: ['./src/**/*.{html,js,svelte,ts}'],

    theme: {
            extend: {},
    },

    plugins: [],
};

module.exports = config;
That’s it for the very basic setup. Let’s build the UI next before we get to the actual authentication.
Next, let’s build the forms for signing up and signing in:
// src/lib/components/SignInForm.svelte
<script>
  import Input from '$lib/components/Input.svelte';
  import Button from '$lib/components/Button.svelte';

  let email = '';
  let password = '';
</script>

<form method="POST" class='space-y-5 {$$props.class}'>
  <Input label='Email' id='email' name='email' type='email' bind:value={email} required />
  <Input label='Password' id='password' name='password' type='password' bind:value={password} required />
  <Button type='submit'>Sign In</Button>
</form>
Here, we have a form with an email and password input. With {$$props.class} in the form’s class attribute, we allow passing in Tailwind classes from outside. I use this mainly for positioning a component from the outside. The component itself should not have a margin or something similar on its container.
N.B., You can find the code for Button and Input in the GitHub repo.
And it is basically the same for SignUpForm.svelte:
// src/lib/components/SignUpForm.svelte
<script>
    import Input from '$lib/components/Input.svelte';
    import Button from '$lib/components/Button.svelte';
    let email = '';
    let password = '';
    let confirmPassword = '';

    let error;

    function validatePassword(password, confirmPassword) {
        return confirmPassword !== password
    }
</script>
<form method="POST" class="space-y-5 {$$props.class}">
    <Input label="Email" id="email" name="email" type="email" bind:value={email} />
    <Input label="Password" id="password" name="password" type="password" bind:value={password} />
    <Input
        label="Confirm Password"
        id="confirm-password"
        name="confirm-password"
        type="password"
        bind:value={confirmPassword}
    />
    {#if confirmPassword !== "" && confirmPassword !== password}
        <p class="text-red-600 text-sm font-semibold">Password not match</p>
    {/if}
    <Button type="submit" disabled="{validatePassword(password, confirmPassword)}">Sign Up</Button>
</form>
In this case, we have an additional input in order to verify that the user entered the intended password. If the user entered different passwords, we show an error and set the focus back to the input.
Let’s now use these forms on actual pages. Routes are created in folders, which means your route path should be the same name as a folder name in the /src/routes/ folder. In this case, our route name is sign-up, which means we need to create a sign-up folder in the /src/routes/. We also need to create the template(+page.svelte) and the server files (+page.server.js). These are the default naming conventions of SvelteKit’s latest release at the time of writing.
We should now have the following files in the /sign-up folder: src/routes/sign-up/+page.svelte and src/routes/sign-up/+page.server.js:
//src/routes/sign-up/+page.svelte
<script>
    import SignUpForm from '$lib/components/SignUpForm.svelte';
    let error;
</script>
<h1 class="text-2xl font-semibold text-center">Sign Up</h1>
{#if error}
    <p class="mt-3 text-red-500 text-center font-semibold">{error}</p>
{/if}
<SignUpForm class="max-w-xl mx-auto mt-8" />
Here, we used our SignUpForm to handle the form submission. If a user submits the form, we send a POST request containing email and password to svelte server via action. This action is a new concept from the latest SvelteKit release that handles user form data from the request.
You can specify a default, which means you don’t have to use any URL in the frontend form action. Likewise, you can specify a path name, which you can use in the action to get your data:
export const actions = {
    default: async ({ request, cookies }) => {
        const form = await request.formData();
        const email = form.get('email');
        const password = form.get('password');
    },
    logout: async ({ request, cookies }) => {
      // TODO:
    },
    register: async ({ request, cookies }) => {
      //TODO:
    }
}
In the case where you don’t use default and probably use register or another name, you should then have:
<form method="POST" action="/register">
...
</form>
+page.server.js handles the backend logic for the signup flow. We then check if the user email and password already exist in our store. We’d create the user if it doesn’t exist, and add the user ID to the cookies session so the user information can be available on other authorized pages within a period that we specify when creating the cookies session. The server responds by redirecting to /protected when the user ID has been added to the cookie session. Otherwise, we render an error.
The /sign-in looks exactly the same, with the only differences being the used form and where we send the request:
// src/routes/sign-in/+page.svelte
<script>
    import SignInForm from '$lib/components/SignInForm.svelte';
     export let form;
</script>
<svelte:head>
  <title>Login</title>
  <meta name="description" content="About this app" />
</svelte:head>
<h1 class="text-2xl font-semibold text-center">Sign In</h1>
{#if form?.incorrect}
    <p class="mt-3 text-red-500 text-center font-semibold">Invalid email/password</p>
{/if}
<SignInForm class="max-w-xl mx-auto mt-8" />
There is also a layout component, an index page, and a navigation component, which I won’t go into detail about here. They are not required to understand how to implement authentication in Svelte. You can look them up in the GitHub repo.
Now, let’s create the backend logic for the authentication.
First, we need one additional library that will help us generate a random ID for each user:
npm i uuid
Let me introduce you to our Svelte store that will be acting as our database for storing the user data and the sessions:
// src/routes/store/db.js
import { v4 as uuidv4 } from 'uuid';
import { create, find } from '.';

export const getUserByEmail = async (email) => {
    const existingUser = find({
        email: email
    });
    if (!existingUser) return Promise.resolve(null);
    return Promise.resolve(existingUser);
};

export const getUserById = async (id) => {
    const existingUser = find({ id: id });
    if (!existingUser) return Promise.resolve(null);
    return Promise.resolve(existingUser);
};

export const createSession = (email,password) => {
    const session = {
        id: uuidv4(),
        email,
        password
    };
    const response = create(session);
    if(!response) {
        return Promise.resolve(null);
    }
    return Promise.resolve(response);
};
Here’s our store, or database, that handles the storing of new user information and retrieving user information by filtering the records by ID and email:
//src/routes/store/index.js

import { writable } from 'svelte/store';
export const user = writable([
    {
        id: 123,
        email: '[email protected]',
        password: 'secret'
    }
]);
export const create = (newUser) => {
    const userExist = find({ email: newUser.email})
    if(userExist) {
       return false;
    }
    user.update((u) => [...u, newUser]);
    return newUser;
};
export const remove = (id) => {
    user.update((u) => u.filter((u) => u.id !== id));
};
export const find = (obj) => {
    let existingUser;
    user.subscribe((value) => {
        if (value) {
            if (obj.email) {
                existingUser = value.find((item) => item.email === obj.email);
            } else {
                existingUser = value.find((item) => item.id === obj.id);
            }
        }
    });
    return existingUser;
};
The writable, as the name implies, allows us to instantiate and prefill our store with a list of user data. The subscribe function allows us to retrieve data already written to the store. The update function allows us to add a new record to the list. The data will be lost if the application is restarted. This is fine for this tutorial, but in the real world, you would connect to a real database or use a SaaS like Supabase.
N.B., There’s nothing like an endpoint in the latest SvelteKit release; the frontend and backend are coupled together.
Now, let’s get to our signup logic:
// src/routes/sign-up/+page.server.js
import { redirect } from '@sveltejs/kit';
import { createSession } from '../../store/db';
import { dev } from '$app/environment';
export const actions = {
    default: async ({ request, cookies }) => {
        const form = await request.formData();
        const email = form.get('email');
        const password = form.get('password');
        if (email === '' || password === '') {
            throw redirect(303, '/');
        }
        const { id } = await createSession(email, password);
        cookies.set('session_id', id, {
            path: '/',
            httpOnly: true,
            sameSite: 'strict',
            secure: !dev,
            maxAge: 60 * 60 * 24 * 7 // one week
        });
        throw redirect(303, '/protected');
    }
};
As I mentioned previously, SvelteKit uses actions to handle requests. We can check if a user with the given email already exists. If that’s not the case, we can register the new user and create a session.
We set the cookie containing session_id. That ID will be sent automatically by the server with the subsequent requests.
N.B., It is questionable whether informing a customer that an email is already in use is a good idea. A potential attacker could use the information about existing email addresses. Nevertheless, companies like Twitter and Facebook also send that information to the client; though, this isn’t to say that these should be the gold standard for data privacy and security.
Now that we understand how the sign-up works, the sign-in is easy enough. This is how the sign-in handler looks:
// src/routes/api/sign-in/+page.server.js

import { fail, redirect } from '@sveltejs/kit';
import { getUserByEmail } from '../../store/db';
import { dev } from '$app/environment';
export const actions = {
    default: async ({ request, cookies }) => {
        const form = await request.formData();
        const email = form.get('email');
        const password = form.get('password');

        if (email === '' || password === '') {
            throw redirect(307, '/');
        }

        const user = await getUserByEmail(email);
        if(!user || user.password !== password) {
            return fail(400, { email, incorrect: true });
        }

        cookies.set('session_id', user.id, {
            path: '/',
            httpOnly: true,
            sameSite: 'strict',
            secure: !dev,
            maxAge: 60 * 60 * 24 * 7 // one week
        });
        throw redirect(303, "/protected")
    }
};
We checked if the email and password exist by using await getUserByEmail(email), which interacts with our store to compare the data with the existing record. We’d return an error if the user email and password don’t match the existing record in the database, and the user would be redirected to a protected page.
We’ll implement our sign-out logic in the layout when a user clicks on sign out. It redirects back to the homepage with a query params of /?signout=true, which is then detected by hooks.server.js and clears the cookie:
// src/routes/+layout.svelte
<script>
    import './styles.css';
    import Navigation from '$lib/components/Navigation.svelte';
    import { goto } from '$app/navigation';
    export let data;

    async function handleSignOut(event) {
        const status = event.detail.signout;
        await goto(`/?signout=${status}`);
    }
</script>
<div class="app">
    <Navigation user={data.user} on:signout={handleSignOut}/>
    <div class="container mx-auto mt-8 antialiased">
        <slot />
    </div>
</div>
Svelte hooks run on the server and allow us to extend the behavior of SvelteKit. The handle hook runs on every request (and during prerendering). It gives us access to the request and allows us to modify the response. We can add custom data to request.locals, which will be available in all endpoints. We will use it to parse the session_id cookie, retrieve the session, and attach the session data to request.locals.
The hook, which can also be referred to as a middleware, helps us handle the unauthorized user trying to access protected pages. This is how we implement the hooks:
// src/hooks.server.js
import { redirect } from '@sveltejs/kit';
import { getUserById } from './store/db';
const unProtectedRoutes = ['/', '/sign-in', '/sign-up'];
export const handle = async ({ event, request, resolve }) => {
    const sessionId = event.cookies.get('session_id');
    if (!sessionId && !unProtectedRoutes.includes(event.url.pathname)) {
        throw redirect(303, '/');
    }
    const userInfo = await getUserById(sessionId);
    const currentUser = userInfo;
    if (currentUser) {
        event.locals.user = {
            isAuthenticated: true,
            email: currentUser.email,
            id: currentUser.id
        };
    } else {
        if (!unProtectedRoutes.includes(event.url.pathname)) {
            throw redirect(303, '/');
        }
    }
    const query = event.url.searchParams.get('signout');
    if (Boolean(query) == true) {
        await event.cookies.delete('session_id', { path: '/' });
    }
    return resolve(event);
};
This way, the user object containing the users’ email will be accessible in the frontend. That is what we will be looking at next.
Let’s now use the user object in the session. In /src/routes/protected, we can create another route, called /protected that will only be accessible by authenticated users.
We can then check if the session contains the user. If that’s not the case, the user isn’t signed in. We can redirect the user by returning the combination of HTTP status code 302 (found) and a redirect pointing to the route where the user should be redirected. Because the load function is running before the actual rendering of the page, an unauthenticated user will never see the page. You can try this by navigating to /protected in the finished demo.
By returning user in the props object from the load function, we can access user as a prop in the component instance. There is an alternative way to access user in the session, as the load function is only available on pages and layouts. You can access the session via the session store provided by SvelteKit. This is used in the Navigation component.
This is how the protected route looks:
// src/routes/protected/+page.svelte
<script>
  export let data;
</script>
<svelte:head>
  <title>Protected Page</title>
  <meta name="description" content="About this app" />
</svelte:head>
<h1 class="text-2xl font-semibold text-center">Hi! You are registered with email: {data.user.email}.</h1>
That’s it! We now have an app with working authentication.
SvelteKit provides us with the tools we need to create a nice user flow for authentication. With it, we can easily create backend logic, hooks for parsing, checking, and providing the session; and in the frontend, we can access the session data either in the load function or through the provided session store. You have full control and can easily extend and change the functionality.
Make sure to play around with the demo (GitHub repo). Or, even better, try to recreate it yourself.
Install LogRocket via npm or script tag. LogRocket.init() must be called client-side, not
server-side
$ npm i --save logrocket

// Code:

import LogRocket from 'logrocket';
LogRocket.init('app/id');
// Add to your HTML:

<script src="https://cdn.lr-ingest.com/LogRocket.min.js"></script>
<script>window.LogRocket && window.LogRocket.init('app/id');</script>

Learn how to protect full-stack projects from NPM supply chain attacks with a practical security checklist.

Explore 15 essential MCP servers for web developers to enhance AI workflows with tools, data, and automation.

Learn how contrast-color() automatically picks accessible text colors using native CSS, without JavaScript.

Learn how to build a harness-style AI workflow using Claude Code with specialized Dev, QE, and Ops subagents, gated handoffs, MCP telemetry, and LEARNING.md.
Would you be interested in joining LogRocket's developer community?
Join LogRocket’s Content Advisory Board. You’ll help inform the type of content we create and get access to exclusive meetups, social accreditation, and swag.
Sign up now

