Imagine a situation in which you are building a new feature on the frontend of an application, but the available HTTP endpoints are not yet ready for consumption from the backend development team. This is a common problem when working inside a large team of various types of developers.

To overcome this obstacle during development, we can use a fake server to mimic all CRUD operations of an HTTP REST API while our data resides locally in our frontend application.
In this tutorial, we’re going to explore the Angular In-memory Web API, followed by a hands-on development of a fake server to mock a simple CRUD backend in Angular, so you can build a functional frontend without depending on the backend team.
Before we get started, make sure you have the following in order to keep up with this tutorial:
angular-in-memory-web-api is a library that intercepts Angular Http and HttpClient requests that would otherwise go to the remote server and redirects them to an in-memory data store that you control in the frontend. With this library, you can seamlessly mimic delayed responses and do essentially everything you might need from a backend developer. However, it has limited capabilities, and it is not intended for use in production.
In this tutorial, we will use the angular CLI tool to scaffold our project.
To check if you have the Angular CLI tool already installed, run the following command in your terminal:
ng --version
//or
ng v
Install the angular CLI tool with the following command:
npm install -g @angular/[email protected]
Now we can create a new Angular project with the following command:
ng new angular-api-backend
The Angular CLI will ask you for some details about the application that you want to create so that it can scaffold the Angular project.
Initially, it will ask if you would like to add Angular routing. For this tutorial, answer “No” to the question and press enter.
The next question is about which stylesheet format you would like to use. Accept the default choice (CSS), and press enter.
This process may take some time depending on your internet connection. During this time, Angular CLI will download and install all of the necessary dependencies, as well as create default files for your Angular application.
When finished, it will have created a folder called angular-api-backend. Navigate to the newly created folder and start your application with the following command:
ng serve
Angular CLI compiles our newly created Angular project and starts a web server that watches for changes in project files.
angular-in-memory-web-api is very easy to set up and configure.
First, we need to install angular-in-memory-web-api as a dev dependency because we will be using it for development only:
npm install angular-in-memory-web-api --save-dev
In the src/app directory, create data.services.ts file and add the following:
//src/app/data.services.ts

import { Injectable } from '@angular/core';
import { InMemoryDbService } from 'angular-in-memory-web-api';
@Injectable({
  providedIn: 'root'
})
export class DataService implements InMemoryDbService {
  constructor() { }
  createDb() {
    return {
      products: [
        {
          id: 1,
          name: 'Seaman Cap',
          description: 'Lorem ipsum . Voluptatem excepturi magnam nostrum dolore recusandae',
          price: '$40'
        },
        {
          id: 2,
          name: 'T-shirt',
          description: 'amet consectetur adipisicing elit.Lorem ipsum dolor sit ',
          price: '$80'
        },
        {
          id: 3,
          name: 'Back Pack',
          description: 'Voluptatem excepturi harum rerum aliquam magnam nostrum dolore recusandae',
          price: '$30'
        }
      ]
    };
  }
}
The above code snippet is an actual Angular service that implements the InMemoryDbService interface. The Angular service then implements the createDb method of the InMemoryDbService interface, which creates an object in memory that represents our database. Each key in the object represents an entity of our database, such as products.
Add the following to src/app/app.module.ts:
//src/app/app.module.ts

import { HttpClientInMemoryWebApiModule } from 'angular-in-memory-web-api';
import { DataService } from './data.service';

@NgModule({
  ...
  imports: [
    ...
    HttpClientInMemoryWebApiModule.forRoot(DataService),
  ],
  ...
})
Notice how we import HttpClientInMemoryWebApiModule by calling its forRoot method, passing the DataService as a parameter. We did this to avoid creating multiple instances of DataService.
We have successfully created a backend API for our Angular app without setting up an actual backend server infrastructure.
The Angular http client is a built-in HTTP client of the Angular framework. This service is available as an injectable class, with methods to perform HTTP requests. It is installed by the Angular CLI by default when creating a new Angular project.
In order to use it, we need to add the following to src/app/app.module.ts:
// src/app/app.module.ts
import { HttpClientModule } from '@angular/common/http';

@NgModule({
  ...
  imports: [
    ...
    HttpClientModule,
  ]
})
The instances of the HttpClientModule service have access to a variety of methods to perform common request operations, such as GET, POST, PUT, etc.
Building CRUD applications is one of the best approaches to learning new tools and concepts in software development.
To better understand how to mock CRUD APIs in Angular, we will build a demo CRUD application that creates products, updates, and deletes them.
We will organize our code in modules as we will create products module as follows:
ng generate module products
Next, we will register a product-list component with the products module:
ng generate component products/productList --module=products
Add the following CSS styles to products/product-list/productlist.component.css :
//products/product-list/productlist.component.css
#customers {
  font-family: Arial, Helvetica, sans-serif;
  border-collapse: collapse;
  width: 100%;
}
#customers td, #customers th {
  border: 1px solid #ddd;
  padding: 8px;
}
#customers tr:nth-child(even){background-color: #f2f2f2;}
#customers tr:hover {background-color: #ddd;}
#customers th {
  padding-top: 12px;
  padding-bottom: 12px;
  text-align: left;
  background-color: #4CAF50;
  color: white;
}
Navigate to the products directory and create product.model.ts with the following:
//products/product.model.ts
export interface Product {
  id: number;
  name: string;
}
Here, we created a type interface for the structure of the product data we will be working with.
In order to communicate with the backend, we need to inject the HttpClient into our ProductService so that we have access to the GET, POST, PUT, and every other HTTP verb required to send an HTTP request to the backend.
In the products directory, create a product.service.ts file and add the following:
import { Injectable } from '@angular/core';
import { Product } from './product.model';
import { HttpClient, HttpErrorResponse } from '@angular/common/http';
import { Observable, throwError } from 'rxjs';
import { catchError, retry } from 'rxjs/operators';
@Injectable({
  providedIn: 'root'
})
export class ProductService {
  private productsUrl = 'api/products/';
  constructor(private http: HttpClient) { }

  getProducts(): Observable<Product[]> {
    return this.http.get<Product[]>(this.productsUrl).pipe(
      retry(2),
      catchError((error: HttpErrorResponse) => {
        console.error(error);
        return throwError(error);
      })
    );
  }

  createProduct(product: Product): Observable<Product> {
    product.id = null;
    return this.http.post<Product>(this.productsUrl, product).pipe(
      catchError((error: HttpErrorResponse) => {
        console.error(error);
        return throwError(error);
      })
    )
  }

  editProduct(product: Product): Observable<any> {
    return this.http.put(this.productsUrl + product.id, product);
  }

  deleteProduct(id: number): Observable<any> {
    return this.http.delete(this.productsUrl + id);
  }
}
In the above snippet, we imported HttpClient from an Angular built-in HTTP package and injected it into the ProductService class as follows:
constructor(private http: HttpClient) { }
The getProducts method uses the HttpClient service to get the list of products from the database and returns an Observable of them. The GET method of HttpClient accepts the URL of an API endpoint as a parameter.
If you are familiar with TypeScript, you will notice that we used generics <Product[]> in the GET method to get a response of the specific type of data returned from the server. In our case, an array of Product objects.
The angular-inmemory-web-api requires that the URL always starts with the word api, followed by the entity that we want to access:
private productsUrl = 'api/products/';
In our case, the entity is products, as defined earlier in the createDb method of DataService.
The createProduct method uses the HttpClient post verb to make a post request to create a new product in the database. It returns an Observable of the newly created product.
The editProduct method uses the HttpClient to make a PUT request to update an existing product in the database. Like with createProduct, it returns an Observable of the updated product.
Finally, the deleteProduct method uses the HttpClient to make a delete request to remove an existing product from the database. It similarly returns an Observable of the deleted product.
Now, we have configured the HttpClient into our ProductService. The next step is to make our component subscribe to the observable stream, because the methods of the ProductService returns an observable stream instead of raw data.
Update product-list.component.ts with the following:
//products/product-list/productlist.component.ts
import { Component, OnInit } from '@angular/core';
import { Product } from "../product.model"
import { ProductService } from "../product.service"

@Component({
  selector: 'app-product-list',
  templateUrl: './product-list.component.html',
  styleUrls: ['./product-list.component.css']
})
export class ProductListComponent implements OnInit {
  product = {
    name: '',
    id: null
  }
  edit = true;
  add = false;
  products: Product[];

  constructor(private productService: ProductService) {}

  ngOnInit(): void {
    this.getProducts()
  }

  private getProducts() {
    this.productService.getProducts().subscribe(products => this.products = products);
  }

  addProduct() {
    const data = {
      name: this.product.name,
      id: this.product.id
    };
    this.productService.createProduct(data).subscribe(response => {
      console.log(response)
      this.getProducts();
    });
  }

  setProductEdit(product: Product) {
    this.product.name = product.name;
    this.product.id = product.id;
    this.edit = false;
    this.add = true;
  }

  resetValues() {
    this.product.name = "";
    this.product.id = null;
    this.edit = true;
    this.add = false;
  }

  removeProduct(product: Product) {
    const id = product.id;
    console.log(product)
    this.productService.deleteProduct(id).subscribe(product => console.log(product));
    this.getProducts()
  }

  updateProduct(){
    this.productService.editProduct(this.product).subscribe(response => console.log(response));
    this.getProducts()
    this.resetValues()
  }
}
The getProducts method subscribes to the getProducts method of ProductService and sets the result to the products property of the component, while the ngOnInit() lifecycle hook calls the getProducts method when the component is initialized.
Similarly, the addProduct, removeProduct, and updateProduct methods subscribe respectively to the createProducts, editProduct, and deleteProduct methods of ProductService.
Now, let’s couple the component logic with the template. Add the following to products/product-list/productlist.component.html:
//products/product-list/productlist.component.html
<div>
  <input type="text" name="productName" [(ngModel)]="product.name">
  <button [hidden]="add" (click)="addProduct()">add Product</button>
  <button [hidden]="edit" (click)="updateProduct()">Update Product</button>
</div>
<table id="products">
  <tr>
    <th>S/N</th>
    <th>Name</th>
    <th>Update</th>
    <th>Delete</th>
  </tr>
  <tr *ngFor="let product of products">
    <td>{{product.id}}</td>
    <td>{{product.name}}</td>
    <td><button (click)="setProductEdit(product)">Update</button></td>
    <td><button (click)="removeProduct(product)">Delete</button></td>
  </tr>
</table>
The *ngFor directive is used to render a list of items based on a data source. In our case, we render a product data for each of the product objects in our products array.
Update products.module.ts as follows:
import { NgModule } from '@angular/core';
import { CommonModule } from '@angular/common';
import { ProductListComponent } from './product-list/product-list.component';
import { FormsModule, ReactiveFormsModule } from '@angular/forms';

@NgModule({
  declarations: [ProductListComponent],
  imports: [
    CommonModule,
    FormsModule,
    ReactiveFormsModule
  ],
  exports: [ProductListComponent]
})
export class ProductsModule { }
Now, let’s render our product-list component in the browser. Update app.component.html as follows:
<app-product-list></app-product-list>
Also, update app.module.ts as follows:
import { NgModule } from '@angular/core';
import { BrowserModule } from '@angular/platform-browser';
import { HttpClientModule } from '@angular/common/http';
import { AppComponent } from './app.component';
import {ProductsModule} from "./products/products.module"
import { HttpClientInMemoryWebApiModule } from 'angular-in-memory-web-api';
import { DataService } from './data.service';
@NgModule({
  declarations: [
    AppComponent,
  ],
  imports: [
    BrowserModule,
    HttpClientModule,
    ProductsModule,
    HttpClientInMemoryWebApiModule.forRoot(DataService)
  ],
  providers: [],
  bootstrap: [AppComponent]
})
export class AppModule { }
It’s been a long build, so let’s see our final project on the browser. If your development server is shut down, run the ng serve command again and open your browser on http://localhost:4200/.
In this tutorial, we’ve created a basic CRUD application that makes use of the angular-in-memory-web-api package to mock a REST API with an in-memory database for when the HTTP endpoints are not yet ready for consumption from the backend development team.
If you are interested, you can find the GitHub repo for our CRUD application here.
Debugging Angular applications can be difficult, especially when users experience issues that are difficult to reproduce. If you’re interested in monitoring and tracking Angular state and actions for all of your users in production, try LogRocket.
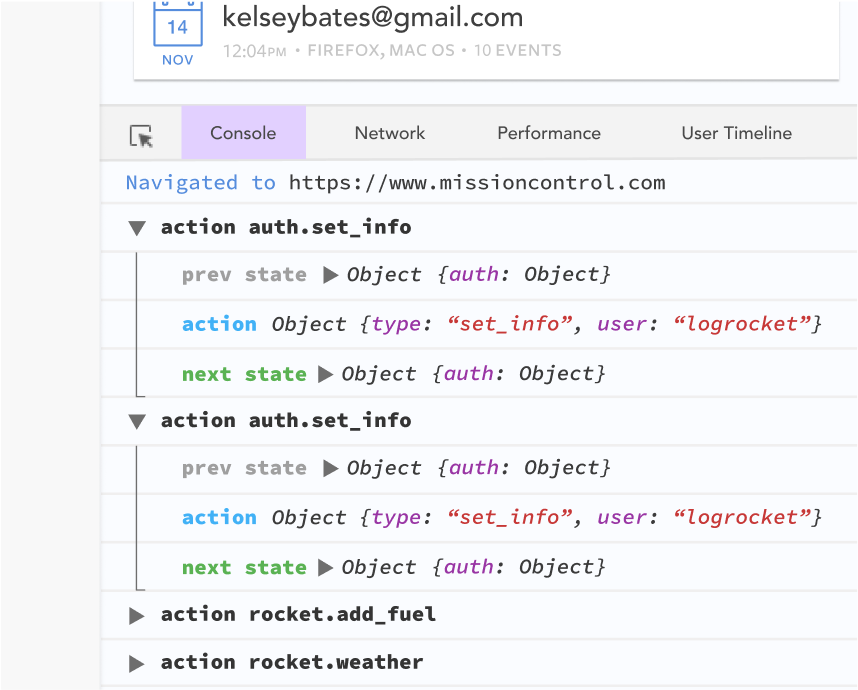
LogRocket lets you replay user sessions, eliminating guesswork by showing exactly what users experienced. It captures console logs, errors, network requests, and pixel-perfect DOM recordings—compatible with all frameworks.
With Galileo AI, you can instantly identify and explain user struggles with automated monitoring of your entire product experience.
The LogRocket NgRx plugin logs Angular state and actions to the LogRocket console, giving you context around what led to an error, and what state the application was in when an issue occurred.
Modernize how you debug your Angular apps — start monitoring for free.

Learn how to set up Meilisearch, index documents, and build keyword, semantic, and hybrid search with AI-powered retrieval.

Compare pnpm and npm across security defaults, disk usage, dependency strictness, and workspace policy to decide which package manager fits your project.

I migrated 20 production-style components from Tailwind to StyleX. Here’s what the data showed about LOC, CSS bundle size, build time, and type safety.

A guide for using JWT authentication to prevent basic security issues while understanding the shortcomings of JWTs.
Hey there, want to help make our blog better?
Join LogRocket’s Content Advisory Board. You’ll help inform the type of content we create and get access to exclusive meetups, social accreditation, and swag.
Sign up now

