Web workers are worker threads that run tasks and other functionalities in the background.

In this guide, we’ll explore the basics of using web workers, walk through useWorker implementation, and build a demo app so you can see the library in action. We’ll also go over some real-world use cases and interesting facts about web workers.
You might be wondering, “Why would I need to run anything in the background?” Take a look at the demo below.
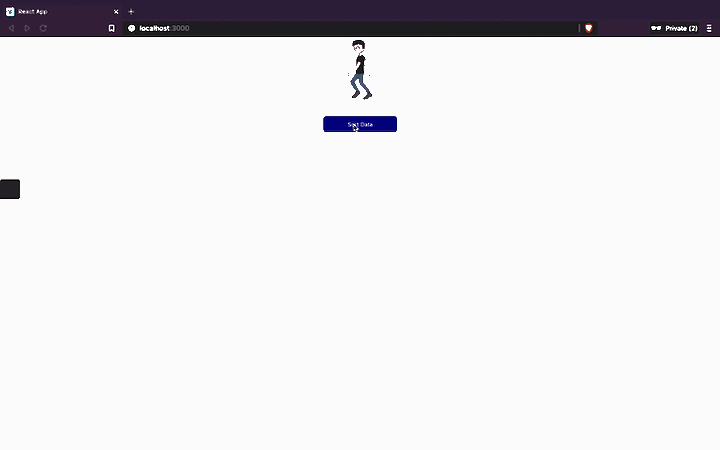
As you can see, when you click the button, the app’s UI freezes for a few seconds. After a pause, a toast shows that the action is completed.
Here we have two components: one to render the animation and another to handle the heavy computation of thousands of records. As soon as you click the button, it starts the computation, which leads to the UI freezing.
Obviously, this makes for a subpar user experience. The user shouldn’t have to wait for a specific action to be completed. Web workers solve this problem by enabling you to run high-volume computational tasks in the background without affecting the UI thread.
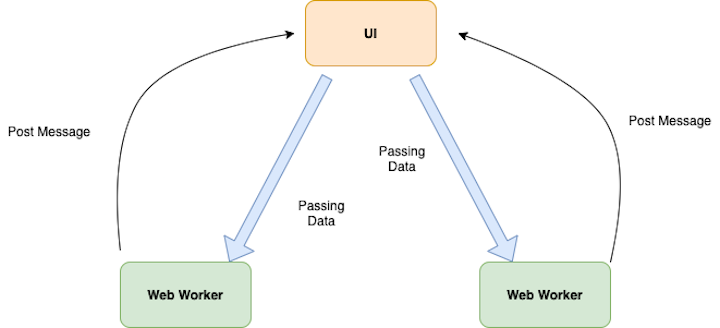
When your application needs to run a heavy computational task, a worker thread will handle the computation in a thread separate from the main UI thread. You can pass the data to the worker threads from the main thread.
Once a worker thread completes a task, it will post a message to the main thread. You can then update your main UI thread based on this message.
To paint a basic picture and demonstrate web workers’ ease of use, let’s start by implementing a web worker without using useWorker hooks.
Create a react component and add the following code.
import React, { useEffect, useState } from "react";
import { fetchUsers } from "../../utils/sortData";
import { useToasts } from "react-toast-notifications";
import "./index.css";
import webworker from "../../utils/app.worker";
import WorkerClass from "./Worker";
const WebWorker = () => {
  const [workerState, setWorkerState] = useState("DESC");
  const { addToast } = useToasts();

  const sortWorkerData = async () => {};

  return (
    <div className="user-div">
      <button
        className="sort-button"
        onClick={sortWorkerData}
      >
        {" "}
        Worker Sort
      </button>
    </div>
  );
};
export default WebWorker;
Here, we have a button that, when clicked, performs a heavy computational task. Lets bring this functionality to our web worker.
First, create a wrapper class around the Worker class in JavaScript, Worker.js.
export default class WebWorker {
  constructor(worker) {
    const code = worker.toString();
    const blob = new Blob(["(" + code + ")()"]);
    return new Worker(URL.createObjectURL(blob));
  }
}
This returns a new Worker object with the worker thread function.
Next, import the Worker class wrapper in your component.
import WorkerClass from "./Worker";
The next step is to create the worker thread to handle the computational task.
export default () => {
  self.addEventListener("message", (e) => {// eslint-disable-line no-restricted-globals
    if (!e) return;
    let users = e.data;
    const copy = [...users];
    for (var i = 0; i < copy.length - 1; i++) {
      for (var j = i + 1; j < copy.length; j++) {
        if (copy[i].commentCount < copy[j].commentCount) {
          var t = copy[i];
          copy[i] = copy[j];
          copy[j] = t;
        }
      }
    }
    postMessage(copy);
  });
};
The above code adds an event listener where the thread performs a computational task and postMessage after it’s done.
Let’s import that in our component.
import webworker from "../../utils/app.worker";
Now it’s time to wrap the component. Add the function.
const sortWorkerData = async () => {
    try {
      const users = await fetchUsers();
      let worker = new WorkerClass(webworker);
      worker.postMessage(users);
      worker.addEventListener("message", function (event) {
        setWorkerState("ASC");
        // setUsers(sortedData)
        addToast("Finished: Sort using useWorker.", { appearance: "success" });
      });
    } catch (e) {
      console.log(e);
      addToast("Some Error Occurred", { appearance: "error" });
    }
  };
First, fetch all the user data and create a worker object before instantiating the WorkerClass, which is a wrapper of Worker.
Next, postMessage to the worker thread with the user’s data. Once the computational task is done, it fires the event listened with the result.

useWorkerSo far, we’ve gone over how to implement the web worker API in a React application. One problem with the web worker API is that it’s difficult to track the status of a worker.
As you can see in the demo, it’s hard to tell whether a worker thread is running unless it is completed. This will become increasingly difficult as the number of threads in your application increases.
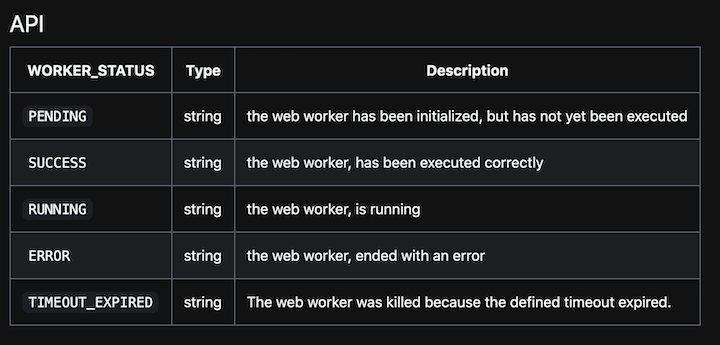
useWorker adds four main features to the plate:
To install useWorker in your application:
npm i @koale/useworker
Let’s implement useWorker to see it in action.
import React, { useEffect, useState } from "react";
import {
  fetchUsers,
  sortListDescending,
  sortListAscending,
} from "../../utils/sortData";
import { useWorker, WORKER_STATUS } from "@koale/useworker";
import { useToasts } from "react-toast-notifications";
import "./index.css";
const UserList = () => {
  const [users, setUsers] = useState([]);
  const { addToast } = useToasts();
  const [
    sortListDescWorker,
    { status: DescWorkerStatus, kill: DescWorkerKill },
  ] = useWorker(sortListDescending);
  useEffect(() => {
    async function fetchData() {
      const user = await fetchUsers();
      setUsers(user);
    }
    fetchData();
  }, []);
  const sortWorkerData = async () => {
    try {
      const users = await fetchUsers();
      await sortListDescWorker(users);
      addToast("Finished: Sort using useWorker.", { appearance: "success" });
    } catch (e) {
      console.log(e);
      addToast("Some Error Occurred", { appearance: "error" });
    }
  };
  return (
    <div className="user-div">
      <button
        className="sort-button"
        disabled={DescWorkerStatus === WORKER_STATUS.RUNNING}
        onClick={sortWorkerData}
      >
        {DescWorkerStatus === WORKER_STATUS.RUNNING
          ? `Loading`
          : "useWorker Sort"}
      </button>
      {DescWorkerStatus === WORKER_STATUS.RUNNING ? (
        <button className="sort-button" onClick={DescWorkerKill}>
          Kill Worker
        </button>
      ) : null}
    </div>
  );
};
export default UserList;
First, implement useWorker with a function that has a heavy computational task.
 const [
    sortListDescWorker,
    { status: DescWorkerStatus, kill: DescWorkerKill },
  ] = useWorker(sortListDescending);
useWorker exports three parameters:
Invoke the worker thread function along with the data to be passed.
  const sortWorkerData = async () => {
    try {
      const users = await fetchUsers();
      await sortListDescWorker(users);
      addToast("Finished: Sort using useWorker.", { appearance: "success" });
    } catch (e) {
      console.log(e);
      addToast("Some Error Occurred", { appearance: "error" });
    }
  };
It’s as easy as that! useWorker updates the status of the web worker to the component. You can use it to update the UI based on its status.
useWorker final demo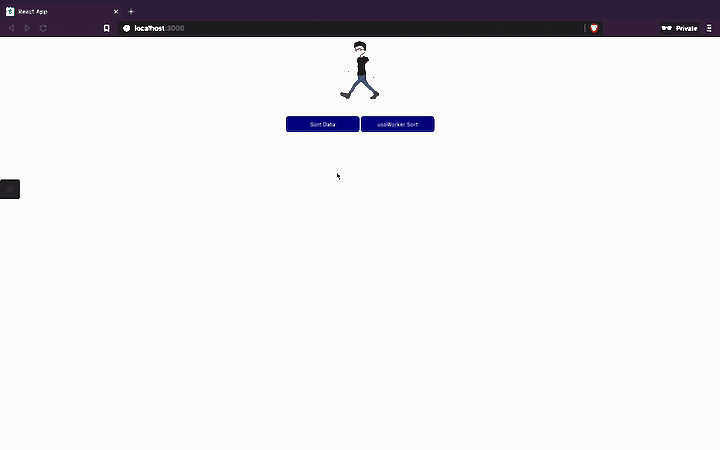
useWorkerLet’s take a step back and review the main advantages of using useWorker.
As mentioned earlier, useWorker provides us a good wrapper function to update the UI based on the status of a worker thread. It also provides a wrapper function to kill the thread.
useWorker hooks enable you to write readable and maintainable code using the web worker API.
Let’s see what the code looks like with and without useWorker.
useWorker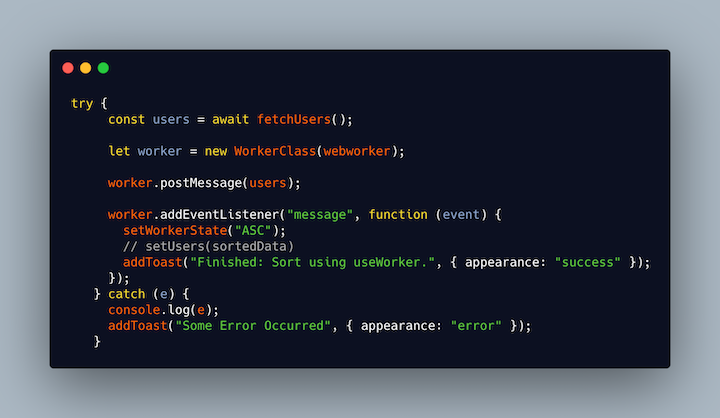
useWorker
We all know that hooks are the preferred way to write components in the React ecosystem. useWorker will be the most elegant way to use web workers in your application, mainly due to the readability and maintainability benefits.
Try it out yourself and tell us how it’s going in the comments. Happy coding!
Install LogRocket via npm or script tag. LogRocket.init() must be called client-side, not
server-side
$ npm i --save logrocket

// Code:

import LogRocket from 'logrocket';
LogRocket.init('app/id');
// Add to your HTML:

<script src="https://cdn.lr-ingest.com/LogRocket.min.js"></script>
<script>window.LogRocket && window.LogRocket.init('app/id');</script>

Learn how to protect full-stack projects from NPM supply chain attacks with a practical security checklist.

Explore 15 essential MCP servers for web developers to enhance AI workflows with tools, data, and automation.

Learn how contrast-color() automatically picks accessible text colors using native CSS, without JavaScript.

Learn how to build a harness-style AI workflow using Claude Code with specialized Dev, QE, and Ops subagents, gated handoffs, MCP telemetry, and LEARNING.md.
Would you be interested in joining LogRocket's developer community?
Join LogRocket’s Content Advisory Board. You’ll help inform the type of content we create and get access to exclusive meetups, social accreditation, and swag.
Sign up now

