Designers used Adobe Illustrator and Photoshop-like graphic design tools for creating product designs before the arrival of popular dedicated UI/UX design tools like Figma, Adobe XD, Sketch, and Penpot. Figma and other UI/UX design tools offer basic graphic design features to create design elements as you imagine, but Illustrator offers built-in advanced vector design features for creating complex design elements more productively and precisely. Creating logos, icons, and complex UI elements in Illustrator is more productive than creating them in Figma with its basic vector design features and workarounds, especially if you are familiar with the Adobe suite.

Using Illustrator for vector design and using Figma for UI/UX design is a popular product design workflow. Illustrator and Figma are two different apps that use different internal representations of graphical elements, so transferring Illustrator elements to Figma isn’t simple copy-pasting. You have multiple ways to bring Illustrator elements into Figma — you should choose the right way based on what happens next to the imported Illustrator element.
In this article, I’ll guide you on creating a reliable and efficient Illustrator-to-Figma design workflow by evaluating all possible methods that you can use to bring Illustrator elements to Figma.
Editor’s note: Shalitha Suranga substantially revised and expanded this article in September 2026. He retested the Illustrator-to-Figma workflows against current versions of both tools, updated the guidance around SVG copy-and-paste behavior, documented what does and doesn’t transfer cleanly, and added new troubleshooting guidance for common compatibility issues, including rasterized vectors, broken gradients and masks, and missing fonts.
Illustrator allows you to configure copy action behavior. You can configure Illustrator to copy elements as SVG or PNG images.
Starting from version 29.7.1, Illustrator no longer places SVG code into the system clipboard by default, so copy-pasting even a simple vector object from Illustrator to Figma just transfers a PNG image, which is not editable as a vector object within Figma.
However, you can use this approach if you simply need to get simple Illustrator design elements to Figma as a static image. For example, you can copy and paste an Illustrator design preview into another high-fidelity design created in Figma or a basic design element that doesn’t scale, such as a small signifier.
The Illustrator object becomes a single Figma image, as follows:

You should manually enable the “Include SVG Code” setting in the clipboard configuration window to transfer vector elements as editable SVG elements to Figma with copy-pasting. Go to “Edit -> Preferences -> Clipboard Handling” and check the “Include SVG Code” checkbox:
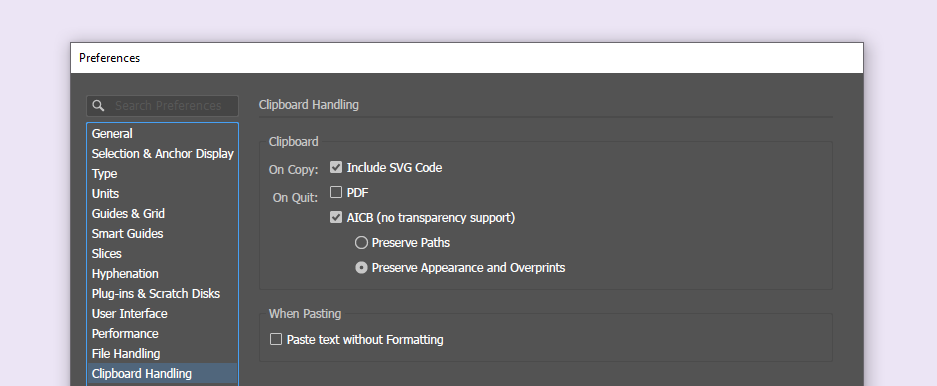
Now, you can easily transfer any complex element created with vector paths by copying and pasting. Once you paste the Illustrator element in the Figma canvas, you can edit vector paths as expected:
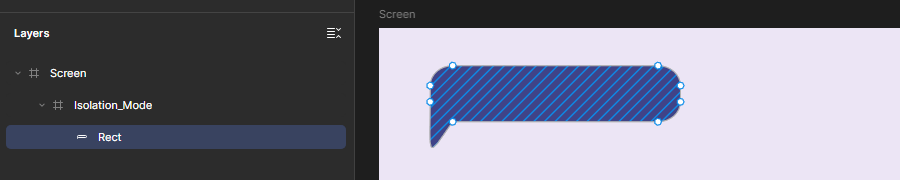
You can copy any vector object or group using this approach, but it won’t work for text elements. If the element group you copy contains a text element, the whole object becomes an image in Figma, since Illustrator doesn’t place SVG code if a text element is detected. This could be a bug (I was using Illustrator 30.7), and future updates may fix it. If you don’t edit copy-pasted text in Figma, you can still transfer the whole segment as a vector group by converting text blocks to vector paths before copying (create outlines using the Ctrl + Shift + O shortcut):

You can export your whole design or selected elements as an SVG file and import it to Figma. Exporting SVG in Illustrator shows various SVG format configuration options and creates a complete SVG file on disk, so this is a reliable, flexible way to transfer editable vector objects from Illustrator to Figma. Manual SVG export delivers editable text elements correctly, unlike copy-paste with “Include SVG Code: On”.
You can either export the whole Illustrator canvas or a part of it as SVG:
To export the whole Illustrator design as an SVG file, go to “File -> Export -> Export As..”, choose SVG format, and click “OK”. Illustrator allows you to configure your SVG file as follows:
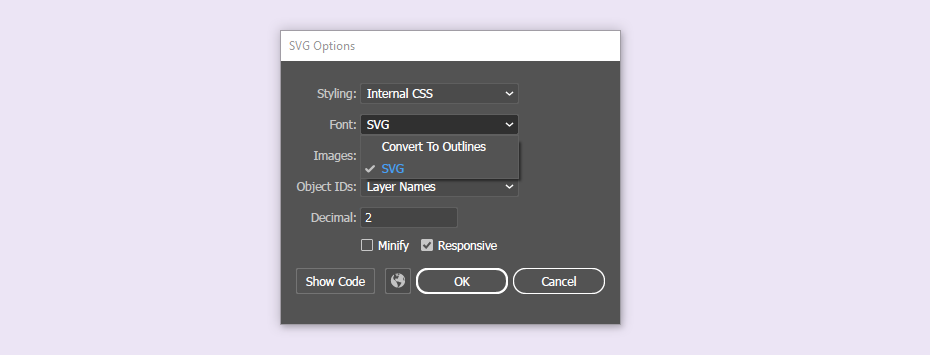
By default, the SVG code includes editable text elements, so if you just need to export a vector group and don’t need to edit text in Figma, you can change the “Font” setting from “SVG” to “Convert to Outlines”.
If you need to export a part of the Illustrator design, you can first select the preferred region and then right-click and choose “Export Selection” from the context menu. Once the “Export For Screens” window appears, you can select the SVG format and click on the “Export Asset” button:
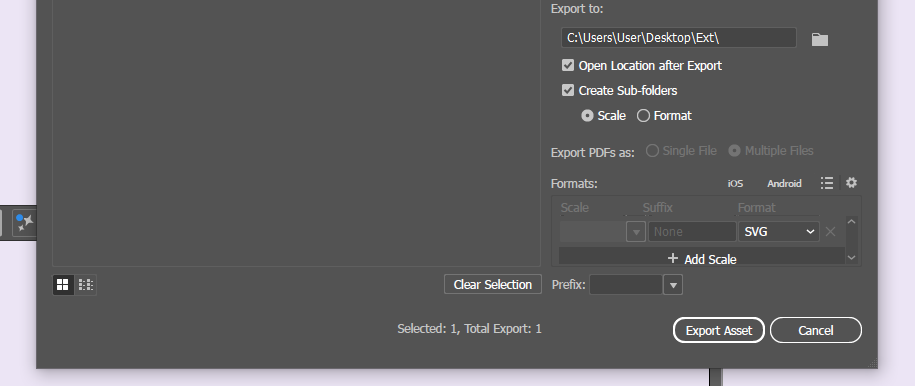
Illustrator will automatically open the exported SVG assets directory soon after finishing the export process.
Figma converts imported SVG assets into editable native vector paths and text. There are several ways to import an SVG file in Figma:
All the above ways work the same way, and you can choose what’s efficient for you; most designers simply drag and drop SVG files anyway.
You can also use a Figma plugin and directly import the Adobe Illustrator file (.ai format) into Figma. This method involves installing a plugin, running the plugin, selecting import options, and choosing the Illustrator file — some plugins aren’t free, but you don’t need to manually export the Illustrator design as an SVG every time you make adjustments in Illustrator if you use a plugin.
The Figma plugin store has so many free and paid plugins to do this job. Here are the most popular ones:
You can use a plugin based on pricing and features (e.g., importing text elements as editable). Each plugin usually asks you to select the .ai file and set the import options. Here is how you can use the “Illustrator.to.design” plugin:
First, install the plugin into the current Figma design file, then open it and choose the .ai file you need to import:
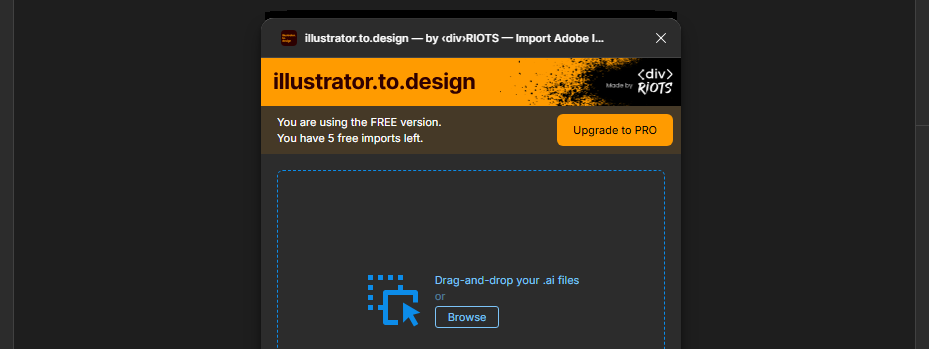
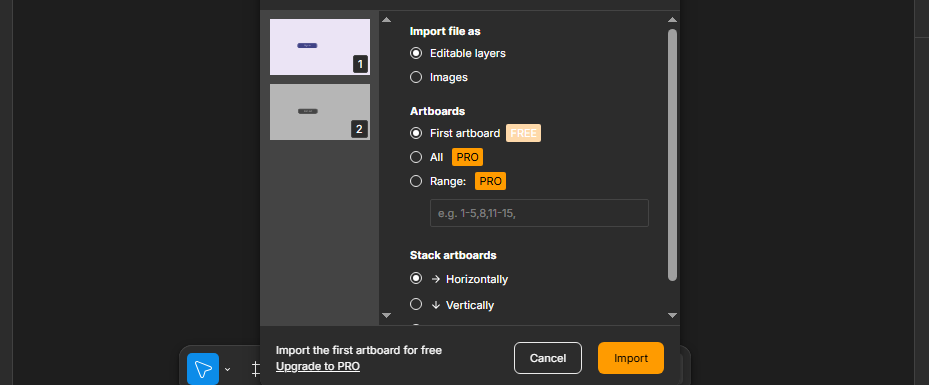
After choosing the file, the plugin will display another screen to set import options. Select artboards and click “Import”:
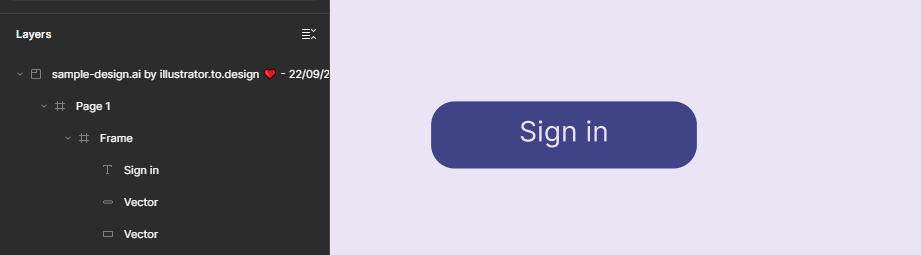
Once the plugin finishes the import process, you’ll see editable Figma elements on the canvas:
There isn’t a single optimal method that you can use to import Illustrator design elements into Figma in your Illustrator-to-Figma design workflow — you can select a method based on your design import scenario, basically based on what you’ll do to the imported design segment.
Here is a comparison of all the above methods and when to use each method:
| Comparison factor | Copy-pasting, Include SVG Code: Off | Copy-pasting, Include SVG Code: On | SVG file export-import | Using Figma plugins |
|---|---|---|---|---|
| How to initiate from Illustrator | Pressing “Ctrl + C / Cmd + C” or clicking the “Copy” context menu item | Pressing “Ctrl + C / Cmd + C” or clicking the “Copy” context menu item | Selecting “Export As” or “Export selection” | No extra actions needed — just save changes to the .ai file |
| How to import from Figma | Pressing “Ctrl + V / Cmd + V” or clicking the “Paste” context menu item | Pressing “Ctrl + V / Cmd + V” or clicking the “Paste” context menu item | Drag-and-drop, clicking on the “Place image ” context menu item, or pressing “Ctrl + Shift + K / Cmd + Shift + K” shortcut | Installing the plugin, running it, and following the plugin-specific import wizard |
| Transferred format | Static PNG Image | SVG becomes native Figma elements | SVG becomes native Figma elements | Native Figma elements |
| Transfers colors | Yes | Yes | Yes | Yes |
| Transfers gradients | Yes, rasterised | Yes | Yes | Yes |
| Creates editable vector paths | No | Yes | Yes | Yes |
| Creates editable text elements | No | No, could be a bug in Illustrator and may be fixed in upcoming versions | Yes | Depends on the plugin |
| Transfers effects | Yes, rasterized | Yes, rasterized | Yes, rasterized | Yes, rasterized |
| Transfers embedded Images | Yes | Yes | Yes | Yes |
| Transfers elements in multiple artboards | Yes | Yes | Yes | Yes, some plugins allow selecting artboards |
| Fonts needed to render the correct typography style | No | No | Yes, if not explicitly set to “Font: Convert To Outlines” | Depends on the plugin |
| Special notes | The whole Illustrator design becomes a single Figma raster image | Copies vector objects properly, but copies a single static image if the copied region contains a text element (this could be a bug in Illustrator, as mentioned earlier) | Whether you make text editable or not can be configured from SVG export options | Only paid plugins offer exporting text as editable elements |
| When to use | Adding quick design previews and basic raster elements, e.g., basic signifiers that don’t scale | Importing vector objects that don’t contain text elements, e.g., text-free logos, simple vector shapes, etc. | Importing finalized, complex vector objects that include text, e.g., icons, logos, UI elements | Importing whole product designs, style guides, or complex multi-page designs without manual, frequent SVG conversion |
Copy-paste works well for transferring small elements quickly. Overall, SVG export and import is a reliable way to transfer complex vector objects. Popular, reliable plugins are paid, but they help you to import complex whole designs into Figma without manually exporting SVGs every time you make a change in the Illustrator file.
None of the above methods convert Illustrator effects (e.g., blur) into native Figma effects, so in such a scenario, recreating elements in Figma becomes the only reliable option for your Illustrator-to-Figma design workflow.
Here are some important FAQs that help you troubleshoot import issues and improve your Illustrator-to-Figma design workflow:
If your imported design segment contains editable text, the typography style will look different until you install the specific font in Figma. If the text isn’t editable, it’ll look the same as the Illustrator text element, since it’s converted to vector paths or a raster image
If “Convert To Outlines” is selected while exporting SVG, Figma will render the exact typography style even if the specific font isn’t available in Figma. This is very useful for exporting logos and similar design elements that use proprietary or unique, artistic fonts
SVG and Figma plugins can’t convert Illustrator effects to native Figma effects — you’ll get a rasterized image if the specific element has an Illustrator effect applied
Raster images lose quality while scaling, but they can render complex imagery at the original scale, and it’s the only way to render a specific Illustrator effect in Figma, so use a raster format for photos and elements that use Illustrator effects
Adobe XD has already lost popularity in the design industry, but Adobe Illustrator dominates the vector graphic design industry. By using the Illustrator-Figma combo creates a powerful design workflow for UI/UX design; you can use Illustrator for complex vector design and Figma for UI/UX design by importing Illustrator assets.
In this article, we discussed all possible ways that you can use to import Illustrator design elements into Figma. There isn’t a single optimal way; you can copy-paste, export-import SVG, and use Figma plugins, depending on what should be transferred and what you’ll do to the imported element next. Proprietary Illustrator effects can’t be converted into SVG code, so use raster image formats in such scenarios.
LogRocket's Galileo AI watches sessions and understands user feedback for you, automating the most time-intensive parts of your job and giving you more time to focus on great design.
See how design choices, interactions, and issues affect your users — get a demo of LogRocket today.

Giving designers AI tools is the easy part. I share how our team used office hours, small experiments, hackathons, and shared failures to build better AI habits together.

Growth design isn’t just about getting more users to convert. It’s about using research, experimentation, and data to improve activation, retention, and long-term user value without sacrificing trust or the quality of the experience.

Starting with proto-personas can be better than a blank page, but don’t forget — they’re assumption-driven placeholders for the real thing. Research is key to turning them into true personas.

Design thinking workshops are your key to turning big problems into clear solutions. In this blog, I share how to run them efficiently and keep your team aligned.



 Learn more →