If you want the images in your designs to look as polished as possible, editing is essential. Editing an image can be as simple as cropping out unnecessary parts or as complex as removing specific unwanted elements or changing the entire background. And many designers who have Figma don’t have access to Adobe Suite to accomplish these tasks.

While removing an image background can seem tricky, Figma is one tool that offers multiple ways to accomplish it. From background removal plugins to image masking, Figma is a powerful tool that makes removing backgrounds a breeze.
In this guide, we’ll show you four ways to remove an unwanted image background in Figma. We’ll discuss three ways to eliminate image backgrounds completely and one way to hide these backgrounds from view.
So, whether you’re a beginner or a seasoned designer, these step-by-step tutorials, accompanied by images, will help you take your image editing game to another level. First, we’ll start with the easy option: background removal plugins.
Remove BG is a Figma plugin that automatically removes image backgrounds with a single click. However, you’ll need a Remove BG account to use this plugin.
Here’s how to create a free account and remove backgrounds with this incredible plugin:
Open a New design file in Figma and import the image you want to edit. Select one with a background.
For this example, we’ll be using an image from Unsplash. You can use any image. Just ensure that the subject you are trying to remove is in focus:
To run the Remove BG plugin, click the Resources tool (Shift + I) and select Plugins from the available options. Type Remove BG into the search bar, and press Enter. Click Run.
A pop-up window will appear, prompting you to create an account and set your API key. Follow the link and head over to the remove.bg website. Not to worry, the process is 100 percent free.
On the Remove BG website, click the Sign up button at the top right corner, enter your email address, choose a password, and click Sign up. Follow the steps to complete the verification process.
Once your account is all set up, head over to My Account by clicking your profile icon at the top right corner of the interface:
From there, follow these steps: My Account > API Keys > New API Key > Create API Key. This action will generate a new API key. Copy the API key, click Save Changes, and return to Figma.
Paste the API key in the Remove BG pop-up window and click Save. You’ll get the notification message, “API key saved”:
You can now run the Remove BG plugin from Figma.
Select the image you want to edit, right-click, and go to Plugins > Remove BG > Run. And voila, your image background will disappear in only a few seconds:
You can take things one step further by replacing the background with a new image. To achieve this, create a Rectangle (R) as a new layer. Fill the rectangle with any image of your choice and send it behind the cropped image layer:
Zooming in on the image, you can see that there aren’t any blurred-out edges, and nothing seems pixelated. For an app that automatically removes backgrounds, the results are almost perfect.
Next, let’s try another Figma plugin.
Remove background (privacy-first) is a free Figma plugin that removes backgrounds from any image while keeping it 100 percent private. This plugin analyzes your image locally on your device and never uploads or shares it anywhere.
Here’s how to remove an image background with this plugin:
As before, upload the image you want to edit from your gallery or choose a stock photo. For this example, we’ll be using one from Unsplash:
With your image selected, go to Resources (Shift + I) and select Plugins from the available options. Type Remove Background into the search bar, and press Enter.
This action will open the Remove Background pop-up window. Click Remove Background:
This background removal process takes a few more minutes than Remove BG, but the results are impressive:
If we zoom into the areas around the tail, you’ll notice that all the small spaces in between were cropped nicely.
The final plugin we’re going to explore is the Icons8 Background Remover.
Icons8 Background Remover is a free Figma plugin that removes backgrounds from one or many images at once. You don’t need to sign up to use this plugin; you can just run it directly from your Figma file. Let’s show you how:
Open a New Design File in Figma and upload the image you want to edit from your gallery or choose a stock photo. For this example, we’ll be using one from Unsplash.
Select the image you want to edit. Go to Resources (Shift + I) and select Plugins from the available options. Type Icons8 Background Remover into the search bar, and press Enter. Select Remove Background from the pop-up options:
The image background will disappear in a couple of seconds.
To evaluate the effectiveness of each of the plugins we’ve discussed so far, let’s examine the results side-by-side using the same image.
Here’s the result from Remove BG:
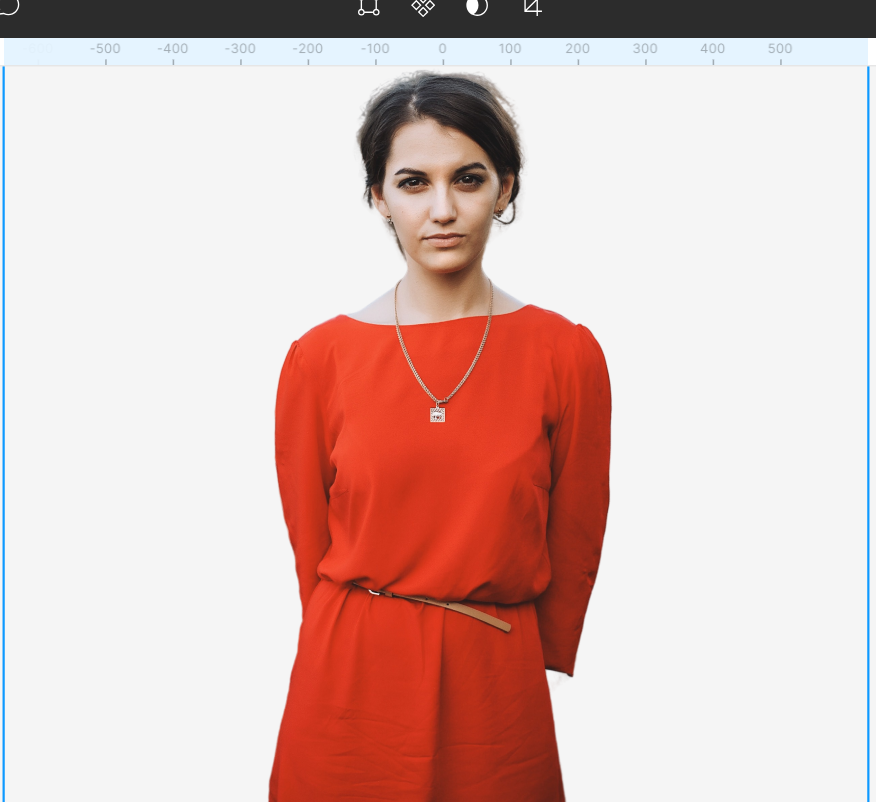
And here’s the result from Remove Background (Privacy-First):
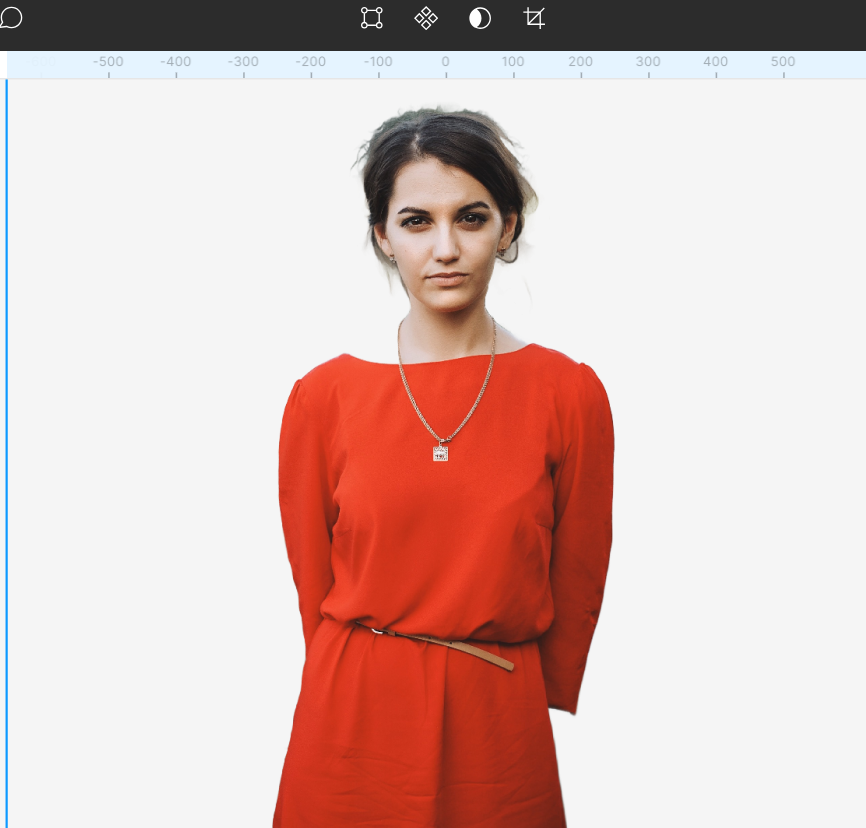
And finally, here’s the result from Icons8 Background Remover:
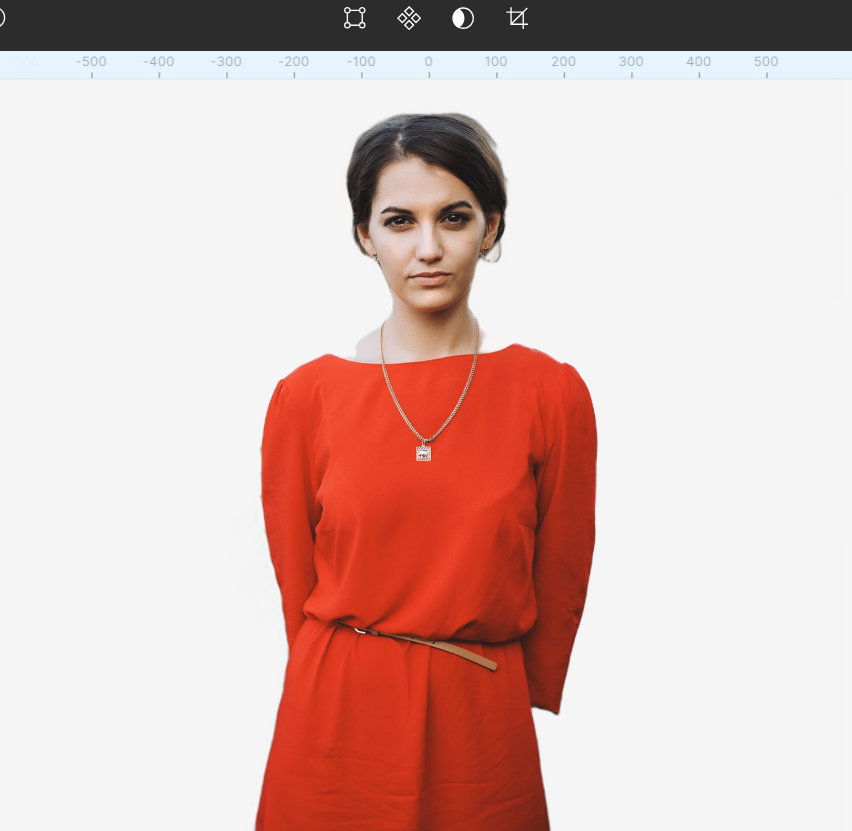
Which of them did the best job? You be the judge!
It’s safe to say that these plugins make background removal in Figma a breeze. But if you’re not entirely sure about removing an image background completely, you might want to consider a less destructive method.
The method we’re about to discuss doesn’t necessarily remove the image background. Rather, it conceals parts of your image without modifying or deleting anything. It’s known as Image masking.
Image masking is a technique for concealing or revealing certain portions of an image. With an image mask, you have absolute control over what parts of the image are revealed or concealed.
Now, let’s explore how to hide an unwanted image background using layer masks.
Import an image into your Figma canvas by clicking Main Menu > File > Place Image or pressing Ctrl/Cmd + Shift + K. Alternatively, you can use plugins like Unsplash or Pexels to get high-quality photos. Just ensure that the image has a background and that the subject you want to reveal has sharp, defined lines and is in focus:
We’ll use the pen tool to trace around the object we want to remove the background from (the subject), in this case, the lady.
Start by zooming in on the image until you can see the edges of your subject clearly.
Next, select the Pen icon from the toolbar or press P. Starting at the bottom of the image, click to create your first node. Moving around the subject, continue clicking to create more nodes.
As you click, Figma will automatically connect the nodes with Bezier curves. You can adjust the Bezier curves by dragging the small handles that appear on both ends. Drag the handles until you match the edge as best as possible:
This process might be tricky at first, but with practice, you’ll get the hang of where to place the nodes and how to adjust them.
Once you’ve traced around the image completely, come back to the first node and close the vector path. If you’re happy with your traced outline, click on Done and you’ll have a vector object. From the right sidebar, select Fill. By default, the fill color is gray:
After applying fill, remove the stroke by clicking the Minus icon next to the stroke properties in the right sidebar. Next, move the vector layer below your original image in the layers panel:
Finally, select both the vector and the original image together. You can do this by holding Shift and selecting both layers. With both layers selected, go to the toolbar, click the Use as mask icon, or press Ctrl/Cmd + Alt + M.
And just like that, the background image will no longer be visible. You’ll be left with just your cropped image:
Figma offers users a wide range of options for removing backgrounds from images. In this guide, we shared four of these methods. We looked at three automated plugins to remove image backgrounds in a matter of seconds, highlighting the pros and cons of each tool.
And for those who want a more nuanced approach with greater control, we also talked about image masking. This method, achieved through the precision of the pen tool, gives you absolute control of the visible areas while preserving the entire image. Although it requires considerably more time than the automated methods, the results are worth the effort.
So, whether you opt for the speed and convenience of background removal plugins or the meticulous control of image masking, you now have all the information you need to remove your image backgrounds like a pro.
LogRocket's Galileo AI watches sessions and understands user feedback for you, automating the most time-intensive parts of your job and giving you more time to focus on great design.
See how design choices, interactions, and issues affect your users — get a demo of LogRocket today.
Optimization fatigue is real. Here’s why designing only for metrics drains creativity, and how to bring the human back into UX.
Let’s explore why and when to use drag and drop, discussing real-world examples, platform-specific considerations, and accessibility tips.

We’re told to reduce friction, but sometimes friction builds value. This blog explores how scarcity, when designed well, sharpens focus and strengthens user trust.
Discover how to craft UX-friendly hero sections with examples, design tips, and strategies that drive engagement and conversion.