
Cloudflare Workers is a serverless platform that lets developers execute JavaScript code on Cloudflare’s edge server network. With Workers, programmers can build and distribute nimble, event-driven scripts and apps that can respond to HTTP requests, scheduled occasions, and other triggers. Workers can be used to alter HTTP requests and responses, route traffic to various servers, authenticate requests, deliver static files, and more.

Developers can write their Workers code in JavaScript or TypeScript, and use popular frameworks like Node.js or React. Workers can also be written in other languages such as Rust, Go, etc. and have it converted to WebAssembly (Wasm).
In this article, we will build a serverless API with two endpoints, and deploy the app on the Cloudflare server.
Jump ahead:
The Replay is a weekly newsletter for dev and engineering leaders.
Delivered once a week, it's your curated guide to the most important conversations around frontend dev, emerging AI tools, and the state of modern software.
The fact that Cloudflare Workers operate at the network’s edge puts them closer to users and enables them to serve content with less lag time. This results in better user experience, quicker load times, and higher SEO results.
Developers don’t have to stress about provisioning and managing servers to handle traffic spikes because Cloudflare Workers can scale automatically to handle high amounts of traffic.
Developers can start using the platform without having to pay much money because Cloudflare Workers offers a generous free option. It also provides affordable pricing for apps that need more resources.
As a serverless platform, Cloudflare Workers relieve developers of the responsibility of overseeing networks and servers. Developers can now concentrate on creating apps and features without being distracted by administrative hassles.
Cloudflare Workers integrate with Cloudflare’s suite of security and performance services, which means that developers can build secure and performant applications without having to worry about implementing security features themselves.
Cloudflare Workers provide a modern developer experience, with support for popular tools and frameworks such as webpack, Rollup, and Node.js. This makes it easy for developers to get started with the platform and build applications quickly.
Because of their restrictions on a particular runtime environment and programming paradigm, Cloudflare Workers may only be used for a restricted range of applications. For example, Cloudflare Workers are built on JavaScript and need a particular set of libraries and APIs, which might not be appropriate for all use cases.
The lack of persistent storage offered by Cloudflare Workers can make it challenging to develop apps that need long-term data storage or intricate data manipulation.
Cloudflare Workers do not provide robust debugging and testing tools, which can make it difficult to diagnose and fix errors in production.
Cloudflare Workers are a proprietary platform, which means that developers who build applications on the platform may be locked into using Cloudflare services they did not intend to use.
Cloudflare Workers is a relatively new platform, and as such, there may be a limited community of developers who can provide support or guidance for developers who are new to the platform
To follow along with this tutorial, you’ll need the following:
To simplify Cloudflare Workers, we will build a Serverless API with a few endpoints and then deploy it to Cloudflare.
To get started, we need to install a CLI tool via Rust Cargo called Wrangler, which simplifies builds and deployment. It is designed to ease the development process:
> cargo install wrangler
For this tutorial, you can either clone a sample project or create one from scratch, which is what we will be focusing on in this tutorial.
We will use Cargo to set up a simple Rust project so we can write our code from scratch:
> cargo new --lib worker-app


[package]
name = "worker-app"
version = "0.1.0"
edition = "2021"

[lib]
crate-type = ["cdylib", "rlib"]
[features]
default = ["console_error_panic_hook"]
[dependencies]
worker = "0.0.11"

[profile.release]
# Tell `rustc` to optimize for small code size.
opt-level = "s"
[package]: This section defines metadata about the package, such as its name, version, and edition. The name field specifies the name of the package, version specifies the version number, and edition specifies the Rust edition to use. In this case, it is set to "2021"[lib]: This section specifies options for building the library crate. The crate-type field specifies the types of output files to generate, which in this case are a shared object library (cdylib) and a static library (rlib)[features]: This section defines optional features that can be enabled or disabled for the crate. In this case, the default feature is enabled, which includes the console_error_panic_hook feature. This feature enables panic messages to be displayed in the browser console when the worker crashes[dependencies]: This section lists the dependencies required by the crate. In this case, the only dependency is the worker crate, version 0.0.11[profile.release]: This section specifies options for building the crate in release mode. The opt-level field tells rustc to optimize for small code size (s). This produces a smaller output binary at the cost of longer compile timesAdd the Wrangler configuration file to our project by creating a file called wrangler.toml and add the following commands. These commands handle our builds, which also help to start our app:
name = ""
main = "build/worker/shim.mjs"
compatibility_date = "2022-01-20"
[vars]
WORKERS_RS_VERSION = "0.0.11"
[build]
command = "cargo install --git https://github.com/CathalMullan/workers-rs worker-build && worker-build --release"
name = "": This line defines the name of the worker. In this case, it is left empty, so the worker will be given a default namemain = "build/worker/shim.mjs": This line specifies the path to the JavaScript shim file that will be used to interact with the Rust code. The shim file is responsible for creating a WebAssembly module and exposing its functions to the JavaScript environmentcompatibility_date = "2022-01-20": This line specifies the date that the worker is compatible with. It ensures that the worker will only be deployed to data centers that have been updated with the required dependencies before this date[vars]: This section defines a variable called WORKERS_RS_VERSION and assigns it the value "0.0.11". This variable specifies the version of the workers-rs library that will be used to build the worker[build]: This section contains a command for building the worker using cargo, the Rust package manager. The command installs the worker-build package from the CathalMullan/workers-rs repository on GitHub, and then runs the worker-build command in release mode. This will compile the Rust code into a WebAssembly module that can be loaded by the JavaScript shimTo proceed, we need to edit the lib.rs file and write the code below, which is a serverless HTTP API route that utilizes worker::*:
use worker::*;

#[event(fetch)]
pub async fn main(req: Request, env: Env, _ctx: worker::Context) -> Result<Response> {
 let r = Router::new();
 r.get("/", |_, _| Response::ok("Hello from Logrocket Workers!"))
 .run(req, env).await
The endpoints are declared inside the main function, which includes the #[event(fetch)] macro specifying the Cloudflare runtime API.
To run our app, we’ll use the following command. If you encounter an error, update your Rust:
> wrangler dev
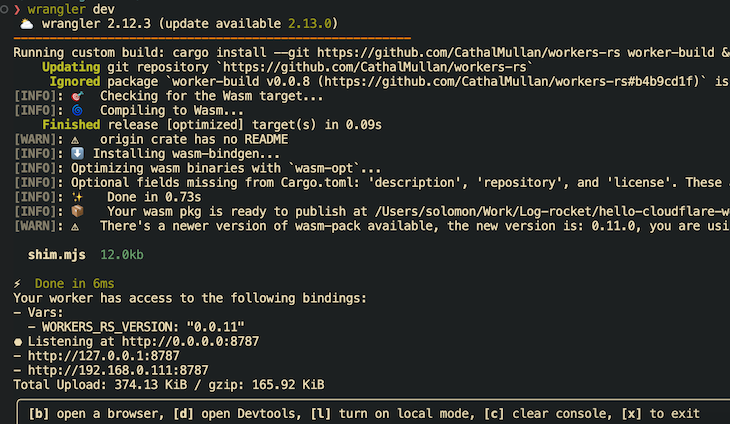
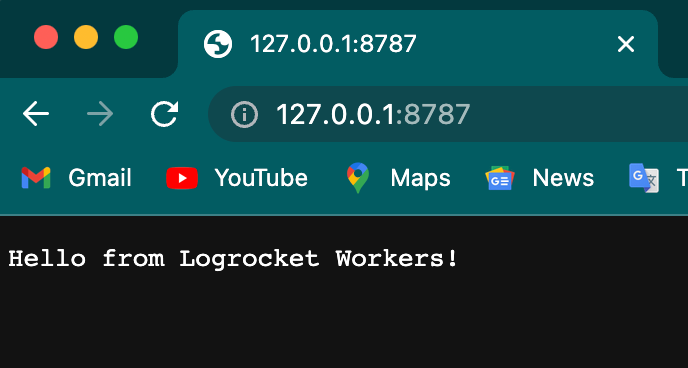
At the process of running our app, Wrangler adds a build folder to our project, which contains the worker directory, index.wasm , shim.mjs, and index.js:
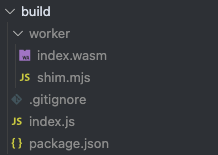
This is the index.js file that contains JavaScript code implementing WebAssembly (Wasm) from Rust. It serves as the entry point for the app:
import * as wasm from "./index_bg.wasm";
import { __wbg_set_wasm } from "./index_bg.js";
__wbg_set_wasm(wasm);
export * from "./index_bg.js";
Let’s add more endpoints to the app. This is a get request that accepts the id query parameter and returns a JSON response:
.get_async("/json/:id", |_, ctx| async move {
            if let Some(id) = ctx.param("id") {
                match id.parse::<u32>() {
                    Ok(id) => {
                        let json = json!({
                            "id": id,
                            "message": "Hello from Logrocket Workers!",
                            "timestamp": Date::now().to_string(),
                        });
                        return Response::from_json(&json);
                    }
                    Err(_) => return Response::error("Bad Request", 400),
                }
        };
To deploy our app to Cloudflare, we need to get authenticated, which will allow easy deployment and updates to our app in production:
wrangler login
The command below allows us to deploy our app to Cloudflare. name will be used as a sub domain for the app:
wrangler publish --name logrocket
Here’s the preview of the command:
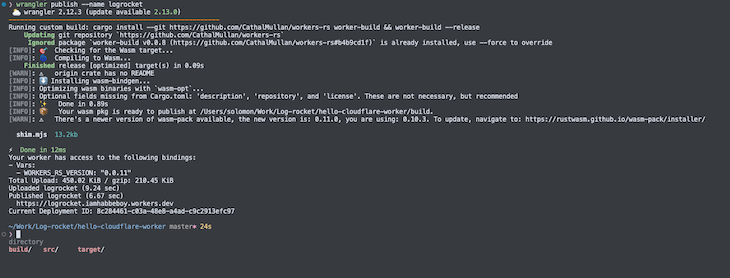
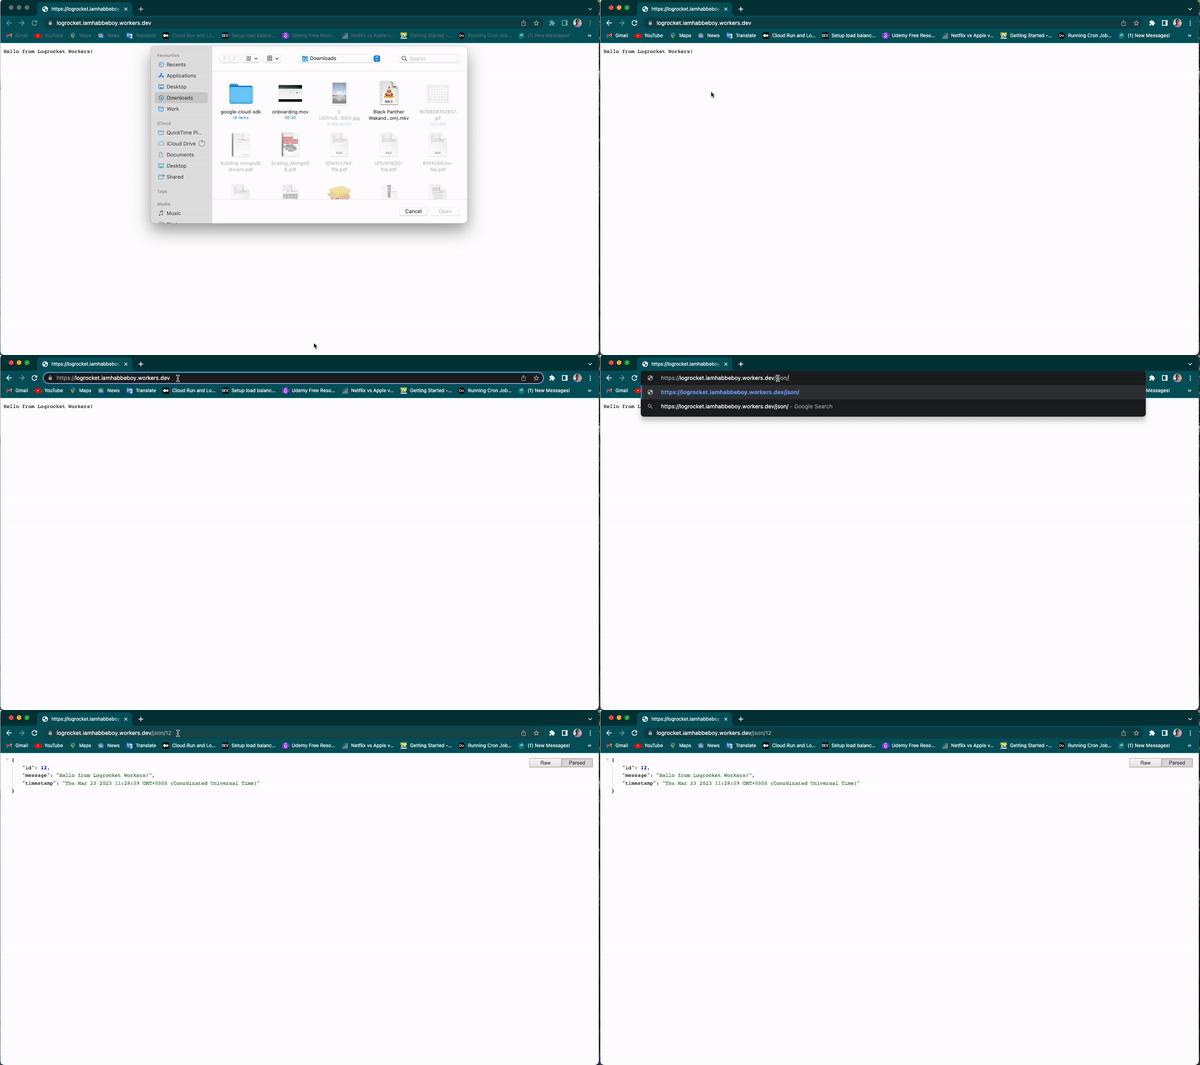
Viola 🎉 Cheers to our app in production:
In this tutorial, we introduced Cloudflare Workers in Rust, including their pros and cons. Then, we built a serverless API and deployed a demo app on the Cloudlfare server.
You can find the entire code used in this article in my GitHub repo.
I hope you found this article useful; please leave your feedback in the comments section. Thanks✌️
Debugging Rust applications can be difficult, especially when users experience issues that are hard to reproduce. If you’re interested in monitoring and tracking the performance of your Rust apps, automatically surfacing errors, and tracking slow network requests and load time, try LogRocket.
LogRocket lets you replay user sessions, eliminating guesswork around why bugs happen by showing exactly what users experienced. It captures console logs, errors, network requests, and pixel-perfect DOM recordings — compatible with all frameworks.
LogRocket's Galileo AI watches sessions for you, instantly identifying and explaining user struggles with automated monitoring of your entire product experience.

Modernize how you debug your Rust apps — start monitoring for free.

Claude Code is deceptively capable. Point it at a codebase, describe what you need, and it’ll autonomously navigate files, write […]

Compare the top AI development tools and models of February 2026. View updated rankings, feature breakdowns, and find the best fit for you.

Broken npm packages often fail due to small packaging mistakes. This guide shows how to use Publint to validate exports, entry points, and module formats before publishing.

Discover what’s new in The Replay, LogRocket’s newsletter for dev and engineering leaders, in the February 11th issue.
Hey there, want to help make our blog better?
Join LogRocket’s Content Advisory Board. You’ll help inform the type of content we create and get access to exclusive meetups, social accreditation, and swag.
Sign up now