Serverless functions are pieces of server-side code run on cloud servers without the need of an actual backend as a part of the serverless computing architecture. These functions are run on demand and require the help of cloud platforms like AWS, Azure, or Vercel to help manage the complexities of orchestrating and maintaining dedicated servers.
Serverless functions (also known as cloud functions or functions-as-a-service (FaaS)) can be used to send emails, perform database queries, handle user authentication, manage form submissions, and more. For frontend developers, there are many benefits and tradeoffs to going serverless.
To successfully run a serverless function, it is necessary to work within the technical confines of the cloud platform that will be used for deployment. For this tutorial, we will focus on Vercel. Vercel serverless functions are written with supported backend languages, like Node.js, in supported frontend frameworks, like React. These functions take an HTTP request, act on it, and provide a response within a stipulated timeout depending on the project plan.
Vercel is a cloud platform for static frontends and serverless functions. With it, you can host websites and web applications that deploy instantly and scale automatically.
Vercel’s treatment of serverless functions is top-of-the-line for many reasons, first among them being its ease of use. There is a familiar and sensible default baseline for your functions that makes the learning curve minimal. Vercel also uses one package.json to rule them all. You can use a single package.json for your application, and Vercel will automatically find and apply packages used based on import.
Vercel also allows you to customize things like runtime versions, memory, and execution and monitor your functions and requests in the monitoring logs that come with the Vercel dashboard. In the event that a runtime isn’t supported, Vercel allows you to use community runtimes or build one yourself.
Finally, the Vercel CLI replicates the production environment for you locally, so you can work with your serverless functions without the need to re-deploy each time a change is made.
Without any configuration, deploying your serverless functions to Vercel is as easy as creating an /api directory in the root of your project that houses your functions as files with corresponding extensions like .js and .ts. With this set up, Vercel will automatically check for the /api directory and execute your functions accordingly.
A basic serverless Node.js function might look like:
// `/api/hello.js`
export default function hello(req, res) {
  res.statusCode = 200;
  res.json({ message: 'It works' });
}
Say you created an /api/hello.js file in the root of your project’s directory with the default function export above. From here, Vercel will execute the function as a serverless function and expose it as an HTTP endpoint behind the /api subdirectory (e.g., baseURL/api/function-name).
Here are a few more examples of what your file and generated HTTP endpoint will look like assuming your baseURL is http://localhost:3000:
/api/hello.js → http://localhost:3000/api/hello/api/index.js → http://localhost:3000/api/api/profile.ts → http://localhost:3000/profileAt this point, you can already access serverless functions by filename. If you had a file /api/user/id.js, an endpoint /api/user/id is automatically generated.
To make things even simpler, serverless functions can be dynamically named and accessed through path segments. This is done by wrapping the filename in square brackets, as in /api/user/[id].js; the id is the dynamic path and accessible in the req.query object.
// `/api/user/[id].js
export default function fetchUser(req, res) {
  res.statusCode = 200;
  const { id } = req.query;

  res.send(`Fetch profile for user: ${id}`);
}
The request and response arguments of your serverless function are instances of http.incomingMessage and http.ServerResponse, respectively. They both have a number of Node.js helpers available as properties and methods that you can work with, including request.body, request.query, response.json(), and response.send().
For a complete explanation of all the helpers available, check out the Node.js helpers documentation.
Typically, you would need to deploy your serverless functions to Vercel each time a change is made. Vercel caters to your local development needs by replicating the production environment on Vercel with your localhost using the Vercel CLI.
To install the Vercel CLI, run the command:
// npm
npm i -g vercel

// yarn
yarn global add vercel
The Vercel CLI exposes a list of commands, including vercel dev for replicating the Vercel production environment locally, vercel login to log in to your Vercel account, and vercel env add to add environmental variables to your projects.
Frameworks like Next.js have native support for serverless functions so you do not need to use the vercel dev command — in fact, the documentation recommends against using it. However, while you might not have the need for vercel dev, you might want to use vercel env pull if you need to download your project’s environmental variables locally.
Also, running your Next.js application automatically listens to your serverless functions. To do this manually, use the --listen <port> option on the vercel dev command. For example, vercel dev --listen 3000 to listen on port 3000.
As you may know, Next.js has a file-based routing system, which means that each new directory and/or file in the pages directory becomes a new route (except for directories and/or files in the pages/api directory, which become API routes).
Although we mentioned earlier that /api directories should be created in the root of your project, when using Next.js, the /api directory that houses your serverless functions should be created in your pages directory instead. Once this is done, you can create functions as you normally would.
For frameworks that do not include native support, including Gatsby and Vue, vercel dev can come in handy. Note, however, that before running vercel dev, you need to have a Vercel account and need to be logged in via the CLI with the command vercel login.
To get started, create an api directory and run the vercel dev command at the root of your project. Then, follow the instructions and answer the questions provided (note that these commands may vary based on your authentication status):
When you successfully complete the process, Vercel will do a few things automatically including:
.vercel folder to your project for its perusal. This will contain a README file basically explaining why the .vercel folder existspackage.jsonFor a list of serverless functions example applications you can deploy to Vercel, check out this GitHub repository.
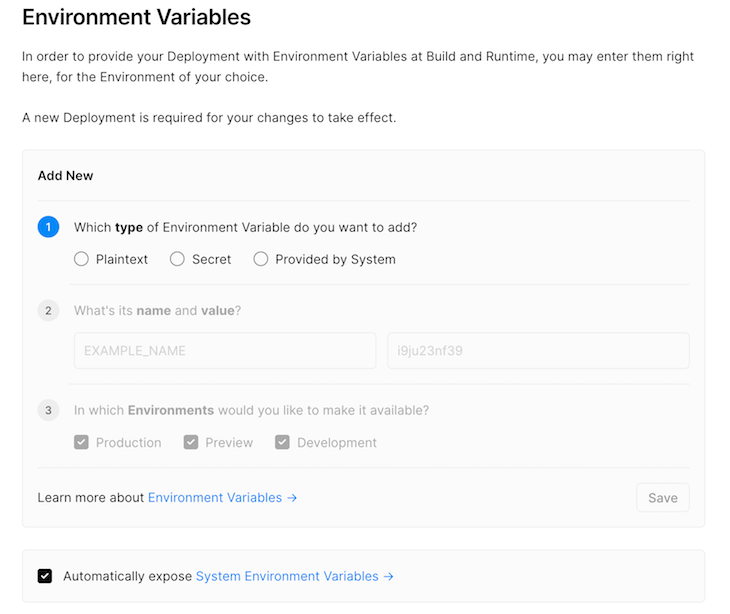
You can configure environmental variables directly from your project’s settings either on Vercel’s dashboard through a GUI or through the Vercel CLI.
Doing so through a GUI is fairly straightforward:
With Vercel CLI, you can use the vercel env add command to add environmental variables and vercel env pull to download them locally in your project, which creates or appends new variables into the .env file at the root of your project.
Whichever way you decide to go, adding environmental variables comes down to three basic features: the type of environmental variable (plaintext, secret, system-provided); the name and value of the environmental variable; and the environment(s) in which you want to make the variable available (production, preview, development, or all of the above).
See the environmental variables documentation for a complete explanation.
Serverless functions run on the cloud through the help of cloud platforms. While following the laid-down syntax of a serverless function is one absolute necessity, there are also other caveats and technical details that you need to know about. And while Vercel provides a good starting point and sensible defaults for your serverless functions, it’s always good to know how to fine-tune to your needs.
Officially, Vercel supports four backend languages or official runtimes:
.js or .ts file extension.go file extension.py file extension.rb file extensionThere’s also support for community runtimes like Deno, PHP, and Rust, etc. Alternatively, you can also develop your own runtime.
Serverless functions have a default execution timeout within which they must respond to an incoming HTTP request. For long-running serverless functions that do not respond to the HTTP request within the default execution timeout, an HTTP 502 (Bad Gateway) response error status code is returned with the error code NO_RESPONSE_FROM_FUNCTION.
Some environment variable names are reserved so that you can’t reuse them. See the full list in the reserved environmental variables documentation.
There is a finite list of limits to be aware of. These include the serverless function payload size limit, which grants the maximum payload size of 5MB for the HTTP request or response body, and the deployment of serverless functions to multiple regions, which is limited based on your plan.
API routes are routes generated for your serverless functions. They are same origin by default because they do not specify CORS headers. There are several ways to enable CORS on Vercel.
Diana Lepilkina has a fantastic post about how to send emails with Nodemailer. Nodemailer is a module that enables you to send emails from Node.js. Install it with the command npm install nodemailer or yarn add nodemailer.
Instead of replicating Lepilkina’s explanation, this section explains how you can achieve the same results with serverless functions. To keep things simple and straightforward, the example uses Next.js.
The prerequisites to continue are to have a MailTrap account and a Next.js app with Nodemailer installed. MailTrap is an email sandbox service that traps your email and enables you to inspect and debug your email samples before sending them formally.
Assuming you already have a Next.js app created, create a serverless function file /api/send-email.js in your Next.js app with the following code:
// 1. Import the `nodemailer` module
import nodemailer from 'nodemailer';

// 2. Create a `nodemailer` transporter - connect Nodemailer to MailTrap (transporter)
const transporter = nodemailer.createTransport({
  host: process.env.MAIL_HOST,
  port: 25,
  auth: {
    user: process.env.MAIL_USER,
    pass: process.env.MAIL_PASS,
  },
});
The Nodemailer createTransport method is used to connect Nodemailer to a transporter like MailTrap or Postmark. The options passed — host, port, and auth — belong to MailTrap. You will need to fetch them from your MailTrap inbox.
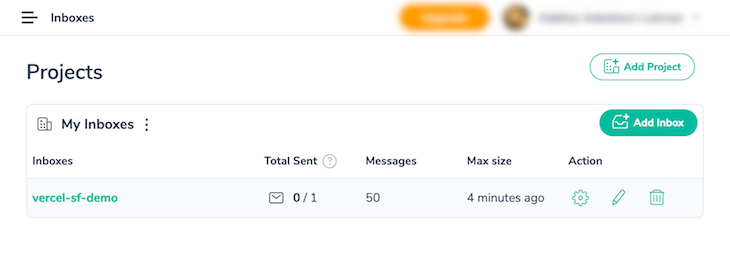
You can reuse inboxes or add a new one with “Add Inbox”. Then, select Nodemailer under “Integrations” and copy your transporter options.
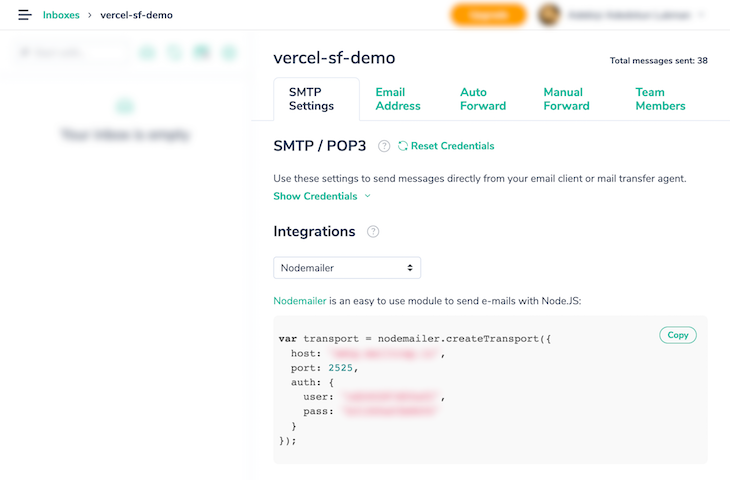
Save the host, user, and pass options as environmental variables: MAIL_HOST, MAIL_USER, MAIL_PASS.
Append the sendEmail function to /api/send-email.js.
async function sendEmail({ name, email }) {
  const emailOptions = {
    from: 'Vercel Serverless Functions Demo <[email protected]>',
    to: `${name} - ${email}`,
    subject: 'Demo Email',
    html: `<h2>Email sent from a Serverless Function</h2>`,
  };

  // 3. This will send the email with the `emailOptions` above.
  return transporter.sendMail(emailOptions);
}
The default export function, handler, handles the incoming request, attempts to sendEmail, then responds appropriately:
export default async function handler(req, res) {
  if (req.method === 'POST') {
    const emailRes = await sendEmail(req.body);
    if (emailRes.messageId) {
      return res.status(200).json({ message: `Email sent successfuly` });
    }

    return res.status(400).json({ message: 'Error sending email' });
  }

  return res.status(400).json({ message: `Incorrect method: ${req.method}. Did you mean POST?` });
}
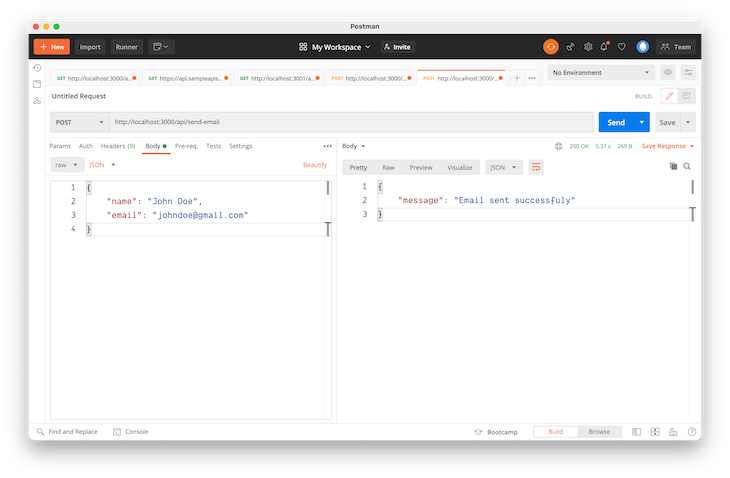
If you so choose, you can test it out using Postman, as in the image below. See how you can use a single function to respond based on the HTTP method?
You can also grab the link to a simple demo on Next.js wired to a form.

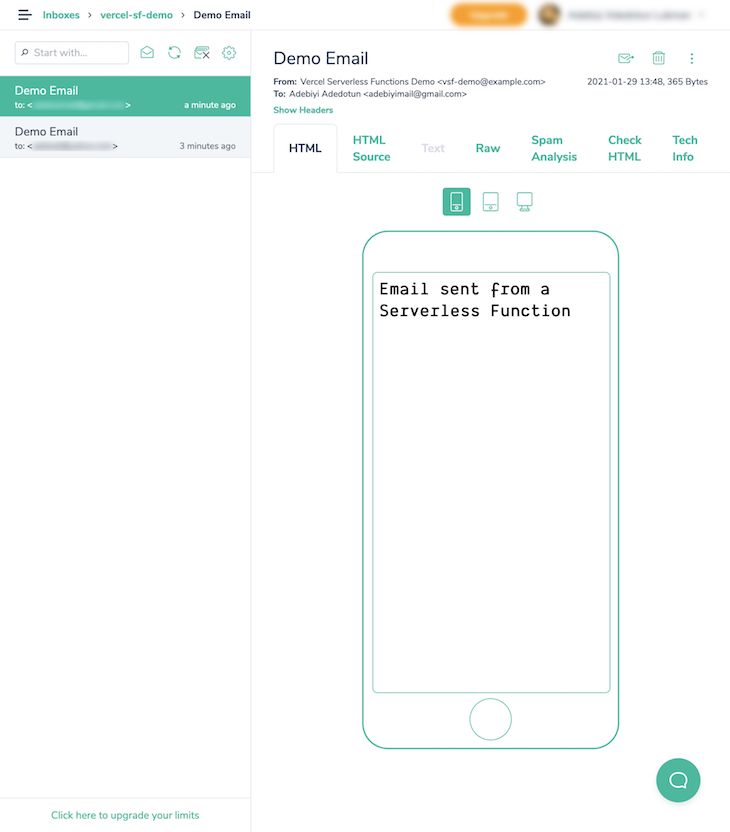
At this point, your MailTrap inbox should start receiving emails.
When integrated with cloud computing platforms, serverless functions eliminate the need to work on the backend even when solving traditionally backend-oriented tasks. With Vercel, deploying your serverless functions or working locally through the Vercel CLI can help you deploy your serverless functions faster and give you time back.
For additional resources, check out this list of useful guides and documentation.
 Monitor failed and slow network requests in production
Deploying a Node-based web app or website is the easy part. Making sure your Node instance continues to serve resources to your app is where things get tougher. If you’re interested in ensuring requests to the backend or third-party services are successful, try LogRocket.

LogRocket lets you replay user sessions, eliminating guesswork around why bugs happen by showing exactly what users experienced. It captures console logs, errors, network requests, and pixel-perfect DOM recordings — compatible with all frameworks.
LogRocket's Galileo AI watches sessions for you, instantly identifying and explaining user struggles with automated monitoring of your entire product experience.
LogRocket instruments your app to record baseline performance timings such as page load time, time to first byte, slow network requests, and also logs Redux, NgRx, and Vuex actions/state. Start monitoring for free.

Learn how to protect full-stack projects from NPM supply chain attacks with a practical security checklist.

Explore 15 essential MCP servers for web developers to enhance AI workflows with tools, data, and automation.

Learn how contrast-color() automatically picks accessible text colors using native CSS, without JavaScript.

Learn how to build a harness-style AI workflow using Claude Code with specialized Dev, QE, and Ops subagents, gated handoffs, MCP telemetry, and LEARNING.md.
Would you be interested in joining LogRocket's developer community?
Join LogRocket’s Content Advisory Board. You’ll help inform the type of content we create and get access to exclusive meetups, social accreditation, and swag.
Sign up now

