TanStack Start has come a long way in a short time, with improvements in developer experience, robustness, and documentation. One of the latest and most impactful features in that evolution is Selective SSR, a flexible new way to control how routes are rendered in your app.

Traditionally, SSR frameworks treat all routes the same: render on the server first, hydrate on the client. But that approach doesn’t always work, especially for routes that depend on browser-only APIs, dynamic content, or slow data fetching. That’s where Selective SSR comes in.
This post walks through how Selective SSR works, when to use it, and how to build a real-world TanStack Start app that mixes server-rendered, client-rendered, and data-only routes, all working seamlessly together.
Editor’s note: This blog was updated in September 2025 to show that React Router v7 does indeed have a feature that is quite similar to TanStack Selective SSR.
The Replay is a weekly newsletter for dev and engineering leaders.
Delivered once a week, it's your curated guide to the most important conversations around frontend dev, emerging AI tools, and the state of modern software.
SSR frameworks render the first requested route of an app by generating the HTML content of that route on the server first. It then sends the generated HTML content to the browser. This method leads to apps built with SSR frameworks having shorter load times or faster First Contentful Paint (FCP).
After sending the HTML content of the first requested route to the browser, the framework then hydrates it with JavaScript. On subsequent user navigation, the app then works like a Single Page Application (SPA). Note that when an SSR framework hydrates an app, it re-renders on the browser. The render on the browser must also match the render on the server, and most SSR frameworks will throw an error if that is not the case.
There are a few reasons why the conventional way SSR frameworks render routes might not be the most effective strategy for every route of a web app:
localStorage) can’t be rendered on the serverIn cases like these, it is important to have a more sophisticated rendering strategy as the standard SSR will either throw a hydration mismatch error or will be too slow. In order to avoid running into those problems, Selective SSR is a clean approach to handling routes in an SSR app.
Every route in TanStack Start has a similar structure to the following:
export const Route = createFileRoute("/")({
  beforeLoad: ()=> beforeLoadFunc(),
  loader: ()=> loaderFunc(),
  component: RouteComponent,
  ssr: true,
});
In the above route, beforeLoad and loader are used to load data for a route (with beforeLoad running before loader). The component property accepts the React component to be rendered when a user navigates to that route. Finally, the ssrproperty is used to set the rendering mode of the route. It is this property that allows Selective SSR.
TanStack Start offers three different modes for rendering routes. These modes are setting ssr to true, "data-only" and false.
ssr: true
This option allows TanStack Start to run the beforeLoad and Loader functions on the server, render the route on the server, and then run those loader functions on the browser and render the route on the browser. This is the default way SSR frameworks render every route. It ensures fast load-times and proper SEO.
ssr: "data-only"
Setting up a route using the ssr: "data-only" mode is a bit unique. Here, the loaders run on the server, but the component itself is not rendered on the server. Instead, the data is sent to the client, which renders the component.
On subsequent navigation, these route loaders will run in the client. This is useful for situations where fast data fetching is needed, but the components do not fit server rendering (maybe because they require dynamic display or use browser-only APIs or functions).
ssr: false
This is the typical behavior of all the routes in SPAs. Here, the loaders only run on the client, and the routes also only render on the client. This is important in SSR apps if the loaders call any browser-only APIs.
The ssr property of a route also accepts a function. That function’s parameter is an object with two properties: paramsand search.
The params parameter here is the path params object in TanStack Router. With it, one can access all the dynamic parameters in a route.
The search value, on the other hand, gives access to URL query parameters in a route. It is also a TanStack Router object. With these parameters, a function value of ssr property can determine the rendering mode of the route.
Here is an example:
export const Route = createFileRoute("/reports/$reportId")({
  validateSearch: z.object({ docView: z.boolean().optional() }),
  ssr: ({ params, search }) => {
    if (params.status === 'success' && search.status === 'success') {
      return search.value.docView ? true : 'data-only'
    }
  }
  beforeLoad: ()=> {
    console.log("Run beforeLoad function")
  },
  loader: () => {
    console.log("Run loader function")
  },
  component: ReportComponent,
});
There is an order or hierarchy to selective rendering. When setting up routes, the default ssr value for the root route is true. This is also the value all of its child routes inherit.
Now, this value can only be changed to something more restrictive. Below is a ranking from the most to least restrictive rendering mode:
ssr: true > ssr: 'data-only' > ssr: false
A route inheriting ssr: true can only be changed to data-only or false and a route inheriting ssr: 'data-only' can only be changed to false. Even if the ssr property of a child-route is set to a less restrictive mode, TanStack Start will override it:
root { ssr: true } // Root route
  child { ssr: false } // route set to `false`
    grandchild { ssr: 'data-only' } // Cannot use `"data-only"` after inheriting `false`, so TanStart will use `false`
This section is a tutorial that illustrates building a TanStack Start project with Selective SSR. The example project is a note-taking app that renders its routes differently. The final source code of the project can be found here on GitHub.
This guides bootstraps TanStack Start with the “start-basic” template.
Open the terminal to download the template and name the project folder selective-ssr:
npx gitpick TanStack/router/tree/main/examples/react/start-basic selective-ssr
cd selective-ssr
npm install
npm run dev
After downloading the framework template and starting the development server, clean up the project folder and leave only relevant files to this tutorial:
utils folderroutes directory leaving only __root.tsx. That root route is the only relevant file for nowpublic folder except the favicon.ico fileNext, configure the router of the app, setting defaultSsr to true, as well as setting up the defaultErrorComponent and defaultNotFoundComponent:
// src/router.tsx
import { createRouter as createTanStackRouter } from "@tanstack/react-router";
import { routeTree } from "./routeTree.gen";
import { DefaultCatchBoundary } from "./components/DefaultCatchBoundary";
import { NotFound } from "./components/NotFound";

export function createRouter() {
  const router = createTanStackRouter({
    routeTree,
    defaultPreload: "intent",
    defaultErrorComponent: DefaultCatchBoundary,
    defaultNotFoundComponent: () => <NotFound />,
    scrollRestoration: true,
    defaultSsr: true,
  });
  return router;
}
declare module "@tanstack/react-router" {
  interface Register {
    router: ReturnType<typeof createRouter>;
  }
}
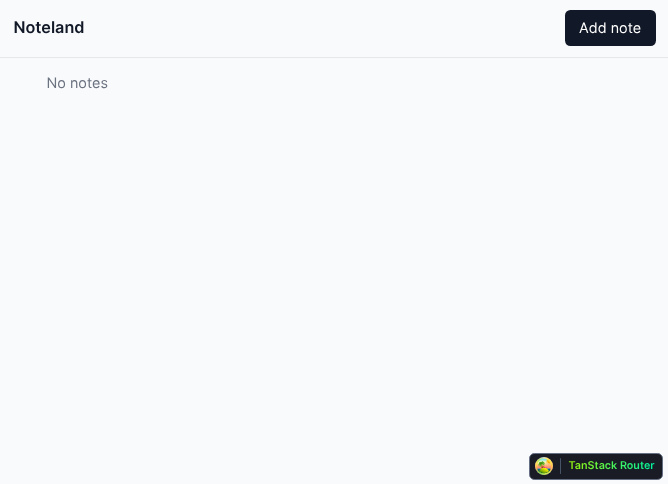
Now, the name of this project is “Noteland”. In the __root.tsx route, add HTML <head> content, as well as the page content of the route. Remember that the root route in TanStack Start will always be matched, meaning its content will always be displayed.
Add the following to the root route:
/// <reference types="vite/client" />
import {
  HeadContent,
  Link,
  Scripts,
  createRootRoute,
} from "@tanstack/react-router";
import { TanStackRouterDevtools } from "@tanstack/react-router-devtools";
import * as React from "react";
import { DefaultCatchBoundary } from "~/components/DefaultCatchBoundary";
import { NotFound } from "~/components/NotFound";
import appCss from "~/styles/app.css?url";

export const Route = createRootRoute({
  head: () => ({
    meta: [
      {
        charSet: "utf-8",
      },
      {
        name: "viewport",
        content: "width=device-width, initial-scale=1",
      },
      { title: "Noteland" },
      {
        name: "description",
        content: "An app with a very original idea",
      },
    ],
    links: [
      { rel: "stylesheet", href: appCss },
      { rel: "icon", href: "/favicon.ico" },
    ],
  }),
  errorComponent: DefaultCatchBoundary,
  notFoundComponent: () => <NotFound />,
  shellComponent: RootDocument,
  ssr: true,
});of

function RootDocument({ children }: { children: React.ReactNode }) {
  return (
    <html>
      <head>
        <HeadContent />
      </head>
      <body>
        <header className='w-full px-4 py-3 border-b'>
          <div className='max-w-4xl mx-auto flex items-center justify-between'>
            <h1 className='text-lg font-semibold'>
              <Link to='/'>Noteland</Link>
            </h1>
            <Link
              to='/notes/$noteId'
              params={{ noteId: "new" }}
              className='px-4 py-2 bg-gray-900 text-white rounded-md hover:bg-gray-800 transition'
            >
              Add note
            </Link>
          </div>
        </header>
        {children}
        <TanStackRouterDevtools position='bottom-right' />
        <Scripts />
      </body>
    </html>
  );
}
Since this is not going to be a very complex app, set up only light mode styling. Open the styles/app.css file and add simple and minimal styling to the app:
@tailwind base;
@tailwind components;
@tailwind utilities;

@layer base {
  html {
    color-scheme: only light;
  }

  * {
    /* border: 1px solid red; */
  }

  html,
  body {
    @apply text-gray-900 bg-gray-50;
  }

  .using-mouse * {
    outline: none !important;
  }
}
Now this is what the application looks like:

Next, create some server functions that will handle data requests. We need three functions: fetchNotes, fetchNoteById, and updateNote. Create these functions inside the utils/notes.tsx file:
import { notFound } from "@tanstack/react-router";
import { createServerFn } from "@tanstack/react-start";

export interface Note {
  id: number;
  title: string;
  note: string;
  created: string;
}

const notes: Note[] = [];

export const fetchNoteById = createServerFn()
  .validator((noteId: number) => noteId)
  .handler(({ data }) => {
    const storedNote = notes[data - 1];
    if (storedNote) return storedNote;
    throw notFound();
  });

export const fetchNotes = createServerFn().handler(() => {
  const reversedNotes = [...notes].reverse();
  return reversedNotes;
});

export const updateNote = createServerFn({
  method: "POST",
  response: "data",
})
  .validator((note) => {
    if (!(note instanceof FormData)) throw new Error("Invalid form data");
    let noteId = note.get("noteId");
    let title = note.get("title");
    let noteText = note.get("note");
    if (!title || !noteText)
      throw new Error("Note must have title and content");
    return {
      id: noteId ? Number(noteId) : undefined,
      title: title.toString(),
      note: noteText.toString(),
    };
  })
  .handler(({ data: { title, note, id } }) => {
    if (id) {
      let storedNote = notes[id - 1];
      notes[id - 1] = { ...storedNote, ...{ title, note } };
      return notes[id - 1];
    }
    let inputNote: Note = {
      id: notes.length + 1,
      title,
      note,
      created: new Date().toISOString(),
    };
    notes.push(inputNote);
    return inputNote;
  });
fetchNotes is a function that fetches all the notes stored in the app. For this project, the notes are stored in a notes array, the data does not persist when the server restarts.
fetchNoteById gets a note that has the same id as the value passed to the function. If a note with that id does not exist, the function throws notFound(). notFound() is a built-in function in TanStack Router which, when thrown in a route loader, will display the configured notFoundComponent of the route, or the router’s defaultNotFoundComponent.
updateNote is a server function that accepts FormData from the client and saves that data to the notes array, or updates an existing note in the array.
Next, create the index.tsx route. This route is the index route of the __root.tsx. Remember that while __root.tsxroute is matched on every page of the app, the index.tsx route just serves as the home page and will unmount for other routes if necessary.
Also note that the __root.tsx which is the parent of the index.tsx route was configured to have ssr value of truewhich means that index.tsx will inherit that unless explicitly changed to something more restrictive.
For the index.tsx route, set the ssr value to "data-only" as we only need data from the server, but do not want to render the route on the browser:
// src/routes/index.tsx
import { createFileRoute, Link } from "@tanstack/react-router";
import { fetchNotes } from "~/utils/notes";
export const Route = createFileRoute("/")({
component: NotesComponent,
ssr: "data-only",
loader: () => fetchNotes(),
});
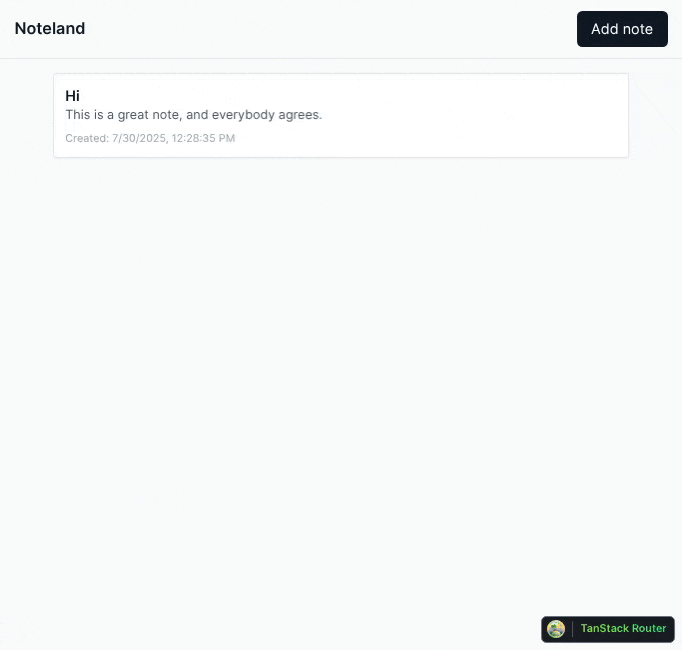
function NotesComponent() {
const notes = Route.useLoaderData();
return (
<div className='max-w-2xl mx-auto p-4'>
{!notes.length ? (
<p className='text-gray-500'>No notes</p>
) : (
<ul className='space-y-4'>
{notes.map((n) => (
<li key={n.id}>
<Link
to='/notes/$noteId'
params={{ noteId: n.id }}
className='border p-3 block rounded shadow-sm bg-white hover:shadow-md'
>
<h2 className='font-semibold'>{n.title}</h2>
<p className='text-sm text-gray-600'>
{n.note}
</p>
<p className='mt-2 text-xs text-gray-400'>
Created:{" "}
{new Date(n.created).toLocaleString()}
</p>
</Link>
</li>
))}
</ul>
)}
</div>
);
}
Now loading the page should display all the notes, except that no notes have been added to the app, so you are left with this:
Next, create the page where a user can add notes to the app. The url of this route is /notes/new when adding a new note and /notes/${noteId} when editing an existing route.
This route will not render on the server; instead, it will render solely on the client browser. This is because the loader of the route fetches data from window.localStorage. It needs to do this because the app saves user input offline in localStorage before the user saves the data to the server.
The frontend saves user input so that even if the user has not saved the data to the server, they would not lose it. Open the routes/notes.$noteId.tsx file and add the following:
import { createFileRoute, useNavigate } from "@tanstack/react-router";
import { useEffect, useState } from "react";
import { fetchNoteById, updateNote } from "~/utils/notes";

interface Draft {
  id?: number;
  title?: string;
  note?: string;
}

const LOCAL_STORAGE_KEY = "draft_note";

const fetchLocalStorage = (): Draft => {
  const raw = localStorage.getItem(LOCAL_STORAGE_KEY);
  const localState = raw ? JSON.parse(raw) : {};
  return localState;
};

const updateLocalStorage = (update: Draft | null) => {
  localStorage.setItem(LOCAL_STORAGE_KEY, JSON.stringify(update ?? {}));
};

export const Route = createFileRoute("/notes/$noteId")({
  params: {
    parse: ({ noteId }) => {
      if (noteId === ("new" as const)) {
        return { noteId };
      } else if (!isNaN(+noteId)) {
        return { noteId: +noteId };
      }
      throw new Error("Invalid Path");
    },
  },
  loader: async ({ params: { noteId } }) => {
    if (noteId === "new") {
      return fetchLocalStorage();
    }
    const { id, title, note } = await fetchNoteById({ data: noteId });
    return { id, title, note };
  },
  component: RouteComponent,
  ssr: false,
});

function RouteComponent() {
  const navigate = useNavigate();
  const fetchedNote = Route.useLoaderData();
  const [formValues, setFormValues] = useState(fetchedNote);

  useEffect(() => {
    setFormValues(fetchedNote);
  }, [fetchedNote]);

  const handleInputChange = (
    event: React.FormEvent<HTMLInputElement | HTMLTextAreaElement>
  ) => {
    const { name, value } = event.currentTarget;
    setFormValues((prevState) => {
      const nextState = { ...prevState, [name]: value };
      if (!fetchedNote?.id) updateLocalStorage(nextState);
      return nextState;
    });
  };

  return (
    <form
      onSubmit={async (event) => {
        event.preventDefault();
        const formData = new FormData(event.currentTarget);
        formData.append("noteId", fetchedNote?.id?.toString() || "");
        await updateNote({ data: formData });
        updateLocalStorage(null);
        return navigate({ to: "/" });
      }}
      method='post'
    >
      <div className='max-w-2xl mx-auto p-4 space-y-4'>
        <input
          type='text'
          name='title'
          placeholder='Untitled note'
          required
          value={formValues.title || ""}
          onChange={handleInputChange}
          className='w-full text-2xl font-bold p-2 border border-gray-300 rounded focus:outline-none focus:ring'
        />
        <textarea
          name='note'
          placeholder='Start typing your note...'
          required
          value={formValues.note || ""}
          onChange={handleInputChange}
          className='w-full h-40 p-2 border border-gray-300 rounded focus:outline-none focus:ring'
        />
        <button
          type='submit'
          className='px-4 py-2 bg-blue-600 text-white rounded hover:bg-blue-700'
        >
          Save
        </button>
      </div>
    </form>
  );
}
With this, one can now create new notes in the app:

One can also edit the created notes:

And finally, user input is saved in the localStorage so that the user has access to the data even on a page refresh:
This section will look at how other frameworks achieve the same or similar functionality. The frameworks to be compared to TanStack Start are Next.js and React Router (formerly known as Remix), as they are currently the most popular alternative React SSR frameworks.
Next.js by default renders all of its components as React Server Components. Components that require interactivity or browser-only APIs are rendered as Client Components.
However, this is different from what Selective SSR offers. Selective SSR is a feature that allows configuring where the framework renders routes. In Next.js, both Client Components and React Server Components render in some form on the server before they are sent to the browser for hydration.
Next.js has a currently experimental feature called Partial Prerendering (PPR). This feature enables Next.js apps to send a static shell for a requested route. The shell has a slot where dynamic content that might take extra time to load will eventually render. With this, the dynamic section of a route is not rendered on the server at all.
Apart from this, there is no other feature of Next.js that resembles Selective SSR.
React Router works in three different modes: declarative, data, and framework. The data mode is similar to the "data-only" mode; it is only concerned with fetching data for the routes. However, in React Router’s data mode, the data is loaded on the client, and there is no SSR involved.
In React Router’s framework mode configurations (done in the react-router.config.ts file), one can set ssr to true or false. This is similar to the defaultSsr setting in TanStack Start. But you cannot change this ssr value for descendant routes.
// react-router.config.ts
import type { Config } from "@react-router/dev/config";

export default {
  // Server-side render by default, to enable SPA mode set this to `false`
  ssr: true,
  appDirectory: "src",
} satisfies Config;
Now, although not explicitly stated in the documentation, a closer look at a route’s loader and clientLoader function reveals a behavior similar to selective SSR. The loader function runs on the server just like ssr: true in TanStack Start.
The clientLoader, on the other hand, runs only on the client and does not render the component on the server at all. It is similar to ssr: false in TanStack Start. This means you can use browser-only web APIs or random values without worrying about rendering or hydration mismatch errors.
The only selective SSR feature React Router does not replicate is the ssr: "data-only" mode.
TanStack Start, a reliable framework for building full-stack web apps, added the Selective SSR to further give developers more options for rendering layouts in their apps. Selective SSR is useful to choose appropriate rendering modes for routes, no matter what they display and how long they take to load.
The article highlighted situations where Selective SSR is useful, explained how Selective SSR works, featured a tutorial on building a full-stack project with Selective SSR, and finally compared the feature to similar capabilities of other frameworks.

Learn what vinext is, how Cloudflare rebuilt Next.js on Vite, and whether this experimental framework is worth watching.

Memory leaks in React don’t crash your app instantly, they quietly slow it down. Learn how to spot them, what causes them, and how to fix them before they impact performance.

Build agent-ready websites with Google Web MCP. Learn how to expose reliable site actions for AI agents with HTML and JavaScript.

Build a CRUD REST API with Node.js, Express, and PostgreSQL, then modernize it with ES modules, async/await, built-in Express middleware, and safer config handling.
Hey there, want to help make our blog better?
Join LogRocket’s Content Advisory Board. You’ll help inform the type of content we create and get access to exclusive meetups, social accreditation, and swag.
Sign up now

