Bref is a composer package that makes it easy to run serverless PHP applications on AWS Lambda. It achieves this by providing the required layers needed to run PHP applications since they are not supported natively on Lambda.
In this tutorial, we will be building and deploying a serverless PHP application that processes incoming emails programmatically using SendGrid Inbound Parse.
To follow along, you will need:
To get started, create a folder for your application (I am naming mine bref-email-watch) and enter into the directory with the command below:
$ mkdir bref-email-watch && cd bref-email-watch
Install the application dependencies which comprise the bref CLI, phpdotenv to enable us to load environment variables from a .env file, and nexylan/slack to interact with Slack’s API:
$ composer require bref/bref vlucas/phpdotenv nexylan/slack php-http/discovery
With our dependencies installed, initialize Bref by running ./vendor/bin/bref in the project directory and select the HTTP option from the interactive menu.
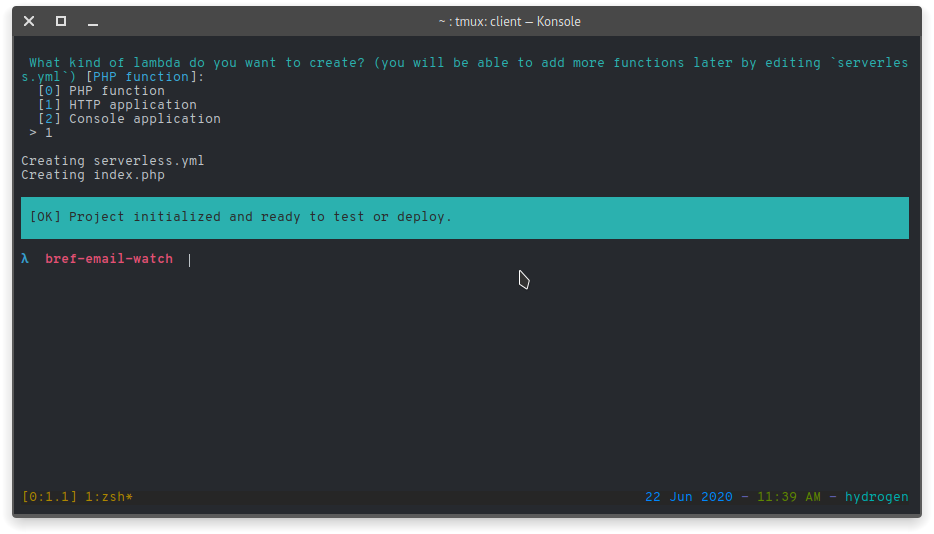
The command will create a serverless.yml file which acts as the manifest for how the serverless framework will deploy your application as well as an index.php file to serve as an entry point into the application.
Next, create a .env file in the project folder and add the Slack hook URL:
SLACK_HOOK_URL="HERE_LIVES_YOUR_SLACK_HOOK_URL"
The application works by receiving JSON payloads (in the form of HTTP post requests) from SendGrid each time there is a new mail on the configured domain. We will modify the generated index.php file to parse these payloads, extract the sender and the recipient (using regex and PHP’s preg_match()), and send a Slack message to the relevant channel containing the extracted data.
Open the index.php file and replace its content with the code block below:
try {
    if (strtoupper($_SERVER['REQUEST_METHOD'] != 'POST')) {
        throw new Exception("Received non-post request on webhook handler");
    }

    if (json_last_error() != JSON_ERROR_NONE) {
        $em = "Error while parsing payload: ".json_last_error_msg();
        throw new Exception($em);
    }

    $from = $_POST['from'];
    $to = $_POST['to'];

    preg_match("#<(.*?)>#", $from, $sender);
    preg_match("#<(.*?)>#", $to, $recipient);
    $senderAddr = $sender[1];
    $recipientAddr = $recipient[1];

    $message = "*You've got mail!*\n";
    $message .= "*To:* ".$recipientAddr."\n";
    $message .= "*From:* ".$senderAddr;

    notifyOnSlack($message, true);

    // send OK back to SendGrid so they stop bothering our webhook
    header("Content-type: application/json; charset=utf-8");
    echo json_encode(["message" => "OK"]);
    exit(0);
} catch (Exception $e) {
    notifyOnSlack($e->getMessage());
    header("Content-type: application/json; charset=utf-8");
    http_response_code(400);
    echo json_encode(["message" => $e->getMessage()]);
    exit(0);
}
In the previous code block, we referenced a notifyOnSlack function that doesn’t exist yet. This function is responsible for sending the $message parameter it receives to Slack. To implement it, load the variables declared in the .env file into your application by adding the following code to the top of the index.php file (just before the try block):
require_once './vendor/autoload.php';
$dotenv = Dotenv\Dotenv::createImmutable(__DIR__);
$dotenv->load();
Next, wire up the function implementation, like this:
function notifyOnSlack($message, $markdown = false)
{
    $slackHookUrl = $_ENV["SLACK_HOOK_URL"];
    $options = [
        "channel" => "#general",
        "allow_markdown" => $markdown,
        "username" => "bref-email-watch",
    ];
    $client = new Nexy\Slack\Client(
        \Http\Discovery\Psr18ClientDiscovery::find(),
        \Http\Discovery\Psr17FactoryDiscovery::findRequestFactory(),
        \Http\Discovery\Psr17FactoryDiscovery::findStreamFactory(),
        $slackHookUrl,
        $options
    );
    $client->send($message);
}
The function loads the SLACK_HOOK_URL environment variable from the .env file and then sets up the options, which includes the channel the message is to be sent to, to then be passed to the Slack client. We also instantiate the client by passing in the HTTPlug discovery services which allow it to find and use any HTTP client that conforms to the PSR standard.
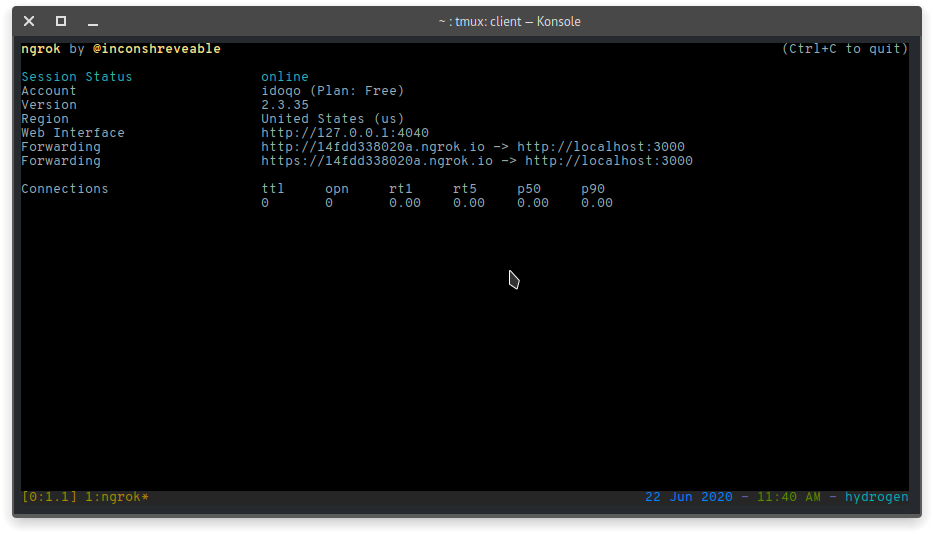
Now that our application is set up, start the built-in PHP server on port 3000 and open an ngrok tunnel on the same port:
$ php -S localhost:3000
$ ngrok http 3000
The ngrok command generates Forwarding URL, like this:
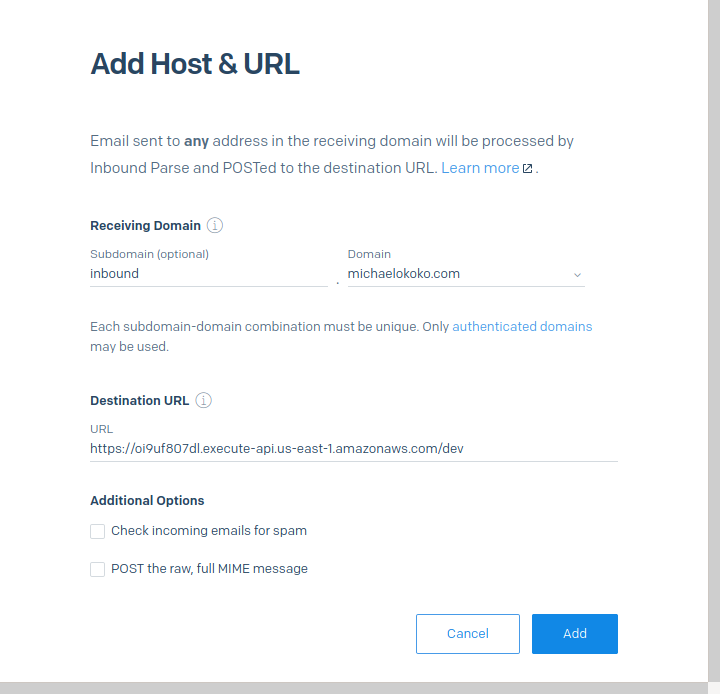
Copy the URL and visit your SendGrid’s Inbound Parse settings page. Now, click on the Add Host & URL button and paste in the copied URL in the Destination URL field.
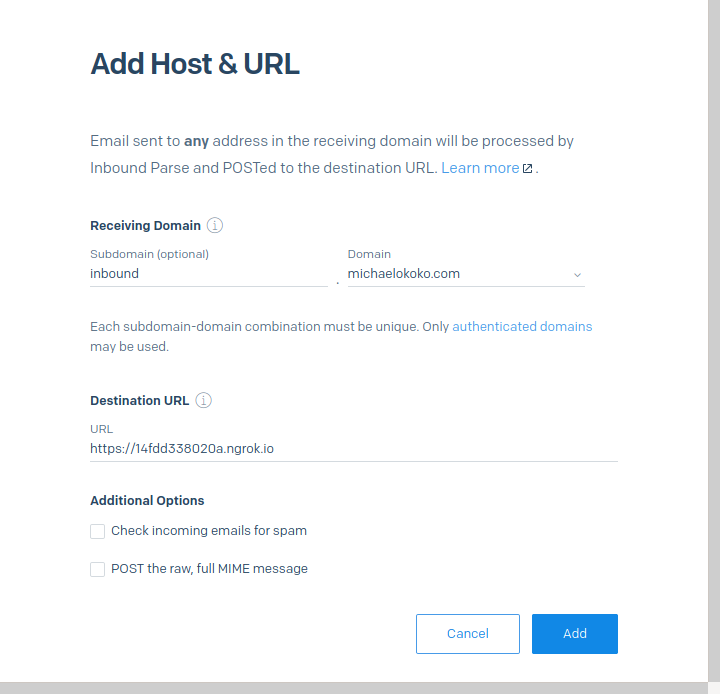
You may want to set up a proper subdomain since SendGrid will notify your webhook of EVERY email that comes to the domain name (irrespective of the username).
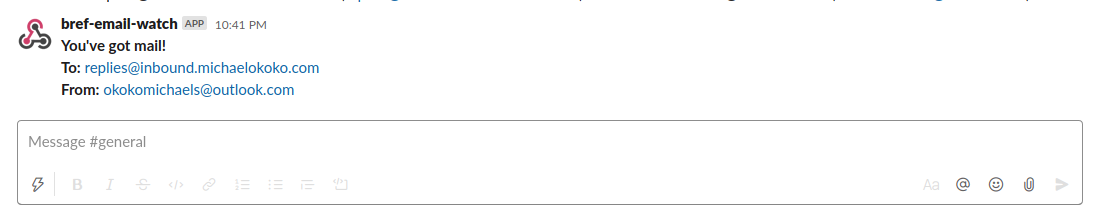
Next, send an email to an email address on the domain you specified and the notification should show up on Slack like this:

For our application to be successfully deployed, Bref and the Serverless CLI need access to the following AWS resources:
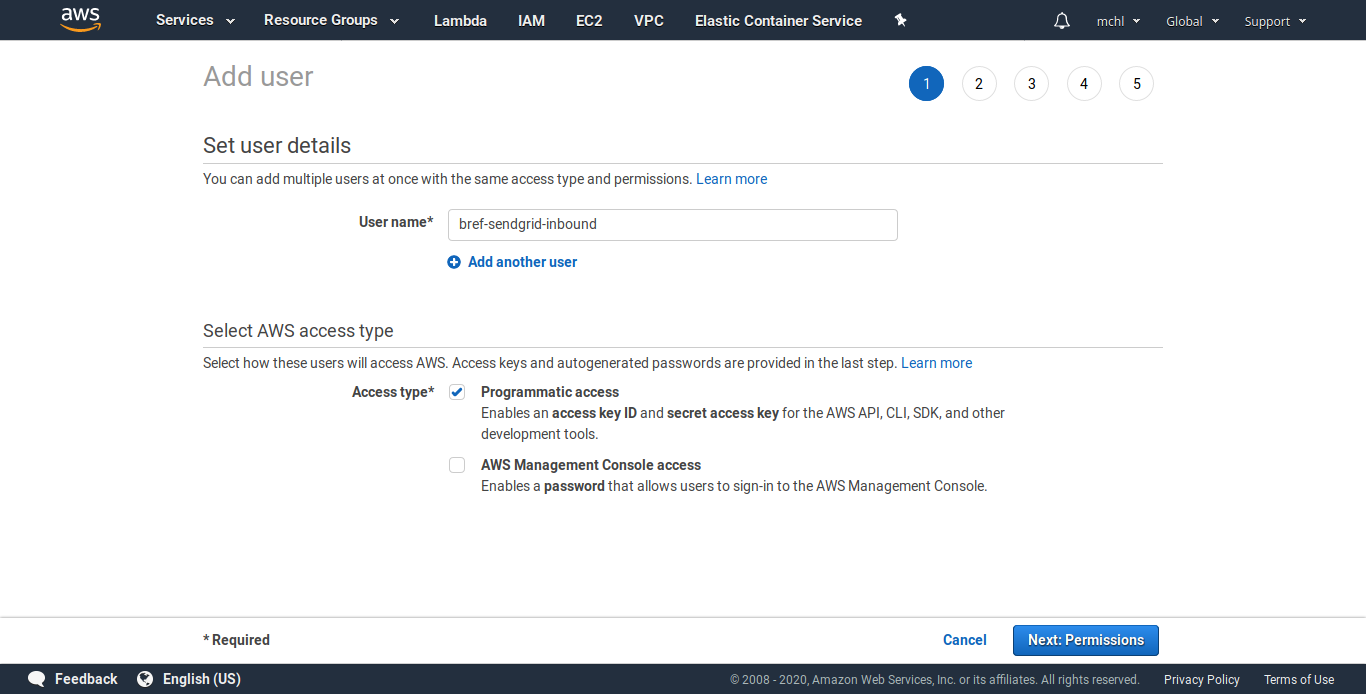
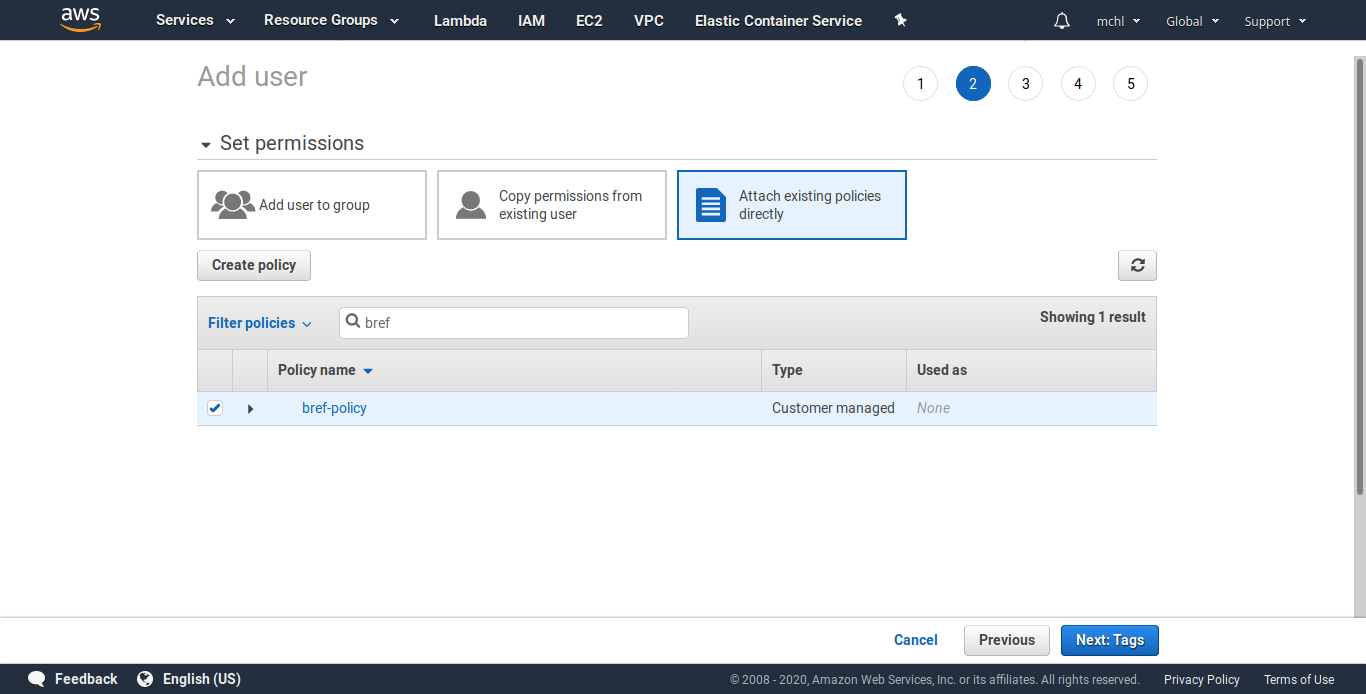
If you have an IAM user with these permissions, you can go ahead and use their AWS access keys and secrets, else:
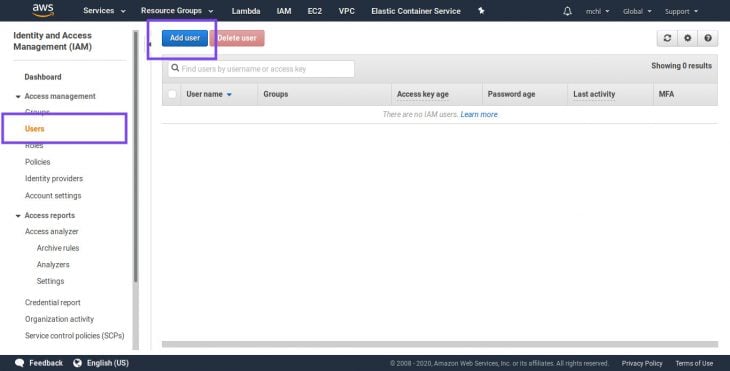
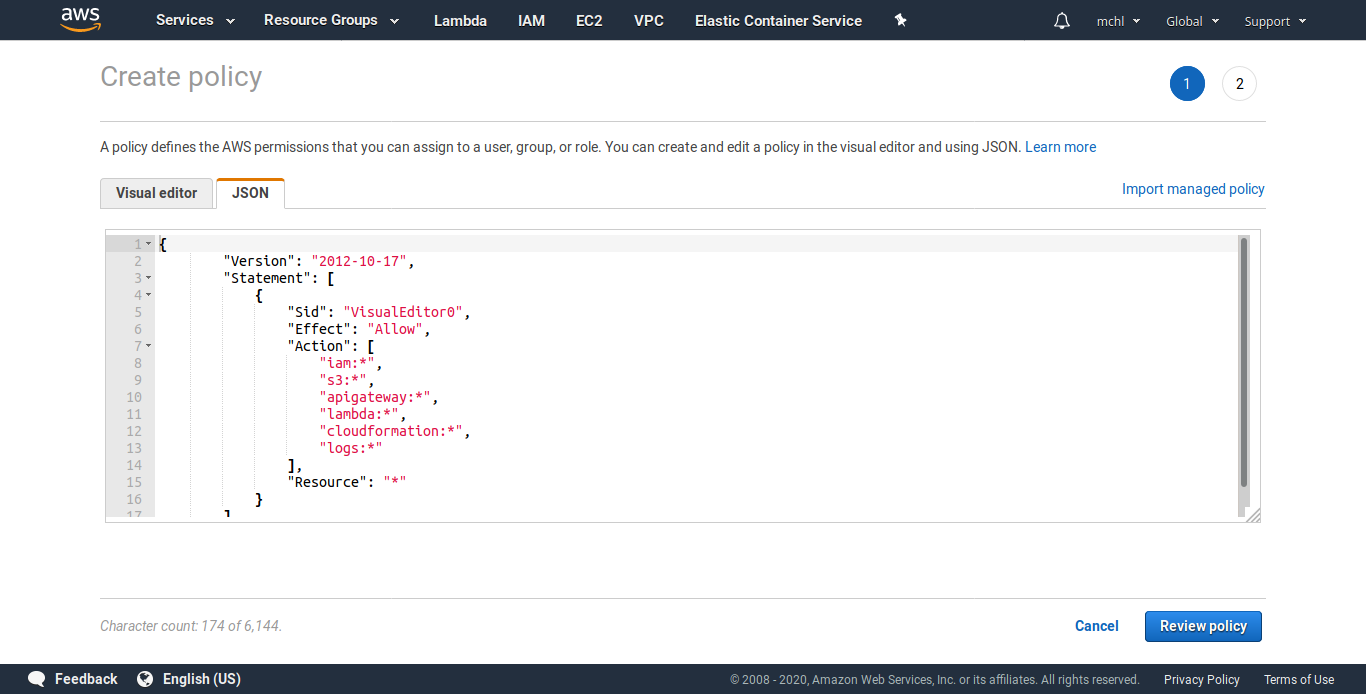
Select the Attach existing policies directly tab and click the Create policy button. This will open a new browser tab for you to set up a new permissions policy.

Select the JSON tab on the Create policy page and paste in the code block below:
{
        "Version": "2012-10-17",
        "Statement": [
            {
                "Sid": "VisualEditor0",
                "Effect": "Allow",
                "Action": [
                    "iam:*",
                    "s3:*",
                    "apigateway:*",
                    "lambda:*",
                    "cloudformation:*",
                    "logs:*"
                ],
                "Resource": "*"
            }
        ]
}
Give the policy a descriptive name, review it, and complete the policy creation process.
Click through the Next button at the bottom of the page to finish creating your IAM user. View and copy the user’s Access Key ID as well as the Secret Key to a temporary place.

Back in your terminal, set up the copied credentials using the serverless config command:
$ serverless config credentials --provider aws --key AWS_ACCESS_KEY_ID --secret AWS_SECRET --profile bref-sendgrid-inbound
The above command will add a new entry in the file holding your AWS credentials. Remember to update the provider section in your serverless.yml file to match the profile specified above as well as your IAM user’s region. Below is an example of the modified serverless.yml config:
service: app

provider:
    name: aws
    region: us-west-2
    runtime: provided
    # "profile" should match the profile specified while configuring the serverless CLI
    profile: bref-sendgrid-inbound

plugins:
    - ./vendor/bref/bref

functions:
    api:
        handler: index.php
        description: ''
        timeout: 28 # in seconds (API Gateway has a timeout of 29 seconds)
        layers:
            - ${bref:layer.php-73-fpm}
        events:
            -   http: 'ANY /'
            -   http: 'ANY /{proxy+}'

# Exclude files from deployment
package:
    exclude:
        - 'node_modules/**'
        - 'tests/**'
We can now deploy our application by running the command below from the project directory.
$ serverless deploy
The command generates an application URL e.g https://XXXXXXX.execute-api.us-west-2.amazonaws.com/dev when it has finished the deployments. You can then update the Destination URL on your Inbound Parse settings page to match this generated URL.
Test the application again by sending an email to username@YOUR_DOMAIN.COM and you should get a Slack message similar to the one below:
Working with emails can be fun and though the focus is usually on sending them, we can have as much fun receiving them via code. In this tutorial, we saw exactly how to do that and explored the Bref serverless library while at it. You can find the complete project on GitHub.
The Bref and serverless framework documentation are good places if you are looking to further explore them. Also, you can further learn to restrict access to your lambda functions by using features like Lambda Authorizers.
Install LogRocket via npm or script tag. LogRocket.init() must be called client-side, not
server-side
$ npm i --save logrocket

// Code:

import LogRocket from 'logrocket';
LogRocket.init('app/id');
// Add to your HTML:

<script src="https://cdn.lr-ingest.com/LogRocket.min.js"></script>
<script>window.LogRocket && window.LogRocket.init('app/id');</script>

Learn how to use Fallow to analyze AI-generated code, detect dead code, duplicate logic, and complexity issues, and integrate automated code quality checks into your AI-assisted development workflow.

Learn how to protect full-stack projects from NPM supply chain attacks with a practical security checklist.

Explore 15 essential MCP servers for web developers to enhance AI workflows with tools, data, and automation.

Learn how contrast-color() automatically picks accessible text colors using native CSS, without JavaScript.
Would you be interested in joining LogRocket's developer community?
Join LogRocket’s Content Advisory Board. You’ll help inform the type of content we create and get access to exclusive meetups, social accreditation, and swag.
Sign up now
