In this tutorial, you will learn how to build a code snippet block with multi-language support for your blog or developer documentation project. We’ll style the code block to look similar to the VS Code interface. We’ll also use React Recoil to improve UX by remembering the user’s language preference.

First, note that this tutorial assumes you have a fundamental understanding of React. Next, you’ll need to confirm that you have Node installed — any version ≥8 is fine. Lastly, if you’d like to follow along, here’s a link to the starter repo.
Your cloned project should have a folder structure similar to this:
|----- src
  |----- components
    |----- Codeblock
      |----- Codeblock.jsx
      |----- Codeblock.scss
    |----- CodeGroup
      |----- CodeGroup.jsx
      |----- CodeGroup.scss
  |----- views
    |----- Home.jsx
    |----- About.jsx
  |----- utils
  |----- store
      |----- index.js
  |----- index.js
  |----- App.js
  |----- App.scss
The starter repo is bootstrapped from create-react-app, with the following Node dependencies pre-installed:
node-sass: While styling, this helps us write SCSS instead of vanilla CSSprism-react-renderer: A lightweight Prism React wrapper. This helps us build our custom code blocks with syntax highlights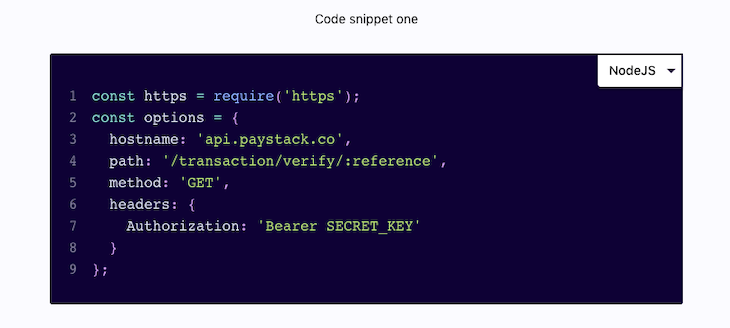
Our code snippet component can be reused across the whole site. A perfect use case would be custom developer documentation or a technical blog, wherein you’ll need to frequently share code snippets.
To aid readability, we’ll split the logic into two components:
CodeSnippet: Displays the code and handles code syntax highlightsCodeGroup: Wraps the CodeSnippet component while adding multi-language supportEdit the CodeSnippet.jsx file with the code below:
import React from 'react';
import Highlight, { defaultProps } from 'prism-react-renderer';

// Import popular vscode nightOwl theme
import theme from 'prism-react-renderer/themes/nightOwl';
import './CodeSnippet.scss';

const supportedSyntax = {
  curl: 'bash',
  node: 'js',
  js: 'js',
  ruby: 'rb',
  php: 'php',
};

const Codeblock = ({ code, syntax, className }) => (
  <Highlight
    {...defaultProps}
    theme={theme}
    code={code.trim()}
    language={supportedSyntax[syntax]}>
    {({ style, tokens, getLineProps, getTokenProps }) => (
      <pre className={`c-pre ${className}`}>
        {/* Tokens are equivalent to each row/line of code text */}
        {tokens.map((line, index) => (
          <div
            className={'c-line'}
            key={index} {...getLineProps({ line, key: index })}>
            <span className="c-line-number">{index + 1}</span> {/* Show code line number */}
            <span className="c-line-content">
              {/* Show code snippet for that line */}
              {line.map((token, key) => (
                <span key={key} {...getTokenProps({ token, key })} />
              ))}
            </span>
          </div>
        ))}
      </pre>
    )}
  </Highlight>
);
export default Codeblock;
The code above extends Highlight and defaultProps from prism-react-renderer. Highlight is a React component that takes in a bunch of props, most importantly:
code (string): The text/code snippet to displaylanguage (string): This helps prism-react-render set language-specific syntax highlights. See the Prism docs for list of supported languagestheme (object): This optional param lets you override the default code theme from Prism. In our case, we override it with the nightOwl theme in line 5 aboveThe defaultProps object handles all the other props required by Highlight; you’ll mostly like never need to change those. See the documentation for a full list of supported props.
Tip: It is advised to use the native JavaScript
.trim()method on yourcodestrings to remove unnecessary whitespace.
Edit the CodeGroup.jsx file with the code below:
import React, { useState, useEffect, useRef } from 'react';

import CodeSnippet from '../CodeSnippet/CodeSnippet';
import './CodeGroup.scss';

const languageOptions = {
  curl: 'cURL',
  node: 'NodeJS',
  php: 'PHP',
};

const CodeGroup = ({ code }) => {
  const select = useRef();
  // Set the default language //
  const [language, setLanguage] = useState('curl');
  const handleChange = event => setLanguage(event.target.value);

  // Update the select value when langauge state changes
  useEffect(() => {
    select.current.value = language;
  }, [language]);

  return (
    <code className="c-code-group">
      <span className="c-dropdown">
        <select
          ref={select}
          name="codeSelect"
          defaultValue={language}
          onChange={handleChange}>
          {Object.keys(code).map((lang, index) => (
            <option
              key={index}
              value={lang.toLowerCase()}>{languageOptions[lang]}</option>)
          )}
        </select>
      </span>
      <>
        {Object.keys(code).map((lang, index) => (
          <CodeSnippet
            key={index}
            code={code[lang]}
            className={language === lang ? 'c-snippet c-snippet--is-active' : 'c-snippet'}
            syntax={lang} />
        ))}
      </>
    </code>
  );
};

export default CodeGroup;
The CodeGroup component wraps the CodeSnippet component and adds multi-language support to our custom code block.
The CodeGroup component accepts a code prop of type object. This is the code we would like to display. The object key is the language name, and the value is a corresponding string to be displayed for that language.
For simplicity, we store these objects in a utils/{page_name}Requests.js file and import them when needed. Below is a sample code object. It can be found in the utils/HomeRequests.js directory:
const curl = `
curl -v -X POST https://api.sandbox.paypal.com/v2/invoicing/generate-next-invoice-number \\
-H "Content-Type: application/json" \\
-H "Authorization: Bearer Access-Token"
`;
const node = `
const https = require('https');
const options = {
  hostname: 'api.paystack.co',
  path: '/transaction/verify/:reference',
  method: 'GET',
  headers: {
    Authorization: 'Bearer SECRET_KEY'
  }
};
`;
const php = `
$stripe = new \Stripe\StripeClient('sk_test_BQokikJOvBiI2HlWgH4olfQ2');
$customer = $stripe->customers->create([
  'description' => 'example customer',
  'email' => '[email protected]',
  'payment_method' => 'pm_card_visa',
]);
echo $customer;
`;
const code = {
  curl,
  node,
  php,
}
export default code;
Here’s a working demo of the app.
In the demo above, the code snippet works across multiple pages. However, the code language option resets when you navigate pages, this may not be great for usability. That’s where Recoil comes to play.
Recoil is a lightweight React state management library — like Redux, but simpler. Recoil has a simple API and is powered by React Hooks under the hood. Recoil lets us persist language across multiple pages or even remember a user’s preferred language when they return to your website.
First, run yarn add Recoil to add Recoil to your project. In your src/index.js file, import RecoilRoot from Recoil and wrap the App component with RecoilRoot:
import React from 'react';
import ReactDOM from 'react-dom';
import { BrowserRouter } from 'react-router-dom';
import { RecoilRoot } from 'Recoil';

import './index.css';
import App from './App';

ReactDOM.render(
  <React.StrictMode>
    <BrowserRouter>
      <RecoilRoot> // Wrap the App component with RecoilRoot
        <App />
      </RecoilRoot>
    </BrowserRouter>
  </React.StrictMode>,
  document.getElementById('root')
);
At its core, React Recoil is based on an atom and selector model. In Recoil, atoms are units of states that components can subscribe to, while selectors are pure functions that are used to update the state, either synchronously or asynchronously. If you’re familiar with other state management libraries like Redux, atoms are akin to state objects. Read more here.
Edit the store/index.js file with the code below:
import { atom } from 'Recoil';

export const codeLanguageState = atom({
  key: 'snippetLanguageState', // Unique state identifier
  default: 'curl', // Default state value
});
The atom function accepts a JavaScript object:
key is a unique identifierdefault, as the name implies, is the default stateWe can now read and write to the codeLanguageState atom using Recoil’s useRecoilState Hook.
Edit CodeGroup.jsx with the following updates:
import React, { useEffect, useRef } from 'react';
+ import { useRecoilState } from 'Recoil';
import { codeLanguageState } from '../../store/index';

import CodeSnippet from '../CodeSnippet/CodeSnippet';
import './CodeGroup.scss';

const languageOptions = {
  curl: 'cURL',
  node: 'NodeJS',
  php: 'PHP',
};

const CodeGroup = ({ code }) => {
  const select = useRef();
  // Set default langauge using
-  const [language, setLanguage] = useState('curl');
+  const [language, setLanguage] = useRecoilState(codeLanguageState);
  const handleChange = event => setLanguage(event.target.value);
  useEffect(() => {
    select.current.value = language;
  }, [language]);
  return (
    <code className="c-code-group">
      <span className="c-dropdown">
        <select
          ref={select}
          name="codeSelect"
          defaultValue={language}
          onChange={handleChange}>
          {Object.keys(code).map((lang, index) => (
            <option
              key={index}
              value={lang.toLowerCase()}>{languageOptions[lang]}</option>)
          )}
        </select>
      </span>
      <>
        {Object.keys(code).map((lang, index) => (
          <CodeSnippet
            key={index}
            code={code[lang]}
            className={language === lang ? 'c-snippet c-snippet--is-active' : 'c-snippet'}
            syntax={lang} />
        ))}
      </>
    </code>
  );
};
export default CodeGroup;
In the snippet above, we make two additions to the existing CodeGroup.jsx file:
useRecoilState (line 2)useState Hook with the useRecoilState Hook and pass our state — the codeLanguageState atom, in this case — as a param (line 18)Recoil’s useRecoilState API is identical to React’s useState Hook, with the major difference being that our state can be shared between components.
Hurray! Our app now stores language preference across multiple pages.
If you’re still following along with the starter file, congratulations. The final step is to go to the Home.jsx and Payments.jsx files in the /views directory and undo the comments to import the CodeSnippet component to the Home and Payments pages.
Here’s a live demo.
From the demo above, you’ll notice that even though the language persists when you navigate between pages, the language resets to curl when the page is refreshed. Using Recoil and recoil-persist (a third-party library), we can add session persistence to our app in three easy steps:
recoil-persistRun yarn add recoil-persist to add recoil-persist to our app.
persistence_UNSTABLE to the atomIn the store/index.js file, update the codeLanguageState with a persistence_UNSTABLE key:
import { atom } from 'Recoil';
export const codeLanguageState = atom({
  key: 'snippetLanguageState',
  default: 'curl',
+ persistence_UNSTABLE: {
+   type: 'snippetLanguageState' // type should be the same as the atom key
+ },
});
initializeState propUpdate your index.js file with the following:
import React from 'react';
import ReactDOM from 'react-dom';
import { BrowserRouter } from 'react-router-dom';
import { RecoilRoot } from 'Recoil';
+ import RecoilPersist from 'recoil-persist';
import './index.css';
import App from './App';
+ const { RecoilPersist, updateState } = RecoilPersist();


ReactDOM.render(
  <React.StrictMode>
    <BrowserRouter>
-     <RecoilRoot>
+     <RecoilRoot initializeState={updateState}>
+       <RecoilPersist />
        <App />
      </RecoilRoot>
    </BrowserRouter>
  </React.StrictMode>,
  document.getElementById('root')
);
Now our app is complete. It’s smart enough to remember the user’s last selected language, even after a refresh. You can try it out here. Here’s a link to the Github repo, if you’d like to play around with the final code.
Install LogRocket via npm or script tag. LogRocket.init() must be called client-side, not
server-side
$ npm i --save logrocket

// Code:

import LogRocket from 'logrocket';
LogRocket.init('app/id');
// Add to your HTML:

<script src="https://cdn.lr-ingest.com/LogRocket.min.js"></script>
<script>window.LogRocket && window.LogRocket.init('app/id');</script>

Learn how to detect unused and ghost dependencies in JavaScript projects using Knip, a project-level linter that keeps your dependency graph accurate.

Learn how Storybook MCP enables AI agents to understand your component library, generate accurate UI, and validate code using documentation, stories, and automated tests.

Debug RSC hydration mismatches in production with Next.js instrumentation, Suspense isolation, HTML diffing, and CI smoke tests.

Explore why npm dependencies are a major supply chain security risk and how to protect JavaScript apps from compromised packages and transitive threats.
Hey there, want to help make our blog better?
Join LogRocket’s Content Advisory Board. You’ll help inform the type of content we create and get access to exclusive meetups, social accreditation, and swag.
Sign up now

