Dragging to reorder a list is a popular use case for many to-do and kanban board apps. Today, we are building a similar sortable to-do list app using React Native. This app will allow users to add, delete, and mark to-do items as complete. The user will also be able to drag and reorder the to-do items, a step that is especially helpful when you want to prioritize certain items.

We’ll build the app using react-native-draggable-flatlist. This library is built upon react-native-reanimated and handles animation seamlessly at 60 FPS. It’s also well maintained and tested, making it much more suitable than other options.
Jump ahead:
React Native projects can be started using React Native or Expo.
For this project, we’ll use Expo to quick start the project because it’s the fastest and most seamless way to start a React Native project.
Run this command to create our app:
npx create-react-app todo-sortable
Once the project is ready, we can install the required library react-native-draggable-flatlist.
Let’s install react-native-draggable-flatlist now:
npm install react-native-draggable-flatlist
OR
yarn add react-native-draggable-flatlist
This package is dependent on react-native-gesture-handler and react-native-reanimated. Let’s continue by installing these packages:
npx expo install react-native-gesture-handler
# OR this command for non expo project
yarn add react-native-gesture-handler
This command will install the supported version of react-native-gesture-handler for Expo.
We also need to update the entry file App.js to support the gesture handler. Go to App.js and update as follows:
// import at the top
import "react-native-gesture-handler";

// wrap whole app with <GestureHandlerRootView>
import { GestureHandlerRootView } from "react-native-gesture-handler";

export default function App() {
  return (
    <GestureHandlerRootView>
      <View style={styles.container}>
        <Text>Open up App.js to start working on your app!</Text>
        <StatusBar style="auto" />
      </View>
    </GestureHandlerRootView>
  );
}
Now, we need to install React Native Reanimated.
npx expo install react-native-reanimated
# OR this command for non expo project
yarn add react-native-reanimated
After the installation is complete, you must also add the Babel plugin to babel.config.js:
module.exports = function (api) {
  api.cache(true);
  return {
    presets: ['babel-preset-expo'],
    plugins: ['react-native-reanimated/plugin'],
  };
};
Now, we need to install a component library, which will make our development process much faster. I’m using react-native-design-system but you can choose any component library you like.
Run this command to install the package:
yarn add react-native-design-system
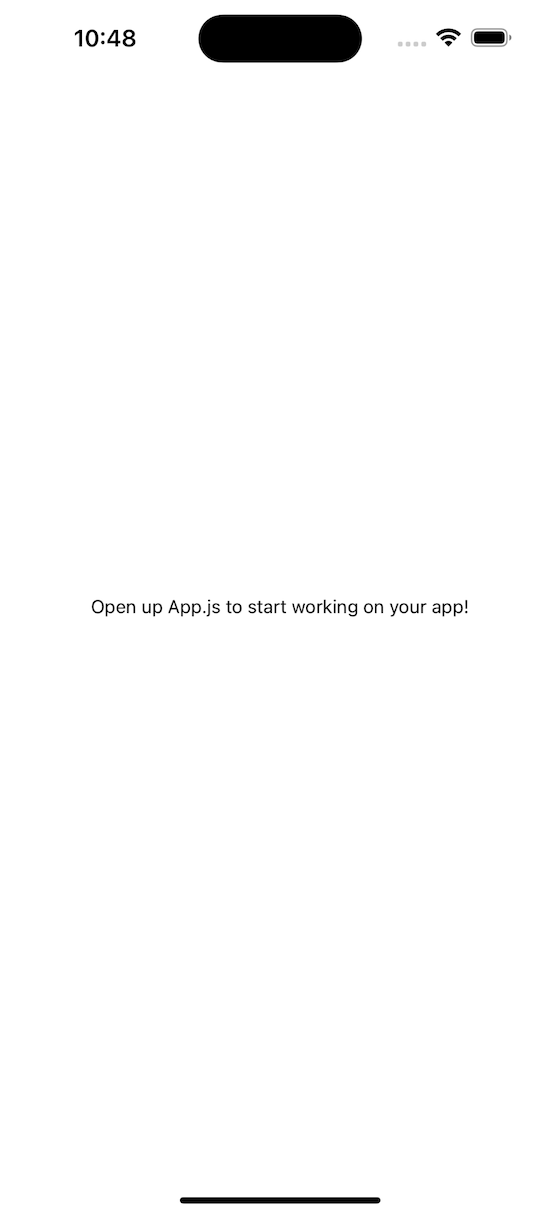
Now we have the boilerplate ready. This is what the app looks like at this step:

Now, let’s dive into the functionality!
Before we can allow to-do items to be draggable, we need to handle adding to-do items. To achieve this, we will use an Input component from react-native-design-system.
First, we need to wrap our app with ThemeProvider from the react-native-design-system. This is required because all the styles of the components are dependent on this.
Go to App.js and wrap your <App/> with ThemeProvider:
import { ThemeProvider, theme } from "react-native-design-system";

const App = () => {
  return (
    <GestureHandlerRootView style={styles.container}>
      <ThemeProvider theme={theme}>
        <View style={styles.container}>
          <Text>Open up App.js to start working on your app!</Text>
          <StatusBar style="auto" />
        </View>
      </ThemeProvider>
    </GestureHandlerRootView>
  );
};

export default App;
Let’s create a new component that will handle the to-do list. Create an src folder and add a TodoList component:
import { View, Text } from "react-native";
import React from "react";

const TodoList = () => {
  return (
    <View>
      <Text>TodoList</Text>
    </View>
  );
};

export { TodoList };
Now, we need to add an Input component and save user input using the useState() hook:
import { View, Text } from "react-native";
import React from "react";
import { Input } from "react-native-design-system";

const TodoList = () => {
  const [text, setText] = useState("");

  const handleTextInput = (input) => {
    setText(input);
  };

  const handleAddTodo = () => {
    // handle adding todos
  };
  return (
    <View>
      <Input
        value={text}
        outline
        onChangeText={handleTextInput}
        onSubmitEditing={handleAddTodo}
      />
    </View>
  );
};

export { TodoList };
This will make sure we are saving the user input state correctly. We will use this state to create to-do items soon. Now we just need to import this component inside App.js:
import { TodoList } from "./src/TodoList";

const App = () => {
  return (
    <GestureHandlerRootView style={styles.container}>
      <ThemeProvider theme={theme}>
        <TodoList />
      </ThemeProvider>
    </GestureHandlerRootView>
  );
};

export default App;
Before starting to add to-do items to our list, we need to understand how the data is requested by the react-native-draggable-flatlist library. If you look at the documentation, you’ll see that it expects the data to be an array.
Let’s imagine how it would look in our case:
const data = [
  {
    key: "123",
    todo: "Buy Grocery",
    isCompleted: false,
  },
  {
    key: "124",
    todo: "Make Omelet",
    isCompleted: false,
  },
  {
    key: "125",
    todo: "Go to the gym",
    isCompleted: false,
  },
];
If you observe the above data, we have numbers as a key along with other properties. To keep the keys unique, we can also generate them using uuid. Let’s install the uuid package first:
yarn add uuid react-native-get-random-values
We need react-native-get-random-values because uuid is dependent on it. Let’s update the App.js file and import react-native-get-random-values as follows:
import "react-native-gesture-handler";
// import the package below
import "react-native-get-random-values";
import { StyleSheet } from "react-native";
// rest of the code
Let’s start adding to-do items in our data array:
// other imports
import DraggableFlatList, {
  ScaleDecorator,
} from "react-native-draggable-flatlist";
import { v4 as uuidv4 } from "uuid";
// import Header
import { Input, Header } from "react-native-design-system";

const TodoList = () => {
  const [text, setText] = useState("");
  // add state to save todos
  const [data, setData] = useState([]);

  const handleTextInput = (input) => {
    setText(input);
  };

  const handleAddTodo = () => {
    // get the current text value
    const todo = text.trim();
    if (!todo) return;
    // generate unique key id
    const key = uuidv4();
    // add new todo with the unique key we generated
    setData((prevData) => {
      const newItem = {
        key,
        todo,
        isCompleted: false,
      };
      return [newItem, ...prevData];
    });
    // reset the input field
    setText("");
  };

  const renderItem = () => {
    // render individual todo items
  };

  return (
    <View>
      <Header>Sortable Todo</Header>
      <Input
        value={text}
        outline
        onChangeText={handleTextInput}
        onSubmitEditing={handleAddTodo}
      />
      <DraggableFlatList
        data={data}
        onDragEnd={({ data }) => setData(data)}
        keyExtractor={(item) => item.key}
        renderItem={renderItem}
      />
    </View>
  );
};
The comments should hopefully be clear enough to explain what’s happening in the code above.
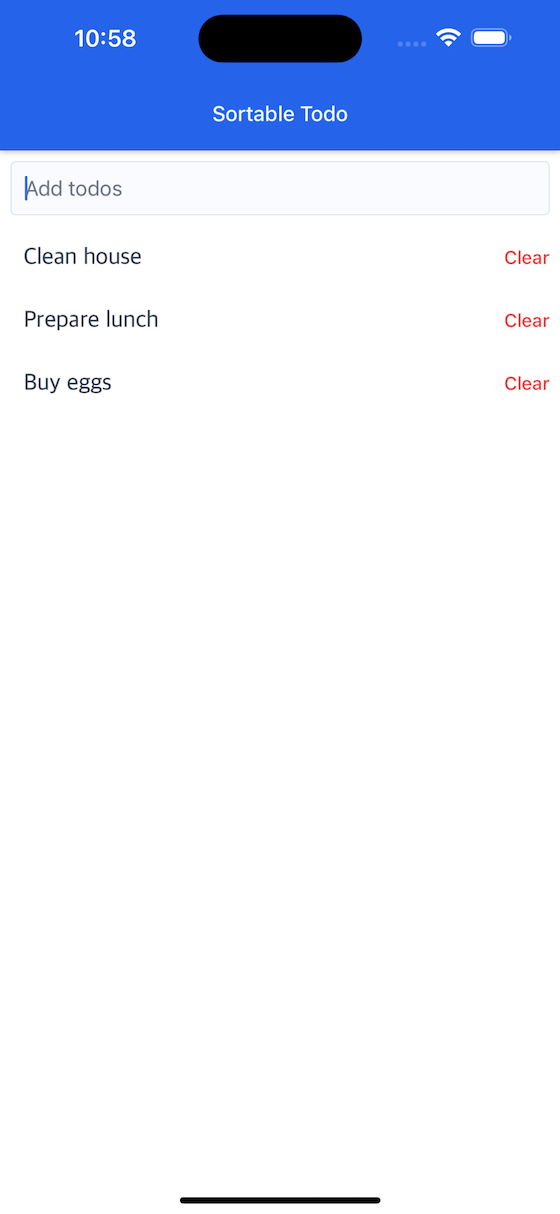
We have also added a Header component so that our app looks a little better.
We successfully added to-do items to the data array, which is being passed to the DraggableFlatList component.
The DraggableFlatList component also implements an onDragEnd prop. This makes sure the order of items in the array is updated as soon as the user finishes dragging.
Let’s quickly add the renderItem implementation that will render individual to-do items:
// import ListItem above
import { ListItem, Input } from "react-native-design-system";

// update renderItem function
const renderItem = ({ item, drag, isActive }) => {
  return (
    <ScaleDecorator>
      <ListItem
        size="lg"
        onLongPress={drag}
        disabled={isActive}
        background={isActive ? "gray300" : "white"}
      >
        {item.todo}
      </ListItem>
    </ScaleDecorator>
  );
};
We are using the ListItem component from the react-native-design-system to render individual items. If you look closely, we have added implementation for the onLongPress, disabled, and background props. Let’s quickly go through what’s happening there:
onLongPress is calling the drag function, which will trigger drag to sort the functionality of DraggableFlatListdisabled is making sure the ListItem stays inactive while it is being dragged. We are simply preventing accidental taps herebackground is switching the color to denote when the item is being draggedWe are almost done with our core functionality. This is an example of what the app looks like at this point:

Even though we have implemented adding and reordering to our to-do items, our to-do app is not yet complete.
Let’s implement the missing functionality that will allows us to mark items as complete:
// add function to mark todos as completed
const handleMarkAsCompleted = (key) => {
  setData((prevData) => {
    prevData.map((item) => {
      if (item.key === key) {
        item.isCompleted = !item.isCompleted;
      }
      return item;
    });
  });
};

// add strike-through text for completed items
const renderItem = ({ item, drag, isActive }) => {
  return (
    <ScaleDecorator>
      <ListItem
        size="lg"
        onLongPress={drag}
        disabled={isActive}
        background={isActive ? "gray300" : "white"}
        onPress={() => handleMarkAsCompleted(item.key)}
        textStyle={{
          textDecorationLine: item.isCompleted ? "line-through" : "none",
        }}
      >
        {item.todo}
      </ListItem>
    </ScaleDecorator>
  );
};
The only thing missing now is the ability to delete items. Let’s add that as well:
// remove deleted item from data array
const handleDeleteTodo = (key) => {
  setData((prevData) => prevData.filter((item) => item.key !== key));
};

// add a clear button to trigger the deletion
const renderItem = ({ item, drag, isActive }) => {
  return (
    <ScaleDecorator>
      <ListItem
        size="lg"
        onLongPress={drag}
        disabled={isActive}
        background={isActive ? "gray300" : "white"}
        onPress={() => handleMarkAsCompleted(item.key)}
        // this Text will trigger the deletion of the todo
        rightIcon={
          <Text
            size="sm"
            color="red500"
            onPress={() => handleDeleteTodo(item.key)}
          >
            Clear
          </Text>
        }
        textStyle={{
          textDecorationLine: item.isCompleted ? "line-through" : "none",
        }}
      >
        {item.todo}
      </ListItem>
    </ScaleDecorator>
  );
};
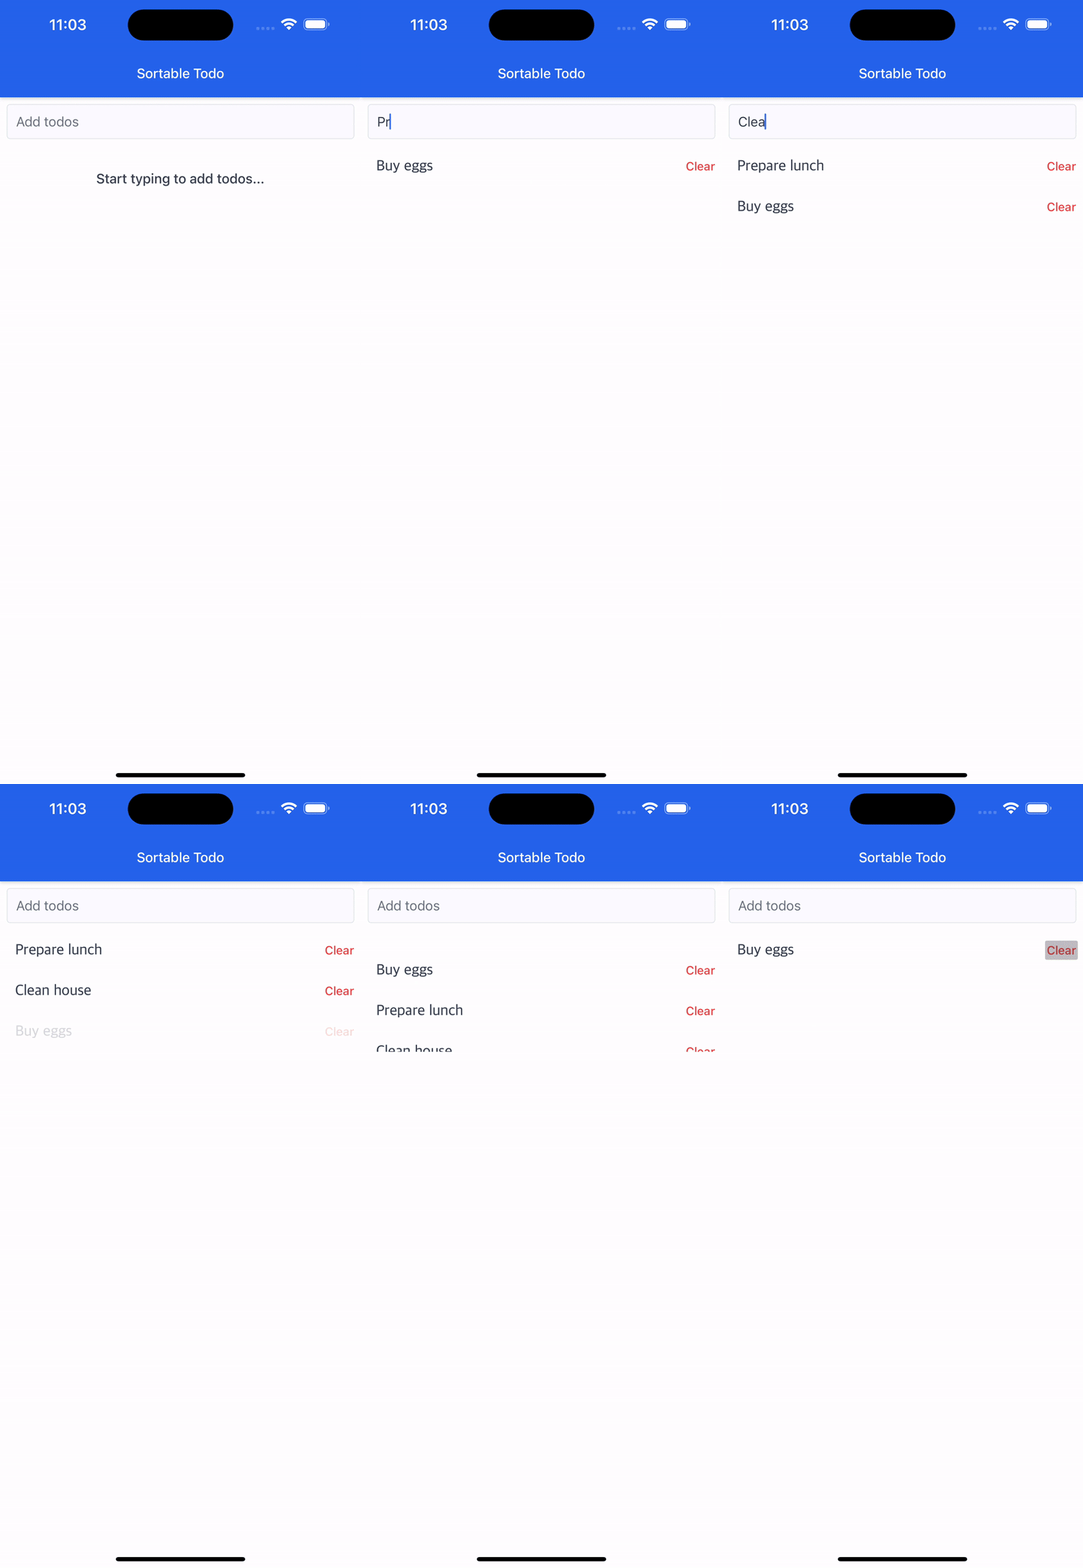
Let’s see if it works:

Success!
In this article, we learned how to create a draggable list using React Native and the react-native-draggable-flatlist package. We were able to add to-do items to the list and drag them around according to our priority, as well as delete them from the list entirely. Check out the GitHub repository to find the complete source code.

LogRocket's Galileo AI watches sessions for you and and surfaces the technical and usability issues holding back your React Native apps.
LogRocket also helps you increase conversion rates and product usage by showing you exactly how users are interacting with your app. LogRocket's product analytics features surface the reasons why users don't complete a particular flow or don't adopt a new feature.
Start proactively monitoring your React Native apps — try LogRocket for free.
Would you be interested in joining LogRocket's developer community?
Join LogRocket’s Content Advisory Board. You’ll help inform the type of content we create and get access to exclusive meetups, social accreditation, and swag.
Sign up now
Discover how to use Gemini CLI, Google’s new open-source AI agent that brings Gemini directly to your terminal.

This article explores several proven patterns for writing safer, cleaner, and more readable code in React and TypeScript.

A breakdown of the wrapper and container CSS classes, how they’re used in real-world code, and when it makes sense to use one over the other.

This guide walks you through creating a web UI for an AI agent that browses, clicks, and extracts info from websites powered by Stagehand and Gemini.