In this tutorial, you will learn how to upgrade and refactor your React application to the latest version without having to rewrite any code using react-codemod.
react-codemod
react-codemod is a library designed to automate the process of upgrading a React app to the latest version and refactoring the codebase to support newly released design patterns.
react-codemod is a collection of scripts that identify specific patterns in a codebase and replace them with updated code — it’s an essential tool for large-scale refactoring and upgrades without the need to manually edit each file.
Before updating your existing React codebase to the latest APIs and design patterns, you first need to upgrade your project’s React version. You can do this by running the following command:
npm install --save react@latest
Next, you need to initialize the project directory as a Git repository because react-codemod requires a Git commit to function. To do that, run the command below:
git init
react-codemodInstall the react-codemod library, which will enable us to run a set of commands that automatically update our codebase to the latest React APIs and design patterns. To install react-codemod, run the following command:
npm i react-codemod
Now, you can start updating your codebase to align with the latest React APIs and design patterns without manually modifying it. The steps below demonstrate how to update your existing React codebase to React 19 APIs and design patterns using react-codemod commands.
createElement to JSX codeConverting a createElement code to JSX is an important step in modernizing your React codebase. JSX provides a more intuitive, readable, and maintainable approach to writing React components compared to createElement.
Let’s take the code below as an example. The code uses createElement to programmatically create React elements:
const element = React.createElement(
  'div',
  { className: 'container' },
  React.createElement('h1', null, 'Hello, world!'),
  React.createElement('p', null, 'This is a React application.')
);
To convert the createElement code above to its equivalent JSX code, you first need to run a Git commit, followed by the react-codemod command for create-element-to-jsx using the commands below:
git add .
git commit -m "Commit message"
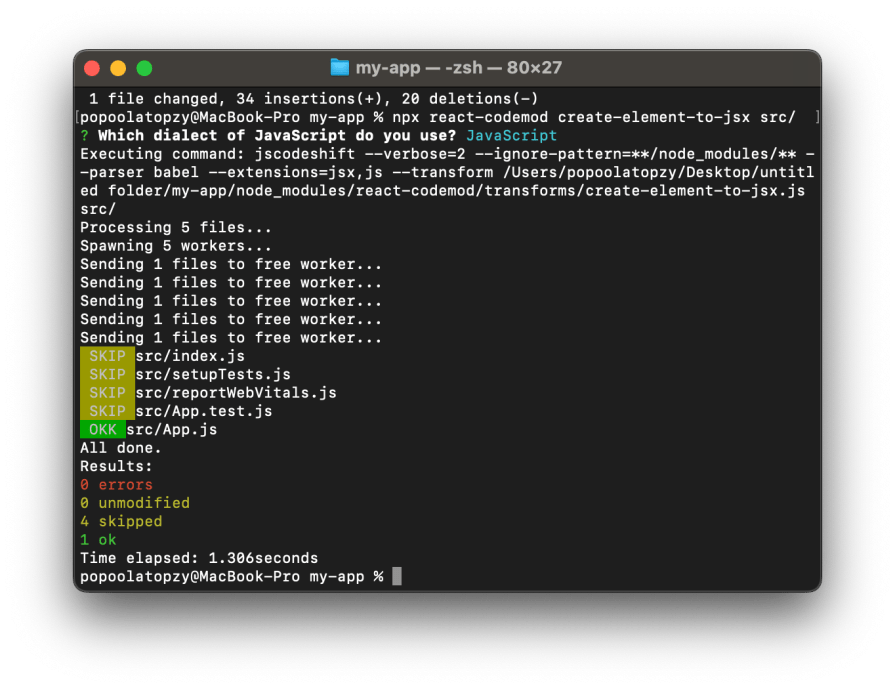
npx react-codemod create-element-to-jsx src/
After running the command above, you will be prompted with the question, Which dialect of JavaScript do you use? Select your preferred option, as shown in the screenshot below:

By reviewing your codebase, you should find that all instances of createElement have been updated to their corresponding JSX versions. For example, the createElement code above will be converted to the following JSX code:
const element = (
<div className="container">
    <h1>Hello, world!</h1>
    <p>This is a React application.</p>
  </div>
);
In class components, using arrow functions provides a concise and modern approach that eliminates the need for explicit bindings. With react-codemod, you can easily convert all binding functions in your codebase to arrow functions without needing to rewrite the entire component.
Let’s take a look at the component below and see how we can convert it to an arrow function:
class MyComponent extends React.Component {
  constructor(props) {
    super(props);
    this.handleClick = this.handleClick.bind(this);
  }
  handleClick() {
    console.log('Button clicked!');
  }
  render() {
    return <button onClick={this.handleClick}>Click me</button>;
  }
}
To convert the binding functions in the component above to arrow functions, run the following commands in your terminal:
git add .
git commit -m "Commit message"
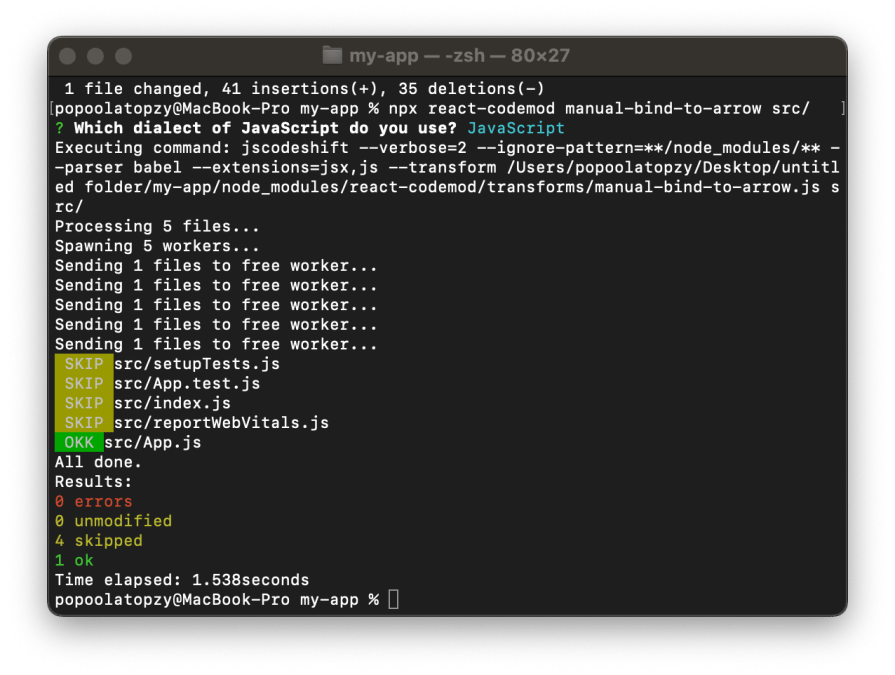
npx react-codemod manual-bind-to-arrow src/
The command above will prompt you to select your JavaScript dialect. Select your preferred option as shown in the screenshot below:

Once the command above is successful, the binding functions will be converted to arrow functions, as shown in the code below:
class MyComponent extends React.Component {
  handleClick = () => {
    console.log('Button clicked!');
  };
  render() {
    return <button onClick={this.handleClick}>Click me</button>;
  }
}
PropTypes to prop-typesStarting with React 19, PropTypes will be removed from the React package and replaced with prop-types. This means that if you use PropTypes in your codebase, you will need to update it to use prop-types instead.
Let’s convert the code below from React PropTypes to prop-types and add the appropriate import statement:
import React from 'react';
class MyComponent extends React.Component {
  render() {
    return <div>{this.props.name}</div>;
  }
}
MyComponent.propTypes = {
  name: React.PropTypes.string.isRequired,
};
You can convert the React PropTypes code to prop-types by running the react-codemod command below:
git add .
git commit -m "Commit message"
npx react-codemod manual-bind-to-arrow src/
After running the command above, your codebase will automatically be updated to use prop-types, as shown in the code below:
import React from 'react';
import PropTypes from 'prop-types';
class MyComponent extends React.Component {
  render() {
    return <div>{this.props.name}</div>;
  }
}
MyComponent.propTypes = {
  name: PropTypes.string.isRequired,
};
PureComponentWhen a parent component is re-rendered, React will re-render its child components. Using PureComponent helps to prevent unnecessary re-rendering of class components, as long as the component’s props and state remain unchanged.
The component below will always re-render whenever its parent component is re-rendered, which can reduce application performance:
import React from 'react';
class MyComponent extends React.Component {
  render() {
    return <div>{this.props.name}</div>;
  }
}
To prevent your child component from re-rendering when its props and state remain unchanged during re-rendering of the parent component, you need to convert your application’s class components to PureComponent using the command below:
git add .
git commit -m "Commit a message"
npx react-codemod pure-component src/
Running the above command will prompt you with the following questions:
Which dialect of JavaScript do you use? Select your preferred optionUse arrow functions? Answer with'y' to convert any component function to arrow functionDestructure props? Answer with 'y' to automatically destructure props in the function’s argument list when it is necessary to do soOnce the command is complete, your codebase’s class components will be converted to PureComponent, preventing unnecessary re-rendering of child components, as shown in the code below:
import React, { PureComponent } from 'react';
class MyComponent extends PureComponent {
  render() {
    return <div>{this.props.name}</div>;
  }
}
In this tutorial, we learned how to upgrade a React application codebase to the latest React APIs and design patterns without rewriting any code, using react-codemod.
Keeping your application codebase up-to-date with the latest React APIs and design patterns ensures optimal performance, security, and adherence to best practices.
Install LogRocket via npm or script tag. LogRocket.init() must be called client-side, not
server-side
$ npm i --save logrocket

// Code:

import LogRocket from 'logrocket';
LogRocket.init('app/id');
// Add to your HTML:

<script src="https://cdn.lr-ingest.com/LogRocket.min.js"></script>
<script>window.LogRocket && window.LogRocket.init('app/id');</script>
Would you be interested in joining LogRocket's developer community?
Join LogRocket’s Content Advisory Board. You’ll help inform the type of content we create and get access to exclusive meetups, social accreditation, and swag.
Sign up now
A breakdown of the wrapper and container CSS classes, how they’re used in real-world code, and when it makes sense to use one over the other.

This guide walks you through creating a web UI for an AI agent that browses, clicks, and extracts info from websites powered by Stagehand and Gemini.

This guide explores how to use Anthropic’s Claude 4 models, including Opus 4 and Sonnet 4, to build AI-powered applications.

Which AI frontend dev tool reigns supreme in July 2025? Check out our power rankings and use our interactive comparison tool to find out.