Recently, I wanted to limit mouse usage when programming in Visual Studio Code since I found interacting with the IDE through a cursor distracting and a major flow-breaker — so, I tried navigating VSC with keyboard alone.

Here, I would like to present some of the shortcuts that I have found to best increase productivity. Go ahead, open Visual Studio Code and let’s get started.
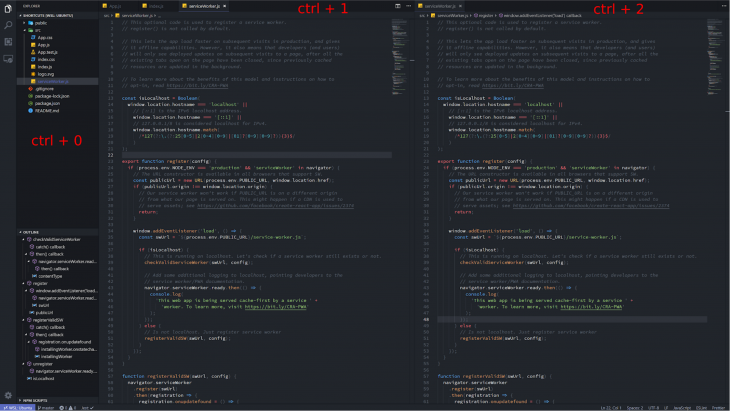
Unless you are working on a very small screen, chances are you split your IDE into two or three views to switch more smoothly between files.
To split the editor, you can use ctrl + \ (⌘ + \).
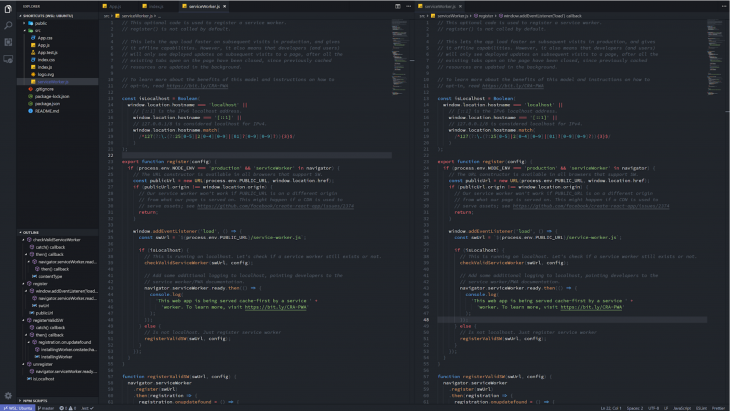
There’s no limit to how many times you can split the editor, but I doubt you will ever want to have more than three views open; it is just not practical beyond that. You can switch between views using ctrl + 1 (⌘ + 1), ctrl + 2 (⌘ + 2), and so on. Alternatively, you can switch between tabs (and, by extension, between views) using ctrl + page up / page down (⌘ + page up / page down).
Having split the editor, we ended up with the same file open in multiple views. Now we would like to focus the explorer panel. We would like to change this without touching the mouse. Also, it would be nice to focus different views without touching the mouse, too.
To focus the explorer panel we use ctrl + 0 (⌘ + 0). We navigate the panel using the up and down arrows. Using the enter key, we open a selected folder or file.
By default, there are two views: the explorer panel and the code view. The code view can be focused by using ctrl + 1 (⌘ + 1). If we create more views by splitting the editor, we use ctrl + 2 (⌘ + 2), ctrl + 3 (⌘ + 3), and so on for the respective views. We can also switch between consecutive tabs with ctrl + page up / page down (by default, this command isn’t defined on macOS).
Note that this will only work when VSC has access to the whole folder, and only when you are working with an open folder — not individual files.
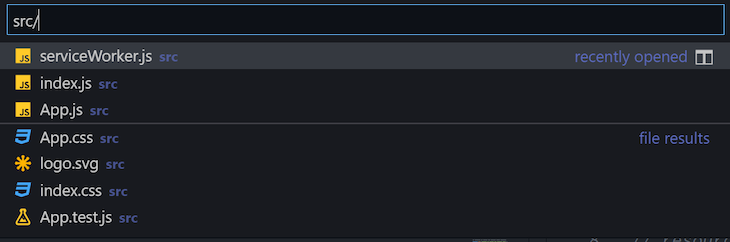
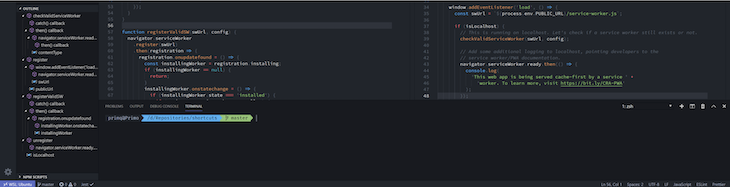
There’s also a slightly different approach to selecting files that are farther in the list from the one currently open. We can use ctrl + p (⌘ + p), which opens up a search bar where we type in either a filename (http.service.ts) or a full path (src/services/http.service.ts).
We often don’t work with all the files in the project at once; we simultaneously work with two, maybe three at most. To shorten the time it takes to switch between them (if we don’t have enough screen space to split the editor), we can use the file history.
File history, as the name implies, saves the files we last used and provides a quick way to restore them. In VSC we use ctrl + tab to switch between the last opened files.
While this is indeed very efficient, there is yet another way which, one might argue, is even faster. By using alt + left / right arrows (ctrl + shift + - / ctrl + -) we can switch directly to the previous/next file in the file history.
Now that we know how to navigate the files, let’s focus on the way we move around the code.
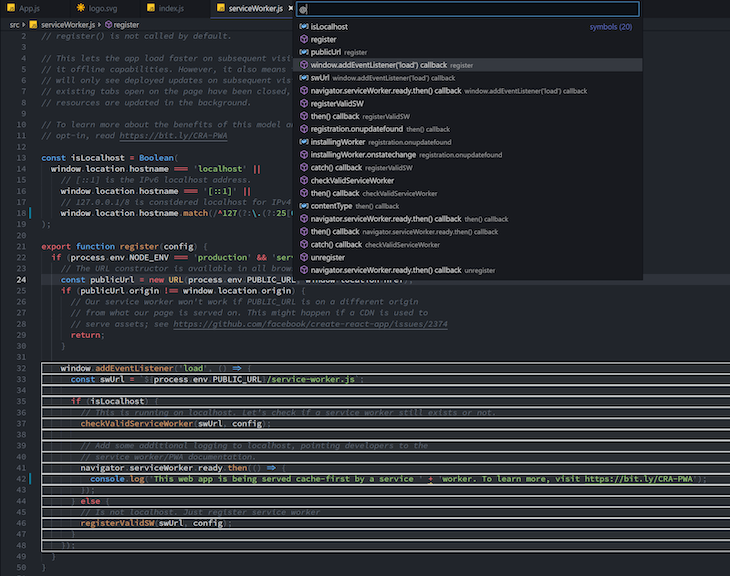
In the explorer panel, you can click the Outline section to have a code’s outline displayed. While the feature itself is amazing in that it lets us see a more general view of the code, we can also use it to quickly move around.
By using ctrl + shift + o (⌘ + shift + o), we can bring up the command palette, where we can choose the part of the outline we would like to jump to. After choosing the definition with an up/down arrow, the appropriate piece of code is highlighted for us, making it easier to get where we want to go.
The same feature could also be used to search the whole project for a given piece of code. By using ctrl + t (⌘ + t), we again bring up the command palette, where we can now type the name of a variable/function/etc. to search for.

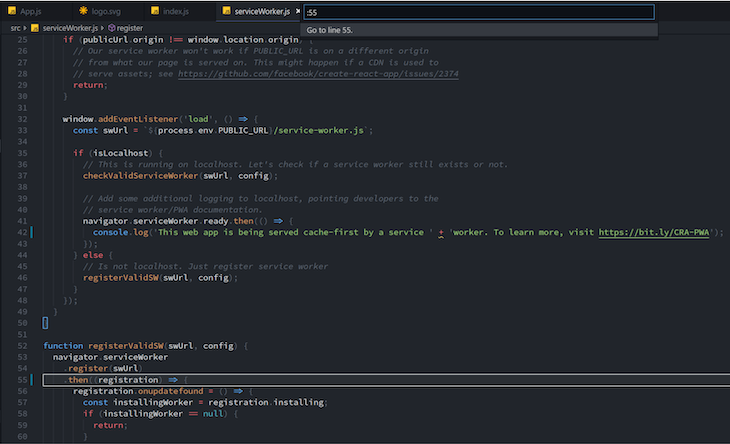
Imagine we want to jump straight to a specific line — for example, when there’s an error pointing to it. To jump to a line with a specified index, we can use ctrl + g.
Often we want to fix something quickly in one place of the code and jump right back to where we were before. This we do using ctrl + u (⌘ + u), which takes the cursor back to where it was prior to the jump.
To jump to the beginning or the end of a file we can use ctrl + home (⌘ + up) and ctrl + end (⌘ + down) respectively.
Have you ever searched for a definition by hand or by ctrl + shift + f (⌘ + shift + f)? If you have, then you know how annoying that can be. VSC has a great shortcut for that!
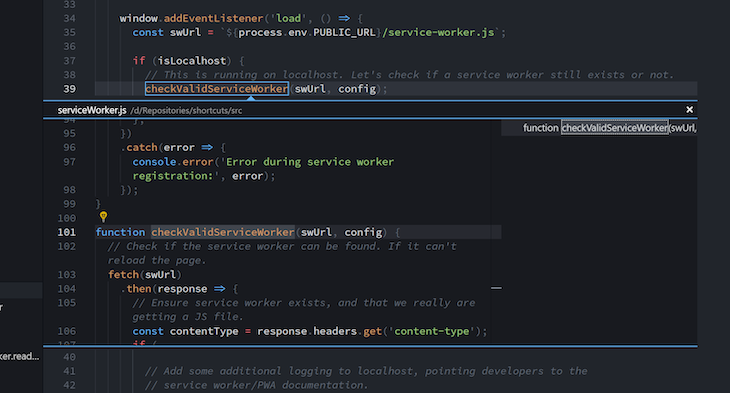
We can jump to the definition of a function or a variable currently highlighted using F12.
Often we only want to have a quick peak at the implementation of, say, a function. Ideally, we don’t want to open another file just to check a few lines. By using alt + F12 (option + F12), we can peek at the implementation of a highlighted function right there next to the cursor. Once we’re done, we just press esc.
There’s also a shortcut for peeking at references of a symbol in a similar manner — right next to the cursor. We do this with shift + F12 (⌘ + k and F12).
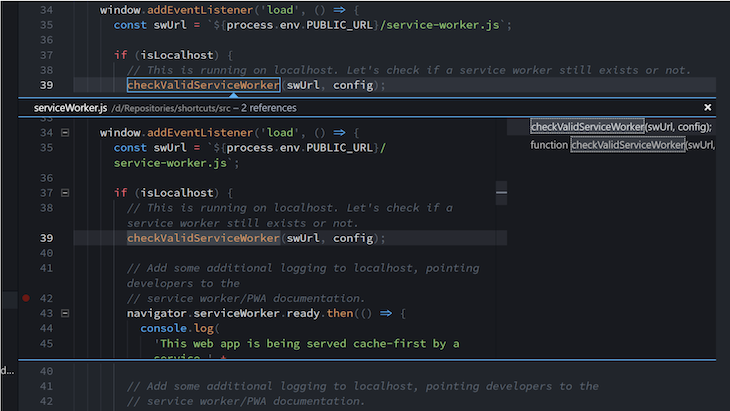
In both cases, we can use the up and down arrows to choose the definition we would like to see or jump to.
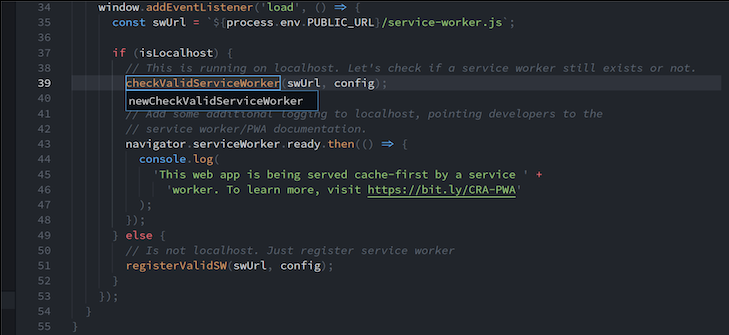
Changing the name of a given symbol (e.g., the name of a function) throughout the whole project can be tedious. It is usually done with ctrl + shift + f (⌘ + shift + f) — we manually replace each usage of the symbol.
This can be done faster with the F2 shortcut. It prompts a window where we type the new name of a currently highlighted symbol, and that’s it — every occurrence has now been replaced with the new name.
When there’s something wrong with our code, VSC underlines it with a red line. Usually, we could just hover over the code with the mouse cursor and see what’s wrong. We can, however, do it much faster by using F8.
We can leave the “error mode” by clicking the esc key.
As was the case with the errors, when we hover over a symbol, VSC shows us its simplified definition. To achieve the same result with the keyboard, we have to set up our own shortcut.
We can set our own shortcuts by using ctrl + k (⌘ + k) and then ctrl + s (⌘ + s), which will open the shortcuts settings view.

Then search for the Show hover action:

And set it to your preferred shortcut. I have chosen alt + shift + s.
The shortcut in action:
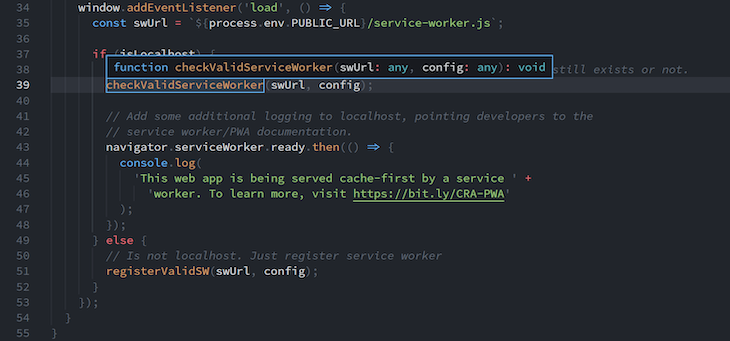
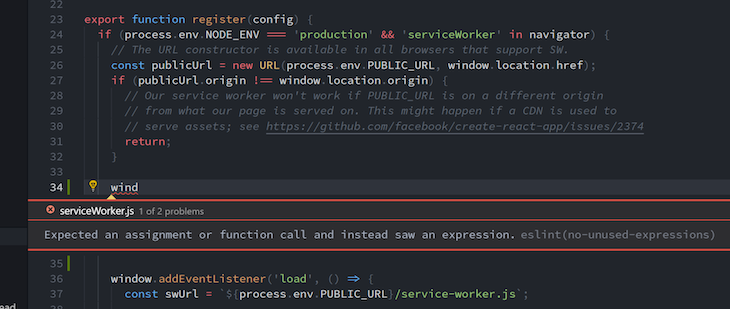
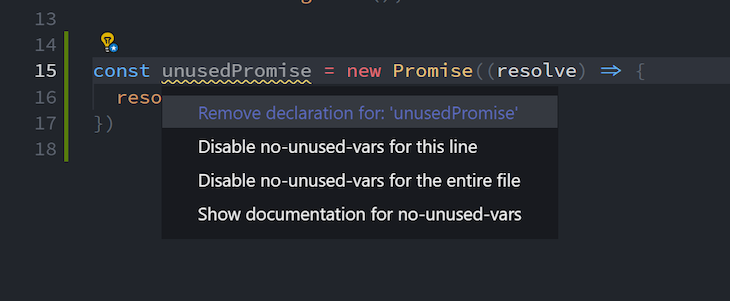
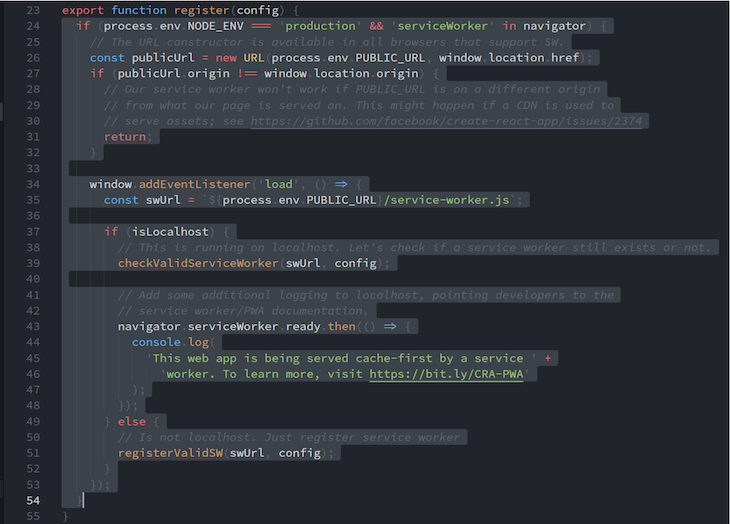
Sometimes VSC is able to fix our problems by, for example, importing the code we forgot to import ourselves or removing unused code. To see the available actions for the currently highlighted code, we can use ctrl + . (⌘ + .).
Code is made of blocks, be it a body of a function or an if block. Sometimes we want to select the whole thing and, say, remove it without worrying about where the block begins and ends.
The alt + shift + left / right (⌘ + ctrl + shift + left / right) shortcut makes it a breeze to select pieces of code based on scope. Repeated use of this shortcut makes the selection appropriately bigger or smaller.
With Visual Studio Code opened in the full-screen mode, it is often convenient to have a terminal right there with us. Switching between the terminal and code calls for a few shortcuts of its own.
To open a terminal, we use ctrl + `.
To open more terminals, we use ctrl + shift + `.
Terminal, just like the editor, can be split up into panels. For this we use ctrl + shift + 5.

To focus on a terminal, while in the editor, we use ctrl + `. If we use ctrl + ` while the terminal is focused, we can toggle its state from shown to hidden.
Once we are focused on the terminal, we can use alt + left/right (⌘ + option + left / right) to switch focus between split panels.
Here are some terminal shortcuts I found to be very helpful.
Killing a terminal can be achieved by clicking the trash icon in the top-right corner of the terminal, but in order for it to be a mouse-free experience, we have to set up a shortcut.
While in the shortcuts settings input, type in “workbench.action.terminal.kill” and then click on it to set up the shortcut. I have chosen to use ctrl + shift + x, but whatever works for you is fine.

Sometimes, when there’s a lot of logs coming in, we would like to temporarily make the terminal larger. Same spiel as before, but in the settings, type workbench.action.toggleMaximizedPanel. Here, I have chosen to put it under ctrl + shift + q.

In case you don’t know what the shortcut is for something, you can always open up the command palette with ctrl + shift + p (⌘ + shift + p) and type in what you want the shortcut to do, e.g., “open terminal.” Most of the time, it will show you the correct action with the shortcut next to the name.

The key to mastering these shortcuts is consistency. Try to implement them gradually, and before you know it, you’ll find yourself relying less and less on the mouse, which in turn will make your coding experience much smoother and more efficient.
Want to learn more? Here’s Visual Studio Code’s documentation.
Have some killer shortcuts that I forgot? Share them down below!
Install LogRocket via npm or script tag. LogRocket.init() must be called client-side, not
server-side
$ npm i --save logrocket

// Code:

import LogRocket from 'logrocket';
LogRocket.init('app/id');
// Add to your HTML:

<script src="https://cdn.lr-ingest.com/LogRocket.min.js"></script>
<script>window.LogRocket && window.LogRocket.init('app/id');</script>
Hey there, want to help make our blog better?
Join LogRocket’s Content Advisory Board. You’ll help inform the type of content we create and get access to exclusive meetups, social accreditation, and swag.
Sign up now
Not sure if low-code is right for your next project? This guide breaks down when to use it, when to avoid it, and how to make the right call.

Compare Firebase Studio, Lovable, and Replit for AI-powered app building. Find the best tool for your project needs.

Discover how to use Gemini CLI, Google’s new open-source AI agent that brings Gemini directly to your terminal.

This article explores several proven patterns for writing safer, cleaner, and more readable code in React and TypeScript.


11 Replies to "Learn these keyboard shortcuts to become a VS Code ninja"
Great article thanks, would love this in a printable cheat-sheet format.
Hey Andy, thanks for the comment. I’m the Marketing Intern here at LogRocket and after reading your comment, I couldn’t agree more. Click here for the cheat sheet which can be printed on a double-sided single page. I hope you may find this useful!
Thanks for this, Maciej. Really helpful. I’m reading the 20th anniversary edition of the The Pragmatic Programmer and just read the section about becoming skilled with your editor’s shortcuts. Your article and cheat sheet here are super-helpful resources for achieving this outcome. Note: in VSC, I’m a frequent user of ⌘ + t to quickly search for any file I want and ⌘ + \ to open and hide the side panel so I can focus on the file I’m working in.
Thank you so much for your kind words. Yeah, the shortcuts you describe are also really helpful, thanks!
This is a great article. I like the systematic approach from opening the right editor windows all the way down to tracking a path in source code. Well done!
Enjoyed this post. Learning keyboard shortcuts is worth the effort. My goal is to be able to throw away my mouse!
I think using vscodevim is very helpful with this; Two of my favorite shortcuts right now which are built into vsvim are gd and gw
gd – go to definition (reaching for the f-keys is difficult)
gh – go to hover – show the result of a mouse hover – (show what type var is, or full namespace names)
Yeah, the one thing that I can’t find on VSC which is there in the Visual C++ IDE is Ctrl+PgUp and Ctrl+PgDn bringing you to the top and bottom of screen immediately – which since I miss it entirely I apparently use a ton. It speeds up the coding and since coding is mostly secretarial work this is important… I also couldn’t find a command to do this in the command palette and neither an extension that offers this functionality. I’d take anything…
Another bit of missing and oft-used functionality is “transpose words around the cursor”. In Visual C++ IDE this is Shift+Ctrl+T (if I remember correctly). There is “transpose characters around the cursor” functionality in Visual Studio Code however this is used much less often. I find myself wanting to use “transpose words around the cursor” 3-4 times a day and it just isn’t available… ;-(
Maybe the VS Code folks changed the shortcuts for Mac. When I’m in Explorer and hit enter on a folder I get the option to rename it, not open it. Right arrow opens the folder.
what colour theme is used here?
Thanks for this epic blog post, Been searching for something like this since I’m forced to use vscode over vim by my mentor