The Replay is a weekly newsletter for dev and engineering leaders.
Delivered once a week, it's your curated guide to the most important conversations around frontend dev, emerging AI tools, and the state of modern software.
RPC (remote procedure call), in simple terms, is a protocol that is used for client-server applications which allows software developers to request a procedure or a function call to a remote server. In this tutorial, you will be learning how to build an RPC server in Go along with an RPC client in Node.js.
You’ll need:
In this article, we will be building a chat RPC server to send a message and return descriptive details of a user. The send message procedure will accept the message body while the other will accept the user’s name and age.
In this step, you will be building your RPC server. Start by creating a new project directory by running:
mkdir rpc-server
Change directory to the newly created folder:
cd rpc-server
A protocol buffer is a data format created by Google to enable developers to generate source code based on the data and service specified for any programming language.
Create a proto file named chat.proto:
touch chat.proto
Open chat.proto with your desired editor and paste the following code:
syntax = "proto3";

package chat;

message Message {
  string body = 1;
}

message Details {
  string name = 1;
  int32 age = 2;
}

message Response {
  string body = 1;
}

service ChatService {
  rpc SayHello(Message) returns (Response) {}
  rpc GetDetails(Details) returns (Response) {}
}
Let us go through what each block does:
syntax = "proto3";
This specifies what version of protobuf we intend to write.
message Message {
  string body = 1;
}
This declares a Message data object that can only contain a string element with the tag body.
message Details {
  string name = 1;
  int32 age = 2;
}
This declares a Details data object that can only contain a string element with the tagged name and an integer element with the tagged age.
message Response {
  string body = 1;
}
This declares a Response data object that can only contain a string element with the tag body.
service ChatService {
  rpc SayHello(Message) returns (Message) {}
  rpc GetDetails(Details) returns (Details) {}
}
This declares a new service called ChatService which will contain two methods, SayHello method which accepts the Message data object and returns Response and the GetDetails method which accepts Details and returns Response back as well. Save and exit the file.
Note: You can learn more about protobuf here.
We will generate a protocol buffer Go code based on the proto file we wrote in the previous step. While still being in the rpc-server directory, run the following command:
mkdir chat
This will generate a new folder named chat within the rpc-server directory. This is where you place our generated Go code along with the implementation of your chat.proto file. Run the following to generate your go code off your chat.proto file:
protoc --go_out=plugins=grpc:chat chat.proto
Note: You can learn more about Go generated code here.
This will generate a new file named chat.pb.go in the chat directory created earlier.
Note: Do not modify the contents of chat.pb.go.
In this step, we will be implementing the methods in ChatService as defined in chat.proto.
Create a new file named chat.go:
touch chat.go
Open chat.go with your desired editor and paste the following code:
package chat

import (
    "fmt"
    "golang.org/x/net/context"
    "log"
)

type Server struct{}

func (s *Server) SayHello(ctx context.Context, message *Message) (*Response, error) {
    log.Println("SayHello Called")
    return &Response{Body: fmt.Sprintf("New Message: %s", message.Body)}, nil
}

func (s *Server) GetDetails(ctx context.Context, message *Details) (*Response, error) {
    log.Println("GetDetails Called")
    return &Response{Body: fmt.Sprintf("Your name is %s and you're %d years old", message.Name, message.Age)}, nil
}
Let me break down the essentials:
type Server struct{}
This acts as a server interface to this ChatService implementation, we will be using this later on to plug into the RPC server.
The first function implements the SayHello function, when called it will log
SayHello Called to the console while returning the Response object along with the message body passed to it back to the client.
The second function implements the GetDetails function, when called it will log
GetDetails Called to console while returning the Response object along with a custom message containing the data passed back to the client.
Both methods return error and a pointer reference of Response which exists as a struct in the chat.pb.go file generated based on what we defined in chat.proto.
Note: Implemented methods must return a pointer reference of what was defined in the proto declaration and error.
In this step, you will serve the ChatService via RPC. Change directory away from /chat to the root of your rpc-server directory.
cd ..
Generate mod file:
go mod init grpc-server/chat
Create a new file named server.go:
touch server.go
Open server.go with your desired editor and paste the following code:
package main

import (
    "fmt"
    "grpc-server/chat"
    "log"
    "net"

    "google.golang.org/grpc"
)

func main() {
    listener, err := net.Listen("tcp", fmt.Sprintf(":%d", 9000))

    if err != nil {
        log.Fatal(err)
    }

    chatServer := chat.Server{}

    grpcServer := grpc.NewServer()

    chat.RegisterChatServiceServer(grpcServer, &chatServer)

    if err := grpcServer.Serve(listener); err != nil {
        log.Fatal(err)
    }
}
In the import block other than Go’s standard libraries, we are importing the chat package which allows you to invoke the server struct interface declared in chat.go and call the RegisterChatServiceServer method auto-generated for us in the chat.pb.go, this method accepts two arguments, a new server instance of grpc and the memory location of the chat server.
The last block serves our RPC server on port 9000 via TCP as declared earlier in listener. Save and exit the file. The content structure of rpc-server should be similar to what we have below:
🗂rpc-server/
  🗂chat/
    🗒 chat.go
    🗒 chat.pb.go
  🗒 chat.proto
  🗒 go.mod
  🗒 server.go
Start your RPC server by running:
go run server.go
Open a new terminal instance and create a different folder outside rpc-server named rpc-client by running:
mkdir rpc-client
Change directory to rpc-client:
cd rpc-client
Initiate npm:
npm init
Accept the default options by pressing return/enter all through to the end. Next, Install the RPC package:
npm i node-grpc-client
Create a chat.proto file:
touch chat.proto
Copy the contents of chat.proto located in rpc-server into your newly created chat.proto. Create a new file named client.js:
touch client.js
Open client.js with your desired editor and paste the following code:
const GRPCClient = require('node-grpc-client')

const path = require("path")

const PROTO_PATH = path.resolve(__dirname, 'chat.proto')

const client = new GRPCClient(PROTO_PATH, 'chat', 'ChatService', 'localhost:9000')

const message = {
    body: "Hello from Trojan",
}

const details = {
    name: "Trojan",
    age: 40
}

client.runService('SayHello', message, (err, res) => {
    console.log(res.body);
});

client.runService('GetDetails', details, (err, res) => {
    console.log(res.body);
});
You can check out the node-grpc-client package documentation to fully understand what this does. Save and exit.
The content structure of rpc-server should be similar to what we have below:
🗂rpc-client/
  🗂node_modules/
  🗒 chat.proto
  🗒 client.js
  🗒 package.json
  🗒 package-lock.json
Run your client code to make calls to the RPC server by executing:
node client.js
This will return the following output from the server: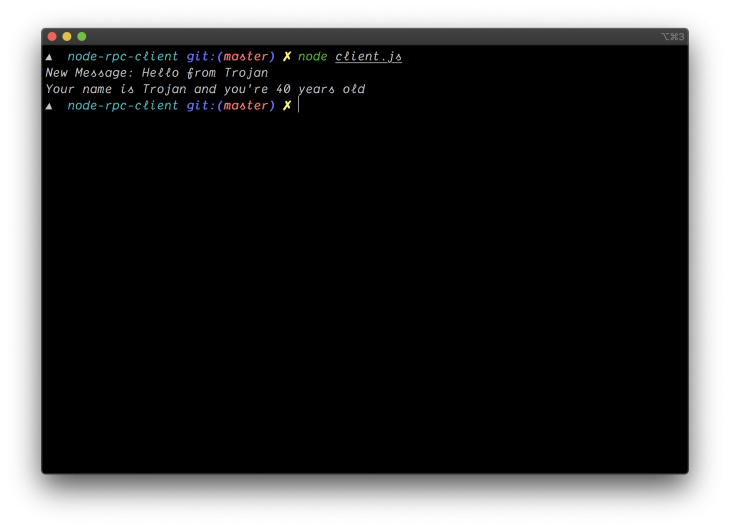
It works, go ahead and check the log output from the server on its terminal tab/window:
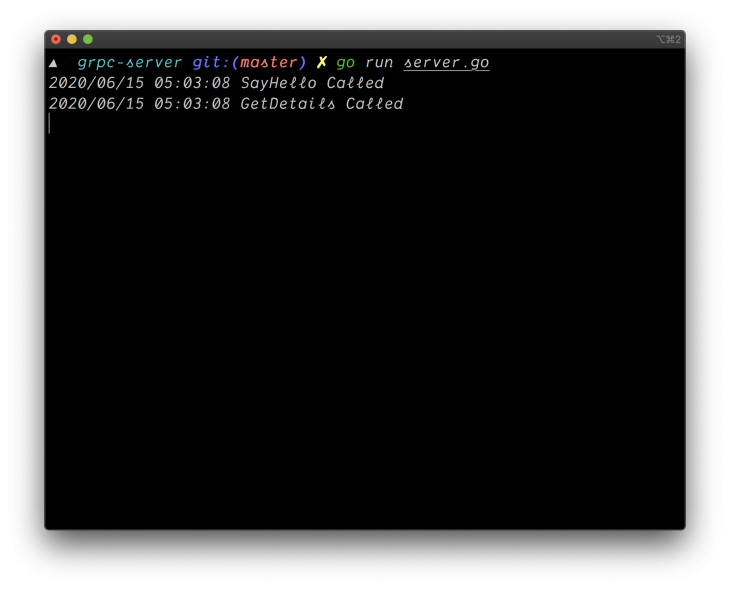
As you can see in the image above, SayHello Called and GetDetails Called was logged as expected as the functions were accessed by the client.
At the end of this tutorial, you should have an understanding of how to build an RPC server in Go and how to make calls to procedures on the server via a client written in Node. You can find the repositories of both the RPC server and RPC client on GitHub.
 Monitor failed and slow network requests in production
Deploying a Node-based web app or website is the easy part. Making sure your Node instance continues to serve resources to your app is where things get tougher. If you’re interested in ensuring requests to the backend or third-party services are successful, try LogRocket.

LogRocket lets you replay user sessions, eliminating guesswork around why bugs happen by showing exactly what users experienced. It captures console logs, errors, network requests, and pixel-perfect DOM recordings — compatible with all frameworks.
LogRocket's Galileo AI watches sessions for you, instantly identifying and explaining user struggles with automated monitoring of your entire product experience.
LogRocket instruments your app to record baseline performance timings such as page load time, time to first byte, slow network requests, and also logs Redux, NgRx, and Vuex actions/state. Start monitoring for free.

Learn how sibling-index() enables clean, JavaScript-free stagger animations using native CSS.

useEffect breaks AI streaming responses in ReactSee why useEffect breaks AI streaming in React, and how moving stream state outside React fixes flicker and stale updates.

A real-world debugging session using Claude to solve a tricky Next.js UI bug, exploring how AI helps, where it struggles, and what actually fixed the issue.

CSS wasn’t built for dynamic UIs. Pretext flips the model by measuring text before rendering, enabling accurate layouts, faster performance, and better control in React apps.
Hey there, want to help make our blog better?
Join LogRocket’s Content Advisory Board. You’ll help inform the type of content we create and get access to exclusive meetups, social accreditation, and swag.
Sign up now

