On July 6, React Native announced that a new version of React Native 0.63 would be shipped with LogBox and turned on by default. Prior to this release, the community had raised concerns about errors and warnings that were difficult to debug. The React Native team responded by redesigning the entire error, warnings, and logging system from the ground up.

In this guide, we’ll go over the basics and walk you through how to use LogBox.
If you’ve ever experienced the hideous red or yellow box in React Native, you’ll understand why something had to be done. To improve velocity and the overall developer experience, the React Native team introduced the LogBox, which offers a completely redesigned logging experience.
LogBox addresses complaints that errors and warnings in React Native were too verbose, poorly formatted, and unactionable. The new solution is:
LogBox is also a complete improvement of the visual design that’s consistent between errors and warnings.
In React Native 0.63, LogBox is turned on by default, no configuration needed. If you’re using an older version, you can enable LogBox by importing React Native.
require('react-native').unstable_enableLogBox();
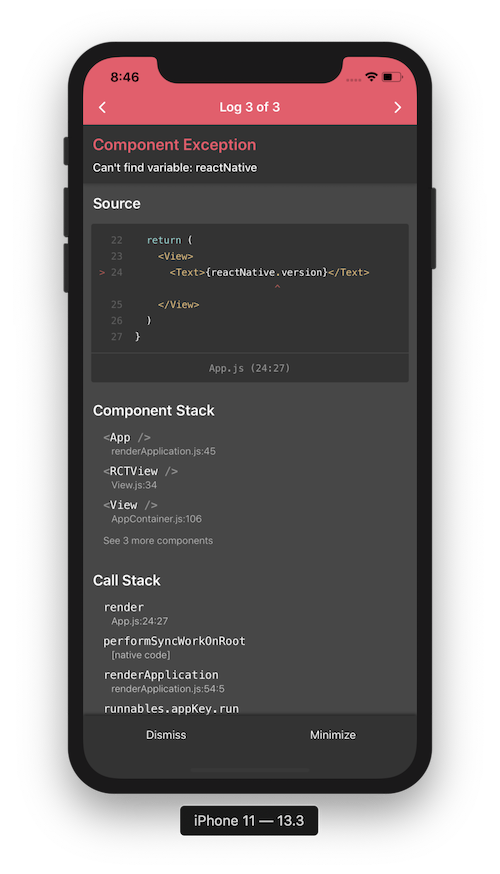
If you run into any errors while you’re coding, LogBox will pop out like this automatically:
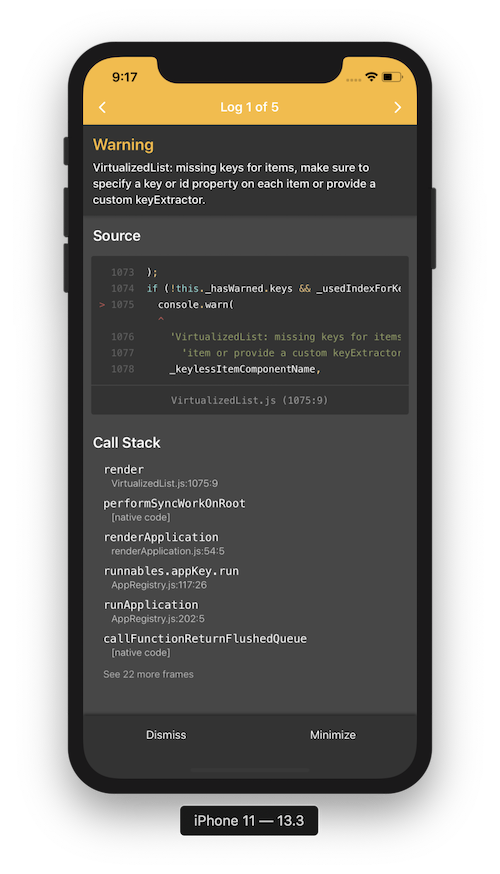
Similarly, when you encounter warnings in your source codes, the new yellow box will display.
To show you LogBox in action, we’ll build a simple application in React Native 0.63.
If you’re just starting out with React Native, you might want to read this guide to setting up the development environment.
After successful installation and configuration, run the following commands to create a new React Native project.
expo init todos-native
cd todos-native
npm start
Make sure you install the current version, React Native 0.63.
If you want, you can simply clone this React Native app by AndrewMorsillo.
For the purpose of this tutorial, we’ll simply modify the App.js file to display a list of information on the screen and introduce error and warning functions.
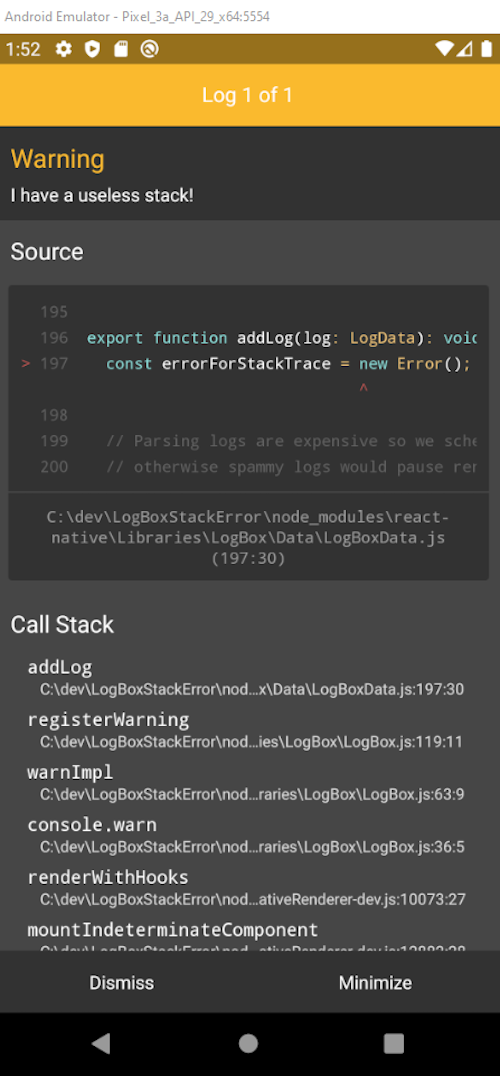
The application should reload automatically once you save your changes. Below we’re presented with the newly and nicely redesigned yellow box.
In this article, we reviewed the new features of React Native. We also showed how the team completely redesigned the logging functionality to improve the developer experience and boost velocity.
Happy debugging!

LogRocket's Galileo AI watches sessions for you and and surfaces the technical and usability issues holding back your React Native apps.
LogRocket also helps you increase conversion rates and product usage by showing you exactly how users are interacting with your app. LogRocket's product analytics features surface the reasons why users don't complete a particular flow or don't adopt a new feature.
Start proactively monitoring your React Native apps — try LogRocket for free.

Chrome’s Modern Web Guidance embeds modern web platform skills into AI coding agents, helping them choose native HTML, CSS, and browser APIs over legacy patterns.

Learn how to use Fallow to analyze AI-generated code, detect dead code, duplicate logic, and complexity issues, and integrate automated code quality checks into your AI-assisted development workflow.

Learn how to protect full-stack projects from NPM supply chain attacks with a practical security checklist.

Explore 15 essential MCP servers for web developers to enhance AI workflows with tools, data, and automation.
Hey there, want to help make our blog better?
Join LogRocket’s Content Advisory Board. You’ll help inform the type of content we create and get access to exclusive meetups, social accreditation, and swag.
Sign up now

