
Virtual reality (VR) is an interactive technology that allows users to step into a computer-generated, three-dimensional world and experience it as if they were truly there. Using advanced hardware and software, VR technology creates a simulated environment that mimics the physical world, complete with lifelike sights, sounds, and even sensations.

Augmented reality (AR) is a technology that enhances the real world with virtual elements, creating a layered experience that seamlessly blends the physical and digital worlds. Unlike Virtual reality, which completely immerses the user in a computer-generated environment, AR uses a device such as a smartphone, tablet, or specialized glasses to overlay digital information onto the user’s view of the real world. This can take the form of images, text, videos, or animations that are superimposed on the user’s surroundings, allowing them to interact with digital content in real time.
In this tutorial, you will learn how to use the A-Frame and the AR.js libraries to integrate virtual reality and augmented reality into a Node.js application.
By the end of this tutorial, you will have an application capable of providing virtual and augmented reality experiences like the following example:
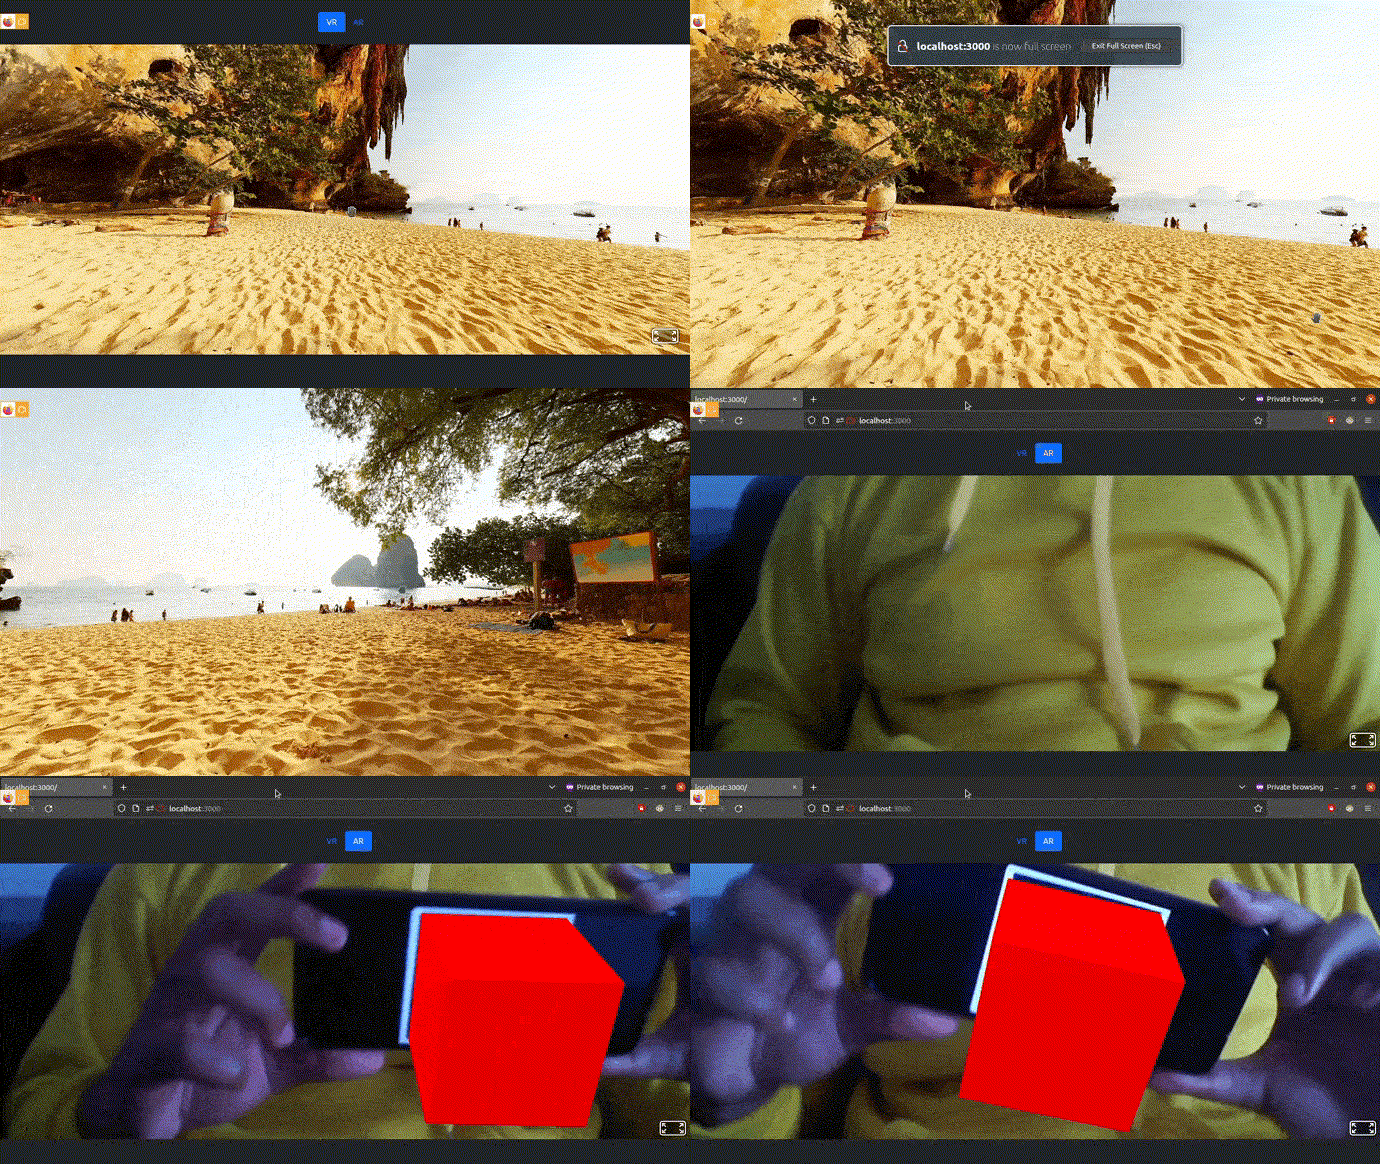
Jump ahead:
The Replay is a weekly newsletter for dev and engineering leaders.
Delivered once a week, it's your curated guide to the most important conversations around frontend dev, emerging AI tools, and the state of modern software.
In order to follow this tutorial you will need Node and npm.
In this section, you will create your project’s directory structure. Then you will initialize a Node.js project for your application’s server.
Create a new directory named node-AR-VR :
mkdir node-AR-VR
Navigate into the directory you have just created:
cd node-AR-VR
next, create a directory named public :
mkdir public
The public directory will be used to store static assets such as images, style sheets, and client-side JavaScript files.
Then, navigate into the public directory :
cd public
Use the following command to create the directory where you will store the images:
mkdir images
Next, download the following 360 degree image by tomazolivier from Pixabay and saved it in the images directory under the name beach.jpg. You will use this image to create a virtual reality experience:

Navigate to your project’s root directory:
cd ..
Then, create a new Node project with the default settings :
npm init -y
Install this application’s server dependency:
npm install express
The command above installs the express Node module. express is a popular JavaScript library for building web applications with Node.js. It provides a simple and easy-to-use interface for creating routes, handling requests, and rendering templates. It is designed to be lightweight and flexible, and it is widely used as the basis for many web application frameworks. This dependency will be used to create the application’s server.
In this section, you will create the application’s server. This server will be responsible for serving the webpage where you will implement the virtual reality and augmented reality functionality when the / endpoint receives an HTTP request.
Using your preferred code editor, create a file named server.js in your project’s root directory and add the following code to it:
const express = require('express')
const app = express()
const port = 3000
In the block of code above, first, you imported the express module.
After importing the module, you created an instance of an Express application and stored the object in a variable named app. The app variable will be used to configure and control the web server.
Lastly, you created a constant variable called port and assigned it the value of 3000. This is the port number on which the web server will listen for incoming requests.
Add the following code to the bottom of your server.js file:
app.use(express.static('public'))

app.listen(port, () => {
  console.log(`Example app listening at http://localhost:${port}`)
})
The first line in the code above tells the Express application to serve static files stored in the public directory.
The third and the remaining lines tell the Express application to start listening for incoming requests on the port specified by the port variable. Alongside the port, an anonymous function is also passed as an argument to the app.listen() method. This function will log a message to the console when the server starts listening for incoming requests.
Go back to your terminal and run the following command to start your server :
node server.js
Open your preferred browser and navigate to http://localhost:3000/ and you should see the following:

You are getting the error above because you haven’t created any pages yet.
In this section, you will create the main HTML file for your application, which will contain the layout that is displayed to the client. The layout consists of a page with two tabs: “AR” and “VR”. The “AR” tab is where you will implement the augmented reality functionality and the “VR” tab is where you will implement the virtual reality functionality.
Go back to your code editor and inside the public directory, create a file named index.html and add the following code to it:
<!DOCTYPE html>
<html>
<link href="https://cdn.jsdelivr.net/npm/[email protected]/dist/css/bootstrap.min.css" rel="stylesheet"
  integrity="sha384-EVSTQN3/azprG1Anm3QDgpJLIm9Nao0Yz1ztcQTwFspd3yD65VohhpuuCOmLASjC" crossorigin="anonymous">
<body>
  <script src="https://cdn.jsdelivr.net/npm/[email protected]/dist/js/bootstrap.bundle.min.js"
    integrity="sha384-MrcW6ZMFYlzcLA8Nl+NtUVF0sA7MsXsP1UyJoMp4YLEuNSfAP+JcXn/tWtIaxVXM"
    crossorigin="anonymous"></script>
</body>
</html>
In the block of code above, you added Bootstrap to this HTML document.
Add the following code before the <script> tag inside the body section:
<body>
  <div class="bg-dark">
    <div class="pt-4">
      <nav class="nav nav-pills justify-content-center">
        <a class="nav-item nav-link active" data-bs-target="#tab-1" data-bs-toggle="tab">VR</a>
        <a class="nav-item nav-link " data-bs-target="#tab-2" data-bs-toggle="tab">AR</a>
      </nav>
    </div>
    <div class="tab-content pt-4" style="height: 100vh">
      <div class="tab-pane active" id="tab-1">
        <iframe src="vr.html" style="height: 80vh; width: 100vw">
        </iframe>
      </div>
      <div class="tab-pane  " id="tab-2">
        <iframe src="ar.html" style="height: 80vh; width: 100vw">
        </iframe>
      </div>
    </div>
  </div>
</body>
Here, you used Bootstrap to create two tabs named “AR” and “VR”. These tabs will be used to display the contents of two HTML files in separate iframe elements. These HTML files will be named ar.html and vr.html and will contain the AR and VR functionalities respectively.
Your index.html file should look similar to the following:
<!DOCTYPE html>
<html>
<link href="https://cdn.jsdelivr.net/npm/[email protected]/dist/css/bootstrap.min.css" rel="stylesheet"
  integrity="sha384-EVSTQN3/azprG1Anm3QDgpJLIm9Nao0Yz1ztcQTwFspd3yD65VohhpuuCOmLASjC" crossorigin="anonymous">

<body>
  <div class="bg-dark">
    <div class="pt-4">
      <nav class="nav nav-pills justify-content-center">
        <a class="nav-item nav-link active" data-bs-target="#tab-1" data-bs-toggle="tab">VR</a>
        <a class="nav-item nav-link " data-bs-target="#tab-2" data-bs-toggle="tab">AR</a>
      </nav>
    </div>
    <div class="tab-content pt-4" style="height: 100vh">
      <div class="tab-pane active" id="tab-1">
        <iframe src="vr.html" style="height: 80vh; width: 100vw">
        </iframe>
      </div>
      <div class="tab-pane  " id="tab-2">
        <iframe src="ar.html" style="height: 80vh; width: 100vw">
        </iframe>
      </div>
    </div>
  </div>
  <script src="https://cdn.jsdelivr.net/npm/[email protected]/dist/js/bootstrap.bundle.min.js"
    integrity="sha384-MrcW6ZMFYlzcLA8Nl+NtUVF0sA7MsXsP1UyJoMp4YLEuNSfAP+JcXn/tWtIaxVXM"
    crossorigin="anonymous"></script>

</body>

</html>
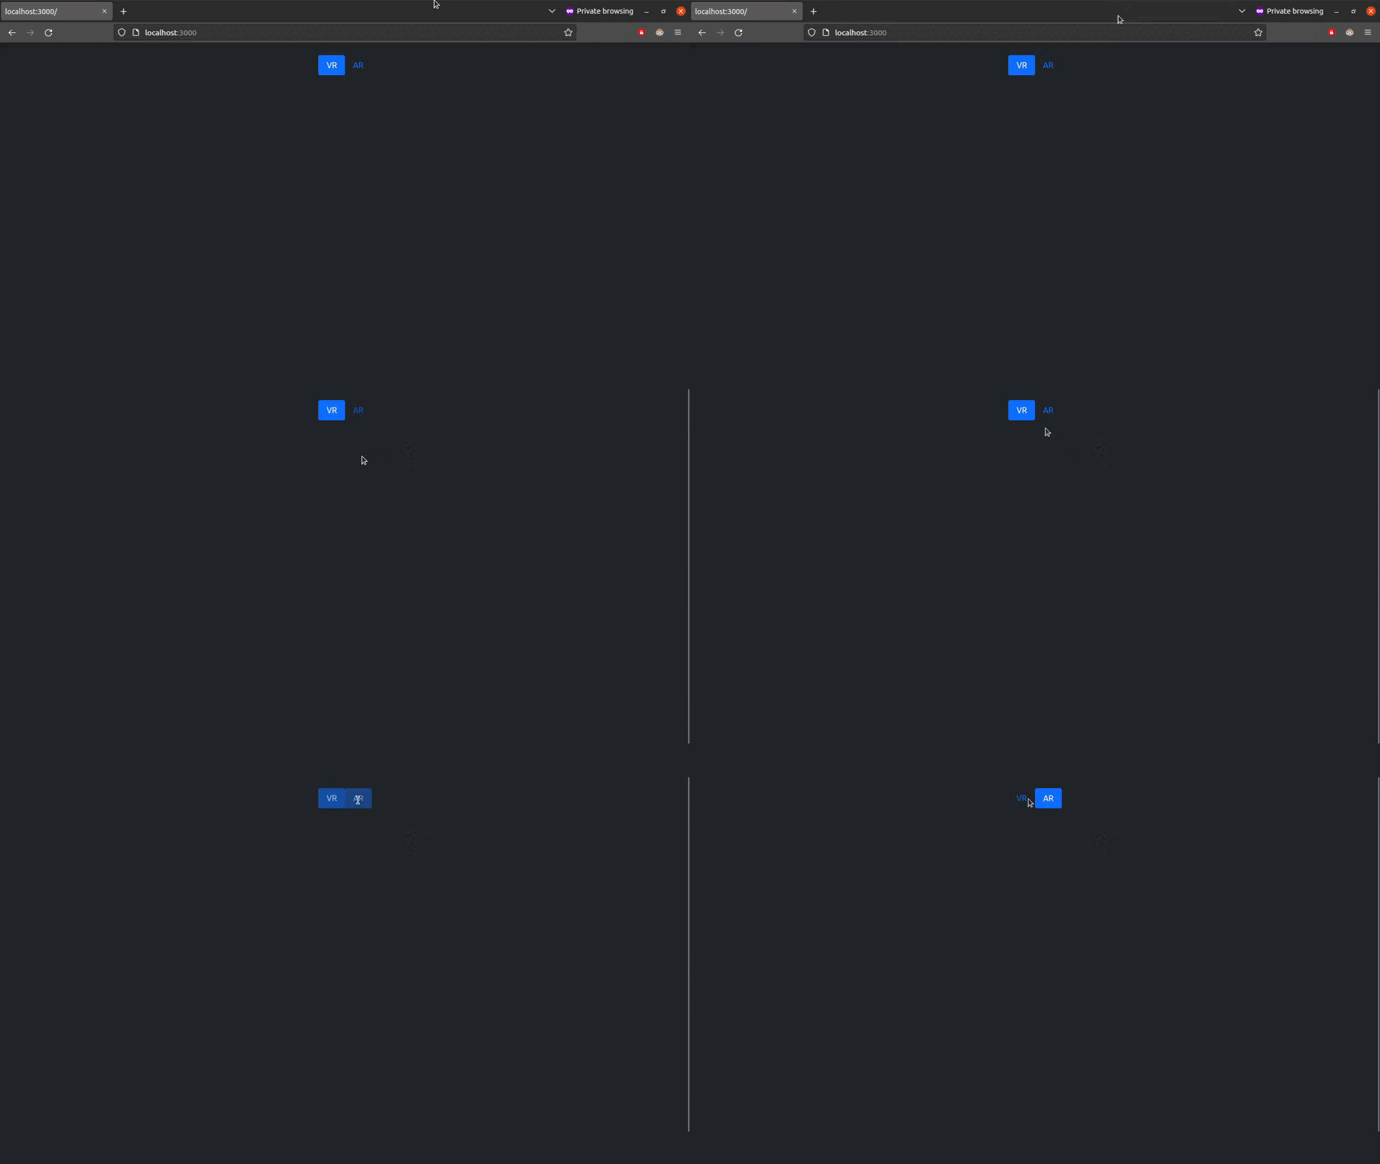
Go back to your browser and the tab where you visited your application, and you should see the following:
In this section, you will learn how to use the A-Frame library to integrate virtual reality into the VR tab.
A-Frame is a web framework designed for building virtual reality experiences, that is built on top of HTML for ease of use. A-Frame is not just a simple 3D scene graph or markup language but rather it is built on a robust entity-component structure that allows for easy manipulation of three.js, providing a powerful and flexible way to design VR experiences.
Go back to your code editor, create a file named vr.html inside the public directory and add the following code to it:
<!DOCTYPE html>
<html>
<head>
    <script src="https://aframe.io/releases/1.4.0/aframe.min.js"></script>
</head>
<body>
</body>
</html>
Here, you added the A-Frame library script to the head section. This script contains the code that will allow you to add the virtual reality functionality to this tab.
Now, add the following code to the body section of this HTML file:
<body>
    <a-scene>
    </a-scene>
</body>
In this block of code, you added an <a-scene> element, which is an A-Frame element that represents a scene.
A scene in A-Frame is a virtual environment that serves as the global container for all entities such as meshes, shapes, lights, and cameras, which can be interacted with and animated to create a believable and immersive virtual reality experience.
Entities are objects that serve as placeholders to which developers can attach components. These components give the entities appearance, behavior, and functionality to create interactive virtual reality experiences.
Now, add the following code inside the <a-scene> element:
<body>
    <a-scene>
        <a-sky src="./images/beach.jpg" rotation="0 -130 0"></a-sky>
    </a-scene>
</body>
Inside <a-scene>, you added an <a-sky> element. <a-sky> is an element provided by A-Frame that allows you to add a background color or a 360 degree image to the scene. This is achieved by creating a large sphere with a chosen color or texture applied to the inside surface.
In the code above, the texture chosen is the 360 degree image named beach.jpg stored in the images directory. The texture is specified by the src attribute, and the rotation is specified by the rotation attribute.
Your complete vr.html file should look like the following:
<!DOCTYPE html>
<html>
<head>
    <script src="https://aframe.io/releases/1.4.0/aframe.min.js"></script>
</head>
<body>
    <a-scene>
        <a-sky src="./images/beach.jpg" rotation="0 -130 0"></a-sky>
    </a-scene>
</body>
</html>
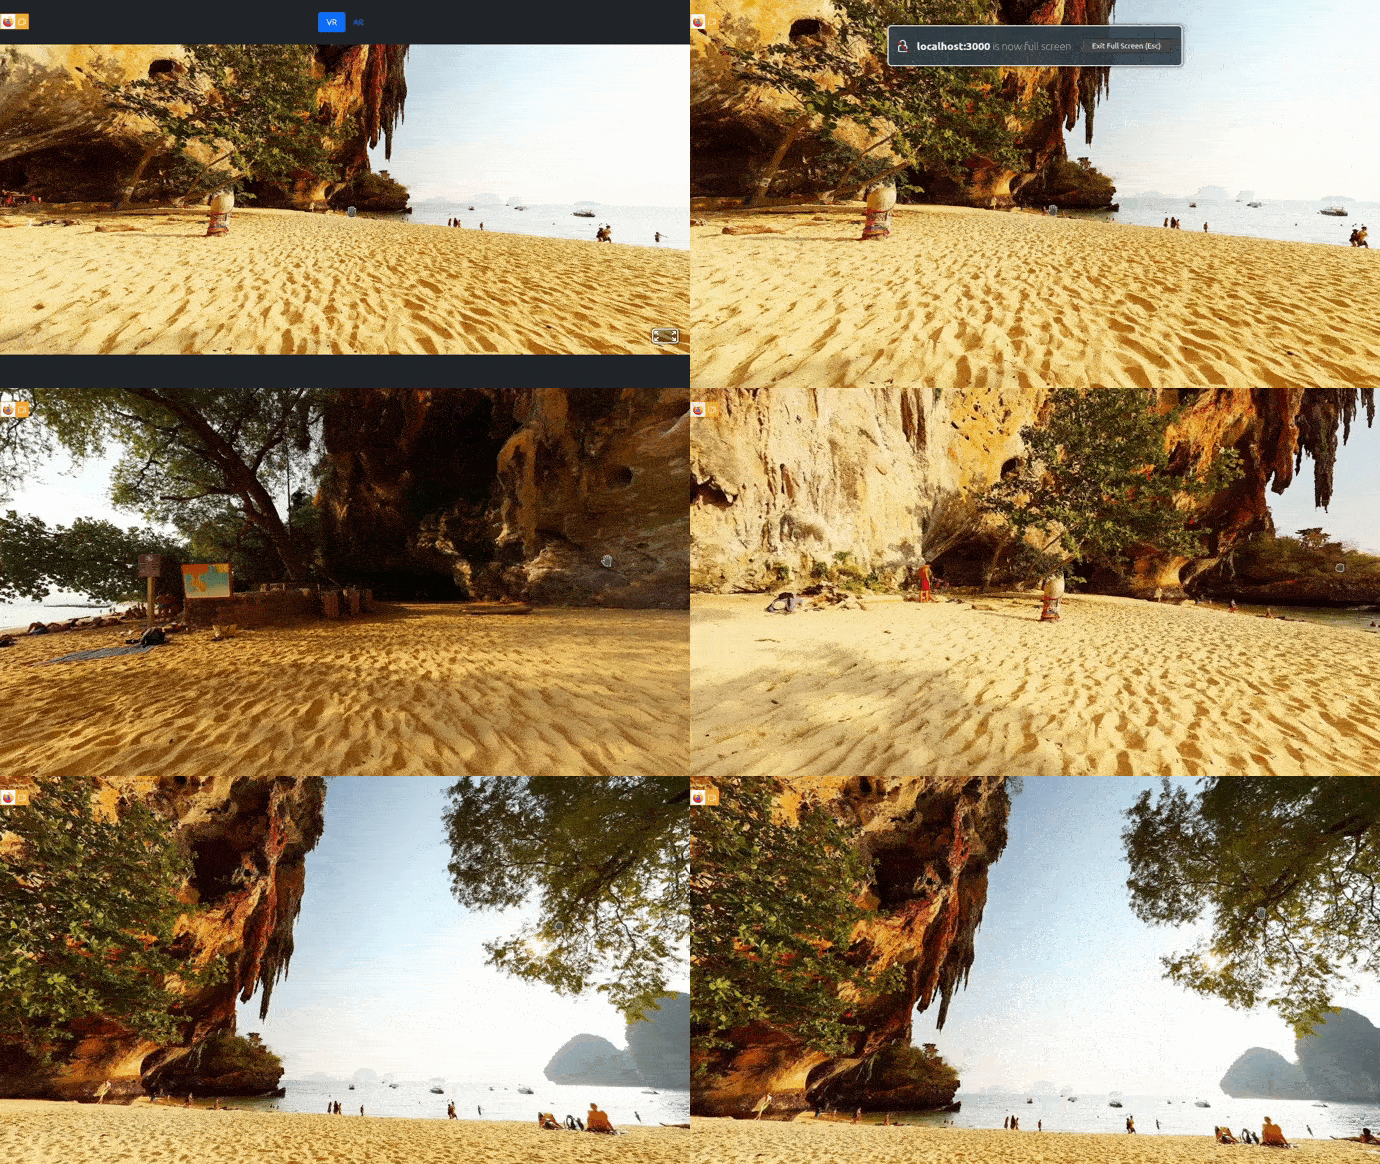
Go back to your browser, refresh the tab where you visited this application, and explore the virtual reality experience:
In this section, you will learn how to use the A-Frame and the AR.js libraries to integrate augmented reality into the ar tab.
AR.js is a lightweight library that allows for the implementation of augmented reality on the web, offering capabilities such as image tracking, location-based AR, and marker tracking.
Image tracking involves detecting a 2D image with a camera and overlaying it with various forms of content, such as 2D images, GIFs, 3D models, and 2D videos, onto or in proximity to it.
Location-based AR involves displaying augmented reality content on a user’s device based on their real-world location. This type of AR is used to create experiences that are tied to specific places in the real world. The user can move around, ideally outdoors, and use their smartphone to view AR content that corresponds to their physical location. As the user moves and rotates their phone, the AR content will change to reflect their position and orientation, with the content appearing larger or smaller depending on its distance from the user.
Marker tracking involves detecting a marker with a camera and overlaying it with various forms of content. Similar to image tracking, markers are stable but limited in shape, color, and size. This feature is ideal for scenarios that require a large number of markers with different content.
In this tutorial, you will implement the marker tracking functionality in your ar tab.
Go back to your code editor, create a file named ar.html inside the public directory and add the following code to it:
<!DOCTYPE html>
<html>
<head>
    <script src="https://aframe.io/releases/1.4.0/aframe.min.js"></script>
    <script src="https://raw.githack.com/AR-js-org/AR.js/master/aframe/build/aframe-ar.js"></script>
</head>
<body>
</body>
</html>
Here, you added the A-Frame and the AR.js scripts to the head section. These scripts contain the code that will allow you to add the augmented reality functionality to this tab.
Now, add the following code to the body section of this HTML file:
<body>
    <a-scene embedded arjs>
    </a-scene>
</body>
In this block of code, you added an <a-scene> element. The embedded component simplifies the process of integrating A-Frame into an existing webpage by eliminating the fullscreen CSS styles, allowing for smoother integration within the layout. arjs specifies that the scene should use the AR.js library to display the augmented reality content.
Add the following code inside the <a-scene> element:
<body>
    <a-scene embedded arjs>
        <a-marker preset="hiro">
            <a-box position="0 0.5 0" material="color: red;"></a-box>
        </a-marker>
        <a-entity camera></a-entity>
    </a-scene>
</body>
You added to <a-scene> the following elements: an a-marker and an a-entity.
a-marker is used to define an AR marker that the camera will look for and track. The preset attribute is set to hiro , which is a predefined marker image that is included with AR.js. Inside a-marker, there is an a-box element that defines a red-colored box and its position in the scene.
The a-entity element with the camera component creates the camera of the scene. camera is the perspective through which the user perceives the scene.
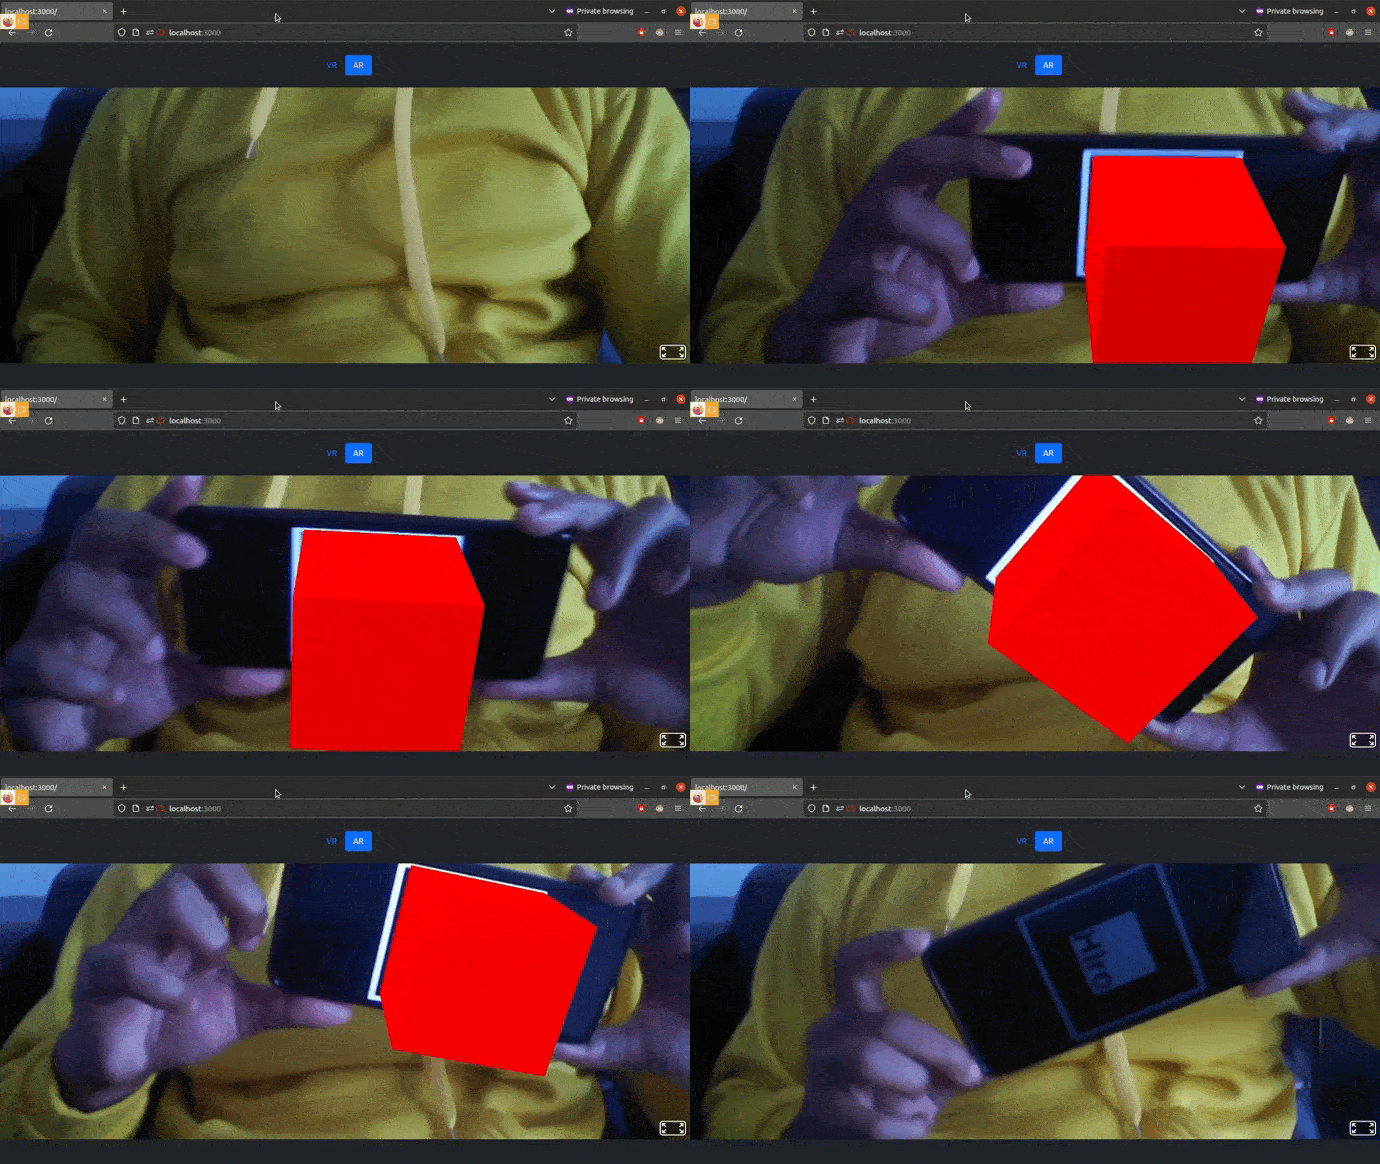
a-box will only be displayed in the scene if the hiro.png image is detected:

Make sure you download this image to your mobile device to test the augmented reality functionality.
Your complete ar.html file should look like this:
<!DOCTYPE html>
<html>
<head>
    <script src="https://aframe.io/releases/1.4.0/aframe.min.js"></script>
    <script src="https://raw.githack.com/AR-js-org/AR.js/master/aframe/build/aframe-ar.js"></script>
</head>
<body>
    <a-scene embedded arjs>
        <a-marker preset="hiro">
            <a-box position="0 0.5 0" material="color: red;"></a-box>
        </a-marker>
        <a-entity camera></a-entity>
    </a-scene>
</body>
</html>
Go back to your browser, refresh the tab where you visited this application, allow this app access to your web camera and click on the “AR” tab. Once the tab opens, open the hiro.png image on your mobile phone and show it to your web camera. When the web camera detects the image, you should see the following:
In this tutorial, first, you learned what virtual and augmented reality are. Then you learned how to use the A-Frame library to integrate virtual reality into your Node application. Lastly, you learned how to use the A-Frame library alongside the AR.js library to integrate augmented reality into your application.
Happy coding!
 Monitor failed and slow network requests in production
Deploying a Node-based web app or website is the easy part. Making sure your Node instance continues to serve resources to your app is where things get tougher. If you’re interested in ensuring requests to the backend or third-party services are successful, try LogRocket.

LogRocket lets you replay user sessions, eliminating guesswork around why bugs happen by showing exactly what users experienced. It captures console logs, errors, network requests, and pixel-perfect DOM recordings — compatible with all frameworks.
LogRocket's Galileo AI watches sessions for you, instantly identifying and explaining user struggles with automated monitoring of your entire product experience.
LogRocket instruments your app to record baseline performance timings such as page load time, time to first byte, slow network requests, and also logs Redux, NgRx, and Vuex actions/state. Start monitoring for free.

@container scroll-state: Replace JS scroll listeners nowCSS @container scroll-state lets you build sticky headers, snapping carousels, and scroll indicators without JavaScript. Here’s how to replace scroll listeners with clean, declarative state queries.

Explore 10 Web APIs that replace common JavaScript libraries and reduce npm dependencies, bundle size, and performance overhead.

Russ Miles, a software development expert and educator, joins the show to unpack why “developer productivity” platforms so often disappoint.

Discover what’s new in The Replay, LogRocket’s newsletter for dev and engineering leaders, in the February 18th issue.
Would you be interested in joining LogRocket's developer community?
Join LogRocket’s Content Advisory Board. You’ll help inform the type of content we create and get access to exclusive meetups, social accreditation, and swag.
Sign up now
2 Replies to "Integrating augmented and virtual reality into a Node.js app"
Thanks for sharing this!
how to detect and mark plane surface instead of barcode?