Type safety is important in programming because it ensures that type errors are caught during compilation by the compiler instead of at the run time. JavaScript is one of the most popular programming languages and the language of the web because it’s fast and lightweight, but it’s also not a strongly typed language, which means that some type errors are not caught during development. This might lead to unexpected consequences within our application.

There have been efforts to create flavors of JavaScript that ensure type safety, such as TypeScript, which has been received well by the JavaScript community. While that’s good enough for general programming, we still need some type of safety check when writing queries and interacting with our database. This is where Slonik comes in.
In this tutorial, I’m going to teach you how to ensure type safety using Slonik. Slonik is a Node.js PostgreSQL driver with strict types, detailed logging, and assertions. You might be wondering why we don’t just use ORMs or query builders that have TypeScript enabled, and while that is true, I believe writing raw queries remains the best way forward.
Though using ORMs might enable you to get started quickly and help protect you from SQL injection, their queries can be inefficient, and you’ll still need to write some complex queries for complex operations. They’ll also hinder you from learning how to write SQL queries properly, which is an important skill to have as a backend engineer.
Thankfully, Slonik gives us the best of both worlds; we get type safety, assertions, logging, and protection against SQL injections while still having total control over our queries. In this tutorial, I’m going to walk you through how to build a backend app that uses PostgreSQL as the database and Slonik as the database driver. I’m going to be building a simple wallet API that allows registered users to send money to each other using their usernames
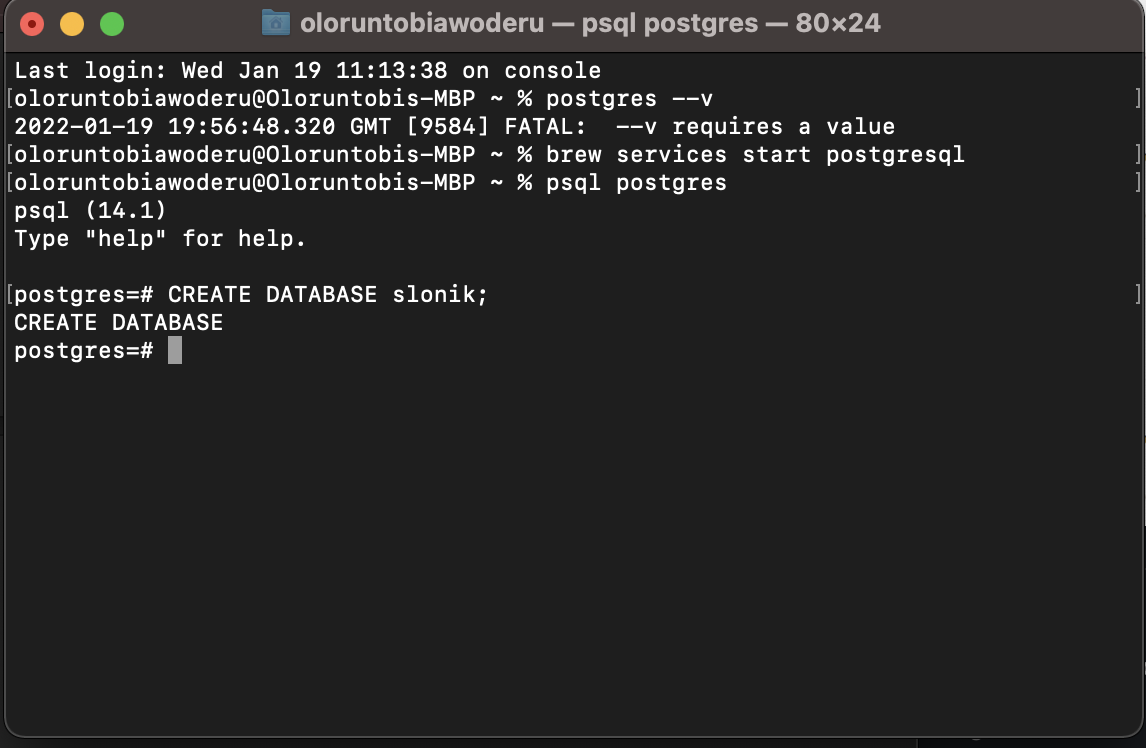
Firstly, we need to install Postgres on our local machine. You can do that by following this link and following the instructions that apply to your operating system.
After installing Postgres, we’ll create a database as seen below:
We’ll also run some queries to create our database tables and attributes:
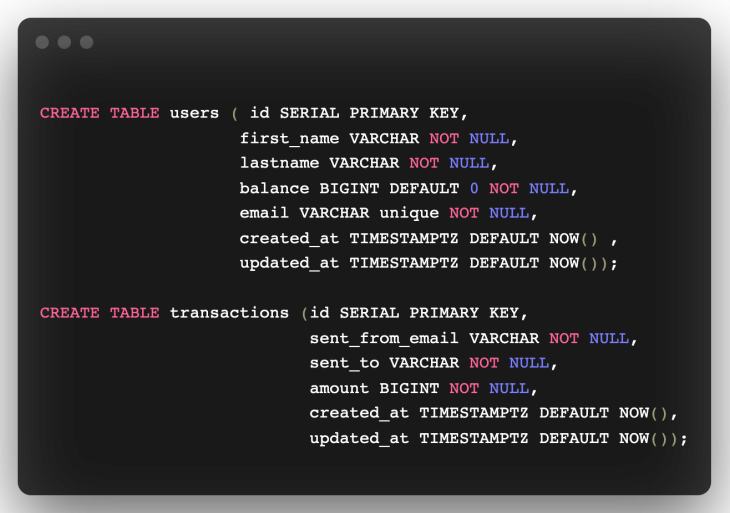
You can run this query on your terminal or using an app like Postico.
You can start by creating a new directory to house the server. In that directory, we’ll initialize the server using npm like so:
mkdir server
cd server/
npm init --yes
The –yes flag initializes the server using the default settings. Running this command should create a package.json file similar to what I have here:
{
  "name": "slonik-example",
  "version": "1.0.0",
  "description": "",
  "main": "index.js",
  "scripts": {
    "test": "echo \"Error: no test specified\" && exit 1"
  },
  "keywords": [],
  "author": "Oloruntobi Awoderu",
  "license": "ISC"
}
Now, we’ll install the required dependencies for this project, and create an index.ts file at the root of the project. Install the dependencies by running this command:
npm i body-parser dotenv express jsonwebtoken slonik ts-node typescript –save-dev @types/body-parser @types/express @types/jsonwebtoken @types/node nodemon @types/pg
After installing these dependencies, we’ll need to create a tsconfig.json file in our root folder to specify the compiler options when compiling our TypeScript to JavaScript.
Use the following configuration:
{
    "compilerOptions": {
      "target": "es6",
      "module": "commonjs",
      "rootDir": "./",
      "outDir": "./build",
      "esModuleInterop": true,
      "strict": true
    }
  }
The compilerOptions field must be specified. The options used in the config above are:
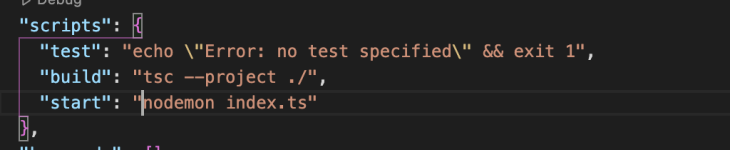
Target, the JavaScript version that will be outputted after being compiledModule, which supports module manager such as common js in our coderootDir, which specifies where our typescript project is locatedoutDir, which specifies the directory where the compiled code can be foundesModuleInterop, which compiles ES6 modules to CommonJS modulesStrict, which enables strict type checkingWe’ll also need to add start and build scripts to our package.json file:
Next we can create an index.ts file at the root of our folder. We are going to be writing all of our code in this file; this isn’t ideal in a production environment, but for the sake of this tutorial, it will work.
Firstly, we are going to import our required dependencies and start our server. Paste the code below into your index.ts file and then run the command npm run start:
import express, { Request, Response, Express} from 'express';
import bodyParser from 'body-parser';

const app: Express = express();
const PORT: number = 8000;

app.use(bodyParser.json());
app.use(bodyParser.urlencoded({ extended: false }));

app.listen(PORT, () => {
    console.log(`[server]: Server is running at https://localhost:${PORT}`);
});
We’ll now connect our server to our database using Slonik’s createPool method:
import { createPool } from 'slonik';
Slonik allows us to connect to our database using a connection URI that we provide with the configuration below:
postgresql://[user[:password]@][host[:port]][/database name][?name=value[&...]]
I connected to my database using the following URI:
const pool = createPool('postgresql://oloruntobiawoderu:@localhost:5432/slonik')
user = oloruntobiawoderu
password = empty ( I didn't set a password for this user on my local machine. If you have a password for yours, use it)
host: localhost
port =5432 (default port Postgres runs on local)
database name = slonik (It can be any name, as long as you already created the database)
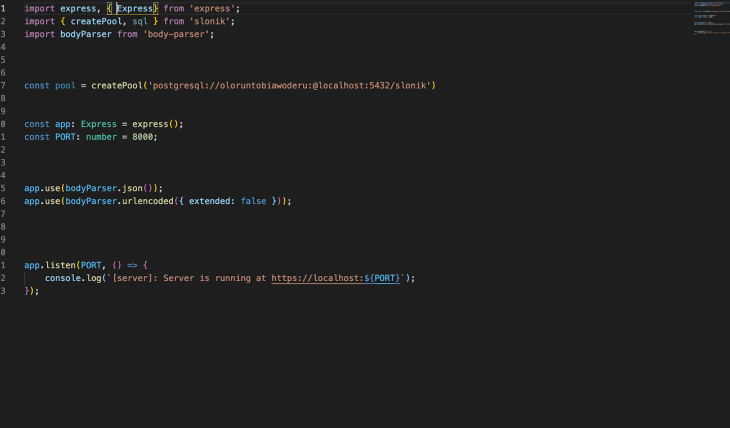
Right now, our index.ts file should look like this:
Now, we are going to create our first endpoint to create a user. For this, we’ll need to import the JSON web token (JWT) and dotenv packages, because we’ll need to create a JWT for our user after creation. We’ll also need to create a .env file in the root of our project to store our JWT secret.
First, we are going to create a helper function to help us generate our JWT:
async function generateToken(user: any) {
    const payload = {
        subject: user.id,
        email: user.email
    };

    const options = {
        expiresIn: '2d'
    };
    try {
        const token = jwt.sign(payload, String(env.JWTSecret), options);
        return token;
    } catch (error: any) {
        return error.message;
    }
}
The function takes in a user object and generates a token that contains the user ID and the user email.
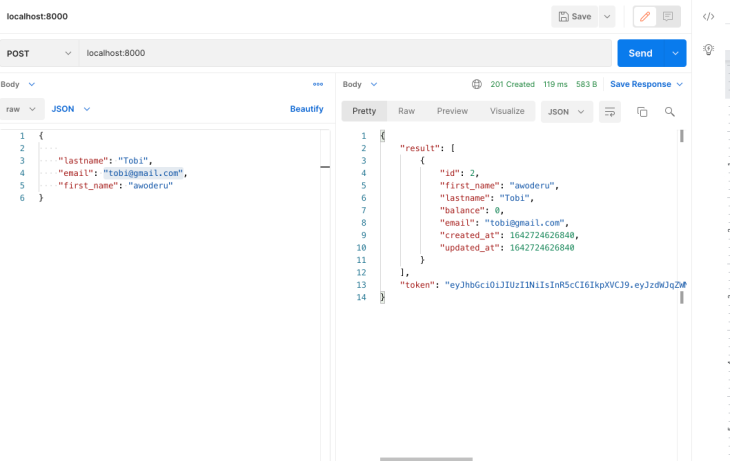
We’ll then go ahead to create our first endpoint with the code below:
app.post('/', (req: Request, res: Response) => {
    try {

        const { first_name, lastname, email }: { first_name: string, lastname: string, email: string } = req.body

        pool.connect(async (connection) => {
            const result = await connection.many(sql`INSERT INTO users (first_name, lastname, email) VALUES (${first_name}, ${lastname}, ${email}) RETURNING *`)
            const token = await generateToken(result[0])
            return res.status(201).json({ result, token })
        })
    } catch (error) {
        if (!(error instanceof NotFoundError)) {
            return res.status(400).json('User was not created')
        }

    }

})
We’ll receive and destructure the user data from our request body, then use our createPool variable to make a connection, and run our Insert query using the many query method. We are using the many query method here because it returns a NotFoundError when no rows are returned, and we can catch that in a catch block and return a response.
The result of our query is passed into our generateToken function to generate a JWT for the user. The user data and JWT are then returned.
We can go to Postman and test out this endpoint:
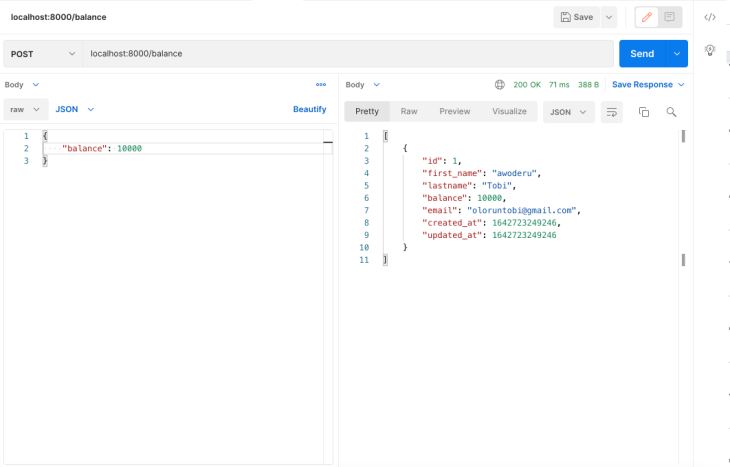
I’m going to add a few endpoints using the same principles, with the exception of decoding our token first so we can ascertain which user is making a request:
app.post('/balance', (req: Request, res: Response) => {
    try {
        const { authorization } = req.headers;
        const decoded: any = jwt.verify(String(authorization), String(env.JWTSecret));

        const { balance }: { balance: number } = req.body

        pool.connect(async (connection) => {
            const result = await connection.many(sql`UPDATE users SET balance = ${balance} WHERE users.id = ${decoded.subject} RETURNING *`)
            return res.status(200).json(result)
        })
    } catch (error) {
        if (!(error instanceof NotFoundError)) {
            return res.status(400).json('User was not found')
        }

    }
})

app.get('/user', (req: Request, res: Response) => {
    try {
        const { authorization } = req.headers;
        const decoded: any = jwt.verify(String(authorization), String(env.JWTSecret));
        pool.connect(async (connection) => {
            const result = await connection.many(sql`SELECT * FROM Users WHERE users.id = ${decoded.subject}`)
            return res.status(200).json(result)
        })
    } catch (error) {
        if (!(error instanceof NotFoundError)) {
            return res.status(400).json('User was not found')
        }

    }

})
The balance endpoint serves to add an amount to the balance of the users, while the user endpoint gets the details of each user. The result of this API calls is as follows:
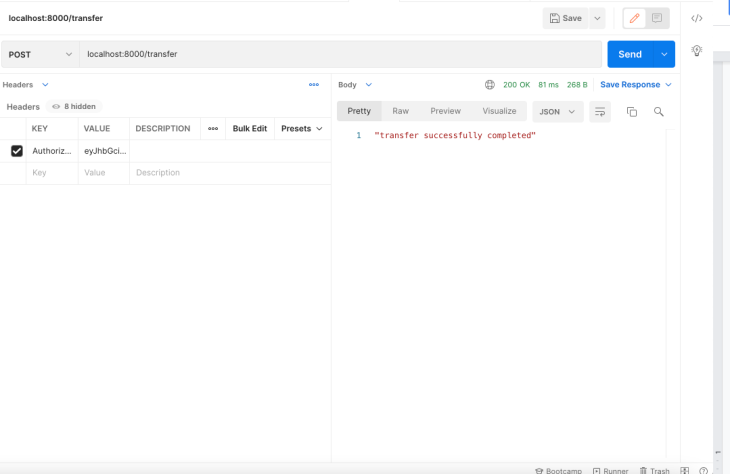
Next, we are going to build out the transfer endpoint, which will allow users to transfer amounts to each other. This will also showcase how to use transactions with Slonik:
app.post('/transfer', (req: Request, res: Response) => {
    const { amount, destinationEmail }: { amount: number, destinationEmail: string } = req.body
    const { authorization } = req.headers;
    const decoded: any = jwt.verify(String(authorization), String(env.JWTSecret));
    pool.transaction(async (connection) => {
        await connection.query(sql`UPDATE users SET balance = balance + ${amount} WHERE users.email = ${destinationEmail}`);
        await connection.query(sql`UPDATE users SET balance = balance - ${amount} WHERE users.id = ${decoded.subject}`);
        await connection.query(sql`INSERT INTO transactions (sent_from_email, sent_to, amount) VALUES (${decoded.email}, ${destinationEmail}, ${amount})`)
        return res.status(200).json("transfer successfully completed")
    })

})
For the transfers endpoint, we connect and run our query using pool.transaction instead of pool.connect. This automatically runs all of our queries and commits the result when they are run successfully, or rolls back if there’s an error.
Slonik also automatically retries transaction queries if the error returned is a rollback transaction error. You can determine how many times a transaction is retried using the transactionRetryLimit configuration. The default configuration for the transactionRetryLimit is five.
Below is the result of the transfers API call:
Slonik is a great Postgres client. It offers good type checking using its query methods, while still giving you full control over your queries. Although it isn’t as mature as other Node Postgres clients such as pg and pg-promise, it is a solid alternative. You can find the full documentation here, and the full code for this tutorial here.
Install LogRocket via npm or script tag. LogRocket.init() must be called client-side, not
server-side
$ npm i --save logrocket

// Code:

import LogRocket from 'logrocket';
LogRocket.init('app/id');
// Add to your HTML:

<script src="https://cdn.lr-ingest.com/LogRocket.min.js"></script>
<script>window.LogRocket && window.LogRocket.init('app/id');</script>
Hey there, want to help make our blog better?
Join LogRocket’s Content Advisory Board. You’ll help inform the type of content we create and get access to exclusive meetups, social accreditation, and swag.
Sign up now
A breakdown of the wrapper and container CSS classes, how they’re used in real-world code, and when it makes sense to use one over the other.

This guide walks you through creating a web UI for an AI agent that browses, clicks, and extracts info from websites powered by Stagehand and Gemini.

This guide explores how to use Anthropic’s Claude 4 models, including Opus 4 and Sonnet 4, to build AI-powered applications.

Which AI frontend dev tool reigns supreme in July 2025? Check out our power rankings and use our interactive comparison tool to find out.


One Reply to "Improving type safety in PostgreSQL with Slonik"
This article started out great and was following along nicely but it lost it’s way around the endpoints creation and felt really rushed from there to the end.
Thanks for writing anyhow but yeah I’ve had to abandon it since it wasn’t clear on the imports around dotenv and jwt tokens. Shame really