ImageKit is an image CDN service with real-time image optimization facilities. With ImageKit, you can perform many operations on an image, like transforming a picture or adding an overlay.

In this article, you’ll learn to integrate ImageKit into a Vue.js application and how to perform the transformations provided by the service.
As mentioned, Imagekit is an image management service with real-time optimization facilities. It provides facilities like optimization, resizing, cropping, and CDN delivery.
ImageKit is an excellent service that can help you speed up your application performance by reducing the image sizes and serving the images through CDN.
Here are some of the services provided by ImageKit:
In this tutorial, we’ll integrate ImageKit with a Vue.js application. By doing so, you’ll learn the various use cases of the ImageKit and how to use the Vue.js SDK to achieve this.
Currently, the support for ImageKit with Vue.js is limited to Vue 2. The support for Vue 3 is not yet stable and has known issues. Because of this, we’ll cover how to integrate ImageKit with Vue 2 in this article.
The primary purpose of this tutorial is straightforward; you’ll be exploring the SDK only. We won’t build a specific project; instead, we’ll review different use cases.
The Vue CLI is the command-line interface for scaffolding a Vue.js project. If you already work with Vue.js and have the Vue CLI installed, you can skip this step.
The Vue CLI is an npm package that needs to be installed globally using the following command:
npm install -g @vue/cli
# OR
yarn global add @vue/cli
Once the CLI is installed successfully, open a folder in your favorite code editor where you want to create the Vue project. Now open up the terminal and locate the terminal to that directory. In the terminal, type the following command:
vue create project-name
project-name is the name you want to give to the project:

Select Default ([Vue 2] babel, eslint) or manually select the features and use Vue 2 (For this tutorial, Vue 2 default is enough). Choosing this will create a project with the name you provided.
Once the project setup is complete, go inside the directory using the terminal with cd project-name and type npm run serve. It will start the local server at port 8080, and you’ll see something like this:
The component structure for the default Vue.js application is fundamental. It has an image called logo.png inside the src\assets folder that is rendered at the top.
Note that all the below text and links are generated from the HelloWorld.vue component.
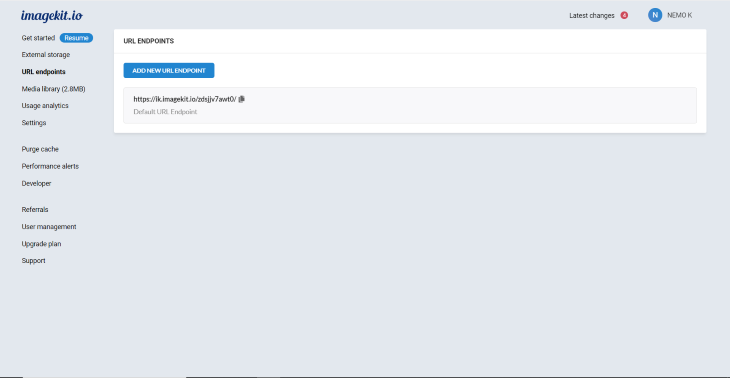
To use ImageKit, you’ll have to create an ImageKit account. Visit this link to create an account. From the sidebar, open the URL endpoints option and copy the URL. You’ll need this URL endpoint later.
From the Media Library, you can upload images to explore the functionalities. For this article, an image has been uploaded to the ImageKit dashboard and has been renamed to image.
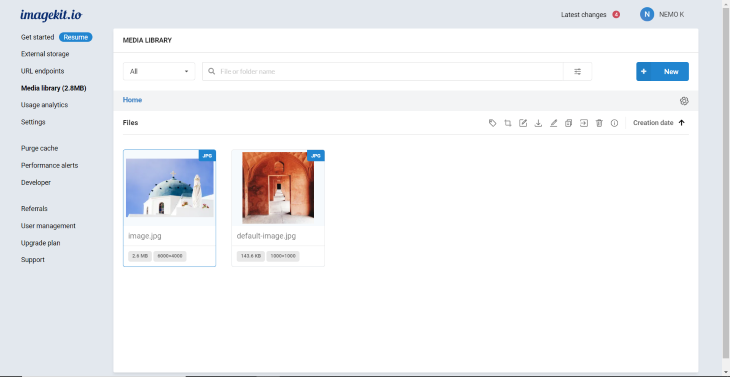
Even if you don’t want to upload an image, you can still work with the default-image.
From the Developer section in the menu, you can obtain the private API key necessary for client-side image uploading. The image uploading part won’t be covered in this article.
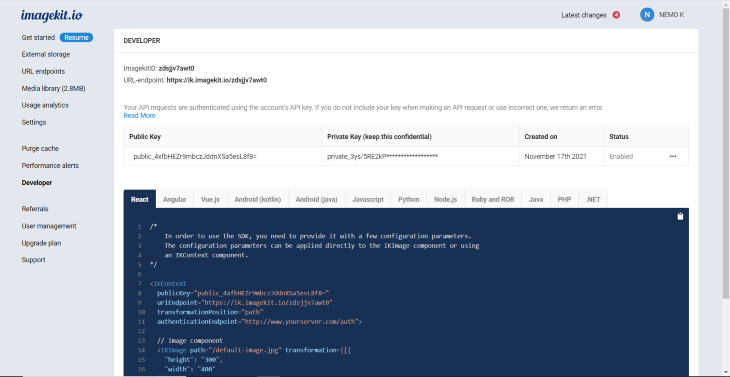
You’ll also be able to get some boilerplate code for different languages from here.
To install the ImageKit package, you’ll have to run the following command in the terminal:
npm install imagekitio-vue
# OR
yarn add imagekitio-vue
Once the package installation is complete, initialize ImageKit by opening the main.js file and pasting the following code:
import ImageKit from 'imagekitio-vue';
Vue.use(ImageKit, {
  urlEndpoint: 'YOUR_URL_ENDPOINT',
});
In YOUR_URL_ENDPOINT, paste the URL from the ImageKit menu, or you can follow this link to get your URL endpoint. You can also paste two more optional parameters here: publicKey and authenticationEndpoint.
But these are required only when working with uploads. Because this article is not going to cover the uploads, you will not need those parameters.
The urlEndpoint parameter is a required parameter in all cases. It was the only step necessary to initialize the SDK.
For us, everything will be under the HelloWorld.vue component. Open the HelloWorld.vue component and delete everything inside the template tags.
Open the App.vue file and delete the img tag, too, so that we’ll have an empty page.
The ImageKit package provides a component called ik-image, which is used to render all the images.
To render an image without any transformation or modification, you can use the following code inside the template tags in your HelloWorld.vue component:
<div>
    <h3>ImageKit Vuejs quick start</h3>
    <ik-image width="400" path="/image.jpg"> </ik-image>
</div>
The width property sets the width of the image as 400px. Remember, /image.jpg is not the image in your local directory. It’s the image in the ImageKit dashboard.
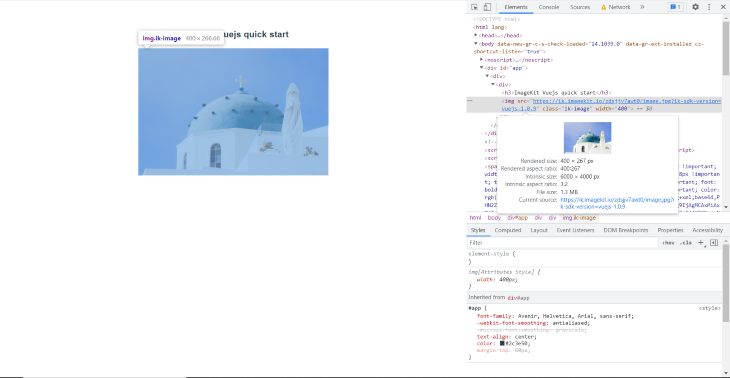
You can see in the above image how the component is rendered. Rendering a photo in this way will not reduce the file size very much.
Another way to control the height and width is using the :transformation property. :transformation is heavily used to transform images, which you’ll see in later examples.
<div>
    <h3>Resizing Images in Vue.js</h3>
    <ik-image path="/image.jpg" :transformation="[{ w: 450, h: 450 }]" />
</div>
Here, :transformation="[{ w: 450, h: 450 }]" resizes the image. The w stands for width, and the h stands for height. Instead of using shorthands, you can also use width and height.
The above code is resizing the image to 450px height and width. You can find a list of complete transformations here.
Before moving to the next transformation, let’s understand the chained transformation property, which refers to when more than one object is passed inside the transformation prop to chain the transformations sequentially.
The next transformation we’ll cover is quality manipulation, where you can manipulate the quality of the image provided by the CDN.
<div>
    <h3>Quality Manipulation</h3>
        <ik-image
            path="/image.jpg"
            :transformation="[{ quality: 50 }, { width: 500 }]"
        />
</div>
The above code also shows you chained transformations. First, the quality is manipulated to 50%, and then the width is set to 500px.
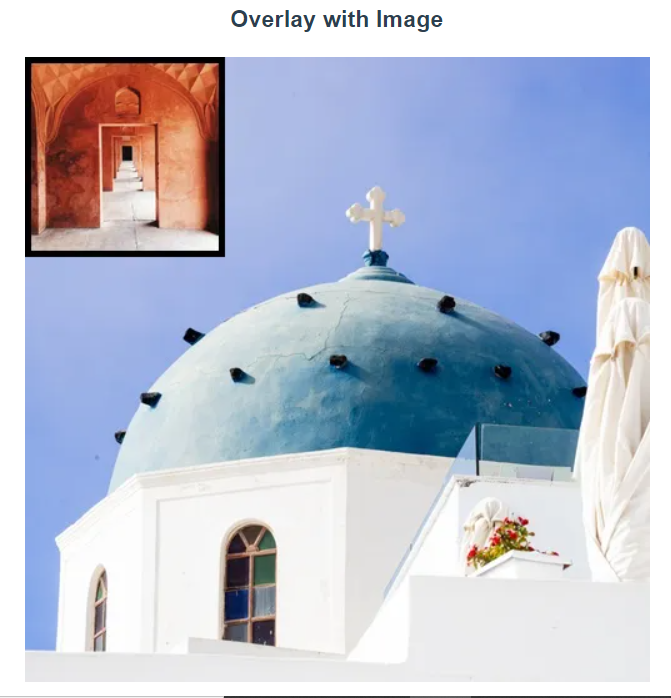
This one is exciting. You can use an overlay with an image to create watermarks or display another image on top of another image. Inside the transformation prop, the overlayImage key is used to apply this transformation. Check the example below to get an idea about how it works.
<div>
    <h3>Overlay with Image</h3>
    <ik-image
        path="/image.jpg"
        :transformation="[
            {
                width: 500,
                height: 500,
            },
            {
                overlayImage: 'default-image.jpg',
                overlayWidth: 150,
                overlayX: 0,
                overlayImageBorder: '5_000000', // 5px border of color 000000
            },
        ]"
    />
</div>
The overlayImage: 'default-image.jpg' is the image that is being used as an overlay. overlayWidth: 150 is the width of the overlayed image, and overlayX is the x-axis position of the image. Finally, overlayImageBorder: 5_000000 represents a border of 5px of black color. The output will be as follows:
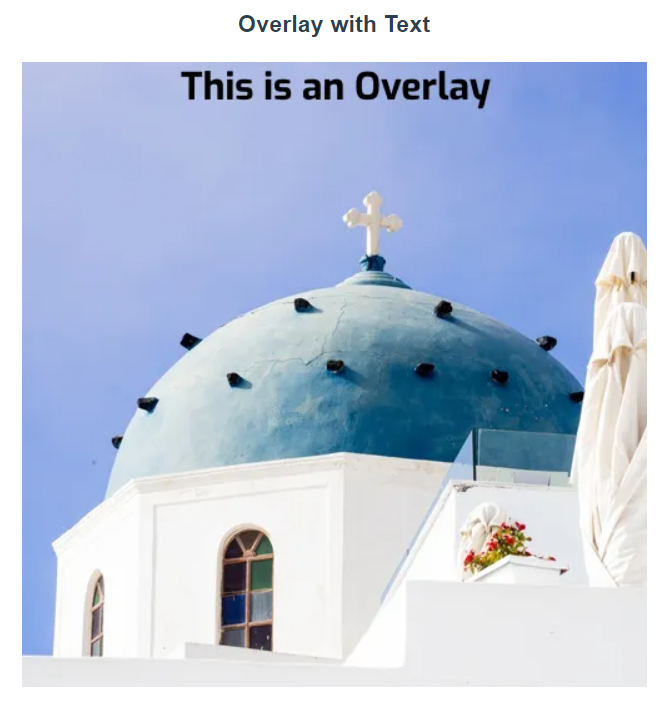
An overlay can also be achieved using text. The overlayText key is used to create this:
<div>
    <h3>Overlay with Text</h3>
    <ik-image
        path="/image.jpg"
        :transformation="[
            {
                width: 500,
                height: 500,
            },
            {
                overlayText: 'This is an Overlay',
                overlayTextFontFamily: 'exo',
                overlayFocus: 'top',
                overlayTextFontSize: 30,
            },
        ]"
    />
</div>
In the above code, overlayText represents the text that is going to be overlayed. The overlayTextFontFamily is the font that will be used to display it. Any font from this list can be used here, but you can also use custom fonts.
The overlayFocus is the position where you want to place the text. It can have these possible values, center, top, left, bottom, right, top_left, top_right, bottom_left, and bottom_right. The default value is center. Other than using the overlayFocus, you can also use overlayX and overlayY to position your text or image.
You can also use ImageKit to display a blurred image placeholder before the image completely loads. Here’s how it can be achieved.
<div>
    <h3>Blurred Image Placeholder</h3>
    <ik-image
        path="/image.jpg"
        :lqip="{ active: true, quality: 40, blur: 5 }"
        :transformation="[{ height: 500, width: 500 }]"
    />
</div>
Using the lqip prop, you can add a blurred image placeholder.
Lazy loading is another important use case, as it can drastically optimize performance. Here’s how to lazy load images with ImageKit:
<div>
    <h3>Lazy Loading</h3>

    <ik-image
        path="/image.jpg"
        :transformation="[{ height: 500, width: 500 }]"
        loading="lazy"
        height="500"
        width="500"
    />
</div>
Just add loading="lazy", and you are good to go. Simple, right?
We covered common use cases for ImageKit in this post. The ImageKit documentation is excellent, and you should refer to it whenever you get stuck with any of the topics. You are also free to discover the ImageKit SDK on your own so that you find your perfect use case!
Debugging Vue.js applications can be difficult, especially when users experience issues that are difficult to reproduce. If you’re interested in monitoring and tracking Vue mutations and actions for all of your users in production, try LogRocket.

LogRocket lets you replay user sessions, eliminating guesswork by showing exactly what users experienced. It captures console logs, errors, network requests, and pixel-perfect DOM recordings — compatible with all frameworks.
With Galileo AI, you can instantly identify and explain user struggles with automated monitoring of your entire product experience.
Modernize how you debug your Vue apps — start monitoring for free.
Hey there, want to help make our blog better?
Join LogRocket’s Content Advisory Board. You’ll help inform the type of content we create and get access to exclusive meetups, social accreditation, and swag.
Sign up now
A breakdown of the wrapper and container CSS classes, how they’re used in real-world code, and when it makes sense to use one over the other.

This guide walks you through creating a web UI for an AI agent that browses, clicks, and extracts info from websites powered by Stagehand and Gemini.

This guide explores how to use Anthropic’s Claude 4 models, including Opus 4 and Sonnet 4, to build AI-powered applications.

Which AI frontend dev tool reigns supreme in July 2025? Check out our power rankings and use our interactive comparison tool to find out.


