In this tutorial, we’ll look at one of the ways to create onboarding screens in a React Native app. We are going to use a React Native community package, called react-native-viewpager, that allows us to swipe left or right between different pages where each page has some data to display. We are going to create some reusable components and mimic the basic example of an onboarding screen that has some logic to navigate to the next onboarding page, go back to the previous onboarding page, and navigate to the main contents of the app. For the last section, we are going to integrate the react-navigation library.

Before you begin, please make sure to have the following installed on a local environment:
Do note that to demonstrate I’ll be using an iOS simulator. If you prefer to use an Android device or an emulator, the code snippets shared in this post will run the same.
Begin by creating a new React Native app and installing the dependency required to build the onboarding screens. Open up a terminal window and execute the commands below:
npx expo-cli onboarding-viewpager-example

# navigate inside the project directory
cd onboarding-viewpager-example

# install the dependency
expo install @react-native-community/viewpager
If you are following this post using a plain React Native project and assuming you are on the latest version of React Native, the component installed is going to be auto-linked.
The component react-native-viewpager was initially supported on Android devices only. In its current version, the component supports both iOS and Android devices.
The component library uses native views implementations on each mobile platform. On iOS, it uses UIPageViewController container that manages navigation between different pages further containing data to display. On Android, it uses ViewPager layout manager to navigate by swiping left and right between different pages:
Let’s start by creating an onboarding screen that is going to have different child views known as pages. Each page is going to represent a different state of data to display.
Before we proceed, let’s create an initial structure of how the files and directories are going to look:
src/screens — where all the screens are createdsrc/screens/Onboarding.js — the Onboarding screen to create for this sectionsrc/screens/components — where all the components used in screens are createdsrc/screens/components/Page.js — the reusable page componentsrc/screens/components/Footer.js — the component to hold navigation buttons for each pagesrc/screens/components/RoundedButton.js — the component for the navigation buttonLet’s start by building an onboarding screen that is going to have a single Page component wrapped inside a View. This view has a prop called key to differentiate between pages. It is wrapped inside the ViewPager component that has a style of flex: 1. Inside the file OnBoarding.js, add the following code snippet:
import React from 'react';
import { View } from 'react-native';
import ViewPager from '@react-native-community/viewpager';

import Page from '../components/Page';

const Onboarding = () => {
  return (
    <View style={{ flex: 1 }}>
      <ViewPager style={{ flex: 1 }}>
        <View key="1">
          <Page
            backgroundColor="#ffc93c"
            iconName="sun"
            title="Welcome to the weather app"
          />
        </View>
      </ViewPager>
    </View>
  );
};

export default Onboarding;
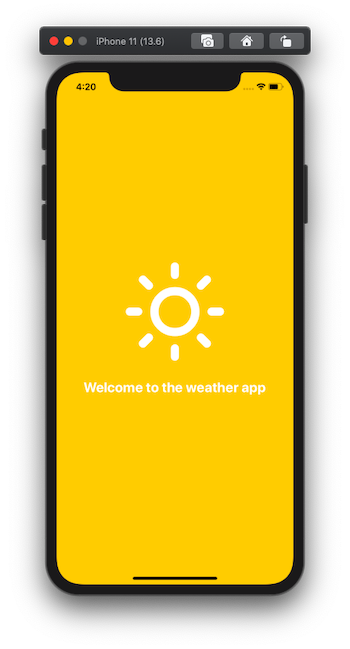
The Page component accepts three props. The backgroundColor of the page, the name of the icon to display, as well as some title display below the icon. The icon is used from @expo/vector-icons. It’s a plain React component that renders some UI. Open Page.js and add the following:
import React from 'react';
import { View, Text } from 'react-native';
import { Feather as Icon } from '@expo/vector-icons';

const Page = ({ backgroundColor, iconName, title }) => {
  return (
    <View
      style={{
        flex: 1,
        justifyContent: 'center',
        alignItems: 'center',
        backgroundColor
      }}
    >
      <Icon name={iconName} size={172} color="white" />
      <View style={{ marginTop: 16 }}>
        <Text style={{ fontSize: 24, fontWeight: 'bold', color: 'white' }}>
          {title}
        </Text>
      </View>
    </View>
  );
};

export default Page;
To see this screen component in action, open App.js file and modify it like this:
import React from 'react';
import { StatusBar } from 'expo-status-bar';

import Onboarding from './src/screens/Onboarding';

export default function App() {
  return (
    <>
      <StatusBar style="dark" />
      <Onboarding />
    </>
  );
}
Go back to the terminal window and start the development server by running the command expo start. Here is the output you are going to get after this step:
Add another Page component below the previous, wrapped in its own View with an incremental key value in the Onboarding.j file:
const Onboarding = () => {
  return (
    <View style={{ flex: 1 }}>
      <ViewPager style={{ flex: 1 }}>
        <View key="1">
          <Page
            backgroundColor="#ffc93c"
            iconName="sun"
            title="Welcome to the weather app"
          />
        </View>
        <View key="2">
          <Page
            backgroundColor="#07689f"
            iconName="cloud-drizzle"
            title="Get updates on weather"
          />
        </View>
      </ViewPager>
    </View>
  );
};
We have yet to add the logic to move from one page component to another.
To navigate from one page to another in the ViewPager we need a button to tell the user that by pressing the button they can navigate to the next onboarding page. Each button is displayed in a footer component on the page. Let’s start by creating the button first.
In the component file RoundedButton.js, create a button component with TouchableOpacity from React Native. It’s a wrapper component that helps to make buttons by providing a response to touches. Using this component to create a press-able button, it dims the opacity when pressed.
The RoundedButton accepts two props, label to display as the title of the button and onPress whose value is defined in the Onboarding screen later:
import React from 'react';
import { Text, TouchableOpacity } from 'react-native';

const RoundedButton = ({ label, onPress }) => {
  return (
    <TouchableOpacity
      style={{ alignItems: 'center', justifyContent: 'center' }}
      onPress={onPress}
    >
      <Text style={{ fontSize: 22, color: 'white', fontWeight: 'bold' }}>
        {label}
      </Text>
    </TouchableOpacity>
  );
};

export default RoundedButton;
Next, let’s create a Footer component that is displayed at the very bottom of the page and shows the RoundedButton.
The Footer component is going to consist of a View that wraps the RoundedButton component. This View is going to have an opacity on the same background color as the whole Page component. It accepts three props from the parent component Onboarding screen, the backgroundColor on which the opacity is applied, rightButtonPress for the button component to take action when pressed and the rightButtonLabel to display a label on the button associated.
Both the props prefixed with right are going to have a default value of false for scenarios where there is no requirement to display the right button in the footer. This adds some flexibility to our reusable component.
It also uses useWindowDimensions().width hook from React Native to get the value of the width of a particular screen. This hook automatically updates the value of the width when the size of the screen changes. Using this value, it makes it easier to determine the height of the Footer component which is 21% of the total width of the window:
import React from 'react';
import { View, useWindowDimensions } from 'react-native';

import RoundedButton from './RoundedButton';

const Footer = ({
  backgroundColor,
  rightButtonLabel = false,
  rightButtonPress = false
}) => {
  const windowWidth = useWindowDimensions().width;
  const HEIGHT = windowWidth * 0.21;
  const FOOTER_PADDING = windowWidth * 0.1;

  return (
    <View
      style={{
        flexDirection: 'row',
        justifyContent: 'flex-end',
        height: HEIGHT,
        backgroundColor,
        opacity: 0.6,
        alignItems: 'center',
        paddingHorizontal: FOOTER_PADDING
      }}
    >
      <RoundedButton label={rightButtonLabel} onPress={rightButtonPress} />
    </View>
  );
};

export default Footer;
Both of our custom components are now ready to be used. Open Onboarding.js file and import the Footer component:
// ... other import statements
import Footer from '../components/Footer';
Next, modify the JSX returned by the screen component to add a Footer to each page:
const Onboarding = () => {
  return (
    <View style={{ flex: 1 }}>
      <ViewPager style={{ flex: 1 }}>
        <View key="1">
          <Page
            backgroundColor="#ffc93c"
            iconName="sun"
            title="Welcome to the weather app"
          />
          <Footer
            backgroundColor="#ffc93c"
            rightButtonLabel="Next"
            rightButtonPress={() => true}
          />
        </View>
        <View key="2">
          <Page
            backgroundColor="#07689f"
            iconName="cloud-drizzle"
            title="Get updates on weather"
          />
          <Footer
            backgroundColor="#07689f"
            rightButtonLabel="Next"
            rightButtonPress={() => true}
          />
        </View>
      </ViewPager>
    </View>
  );
};
Here is the output after this step:
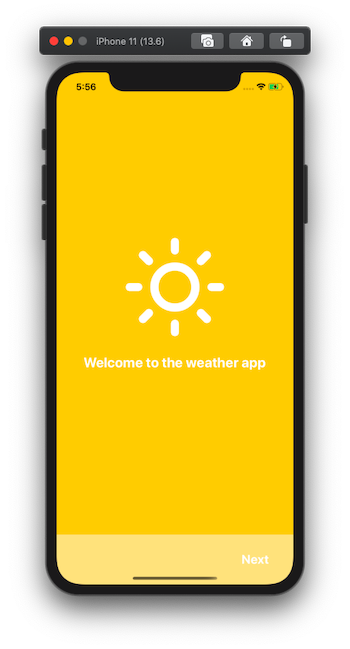
The Next button is shown on the right side of the footer because of the property justifyContent: 'flex-end' in the Footer.js file.
Both of our pages are now set up. We are going to use the useRef hook from the React library to determine the value of the current page number in the ViewPager. Using the value of the current page number, we can then use the button in the footer to let the user navigate from one page to another.
Start by importing the useRef hook from React then, define a pagerRef with the initial value of null. Also make sure to pass this ref to the ViewPager component and on it, define another prop called initialPage. This prop is going to determine the initial page to display when the app starts which is going to be 0.
The navigate from one page to another, let’s define a handler method called handlePageChange. It is going to set the value of the current page number on using the pageRef.current.setPage(pageNumber). It receives the value of the actual page number as the argument. Based on this value, the current page changes.
// modify only the below import statement
import React, { useRef } from 'react';

const Onboarding = () => {
  const pagerRef = useRef(null);

  const handlePageChange = pageNumber => {
    pagerRef.current.setPage(pageNumber);
  };

  return (
    <View style={{ flex: 1 }}>
     <ViewPager style={{ flex: 1 }} initialPage={0} ref={pagerRef}>
    {/* Rest remains same */}
    </ViewPager>
    </View>
  )
Since the onboarding screen has only two pages, the only possible way to navigate is from the page number 0 to 1. Modify the rightButtonPress prop on Footer component of the first Page component:
<Footer
  backgroundColor="#ffc93c"
  rightButtonLabel="Next"
  rightButtonPress={() => {
    handlePageChange(1);
  }}
/>
Go back to the Expo client to navigate from the first page to the next.
Let’s add the logic for the scenario when the app allows the user to navigate back from the current page in the onboarding screen to the previous one. This is going to be determined based on the value of the current page. If the current page is the first page, then there is no need to display the back button.
Open Footer.js and start by adding another set of props that are going to be prefixed with left. Both of these new props are going to have a default value of boolean false.
const Footer = ({
  backgroundColor,
  leftButtonLabel = false,
  leftButtonPress = false,
  rightButtonLabel = false,
  rightButtonPress = false
}) => {
  //...
};
Next, modify the value of justifyContent style on the View to be determined dynamically, based on a condition that if the leftButtonLabel is available, then use the value of space-between between two different buttons otherwise use the value of flex-end.
Similarly, with the presence of leftButtonLabel prop, add a condition to display a left button:
<View
  style={{
    flexDirection: 'row',
    justifyContent: leftButtonLabel ? 'space-between' : 'flex-end',
    height: HEIGHT,
    backgroundColor,
    opacity: 0.6,
    alignItems: 'center',
    paddingHorizontal: FOOTER_PADDING
  }}
>
  {leftButtonLabel && (
    <RoundedButton label={leftButtonLabel} onPress={leftButtonPress} />
  )}
  <RoundedButton label={rightButtonLabel} onPress={rightButtonPress} />
</View>
Go back to the Onboarding.js and add the left button on the second page:
<View key="2">
  <Page
    backgroundColor="#07689f"
    iconName="cloud-drizzle"
    title="Get updates on weather"
  />
  <Footer
    backgroundColor="#07689f"
    leftButtonLabel="Back"
    leftButtonPress={() => {
      handlePageChange(0);
    }}
  />
</View>
Here is the output you are going to get after this step:
A good way to end this post is to navigate from the custom Onboarding screen to the main application that might use thereact-navigation library as the de facto to navigate between different app screens.
Start by adding react-navigation library by executing the following series of commands from a terminal window:
yarn add @react-navigation/native @react-navigation/stack

expo install react-native-gesture-handler react-native-reanimated react-native-screens react-native-safe-area-context @react-native-community/masked-view
Then, create a mock screen called Home.js inside src/screens/ directory with the following code snippet:
import React from 'react';
import { View, Text, StyleSheet } from 'react-native';

const Home = () => {
  return (
    <View style={styles.container}>
      <Text style={styles.text}>Home Screen</Text>
    </View>
  );
};

const styles = StyleSheet.create({
  container: {
    flex: 1,
    justifyContent: 'center',
    alignItems: 'center',
    backgroundColor: '#eb8f8f'
  },
  text: {
    fontSize: 20,
    color: 'white'
  }
});

export default Home;
Next, modify the App.js file to add the logic to navigate between the Onboarding screen and Home screen using the stack navigator pattern:
import React from 'react';
import { StatusBar } from 'expo-status-bar';
import { NavigationContainer } from '@react-navigation/native';
import { createStackNavigator } from '@react-navigation/stack';

import Onboarding from './src/screens/Onboarding';
import Home from './src/screens/Home';

const AppStack = createStackNavigator();

export default function App() {
  return (
    <>
      <StatusBar style="dark" />
      <NavigationContainer>
        <AppStack.Navigator headerMode="none">
          <AppStack.Screen name="Onboarding" component={Onboarding} />
          <AppStack.Screen name="Home" component={Home} />
        </AppStack.Navigator>
      </NavigationContainer>
    </>
  );
}
The last page in the Onboarding screen is going to have a button that can be named appropriately. For this example let’s call it Continue and add it as the right button to the second page.
Using the navigation.navigate() method is simpler to add the action to go on the home screen component. To access the navigation object, let’s import the useNavigation() hook from @react-navigation/native and add it to the Onboarding screen:
// ...rest of the import statements remain same
// import the hook
import { useNavigation } from '@react-navigation/native';

const Onboarding = () => {
  const navigation = useNavigation();
  // ...

  return (
    <View style={{ flex: 1 }}>
      <ViewPager style={{ flex: 1 }} initialPage={0} ref={pagerRef}>
        {/* ... rest remains same */}
        <View key="2">
          <Page
            backgroundColor="#07689f"
            iconName="cloud-drizzle"
            title="Get updates on weather"
          />
          <Footer
            backgroundColor="#07689f"
            leftButtonLabel="Back"
            leftButtonPress={() => {
              handlePageChange(0);
            }}
            rightButtonLabel="Continue"
            rightButtonPress={() => {
              navigation.navigate('Home');
            }}
          />
        </View>
      </ViewPager>
    </View>
  );
};
Here is the complete navigation flow after this step:
There are different ways to add onboarding screens to a React Native app and this post covers only one way but the component react-native-viewpager has a number of props that can be used to achieve different scenarios in a React Native app.
The source code is available at this GitHub repository.

LogRocket's Galileo AI watches sessions for you and and surfaces the technical and usability issues holding back your React Native apps.
LogRocket also helps you increase conversion rates and product usage by showing you exactly how users are interacting with your app. LogRocket's product analytics features surface the reasons why users don't complete a particular flow or don't adopt a new feature.
Start proactively monitoring your React Native apps — try LogRocket for free.
Would you be interested in joining LogRocket's developer community?
Join LogRocket’s Content Advisory Board. You’ll help inform the type of content we create and get access to exclusive meetups, social accreditation, and swag.
Sign up now
A breakdown of the wrapper and container CSS classes, how they’re used in real-world code, and when it makes sense to use one over the other.

This guide walks you through creating a web UI for an AI agent that browses, clicks, and extracts info from websites powered by Stagehand and Gemini.

This guide explores how to use Anthropic’s Claude 4 models, including Opus 4 and Sonnet 4, to build AI-powered applications.

Which AI frontend dev tool reigns supreme in July 2025? Check out our power rankings and use our interactive comparison tool to find out.


