The Go programming language is primed for developer productivity and ease of use. It’s easy to start with the language and build complete applications with Go’s standard library. Go is also backward compatible and upgrades the language to prevent breaking existing code.

One of the exciting features of the release of Go v1.11 was the introduction of Go modules. Finally, Go developers had an easy alternative for versioning and package management.
Now, with Go v1.18 comes the introduction of Go workspaces — a feature that makes working with multiple Go modules easier than ever. This includes versioning without needing to edit your Go modules file for each module in the workspace while resolving dependencies.
In this article, we will explore what Go workspaces are and the various use cases you can explore with the workspaces feature. Before we start, make sure you have working knowledge of Go, setting up Go projects, and Go modules. You will also need Go v1.18 or later installed on your machine.
Jump ahead:

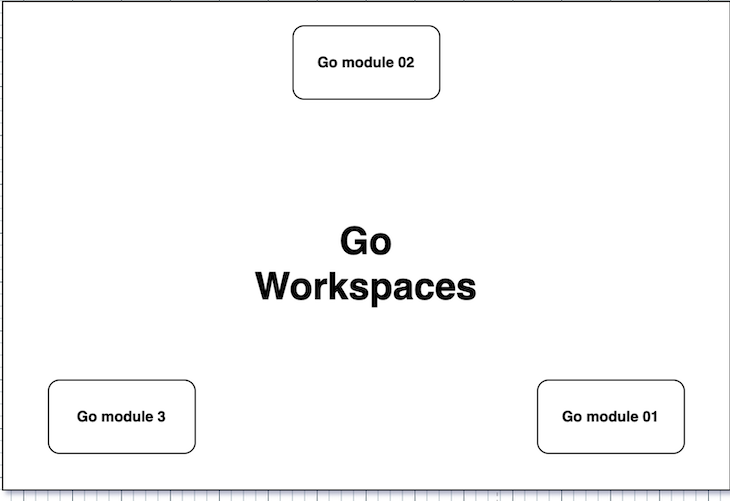
Go workspaces provide functionality for working with multiple Go modules as the main modules simultaneously with a single Go modules file using a go.work file. The go.work file overrides the go.mod file, so you don’t have to worry about changing the initial file to work with various modules.
Before Go workspaces, Go developers had the option of creating multiple Go modules with distinct Go modules (go.mod) files and editing the files for changes or using the replace directory for changes in the go.mod. This was cumbersome, especially as the project size increased.
Go workspaces deliver a productivity boost to developers working on multiple Go projects and allow you to initialize a Go workspace to work with multiple modules simultaneously. You get simpler workflows and monorepos while the tool handles the go.mod file changes. This change lets you focus on writing code that works with multiple modules for your varying use cases.
To start, you’ll need to initialize a Go workspace for multi-module local development in Go. From there, you get to specify modules added to the workspace and work with the modules as a unit.
You can initialize a Go workspace with the init command. After initialization, the init command writes a workspace file (go.work) to the root directory. You can specify the paths as optional arguments to the init command or have the Go tool create an empty workspace:
go work init

After initializing an empty workspace file, you can use the use directive with a Go modules file to add modules to the workspace:
use (
        ./newProject1
        ./newProject2
)
If the modules you’re working with already exist and are initialized, you can add them by specifying all of them at once as optional parameters to the init command:
mkdir newProject1 && cd newProject1 && go mod init newProject1
mkdir newProject2 && cd newProject2 && go mod init newProject2
The code above is a CLI command to create and initialize two Go modules with mod init:
go work init newProject1 newProject2

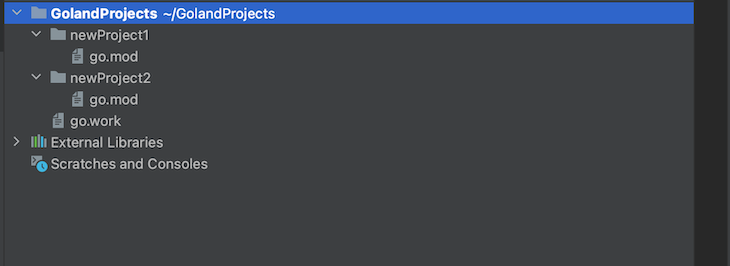
The command above adds the modules to the workspace, automatically updating use:

The go.work file syntax is identical to go.mod file with similar directives. The go directive specifies the Go version for the project. The use directive adds the modules to the modules in the workspace relative to the go.mod file path. You can use the replace directive to replace the content of a specified module’s version(s) with the alternative you specify.
Go provides the edit, use, and sync commands for working with workspaces and the modules in the workspace.
You can use the use command to add new modules to your workspace. The use command modifies the go.work file and adds the module (package) to the use directive if the package exists locally:
go work use ./filePath
The sync command synchronizes the build list (version of dependency modules in the workspace) to the workspace modules:
go work sync
The edit command provides a command-line interface for editing the Go workspace file in current and parent directories:
go work edit
Note: Only the edit command can access the workspace file (no modules).
You can use the -fmt flag with edit to reformat the Go workspace file:
go work edit -fmt
The aim of Go workspaces is multi-module local development. In this tutorial, you’ll access the functions in an external module locally in another module of the same workspace.
Run the code below to create and initialize a Go workspace with two Go modules on your machine. The commands also create Go files in the modules:
go work init
mkdir newProject1 && cd newProject1 && go mod init newProject1 && touch calculate.go
cd ..
mkdir newProject2 && cd newProject2 && go mod init newProject2 && touch calculated.go

The newProject1 module will house a function that the newProject2 module can access and interoperate within development.
Here’s the workspace file with the use directive specifying that the two modules are part of the workspace:
use (
        ./newProject1
        ./newProject2

)
Add these codes to the specified packages to access the newProject1 Calculate function from the newProject2 main function:
// newProject1

package newProject1

func Calculate(x, y int) int {
        return x + y
}
The code above returns the sum of two integers. Since the module (newProject1) is part of the Go workspace, you should be able to access the function from the other module (newProject2):
// newProject2

package main

import (
        "fmt"
        "newProject1"
)

func main() {
        fmt.Println(newProject1.Calculate(3, 4))
}
The code above imports the newProject1 module and accesses the Calculate function. Here’s the result of the main function on running the newProject2 package:
go run ./newProject2

Go workspaces is a relatively new feature, and developers seek new ways and use cases to incorporate it into their projects.
Here are some of the use cases for Go workspaces:
Go workspaces may foster open source collaboration among Go developers because you can use multiple modules seamlessly. It is handy for large projects because switching and inter-operating between projects have become easier.
One of the use cases for Go workspaces is versioning. Go workspaces make it easier to build different versions and features, simultaneously, while syncing dependencies between packages without breaking existing code.
You’ve learned about Go workspaces, the features, how to use Go workspaces for easier workflows in your projects, and use cases for workspaces.
Go workspaces was released along with many other highly anticipated features, from fuzzing to generics and performance improvements across machines. Go authors constantly work to improve the language and recently released Go v1.19.
Install LogRocket via npm or script tag. LogRocket.init() must be called client-side, not
server-side
$ npm i --save logrocket

// Code:

import LogRocket from 'logrocket';
LogRocket.init('app/id');
// Add to your HTML:

<script src="https://cdn.lr-ingest.com/LogRocket.min.js"></script>
<script>window.LogRocket && window.LogRocket.init('app/id');</script>
Would you be interested in joining LogRocket's developer community?
Join LogRocket’s Content Advisory Board. You’ll help inform the type of content we create and get access to exclusive meetups, social accreditation, and swag.
Sign up now
Discover how to use Gemini CLI, Google’s new open-source AI agent that brings Gemini directly to your terminal.

This article explores several proven patterns for writing safer, cleaner, and more readable code in React and TypeScript.

A breakdown of the wrapper and container CSS classes, how they’re used in real-world code, and when it makes sense to use one over the other.

This guide walks you through creating a web UI for an AI agent that browses, clicks, and extracts info from websites powered by Stagehand and Gemini.