The Replay is a weekly newsletter for dev and engineering leaders.
Delivered once a week, it's your curated guide to the most important conversations around frontend dev, emerging AI tools, and the state of modern software.
AI-powered developer tools are evolving fast, and command-line interfaces (CLIs) are no exception. Two of the most prominent players right now are Google’s Gemini CLI and OpenAI’s Codex CLI. Both bring AI directly into your terminal, but they take different approaches and offer different capabilities.

In this article, we’ll walk through installation, setup, and hands-on testing of both tools. By the end, you’ll have a clear idea of how they perform in real coding scenarios and which one might fit best into your workflow.
Before you get started, make sure you have:
Let’s go step by step, starting with Codex CLI.
Codex CLI doesn’t run natively on Windows. You’ll need WSL2 for full compatibility.
Here is a checklist of things you need to get installed:
When you’re done setting up the above, run the following command:
npm install -g @openai/codex
If installation succeeds, you will be shown this screen:

On Windows, Codex CLI is best run via WSL2 for full compatibility.
Codex accepts many LLM providers, and in my case, I tested it using AI models from Openrouter.
Head over to the OpenRouter website, register, and copy your API key.
To set the openrouter API key as an environmental variable, open the command line and run the following command:
export OPENROUTER_API_KEY="Your openai api key here"
In the home folder in the Linux environment, run this command:
~/.codex/config.toml
Then run:
code .
That command will open the folder in VS Code.
Next, edit the codex config.toml file to use openrouter as a provider, like so:
[model_providers.openrouter]
name = "OpenRouter"
base_url = "<https://openrouter.ai/api/v1>"
env_key = "OPENROUTER_API_KEY"

[profiles.openrouter]
model_provider = "openrouter"
model = "deepseek/deepseek-chat-v3-0324:free"
Then run the command below to start up Codex:
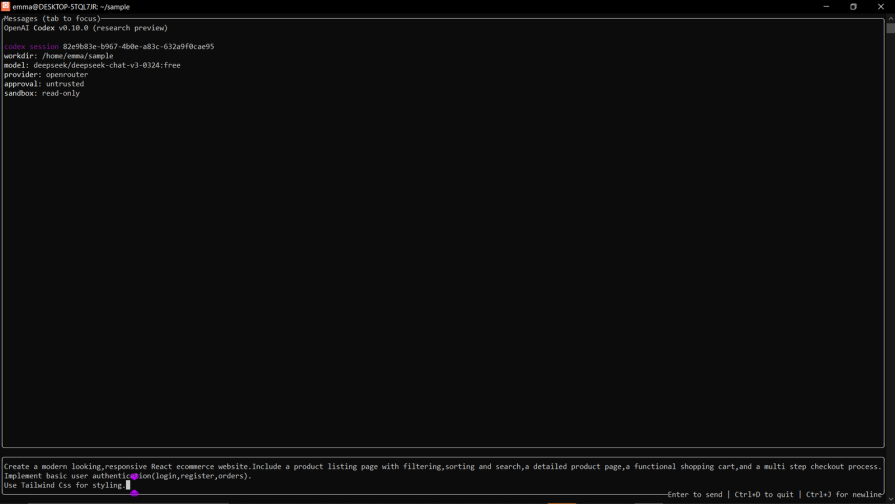
codex -p openrouter
Which will bring up the screen below:
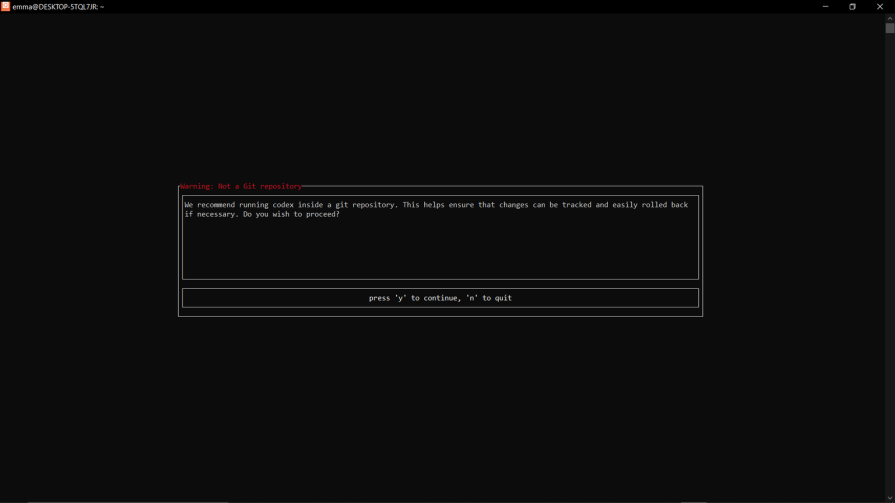
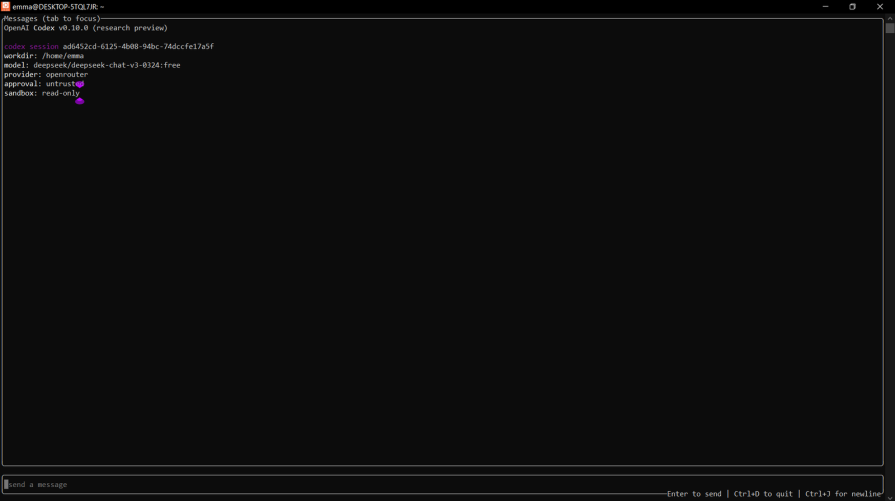
Press the y key to accept, and you‘ll see something like this:
With Node.js and npm installed, open your terminal and run the following command:
npm install -g @google/gemini-cli
gemini
With the above command and the -g attribute, we installed it globally on our machine. If the installation was successful, you’ll see the output below:
![]()
If Gemini didn’t open automatically, you’ll have to run the Gemini command, which is simply:
gemini
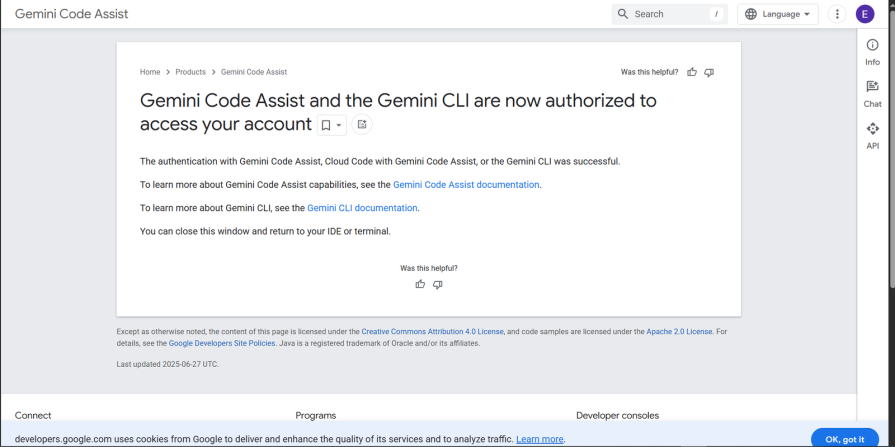
You’ll be prompted to sign in. Use the down arrow key to scroll to the email login option, then click Enter. If login goes smoothly, you should see this screen:
After being prompted to choose your theme, you’re in.
Now let’s familiarize ourselves with these 2 CLIs.
Codex CLI is developed by OpenAI, the team behind ChatGPT. By default, it uses ChatGPT models under the hood.
It supports three approval modes:
You can run codex cli in one-off mode like so:
codex --full-auto "create a todo app"
Or run it interactively with:
codex
Gemini CLI is an open-source AI agent that brings the power of Google’s Gemini models directly to your terminal. Gemini CLI is Google’s answer to the current AI CLI innovation boom.
It supports:
You can try Gemini CLI in 2 modes:
For example, you could use Gemini CLI in interactive mode with:
gemini
In Non-Interactive mode, you could try out Gemini CLI by inputting:
**gemini -p "create a todo app"**
I tested both AI CLIs in real-world developer workflows to see how they perform beyond simple toy prompts. To make the comparison fair, I used the same inputs and evaluated them against three core developer tasks:
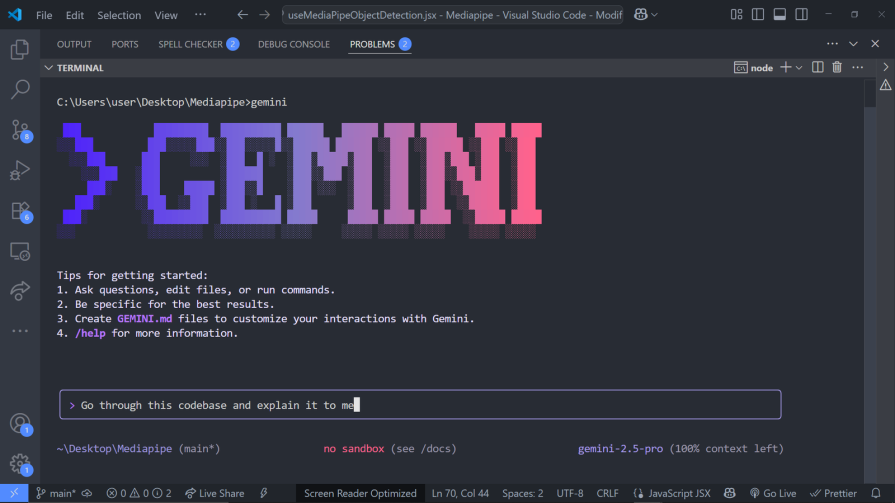
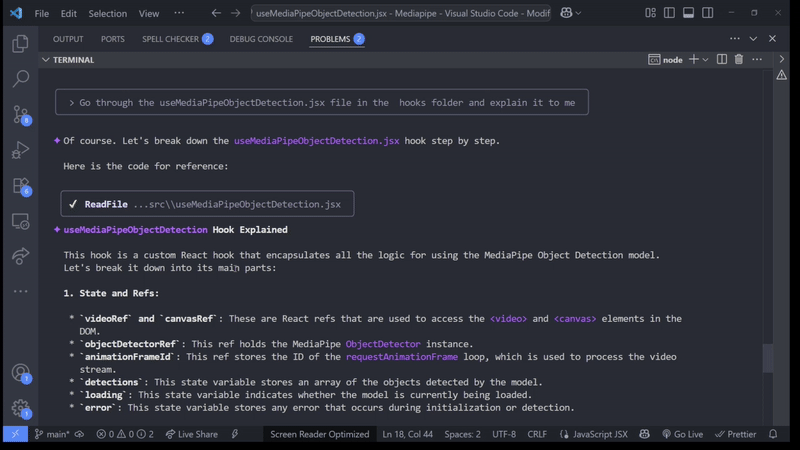
Can the CLI quickly analyze and summarize an existing project so you can understand its structure, logic, and purpose without reading every line of code? The prompt we’ll use to test this is pretty straightforward: “Go through this codebase and explain it to me.”
I gave Codex CLI the prompt: Go through the useMediaPipeObjectDetection.jsx file in the hooks folder and explain it to me. Then I watched it process, as seen below.
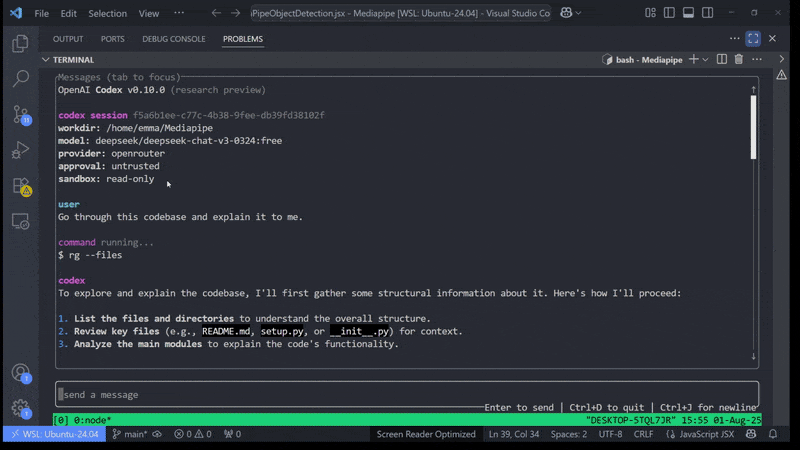
That resulted in the output below:
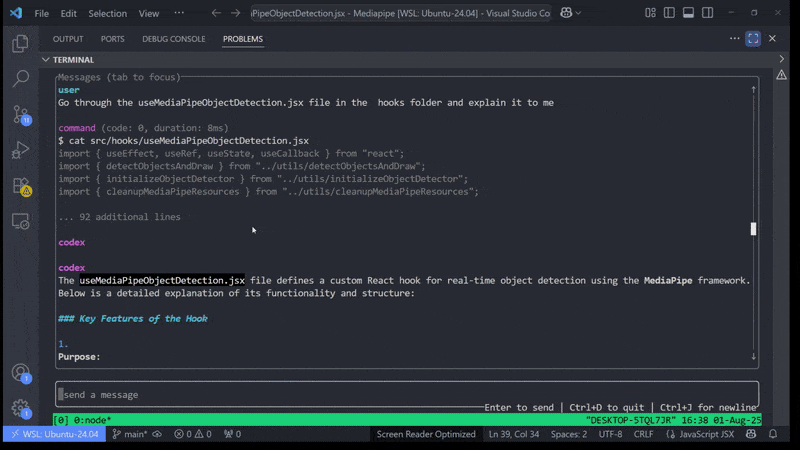
Codex CLI produced helpful, structured explanations, grouping results by:
Codex CLI stood out through its structured explanations and organized output. When asked to walk through a codebase, it grouped the results into purpose, key features, and usage examples. That kind of formatting is immediately actionable. You can glance at the output and quickly understand what a file does without parsing long paragraphs.
Strengths:
Weaknesses:
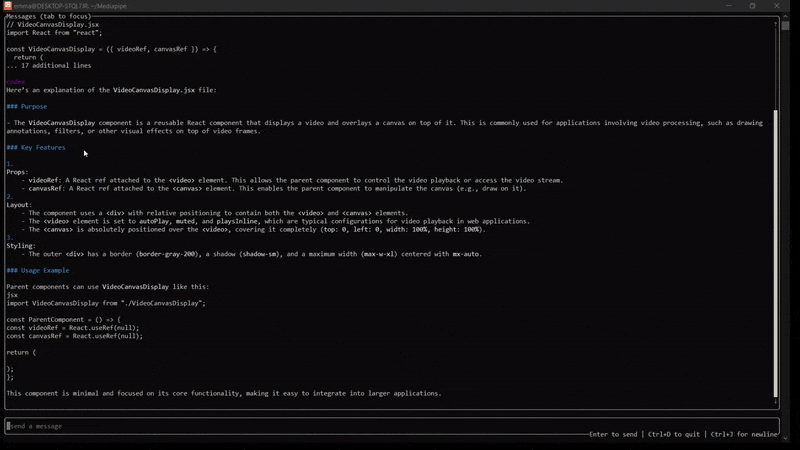
I gave Gemini the same test prompt:
It gave me the explanation below:
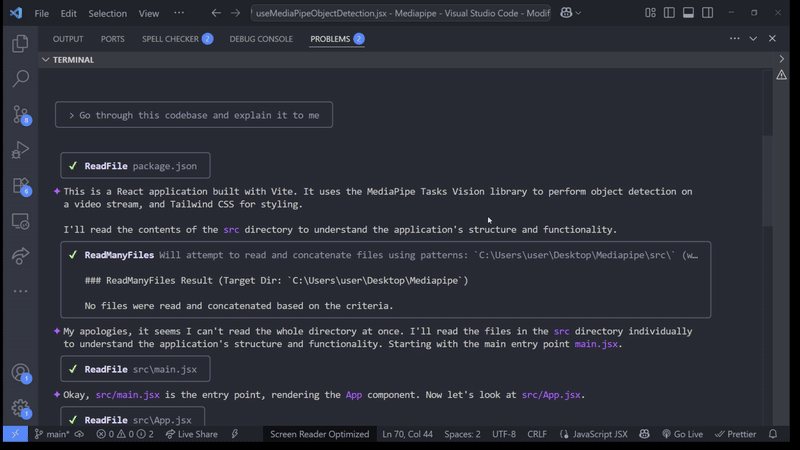
You can see that Gemini CLI provided a comprehensive and detailed overview of what the codebase is all about. It went through all the files in the source code folder and summarised their functions.
Unlike Codex, Gemini shone in its breadth of analysis. Instead of only focusing on the file you point to, it can summarize entire folders and outline how pieces of the codebase fit together. For onboarding or auditing an unfamiliar project, that’s powerful, giving you a “big picture” view before diving into details.
Now, let’s ask Gemini to explain a specific part of the code.
We’ll give it the following prompt:
Go through the useMediaPipeObjectDetection.jsx file in the hooks folder and explain it to me.
Apart from a general summary of what the file does, Gemini CLI broke down the explanation into:
Strengths:
Weaknesses:
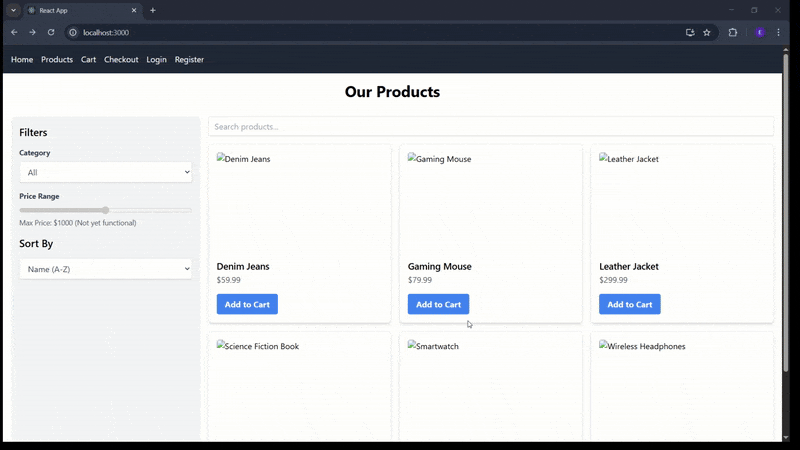
For this test, I asked both CLIs to generate a modern React e-commerce site with fairly standard requirements:
This is a realistic, mid-sized prompt, and the kind of prototype you’d build when validating an idea or setting up a demo for stakeholders. Let’s see how these CLIs do with project creation.
The prompt we’ll use here is as follows: Create a modern-looking, responsive React e-commerce website. Include a product listing page with filtering, sorting, and search, a detailed product page, a functional shopping cart, and a multi-step checkout process. Implement basic user authentication (login/register/orders). Use Tailwind CSS for styling. Manage state with React Context API.
It requests the required permission here.
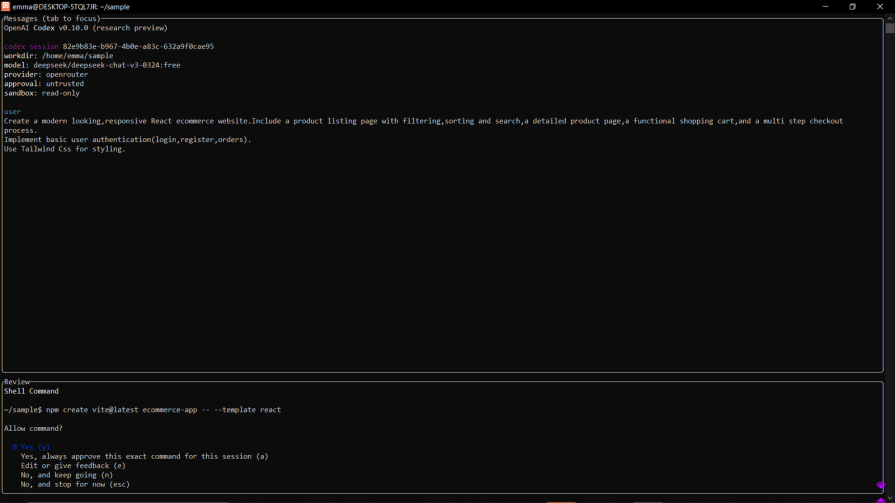
After giving it permission to create files and perform all the required installations, Codex CLI produced the following:
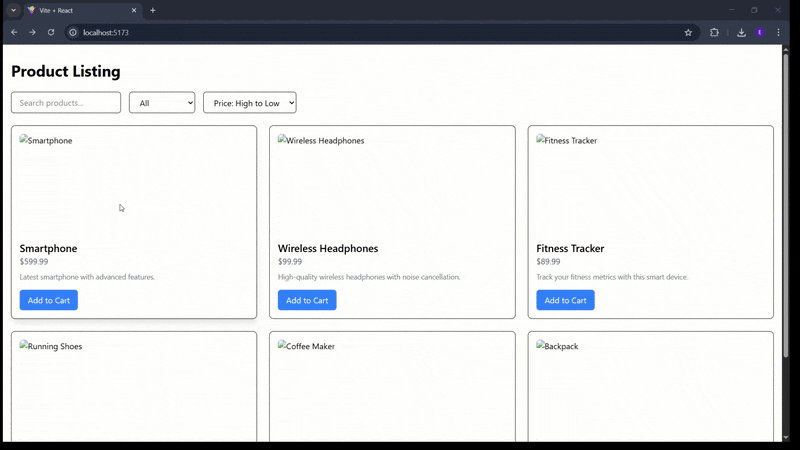
Codex CLI scaffolded a working React app and installed the necessary dependencies. The overall project structure made sense, and the Tailwind integration worked right away. It also generated reasonable starting points for the product listing and checkout flow.
The problem came with complex, stateful features. The shopping cart in particular caused issues. Even after granting file-write and install permissions, Codex introduced bugs where the cart wouldn’t update properly. Re-prompting it didn’t help much. It often claimed the bug was fixed when it wasn’t. In the end, I had to manually debug and patch the logic.
Strengths:
Weaknesses:
After using the same test prompt on Gemini CLI, this is what I got:
Gemini CLI also scaffolded a React app with Tailwind and routing in place. At first glance, the project looked promising. However, functionality gaps surfaced quickly:
The upside was that Gemini’s interactive loop made it easier to iterate. Instead of getting stuck in a cycle of “bug claimed fixed but still broken,” Gemini responded to successive prompts with fresh approaches. After a few iterations, I managed to resolve the missing product and cart issues.
Strengths:
Weaknesses:
A newer capability of AI CLIs is generating code directly from visual input. In this test, I gave both Codex and Gemini the same UI screenshot and asked them to scaffold a project from it.
Codex
Codex CLI lets you provide screenshots in two ways. You can drag and drop directly into the terminal session, like so:

Or you can also give Codex the path to the image file you want to use.
Codex parsed the screenshot and generated React components to match the layout. The code was serviceable, with styled sections and placeholder content roughly aligned to the screenshot.
Strengths:
Weaknesses:
Gemini CLI
With Gemini CLI, you can give a screenshot to Gemini CLI like so:

You can also give Gemini CLI a path to the screenshot.
Gemini CLI supports the same two input methods (drag-and-drop or file path). Where it differs is in the interactive flow. After ingesting the screenshot, Gemini produced the initial components and then prompted me for adjustments (for example, whether I wanted the layout responsive or which framework to use for styling).
Strengths:
Weaknesses:
Gemini is better if you want guided iteration from a screenshot, while Codex is faster for quickly extracting a layout you’ll refine yourself.
Both Codex and Gemini CLI are open source, but Codex offers a couple of unique advantages:
Multiple LLM providers: Unlike Gemini CLI, which is tied exclusively to Google’s Gemini models, Codex can integrate with different providers. This gives you flexibility to switch based on cost, performance, or availability.
Local model support: Codex can connect to models running directly on your machine, making it a strong option if you want more control, privacy, or offline capability.
Even with some early bugs, Gemini CLI felt smoother to use. Its interactive design made it easy to refine prompts and iterate toward a working solution. Codex CLI, on the other hand, provided more flexibility: I could link it to different providers and even run models locally. In practice, Gemini made iteration easier, while Codex gave me more freedom in how I used AI models.
If you are a developer conversant with setting up and using a Linux environment, then Codex is a better option for you.
If you prefer everything working directly on your Windows laptop without needing to set up a
Ultimately, Codex is the better choice if you value adaptability and provider choice, while Gemini is the more convenient option if you want simplicity and guided iteration.
Here’s my honest review based on the metrics I tested both CLIs against, organized into a table:
| Feature | Codex CLI | Gemini CLI |
|---|---|---|
| Explaining a codebase | Clear, structured summaries (purpose, key features, usage). | Broader, more detailed explanations of files and interactions. |
| Building a project from scratch | Generates a solid scaffold but struggles with fixing bugs. | Generates a scaffold but requires multiple prompts to fix issues. |
| From a screenshot | Supports drag-and-drop or file path; produces a quick layout but limited interactivity. | Also supports drag-and-drop or file path; more iterative but slower. |
| Verdict | Best if you want clarity, flexibility, and a strong starting point. | Best if you want comprehensiveness and smoother iterative fixes. |
In this article, we compared Codex CLI and Gemini CLI across three real-world scenarios. Codex stood out for its structured explanations, flexibility with multiple model providers, and the option to connect to local models. Gemini, on the other hand, delivered broader project insights and a smoother iterative flow, especially when fixing bugs.
Ultimately, the “better” choice depends on your workflow:
Both tools are still early-stage, but they already hint at how AI will continue reshaping developer workflows in the terminal.

This article showcases a curated list of open source mobile applications for Flutter that will make your development learning journey faster.

Discover what’s new in The Replay, LogRocket’s newsletter for dev and engineering leaders, in the April 1st issue.
This post walks through a complete six-step image optimization strategy for React apps, demonstrating how the right combination of compression, CDN delivery, modern formats, and caching can slash LCP from 8.8 seconds to just 1.22 seconds.

Learn what vinext is, how Cloudflare rebuilt Next.js on Vite, and whether this experimental framework is worth watching.
Would you be interested in joining LogRocket's developer community?
Join LogRocket’s Content Advisory Board. You’ll help inform the type of content we create and get access to exclusive meetups, social accreditation, and swag.
Sign up now

