
Editor’s Note: This post was reviewed on 5 April 2023 for accuracy and now includes information about scalability, security, and authentication in Firebase and Supabase. Since publication, Supabase has consistently released updates, which include Supabase Clippy, support for serving multiple Edge Functions at the same time, new versions of supabase-js and supabase-flutter, and more. To learn more about Firebase, check out our archive and the official docs.

Backend-as-a-Service (BaaS) is a service model in which developers outsource all the behind-the-scenes aspects of web or mobile development. This is so they can focus on writing and maintaining the frontend on a plug-and-play basis and avoid the stress of writing server-side code.
BaaS platforms provide software for server-side activities, such as authentication, database management, real-time updating, storage, hosting, and push notifications (for mobile apps). Over the last decade, we’ve seen the rise of companies offering these services, including Firebase, Supabase, Parse, Back4app, and AWS Amplify, to name a few.
Although these backend services essentially offer the same solution, they use different backend technologies. For many developers, this is a deciding factor when picking the best service for a given project.
For instance, Back4App offers both REST and GraphQL APIs out of the box, while Firebase uses NoSQL syntax and does not offer GraphQL out of the box.
In this tutorial, we’ll focus on Firebase and the open source alternative, Supabase. We’ll start by exploring each platform individually, then we’ll compare Firebase vs. Supabase and offer some tips on how to choose the best tool for your project.
We’ll cover the following in detail:
The Replay is a weekly newsletter for dev and engineering leaders.
Delivered once a week, it's your curated guide to the most important conversations around frontend dev, emerging AI tools, and the state of modern software.
Firebase was initially founded in 2011 by James Tamplin and Andrew Lee. Google acquired the platform in 2014, and it’s now the company’s flagship offering for app development.
Firebase’s first product was the Firebase Realtime Database, an API that synchronizes application data across iOS, Android, and the web while storing it on Firebase’s cloud. Firebase has evolved into a full-blown BaaS service with products for both development and post-development phases.
Firebase offers products in three phases:

Each phase represents a different stage of development. Firebase has created specific products for each of these phases.
The build phase covers products that provide backend infrastructure for active development. These include core services used while building an application, such as authentication, storage, realtime database, Firestore, hosting, cloud functions, cloud messaging, remote config, and Firebase ML.
Let’s explore these features in more detail:
Firebase tools in the Release and Monitor category are used to monitor the application after it has been developed and released. These tools include the following:
The products in this category are mostly used for mobile apps. They help you engage your users, optimize the user experience, and keep your users happy.
On the paid plan, Firebase provides cool extensions to help you build your app, add functionality, and deploy faster. There are too many to list here, but the most important features include the following.
To get started with Firebase, we have to create a Firebase account and start a new project:

Once we create the project, we now have access to the available Firebase’s features to use in our app.
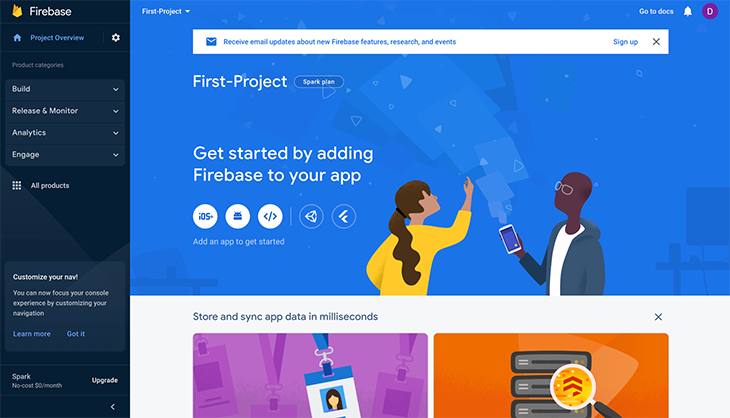
Next, we can go on to register the app for the web. To do this, click on the web icon and add Firebase to the app.
![]()
Once we add the app’s name, it’ll show us how to install the Firebase SDK on our client side. Plus, we now get access to the unique credentials for the app.

Then, we can go on to set up our features for this app. The primary features that are needed within most applications include:
As mentioned earlier, Firebase provides an auth service that lets us manage the user’s authentication data directly through Firebase. They also provide different sign-in methods that we can use to authenticate the users.
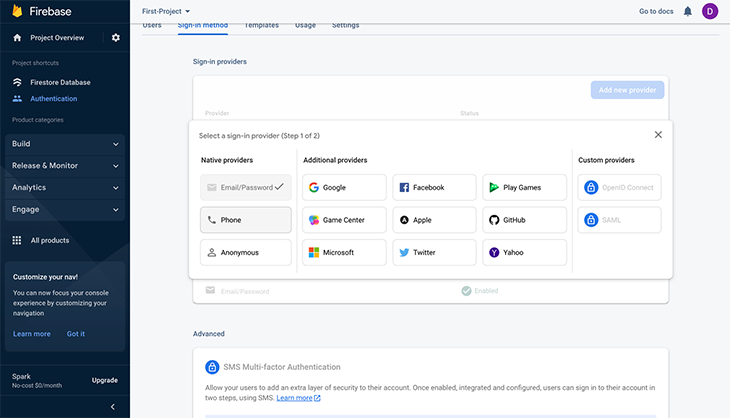
These methods include traditional mediums like email/password, phone number/SMS, or even an anonymous method for guests. Also, Firebase allows us to authenticate our users using third-party providers like Google, Twitter, Github, etc.
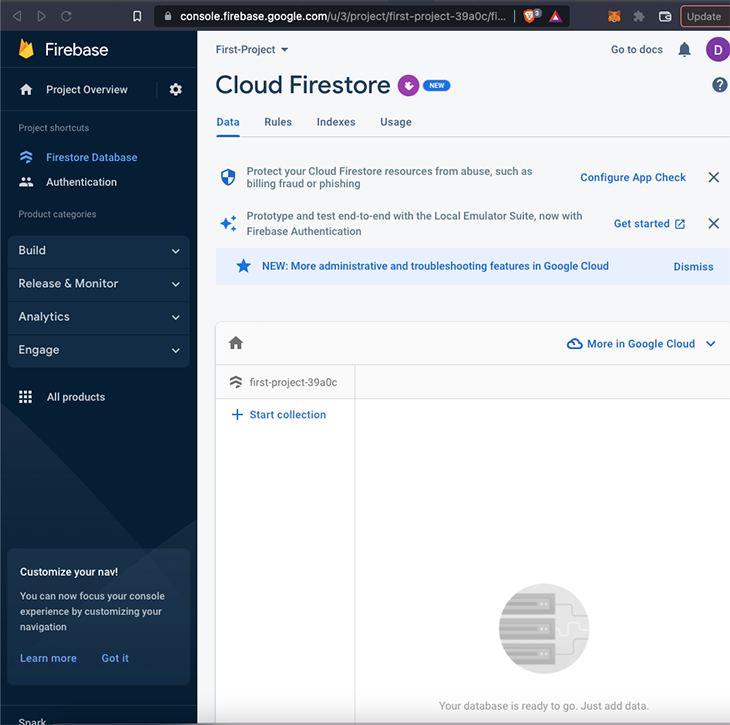
The Firebase Firestore is a NoSQL database provided by Firebase as part of its offering. One upside is that it allows you to perform CRUD operations directly on your database from your client-side SDK.
Firebase also provides a cloud storage feature that allows us to store media files. A simple use case is the ability to upload an image to the cloud and instantly get a URL for the image.
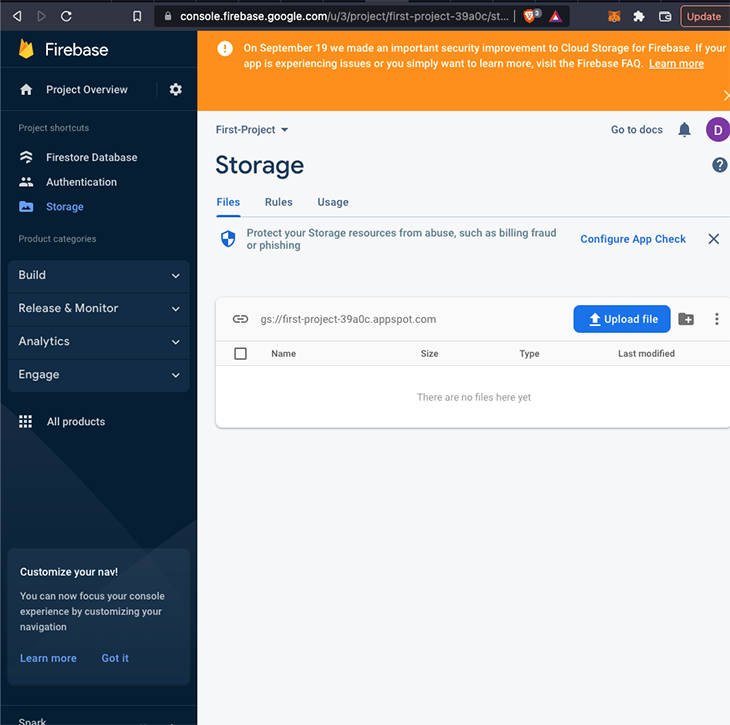
A common scenario when building apps is when we need to upload an image and attach it to its related data. We can go on to upload the image, get back the image URL, and save it as text within a document in the Firestore database.
Once all of this is set up on our Firebase dashboard, we need to integrate this directly into our frontend. We’ll start by installing Firebase SDK into our project. We can do this using the credentials we got earlier.
We go into our app and install the firebase package from npm.
npm install firebase
Next, we import firebase and initialize our firebase config code.
import { initializeApp } from 'firebase/app'
import { getAuth } from 'firebase/auth'

const firebaseConfig = {
    apiKey: "API-KEY",
    authDomain: "AUTH-DOMAIN",
    databaseURL: "DATABASE-URL",
    projectId: "PROJECT-ID",
    storageBucket: "STORAGE-BUCKET",
    messagingSenderId: "MESSAGING-SENDER-ID",
    appId: "APP-ID"
  };

  // Initialize Firebase
initializeApp(firebaseConfig);
After initializing Firebase into our client side, let’s go over how to use it to add authentication. In the same file, we’ll install our getAuth from firebase/auth and also initialize it.
import firebase from "firebase/app";
import { getAuth } from 'firebase/auth'

const firebaseConfig = {
    apiKey: "API-KEY",
    authDomain: "AUTH-DOMAIN",
    databaseURL: "DATABASE-URL",
    projectId: "PROJECT-ID",
    storageBucket: "STORAGE-BUCKET",
    messagingSenderId: "MESSAGING-SENDER-ID",
    appId: "APP-ID"
  };
// Initialize Firebase
 initializeApp(firebaseConfig)

// Initialize Firebase auth
const auth = getAuth()
We can sign up new users on the app using their email and password. We have to pass the user’s email and password as arguments to the auth.createUserWithEmailAndPassword() method.
auth.createUserWithEmailAndPassword(auth, email, password)
  .then((res) => {
    let user = res.user;
  })
  .catch((error) => {
    console.log(error.code);
    console.log(error.message);
  });
Let’s now use Firestore to add data to our database. We’ll create a database collection called names and add users’ names.
import { initializeApp } from "firebase/app";
import { getFirestore } from "firebase/firestore";
import { doc, setDoc } from "firebase/firestore";

// Config and initialize Firebase as shown above

const firebaseConfig = {
    // ...
};

// Initialize Firebase
const app = initializeApp(firebaseConfig);

const db = getFirestore(app);

async function addDocs () {
  try {
    const addedDocs = await setDoc(doc(db, "names", "Doe"), {
    fullName: "John Doe",
    city: "London",
    country: "UK"
    });
    console.log("Document's ID: ", addedDocs.id);
  } catch (error) {
    console.error("Error adding document to DB: ", error);
  }
}
Finally, to store a media file, we can get the metadata and store it in our cloud storage.
import { initializeApp } from "firebase/app";
import { getStorage, ref, uploadBytes } } from "firebase/storage";

// Initialize Firebase
const firebaseConfig = {
  // ...
};

// Initialize Firebase
const app = initializeApp(firebaseConfig);


// Initialize cloud storage and get a reference to the service
const storage = getStorage(app);
const storageRef = ref(storage, 'images/logo.png');
const metadataFile = {
  contentType: 'image/png',
};

const uploadImage = uploadBytes(storageRef, file, metadataFile);
Supabase describes itself as an open source alternative to Firebase. It’s designed to help developers spin up their backend within minutes. Supabase’s mantra is “Build in a weekend, scale to millions.”
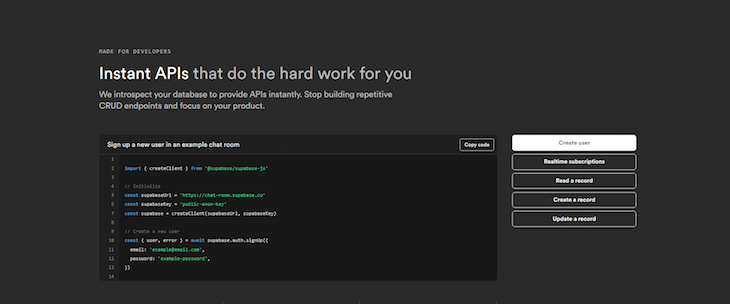
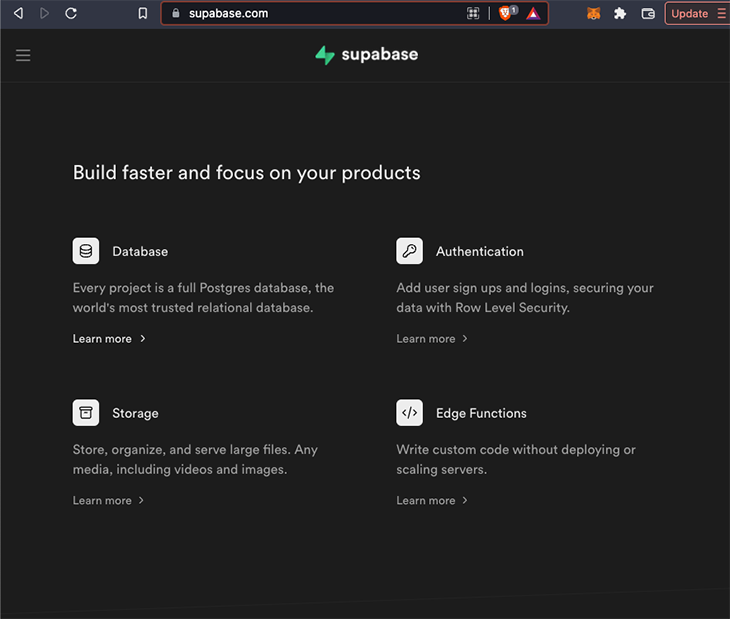
At the time of writing, Supabase products available for use include a Postgres database and authentication service, storage, and Edge functions (serverless functions for backend logic). Supabase and all its tools are mainly open source.
The Postgres database comes with database-related tools, including real-time listening to database changes and an interface for managing them. Plus, Supabase provides instant APIs and syntax that is somewhat similar to Firebase. This helps us handle CRUD operations in a straightforward pattern so we can focus on building rather than rewriting repetitive CRUD code.
The Postgres database is in the form of a table that allows us to store structured and related data like we would on any spreadsheet. Interestingly, when setting up a project, we can import an existing spreadsheet as our Postgres database.
To make use of Supabase in our application, we’ll have to set it up on the dashboard. First, we need to create a new project.
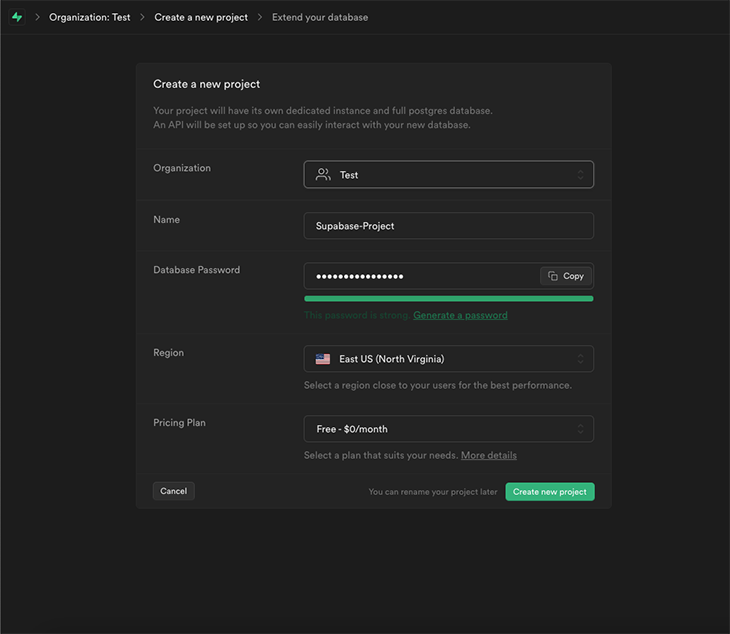
Once the project is ready, click on the SQL editor button.

Under the Quick start section, there are sample scripts for projects we can run. The aim is to get started quickly and create a database for the project.

Let’s select a simple project: A to-do list. It directs us to a SQL Editor page. Once we get on this page, we can just click the Run button.
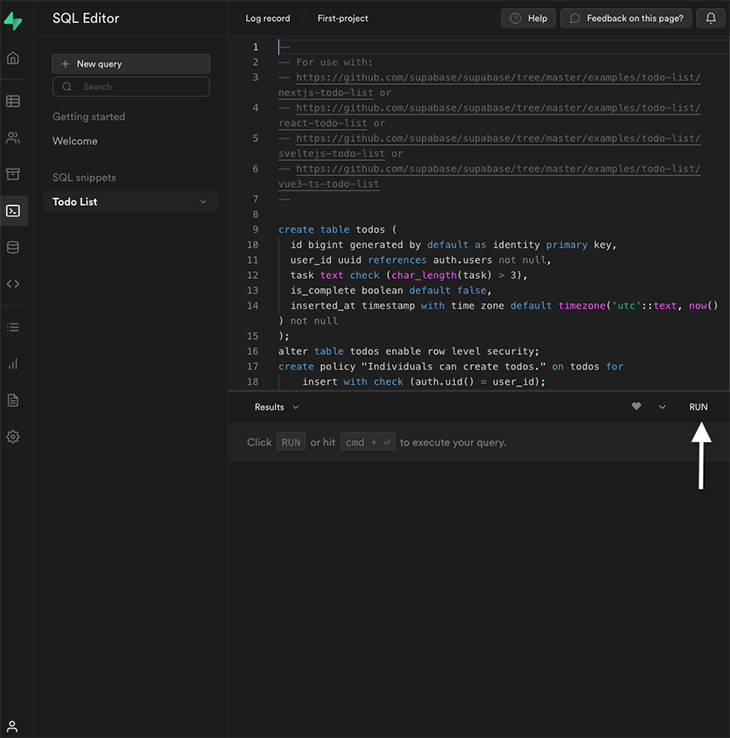
This creates a simple to-do list table that we can then populate with our data.
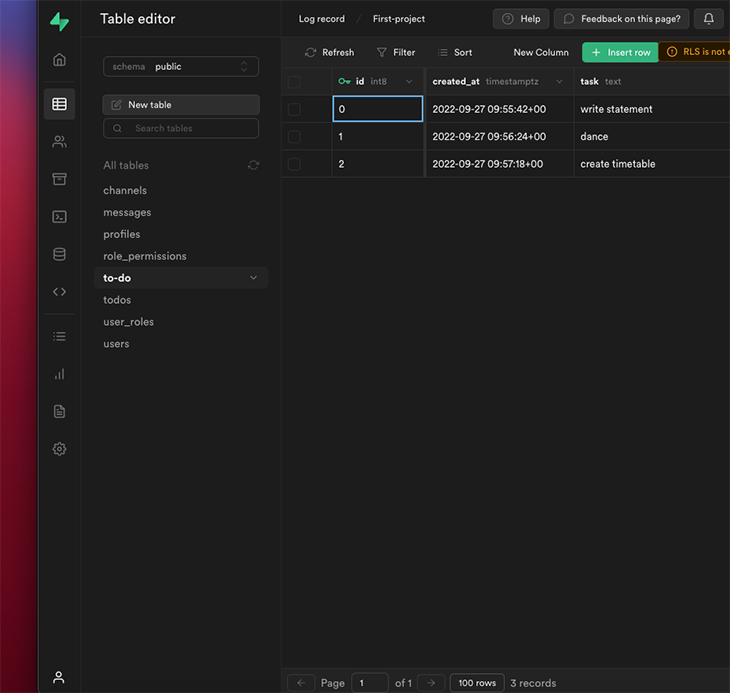
Now that we’ve set up our to-do list table, the final step is to pull this data from our client side. To do this, we need to get two variables from our dashboard Project URL and API key. We can get that by clicking on Settings > API.
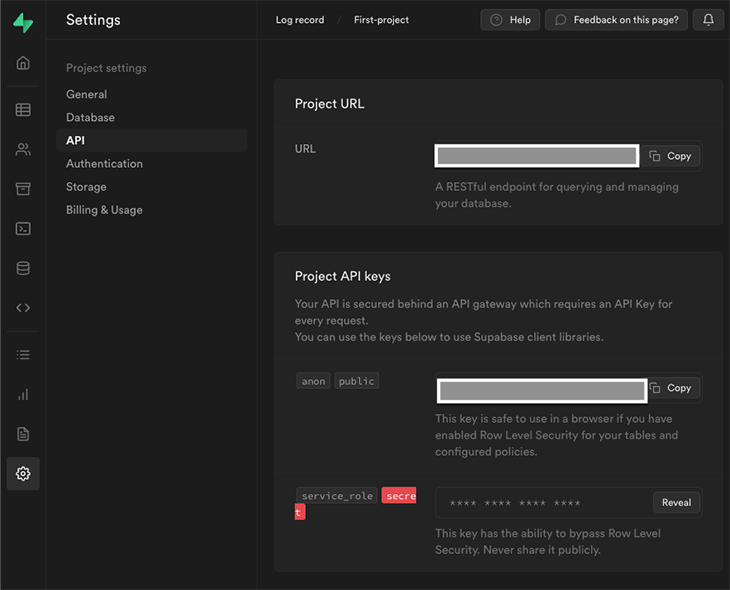
We can then save it as part of our environmental variables, in our .env file.
Now, let’s install Supabase using its npm package.
npm install @supabase/supabase-js
Next, we import it into our project and pull the data from the todos table.
import { createClient } from '@supabase/supabase-js'

const supabaseUrl = process.env.APP_SUPABASE_URL
const supabaseAnonKey = process.env.APP_SUPABASE_ANON_KEY

const supabase = createClient(supabaseUrl, supabaseAnonKey)

const getTodo = async () => {
  try {
    let { data, error } = await supabase.from('todos').select('*')
    if(data) {
      return data
    }
    if(error) {
      throw error
    }
  }
  catch (error) {
    console.log(error)
  }
}
The getTodo function returns data from our todos table and also returns an error if that’s the case.
Now that we’ve explained how Firebase and Supabase work individually, let’s dissect and compare both technologies and examine when we should use Supabase over Firebase.
With Supabase, we can easily import a CSV or copy and paste a spreadsheet to kickstart the project. This is great if we’re migrating data from another platform to Supabase.

Firebase doesn’t offer inbuilt services that enable us to directly upload bulk data. The best we can do is use a third-party node script or something similar, which looks hackish. Plus, we will have to convert our CSV (or whatever format) to JSON before doing anything at all.
Supabase is an open source product, meaning it’s currently free. The Supabase team plans to charge for hosting when it is released. There are also contribution plans for individuals and enterprises to help sponsor the product.
Firebase, on the other hand, is not free. The free Spark plan is generous, making it a good fit for side projects that don’t generate any serious traffic. Enterprise applications would need to get on the Blaze plan (pay-as-you-go) to get access to the complete offering, including Firebase extensions and more space for database and storage.
Supabase is a relational database whereas Firebase is a NoSQL database. The most appropriate database for your project depends on what kind of app you’re building.
Relational databases are useful when data is related, rigid, and needs to be consistent every time. On the other hand, it might be better to use NoSQL if we have flexible data with different data types and we need to move fast.
Both database types have their pros and cons. For instance, NoSQL databases could be repetitive, but querying the database is fast. That’s why it’s used for search engines and social media feeds. Consistency and performance are two big factors.
Firebase provides official extensions that can help us integrate directly with other relevant services like Stripe, Google play, Algolia, Twilio, Mailchimp, etc.
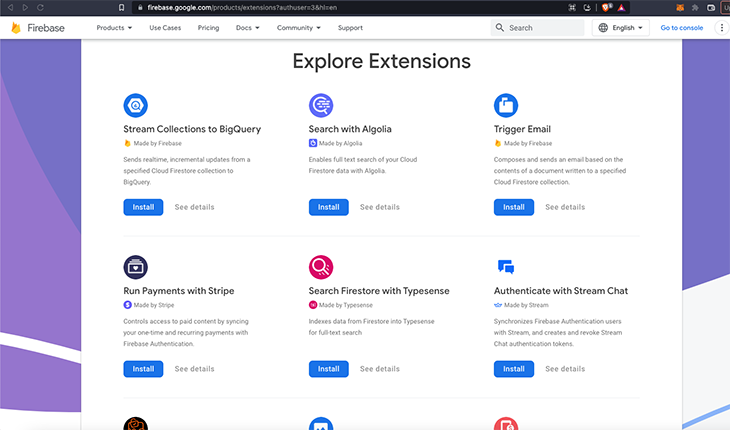
Direct integrations like this help us minimize work and abstract certain functionalities that we’d have needed to implement ourselves if we use Supabase.
When dealing with enterprise applications, data migration is often a priority, especially as the company scales.
Data migration on a NoSQL database without schema or an ORM such as Firebase could prove difficult compared to using a relational database, which is available with Supabase. It’s even harder when we’re already in production.
You can download all our data and schema as a .sql file in Supabase from the backup section on the dashboard. Alternatively, you can dump the latest data from the command line using pg_dump.
Choosing the right BaaS is heavily dependent on your project’s functional requirements and growth potential. If you’re building a big project, you should do your research to understand the constraints associated with each BaaS platform. This will help you avoid technical debt in the future.
Considering the points we’ve highlighted above, we can say both services are relatively scalable. Scalability in this context will now be heavily dependent on the design of the app’s data architecture. Although, the upside that Supabase has, in this case, is mainly around the fact that it uses the Postgres database and its data migration steps.
In this post, we covered the basics of Firebase vs. Supabase. We talked about their general architectures, how to install them, and overviewed the main functions and features of both options. We also compared the two side-by-side across a variety of criteria.
Thanks for reading!
Install LogRocket via npm or script tag. LogRocket.init() must be called client-side, not
server-side
$ npm i --save logrocket

// Code:

import LogRocket from 'logrocket';
LogRocket.init('app/id');
// Add to your HTML:

<script src="https://cdn.lr-ingest.com/LogRocket.min.js"></script>
<script>window.LogRocket && window.LogRocket.init('app/id');</script>

Learn how LLM routing works in production, when it’s worth the complexity, and how teams choose the right model for each request.

Compare key features of popular meta-frameworks Remix, Next.js, and SvelteKit, from project setup to styling.

Discover what’s new in The Replay, LogRocket’s newsletter for dev and engineering leaders, in the February 4th issue.

AI-first isn’t about tools; it’s about how teams think, build, and decide. Ken Pickering, CTO at Scripta Insights, shares how engineering leaders can adapt.
Hey there, want to help make our blog better?
Join LogRocket’s Content Advisory Board. You’ll help inform the type of content we create and get access to exclusive meetups, social accreditation, and swag.
Sign up now
2 Replies to "Firebase vs. Supabase: Choosing the right tool for your project"
A great write up! Just one note on:
“Neither Firebase nor Supabase enables you to migrate your data directly from the dashboard; you’ll need to contact them to go through with data migration.”
You can download all your data + schema as an .sql file in Supabase from the backup section on the dashboard. Or alternatively dump the latest data from the command line using pg_dump
Appwrite also seems like very promising backend alternative for any one looking for an open-source solution:https://appwrite.io