Astro has established itself as a fully featured, reliable frontend framework for content-driven sites. It has added many great features through the years — MDX support, content collections with frontmatter type-checking, handling images automatically, and recently, Astro DB. Now, Astro has done it again.

The Astro 4.8 release ships with another powerful and long awaited feature: Astro server actions.
Server actions in Astro enable you to define and call backend functions with TypeScript’s safety features. A second great feature in the 4.8 release is the ability to rewrite URL requests, also known as rerouting in other frameworks.
These two Astro features are still in the experimental phase, but we can try them out now. Let’s get started.
In this section, we’ll explore what actions are and how to apply them in practice.
Astro actions are backend type-safety functions that can be called from the frontend. They combine several great features:
formData validatorAstro actions were created to help us build more dynamic use cases like counters, rating and comment widgets, and components. Here is a quick summary of the ways Astro actions can empower developers and facilitate the build process:
formData payloadsThe best way to see what’s so great about Astro actions is to actually see them in action. Let’s start by installing the Astro blog template in the next section.
To install Astro blog template, run the following command and accept all defaults during the installation process:
npm create astro@latest -- --template blog
To see the full power of actions, we need a database too. Fortunately, Astro provides its own fine-tuned Astro DB implementation, as I mentioned above. To add it to the project, run the following command:
npx astro add db
Lastly, we need to add React. However, as we want the React 19 beta version, we can’t use the add command. Instead, we need to install it manually. First, run the following command to add React support in Astro:
npm install @astrojs/react
Then, install React 19 by running the following command:
npm install --save-exact react@rc react-dom@rc
You also need to update React types manually by adding the following in your package.json file and reinstall the dependencies:
{
  "dependencies": {
    ...
    "@types/react": "npm:types-react@rc",
    "@types/react-dom": "npm:types-react-dom@rc"
  },
  "overrides": {
    "@types/react": "npm:types-react@rc",
    "@types/react-dom": "npm:types-react-dom@rc"
  }
}
Great! Everything is installed. Now we need to make it works by tweaking the Astro config file. Open astro.config.mjs file and replace its contents with the following:
// astro.config.mjs
import { defineConfig } from 'astro/config';
import mdx from '@astrojs/mdx';
import sitemap from '@astrojs/sitemap';
import react from '@astrojs/react';
import db from "@astrojs/db";

export default defineConfig({
  output: 'hybrid', // or 'server'
  site: 'https://example.com',
  integrations: [mdx(), sitemap(), react(), db()],
  experimental: {
    actions: true,
  }
});
Basically, we add React and Astro DB integrations and activate the Astro actions feature by setting experimental.actions to true and the output to hybrid or server.
Now we’re ready to start the dev server and see if everything is set up correctly:
npm run dev
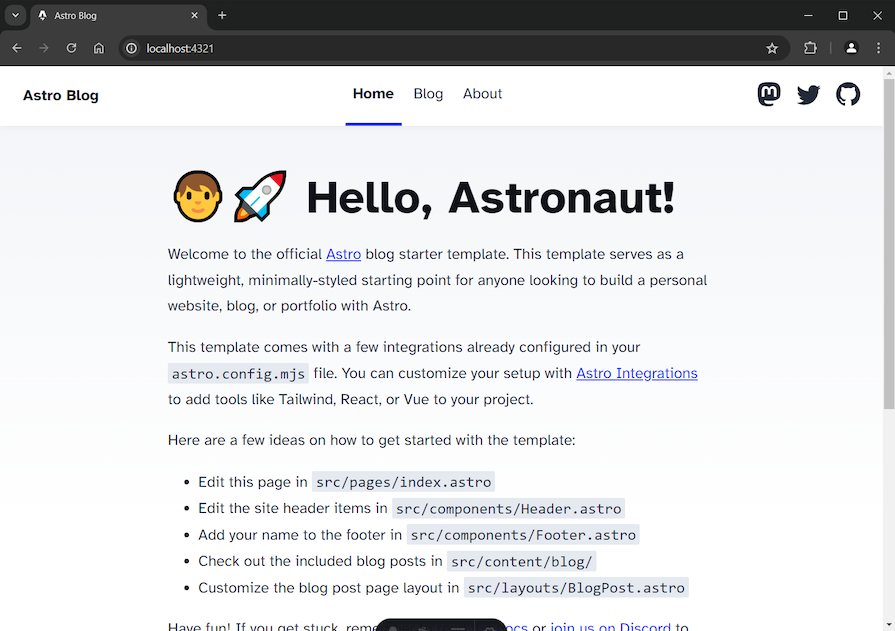
Here is how the homepage should look in your browser:
OK. Let’s start the fun part.
Likes widgetIn this section, we’ll create a Likes widget, which will show a counter for “likes” of the currently viewed post. Clicking the widget will increment the counter by one. If a user has already liked the post, clicking the widget will decrement the counter by one.
Our first task is to create a schema for our database where we’ll store the likes. You should already have config.ts and seed.ts files scaffolded for you in a db directory. Open the config.ts file and replace its content with the following:
// ./db/config.ts
import { column, defineDb, defineTable } from "astro:db";

const Likes = defineTable({
  columns: {
    postId: column.text({ primaryKey: true }),
    likes: column.number(),
  },
});

export default defineDb({
  tables: { Likes },
});
Here, we define a Likes table and export it. We need only two columns: one for the postId and the other for post’s likes.
Now, open seed.ts and replace its content with the following:
// ./db/seed.ts
import { db, Likes } from "astro:db";

export default async function seed() {
  await db.insert(Likes).values({
    postId: "first-post.md",
    likes: 6,
  });
}
Here, we import the Likes table and populate it with some initial values. In our case, we set the first post to have 6 likes.
Note that if you get an error with Likes import, you can just ignore it. The error should be resolved after you restart the server.
Finally, we get to the main point of this tutorial: defining an action. To do so, first create an actions folder in the src directory and add an index.ts file inside. Then, add the following code:
// src/actions/index.ts
import { defineAction, z } from "astro:actions";
import { db, Likes, gt, sql } from "astro:db";

export const server = {
  like: defineAction({
    input: z.object({
      postId: z.string(),
      liked: z.boolean()
    }),
    handler: async ({ postId, liked } ) => {
      const mutate = await db
      .insert(Likes)
      .values({
        postId: postId,
        likes: liked ? 1 : 0,
      })
      .onConflictDoUpdate(
        liked
        ? {
          target: Likes.postId,
          set: {likes: sql`likes + 1`}
          }
        : {
          target: Likes.postId,
          set: {likes: sql`likes -1`},
          where: gt(Likes.likes, 0)
          }
      )
      .returning()
      .get();

      return mutate?.likes ?? 0

    }
  }),
};
All actions must be defined in an exported server object. By default, actions are callable with JSON objects, but this can be changed to formData as we’ll see later on.
To define the like action, we use the defineAction() utility, which accept an object as argument.
We put the action logic in a server-side request handler function. For this action, we need two arguments: a postId variable to get the current post and a liked variable determining if the user has already liked the post or not.
We add a schema validation object to the input property so the handler’s arguments will be type-checked. Astro uses the Zod library for schema validation.
Next, we use Astro DB utilities to add or update the “likes” count in the Likes table. As mentioned before, if the user has already liked the post, then we decrement the “likes” by one; otherwise we increment the “likes” by one.
Lastly, we return the “likes” count or 0 if there are no likes.
Now we need to create a Like component in which we can call the like action.
Create a Like.tsx file in src/components directory and add the following content:
// src/components/Like.tsx
import { actions } from 'astro:actions';
import { useState } from "react";

export function Like({ postId, initial }: { postId: string, initial: number }) {
  const [likes, setLikes] = useState(initial);
  const [liked, setLiked] = useState(false);
  return (
    <button
      onClick={async () => {
        const newLikes = await actions.like({ postId, liked });
        setLikes(newLikes);
        setLiked(!liked)
      }}
    >
      {likes} ❤️
    </button>
  );
}
The Like component accepts two props: the current post’s postId and the initial likes count.
The two variables — likes and liked — respectively track the states of the post’s likes and whether the post is already liked by the user or not.
In the onClick() function, we call the like action to update the likes count in the database and return the result. We then use it to set the likes count and update the view. We also toggle the liked variable.
The last step is to add the Like component to the single post page.
Open the […slug].astro file in the src/pages/blog directory and replace its content with the following:
// src/pages/blog/[...slug].astro
---
import { type CollectionEntry, getCollection } from 'astro:content';
import BlogPost from '../../layouts/BlogPost.astro';
import { db, eq, Likes } from "astro:db";
import {Like} from "../../components/Like";

export async function getStaticPaths() {
  const posts = await getCollection('blog');
  return posts.map((post) => ({
    params: { slug: post.slug },
    props: post,
  }));
}

type Props = CollectionEntry<'blog'>;
const post = Astro.props;
const { Content } = await post.render();

const initialLikes = await db
  .select()
  .from(Likes)
  .where(eq(Likes.postId, post.id))
  .get();
---
<BlogPost {...post.data}>
  <Like postId={post.id} initial={initialLikes?.likes ?? 0} client:load />
  <Content />
</BlogPost>
Here, we add the initialLikes variable, which gets the initial likes count from the database. We also insert the Like component before the post’s content. We also use the client:load directive, which loads and hydrates the component’s JavaScript immediately on page load.
That’s it! Now start the server and navigate to the first post. Here is how the Likes widget should work:

Rating widgetIn this section, we’ll create a Rating widget to allow users to rate a post from one to five stars. Start by opening the config.ts file, adding a Rating table in the database, and then exporting it:
// ./db/config.ts
...
const Rating = defineTable({ // 1. add the Rating table
  columns: {
    postId: column.text({ primaryKey: true }),
    stars: column.number(),
  },
});

export default defineDb({
  tables: { Likes, Rating }, // 2. export the Rating table
});
Next, open the seed.ts file, import the Rating table, and populate it with some initial values:
// ./db/seed.ts
import { db, Likes, Rating } from "astro:db"; // 1. import the Rating table

export default async function seed() {
...
  await db.insert(Rating).values({ // 2. populate it
    postId: "first-post.md",
    stars: 3,
  });
}
Now, it’s time to use an Astro action. Open the index.ts file and add the rate action after the like action:
// src/actions/index.ts
import { db, Likes, Rating, gt, sql } from "astro:db";

export const server = {
...
  rate: defineAction({
    input: z.object({ postId: z.string(), current: z.number() }),
    handler: async ({ postId, current }) => {
      const mutate = await db
      .insert(Rating)
      .values({
        postId: postId,
        stars: current,
      })
      .onConflictDoUpdate({
        target: Rating.postId,
        set: {stars: current}
      })
      .returning()
      .get();
      return mutate?.stars ?? 0
    },
  }),
}
The functionality is pretty similar to the like action: it inserts or updates the number of stars.
Next, let’s create a Rating component. Create Rate.tsx file in src/components directory and put the following code inside:
// src/components/Rate.tsx
import { actions } from "astro:actions";
import { useState, useEffect } from "react";
import '../styles/rating.css'

export function Rate({ postId, initial }: { postId: string, initial: number }) {
  const [rating, setRating] = useState(initial);
  const stars = document.getElementsByClassName("star");
  function removeRating() {
    let i = 0;
    while (i < 5) {
      stars[i].className = "star";
      i++;
    }
  }
  async function updateRating(current: number) {
    const newRating = await actions.rate({ postId, current });
    setRating(newRating);
    removeRating();
    for (let i = 0; i < current; i++) {
      stars[i].className = "star starred";
    }
  }
  useEffect(() => {
    updateRating(initial)
  }, [initial])
  return (
    <div>
      <span>({rating}/5) </span>
      <span onClick={()=>updateRating(1)} className="star">★</span>
      <span onClick={()=>updateRating(2)} className="star">★</span>
      <span onClick={()=>updateRating(3)} className="star">★</span>
      <span onClick={()=>updateRating(4)} className="star">★</span>
      <span onClick={()=>updateRating(5)} className="star">★</span>
    </div>
  )
}
Here, we use several span elements to create the stars for the widget. Each star, when it’s clicked, calls the updateRating() function with the proper number of stars passed in. We also want to make sure the selected number of stars gets highlighted.
The updateRating() function calls the rate action, which updates the database and returns the result. We then use the result to set the rating variable.
To highlight the selected number of stars, we iterate through the star elements. This results in adding a starred class to the affected ones.
The removeRating() function resets the rating before the new one is set. Meanwhile, the useEffect() Hook makes sure that the rating is always properly displayed with the most recent values.
We also import some basic styles to the component. To create the styles, add the following code to a new rating.css file inside the src/styles directory:
// src/styles/rating.css
.star {
  font-size: 8vh;
  cursor: pointer;
}

.starred {
  color: rgb(255, 255, 0);
}
Next, add the following to the […slug].astro file. Note that only the new and affected lines of code are shown below:
---
import { db, eq, Likes, Rating } from "astro:db";
import {Rate} from "../../components/Rate";
...
  const initialStars = await db
  .select()
  .from(Rating)
  .where(eq(Rating.postId, post.id))
  .get();
---
<Rate postId={post.id} initial={initialStars?.stars ?? 0} client:only />
Here, we use client:only directive because we can’t access the document object on the server, which we need for our component to work. With that, we’re done! Take a look at the rating widget functionality in action:

Comment widgetIn this section, we’ll add a comments feature to the blog posts to demonstrate how we can define actions for use in forms. We start again by creating a table in the database for the comments:
// ./db/config.ts
const Comment = defineTable({
  columns: {
    postId: column.text(),
    author: column.text(),
    body: column.text(),
  },
});
Then, insert some initial values:
// ./db/seed.ts
await db.insert(Comment).values({
  postId: "first-post.md",
  author: "Alice",
  body: "Great post!",
});
Next, we define the comment action:
import { db, Likes, Rating, Comment, gt, sql } from "astro:db";

export const server = {
...
  comment: defineAction({
    accept: "form",
    input: z.object({
      postId: z.string(),
      author: z.string(),
      body: z.string(),
    }),
    handler: async ({ postId, body, author }) => {
      const comment = await db
      .insert(Comment)
      .values({ postId, body, author})
      .returning()
      .get();
      return comment;
    },
  }),
}
The new thing here is that we add the accept: "form" line to instruct Astro to accept the formData format instead of JSON.
When using formData with Astro actions there is no need to cast the formData.get() results. Astro automatically parses form requests to objects using the provided Zod schema.
Next, create a CommentForm.tsx file in the src/components directory and add the following content:
import { actions, isInputError } from "astro:actions";
import { useState } from "react";
export function CommentForm({ postId, comments }: { postId: string, comments: { postId: string, author: string, body: string }[] }) {
  const [msg, setMsg] = useState('')
  const [errors, setErrors] = useState({})
  return (<div>
    <form
      onSubmit={ async (e) => {
        e.preventDefault();
        const formData = new FormData(e.currentTarget as HTMLFormElement);
        const { error } = await actions.comment.safe(formData);
        if (error && isInputError(error)) {
          setErrors(error.fields);
        } else {
          setMsg('Your comment was posted successfully.')
        }
      }}
    >
      <input type="hidden" name="postId" value={postId} />
      <label htmlFor="author">Author </label>
      <input id="author" type="text" name="author" />
      <textarea rows={10} name="body"></textarea>
      <button type="submit">Post</button>
    </form>
    {errors.author && <span style={{backgroundColor: 'red'}}>Author: {errors.author}</span>}
    <br></br>
    {errors.body && <span style={{backgroundColor: 'red'}}>Comment: {errors.body}</span>}
    <span style={{backgroundColor: 'lightgreen'}}>{ msg }</span>
    <div className="comments">
      {
        comments.map((c) => (
          <article key={c.body}>
            <p className="comment-body">{c.body}</p>
            <p className="comment-author">{c.author}</p>
          </article>
        ))
      }
    </div></div>
  );
}
In the code above, we first get the formData from our comments form. We do this by calling a new instance of the formData function, which accepts a form element as an argument. Internally, it constructs a set of key-value pairs representing form fields and their values, which we assign to the formData variable.
Then, in the next statement, we call the comment action — but this time, we chain it with a safe() function to catch any potential errors. The safe() function modifies the action, which it’s chained onto, in the following manner:
data object with the resulterror object with the relevant exceptionsIn our case, if any errors occur, we want to get the error object, so we use a destructuring assignment to do so.
In the next conditional statement, we check if the action has returned an error object and if the error is caused by input validation.
If the check returns true, we assign the errors to the errors variable by using the fields property. This property holds a representation of the fields from the form we have passed as argument in FormData().
If it’s false, we assign the msg variable a success message.
Then, below the form, we set some message lines. If the author or body fields failed to validate, then we show an error message or messages with a red background. Otherwise, we set a success message to display with a green background.
Finally, we iterate through the comments and display them.
Now, let’s add this component to each post page. Add the following code in the […slug].astro file:
---
const comments = await db
  .select()
  .from(Comment)
  .where(eq(Comment.postId, post.id));
---
<CommentForm postId={post.id} comments={comments} client:load />
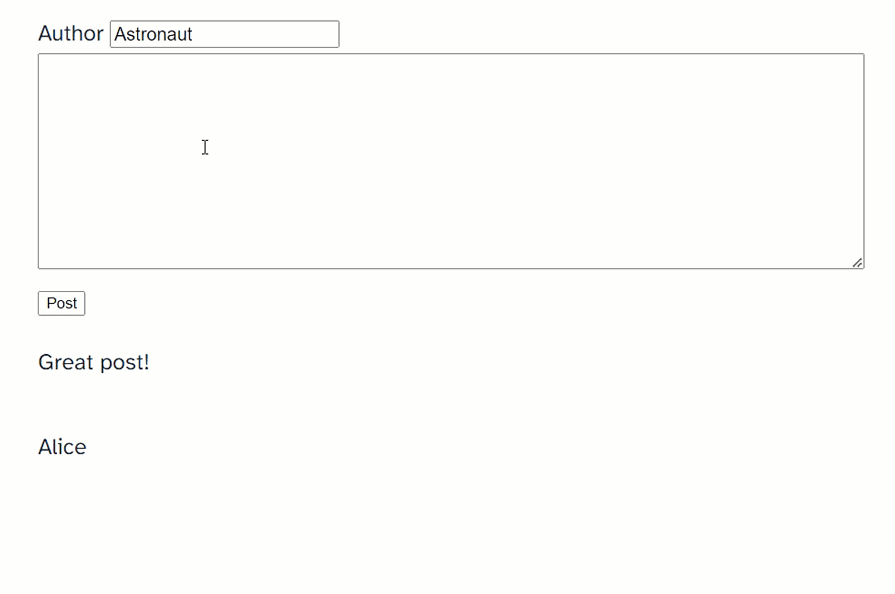
Here is what you should see if a comment is posted successfully:
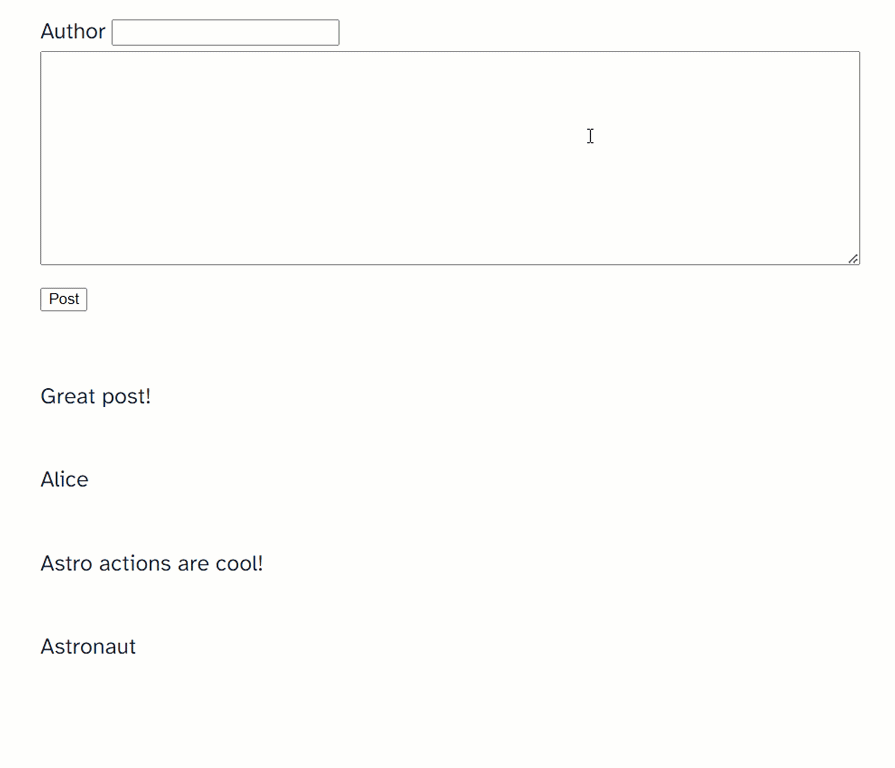
Here, you can see how errors are handled:
In this section, we’ll modify the Likes widget from the first example to demonstrate the use of React 19’s new form action features in Astro. We’ll use this counter widget to display a count of views.
In the actions/index.ts file, replace the code for the like action with the following:
like: defineAction({
  accept: "form",
  input: z.object({
    postId: z.string(),
    liked: z.string()
  }),
  handler: async ({ postId, liked }, ctx ) => {
    const currentValue = await experimental_getActionState<number>(ctx);
    const mutate = await db
    .insert(Likes)
    .values({
      postId: postId,
      likes: liked === 'yes' ? 1 : 0,
    })
    .onConflictDoUpdate(
      liked === 'yes'
      ? {
        target: Likes.postId,
        set: {likes: currentValue + 1}
        }
      : {
        target: Likes.postId,
        set: {likes: currentValue -1},
        where: gt(Likes.likes, 0)
        }
    )
    .returning()
    .get();
    return mutate?.likes ?? 0
  }
}),
Also make sure that you have imported the necessary dependency:
import { experimental_getActionState } from '@astrojs/react/actions';
There are a couple of changes here we need to mention:
formData formatliked property to a string. I’ll explain the reason for this in a minutelikes count to the currentValue variable by calling the experimental_getActionState() with the Context APIcurrentValue variable to set the likes property in the databaseliked propertyNow we’re ready to implement this action. To do so, replace the content of the Like.tsx component with the following:
// src/components/Like.tsx
import { actions } from 'astro:actions';
import { useActionState, useState } from 'react';
import { experimental_withState } from '@astrojs/react/actions';
export function Like({ postId, initial }: { postId: string, initial: number }) {
  const [liked, setLiked] = useState('no')
  const [state, action] = useActionState(
    experimental_withState(actions.like),
    initial, // initial likes
  )
  return (
    <form action={action}>
      <input type="hidden" name="postId" value={postId} />
      <input type="hidden" name="liked" value={liked} />
      <button onClick={ ()=> {
        switch(liked) {
          case 'no':
            setLiked('yes')
            break;
          case 'yes':
            setLiked('no')
        }
      }}>{state} ❤️</button>
    </form>
  )
}
Here, we use the new useActionState() Hook from React 19. We pass the like action as a first argument with the help of Astro’s experimental_withState() function. As a second argument, we pass in the initial state. useActionState() returns the action that we use in the form, along with the latest form state.
Then we use the action directly in the form element <form action={action}> and we add the state inside the button element to display the current likes count.
To track the liked state, however, we need to add a hidden input element. This way, the form data will contain both the post’s ID and the liked state. The reason we have used a string type for the liked property in the action’s definition above is because a hidden input element’s value can’t accept a boolean type.
The resulting Likes widget’s functionality (after the above modifications) is the same, but as you can see how the new React 19 features make form processing a bit more convenient and straightforward.
As mentioned earlier, the second notable feature from Astro 4.8 release is request rewriting. Also known as rerouting, request rewriting allows you to make the same page accessible from different URLs.
This allows you to tailor content according to the user’s locale, device type, or other factors, eliminating the need for various separate URLs. You can render other pages or routes from an Astro page or middleware, all without using implicit routing rules.
Request rewriting can be applied to Astro pages, endpoints, and middleware. Basically, it’s a rewrite() function that can accept a string, a URL, or a Request as an argument:
rewrite("/about");
rewrite(new URL("https://example.com"));
rewrite(new Request("https://localhost:8080", options));
Let’s see how this works in action.
To use the experimental request rewriting feature, activate it in the astro.config.mjs file:
// astro.config.mjs
import { defineConfig } from 'astro/config';
...

export default defineConfig({
  output: 'hybrid',
  site: 'https://example.com',
  integrations: [mdx(), sitemap(), react(), db()],
  experimental: {
    actions: true,
    rewriting: true, // Add this line
  }
});
Next, open the about.astro file and add this at the top:
---
if (!Astro.props.allowed) { // Add
  return Astro.rewrite("/") // this
}                           // statement
import Layout from '../layouts/BlogPost.astro';
---
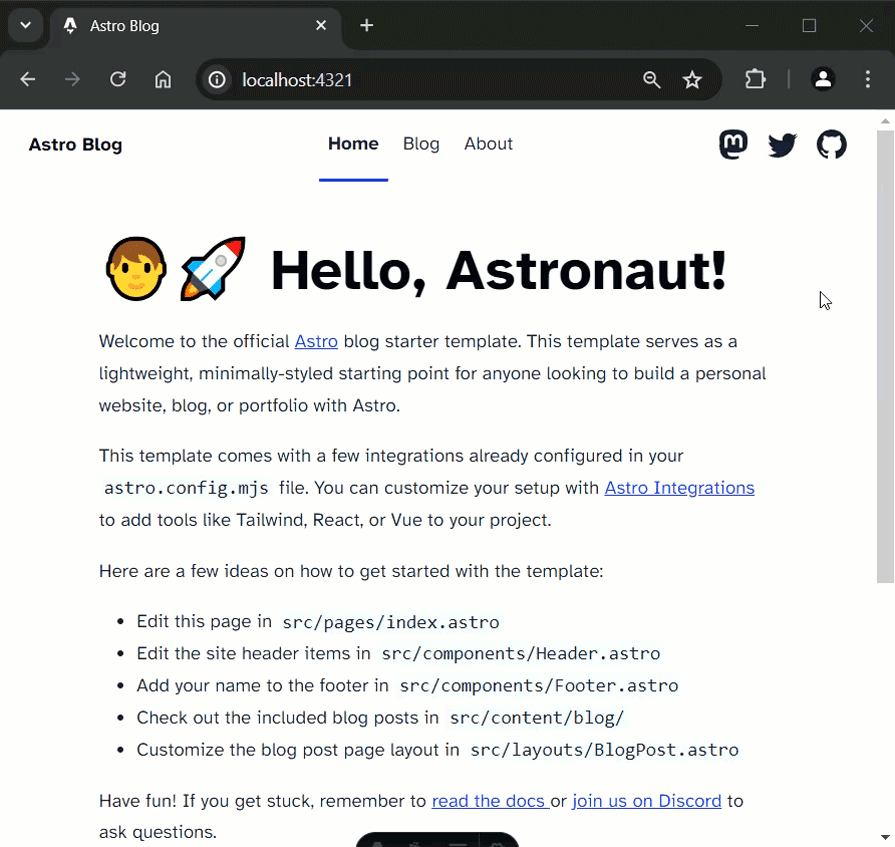
Now, when you click on the About link, the homepage content will be shown thanks to request rerouting:
Astro actions and request rewriting bring a whole bunch of new possibilities. These features in Astro’s 4.8 release help facilitate a smoother frontend-backend integration, marking another big step in Astro’s journey as a leading web framework for content-driven sites.
There’s no doubt that frontends are getting more complex. As you add new JavaScript libraries and other dependencies to your app, you’ll need more visibility to ensure your users don’t run into unknown issues.
LogRocket is a frontend application monitoring solution that lets you replay JavaScript errors as if they happened in your own browser so you can react to bugs more effectively.

LogRocket works perfectly with any app, regardless of framework, and has plugins to log additional context from Redux, Vuex, and @ngrx/store. Instead of guessing why problems happen, you can aggregate and report on what state your application was in when an issue occurred. LogRocket also monitors your app’s performance, reporting metrics like client CPU load, client memory usage, and more.
Build confidently — start monitoring for free.

Learn how to protect full-stack projects from NPM supply chain attacks with a practical security checklist.

Explore 15 essential MCP servers for web developers to enhance AI workflows with tools, data, and automation.

Learn how contrast-color() automatically picks accessible text colors using native CSS, without JavaScript.

Learn how to build a harness-style AI workflow using Claude Code with specialized Dev, QE, and Ops subagents, gated handoffs, MCP telemetry, and LEARNING.md.
Would you be interested in joining LogRocket's developer community?
Join LogRocket’s Content Advisory Board. You’ll help inform the type of content we create and get access to exclusive meetups, social accreditation, and swag.
Sign up now

