The technology industry innovates quickly, requiring developers to deliver products and services at a rapid speed while still prioritizing high quality. Integration and delivery used to be a manual process, but automation makes it much faster and more reliable.
In this article, we’ll explore continuous integration and continuous delivery or deployment. CI/CD automates the delivery of our products and features, making it faster and helping us maintain high quality. There are several tools available to set up CI/CD pipelines, however, in this article, we’ll set up GitHub Actions with Heroku as our cloud hosting service and GitHub to host our repository.
In this tutorial, we’ll use the following tools: Git, GitHub, GitHub Actions, Heroku, React, Draw.io, and Swimlanes.io. You can access the repository for this project on my GitHub profile. Let’s get started!
CI/CD Pipeline using Github Actions and Heroku
Table of contents
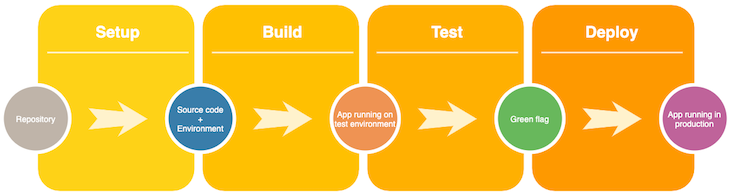
CI/CD has three important terminologies that we need to understand before jumping into the code.
Continuous integration is an automation process for engineers and developers that allows us to test new features in our code, making sure they work as expected.
Continuous delivery comes next, ensuring that the new changes are well-tested, free of bugs, and ready to be deployed to the production environment.
In the continuous deployment stage, changes to the application are deployed to production by merging to a specific branch, like main.
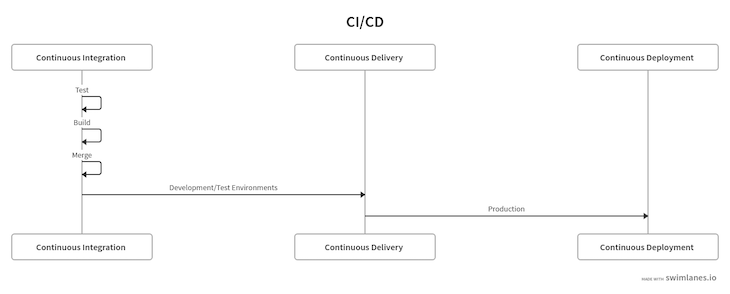
The sample diagram below fully details the CI/CD process:
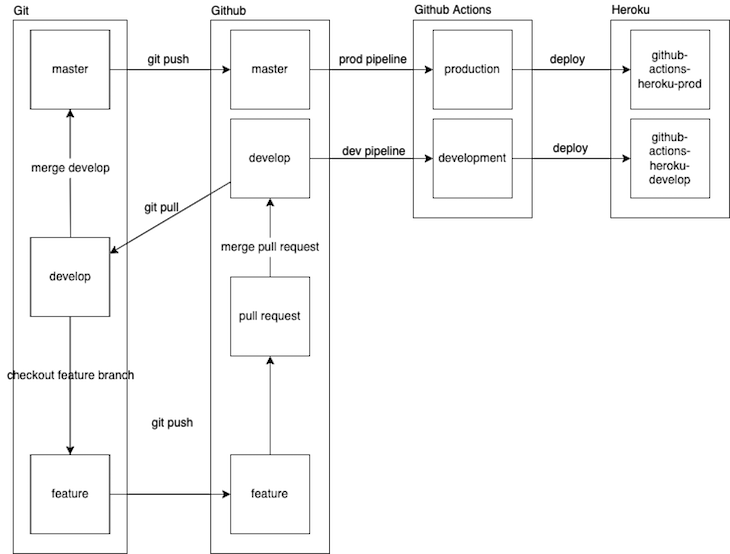
Let’s set up the CI/CD strategy for our example application. We’ll have one GitHub repository with two branches, main and develop. We’ll also make a new feature branch from the develop branch, where we’ll develop a new feature and push those changes to its own feature. Then, we’ll create a pull request against the develop branch on GitHub.
We’ll also have two CI/CD yml files for configuration, development and production. The development file is set up to trigger the CI/CD pipeline and deploy our changes to the Heroku development environment when we successfully merge a pull request into the develop branch.
The production.yml file is set up to trigger a CI/CD pipeline for the production environment on Heroku when we pull the latest changes from the develop branch, merge develop into main, and finally push those changes to the remote main branch.
The diagram below fully details this strategy:
First and foremost, we have to set up a simple React project. Run the command below to create a React project in your projects folder:
npx create-react-app github-actions-heroku
The command above will generate a React project and install all the required dependencies. Below are some of the dependencies we’ll use and their current versions at the time of writing:
react 17.0.2
react-dom 17.0.2
react-scripts 5.0.0
node 17.2.0
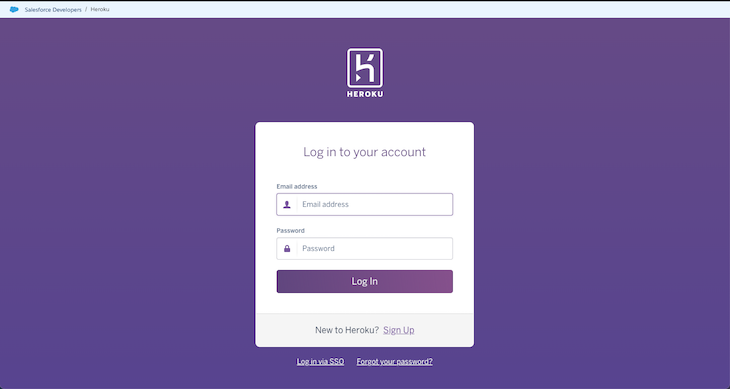
We’ll set up two environments, one for development and one as a production environment. Go ahead and log into your Heroku account on Heroku.com. I’m using my free account for this blog post:
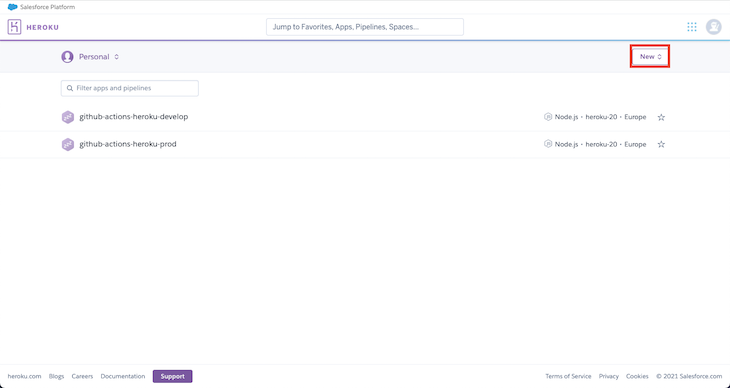
Once you’re logged in, simply click on the New button, as shown below:
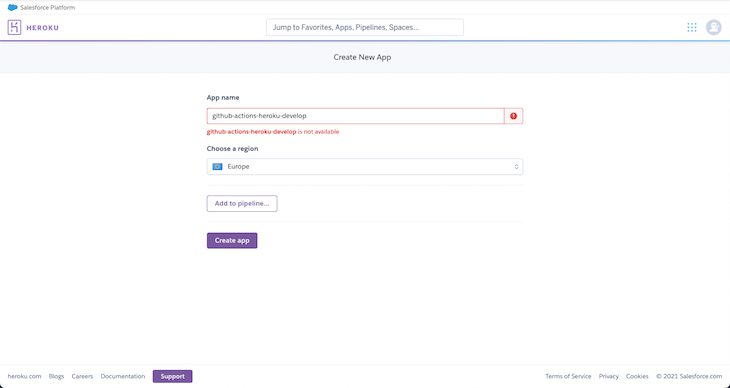
Then, click on Create new app from the dropdown menu. Go ahead and give your app a name. I’m calling mine github-actions-heroku-develop, as shown below.
Since I’ve already created a project with this name, it shows up as unavailable on my account. However, you should go ahead and click on Create app, and a development environment will be created for you:
We’ll merge a pull request to the develop branch, then our app will be deployed to this environment.
Now, let’s repeat the same process to create a new app, which we’ll name github-actions-heroku-prod. When we merge the develop branch into main and push those changes to the remote main branch, those changes will be deployed to this environment.
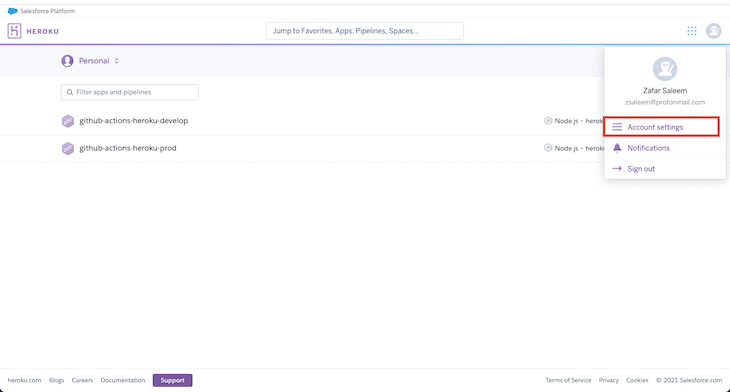
With our Heroku environments set up, we should go ahead and click on our profile picture icon on the Heroku dashboard, then click Account settings, as shown below:
Now, scroll down to the API Key section to reveal the API Key. Copy and paste it somewhere safe, because we’ll need it when we set up our GitHub repository:
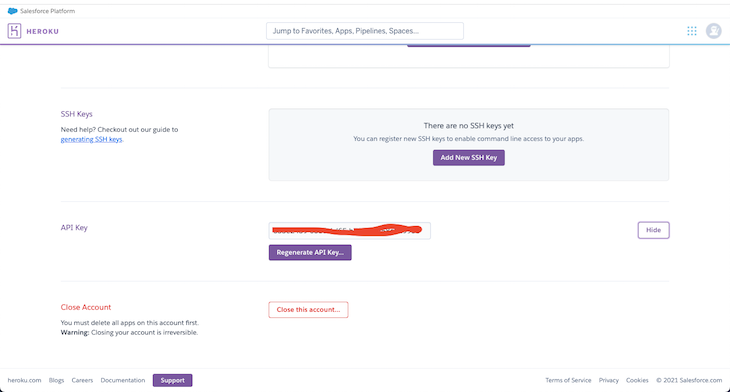
You could also use the Heroku CLI to generate a new authorization key directly from the command line. To do this, make sure you have the heroku-cli installed on your local machine. Also, if you haven’t done so already, authenticate your Heroku account on the heroku-cli. First, log in, like so:
heroku login -i
After entering your credentials and successfully signing in, you can generate a new token with the following command:
heroku authorizations:create
This will immediately establish a new OAuth channel as well as an OAuth token, which we can use in place of the token we copied from our Heroku account earlier.
Now that we’re done with our Heroku setup, let’s move on and set up our GitHub repo.
Go ahead and log into your GitHub account. Click on the + sign in the top right corner, then click on New repository:

Fill out the form as follows:
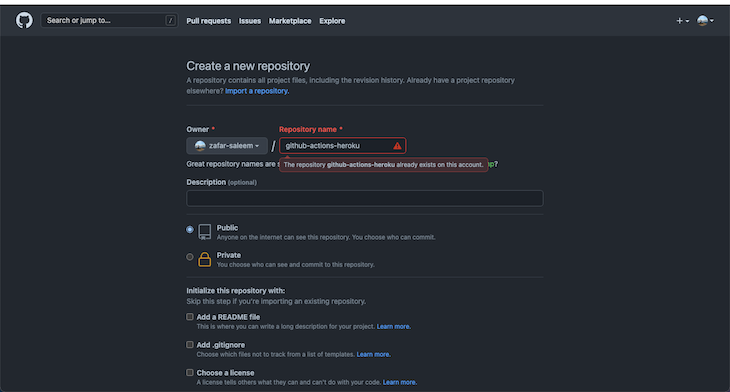
In the screenshot above, the project name github-actions-heroku is not available because I already built one with that name for this article. Therefore, I’ll use the one I already created. However, you should go ahead and create the project.
Once you create a project on GitHub, you’ll see a screen like the one below:
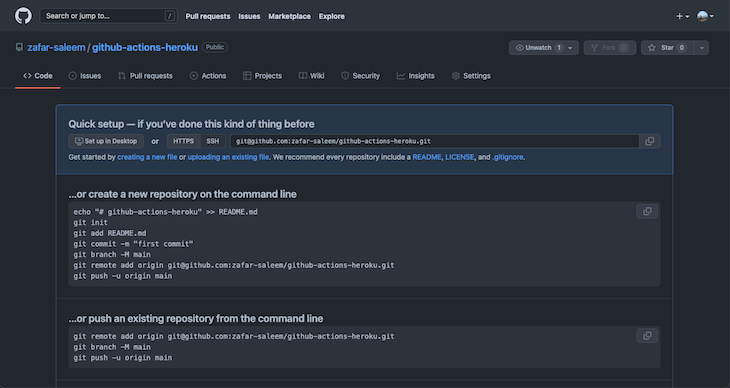
For now, you can leave this screen as is. We’ll return to this in a bit. Go back to your local environment terminal and cd into the local project you created earlier:
cd github-actions-heroku
First, remove the .git folder from the project as follows:
rm -rf .git
Then, go ahead and initialize this repo as a Git project:
git init
The command above will automatically create a main branch. Next, simply create a new branch called develop with the following command:
git checkout -b develop
Now, go back to the main branch:
git checkout main
Add your GitHub repo to your local repo with the following command:
git remote add origin [email protected]:zafar-saleem/github-actions-heroku.git
Next stage, commit, and push your changes to the remote main branch:
git add -A
git commit -m "Initial commit"
git push origin main
Now, we’ll check out the develop branch:
git checkout develop
Finally, we’ll push changes to the remote develop branch:
Now, let’s go back to our project on github-actions-heroku and click on Settings> Secrets > New repository secret, as shown below:
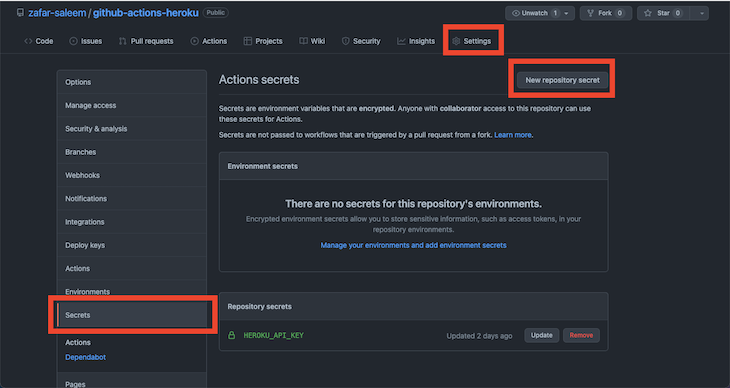
Once you click on New repository secret, you’ll be presented with the following screen:
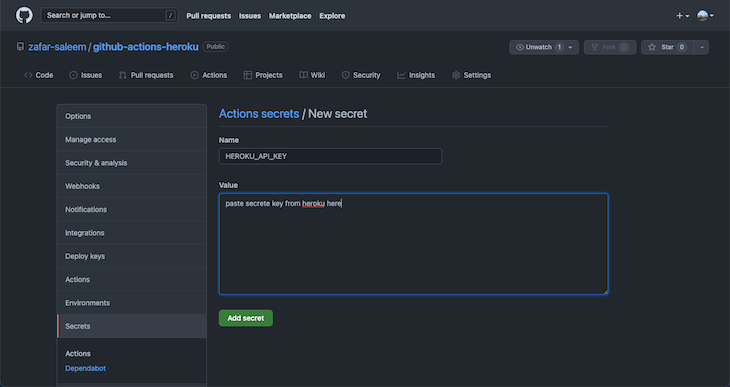
Name your secret accordingly, as shown above, and paste the Heroku API key you copied earlier. Then, click on Add secret. Now, we’re done with our GitHub and local repo.
Now, open github-actions-heroku in your favorite editor; I’m using Sublime Text. Create a folder at the root of the project named .github. Inside .github, create a new folder called workflows.
Inside the workflows folder, create a file named development.yml and paste the code below in it:
name: Development workflow

on:
  push:
    branches:
      - develop

jobs:
  deploy:
    runs-on: ubuntu-latest

    steps:
      - name: Development Code
        uses: actions/checkout@v2
      - name: Use Node.js 17.x
        uses: actions/setup-node@v1
        with:
          node-version: 17.x
      - run: npm install
      - run: npm run build --if-present
      - name: Deploy to Heroku
        uses: akhileshns/[email protected]
        with:
          heroku_api_key: ${{ secrets.HEROKU_API_KEY }}
          heroku_app_name: 'github-actions-heroku-develop'
          heroku_email: '[email protected]'
At the top of this file is a development workflow. Whenever we push any changes or merge a pull request to the develop branch, the pipeline on line 6 will be triggered automatically. We’re using the latest ubuntu machine.
On line 25, we’re using the heroku_api_key from GitHub secrets, which we set up earlier. The Heroku app name on line 26 should be identical to the Heroku environment we set up earlier.
Now, we’re done with development.yml. Let’s create a new file inside the workflows folder called production.yml and paste the contents below into it:
name: Production workflow

on:
  push:
    branches:
      - main

jobs:
  deploy:
    runs-on: ubuntu-latest
    steps:
      - name: Checkout code
        uses: actions/checkout@v2
      - name: Use Node.js 17.x
        uses: actions/setup-node@v1
        with:
          node-version: 17.x
      - run: npm install
      - run: npm run build --if-present
      - name: Deploy to Heroku
        uses: akhileshns/[email protected]
        with:
          heroku_api_key: ${{ secrets.HEROKU_API_KEY }}
          heroku_app_name: 'github-actions-heroku-prod'
          heroku_email: '[email protected]'
The above code is for production and is triggered whenever we push new changes to the main repo.
To test if our workflow is working as expected, we’ll first make sure we’re on the develop branch in our local project:
git checkout -b feature/branch // creates a feature branch from develop branch
// make changes to App.js file.
git commit -am "minor changes"
git push origin feature/branch
On GitHub, create a pull request against the develop branch. Merge that pull request, and it should trigger the development pipeline in the Actions tab of your GitHub project. Let it finish, then follow the steps below:
git checkout develop
git pull origin develop
git checkout main
git merge develop
git push origin main
To see the production pipeline triggered, go to your GitHub project and click on the Actions tab. Once both are successfully finished and deployed, you can go ahead to Heroku and test the latest changes that are deployed.
We’re also able to deploy via a Docker container, and the process is very straightforward. To do so, we’ll need to add a new CMD command to the end of our Dockerfile. This command will be used by Heroku to launch a webserver inside the container. Then, we’ll add usedocker as a new prerequisite to our GitHub workflow files.
With this new addition, our production.yml file would look like this:
name: Production workflow
on:
  push:
    branches:
      - main
jobs:
  deploy:
    runs-on: ubuntu-latest
    steps:
      - name: Checkout code
        uses: actions/checkout@v2
      - name: Use Node.js 17.x
        uses: actions/setup-node@v1
        with:
          node-version: 17.x
      - run: npm install
      - run: npm run build --if-present
      - name: Deploy to Heroku
        uses: akhileshns/[email protected]
        with:
          heroku_api_key: ${{ secrets.HEROKU_API_KEY }}
          heroku_app_name: 'github-actions-heroku-prod'
          heroku_email: '[email protected]'
          usedocker: true
Before deploying, double-check that the usedocker instruction has been attached to the development.yml file as well.
Furthermore, if you’d like to pass additional arguments to your Docker build instructions, you can provide a list of arg names that automatically pull from the environment:
name: Production workflow
on:
  push:
    branches:
      - main
jobs:
  deploy:
    runs-on: ubuntu-latest
    steps:
      - name: Checkout code
        uses: actions/checkout@v2
      - name: Use Node.js 17.x
        uses: actions/setup-node@v1
        with:
          node-version: 17.x
      - run: npm install
      - run: npm run build --if-present
      - name: Deploy to Heroku
        uses: akhileshns/[email protected]
        with:
          heroku_api_key: ${{ secrets.HEROKU_API_KEY }}
          heroku_app_name: 'github-actions-heroku-prod'
          heroku_email: '[email protected]'
          usedocker: true
          docker_build_args: |
            SECRET_KEY
            FOO
        env:
          SECRET_KEY: ${{ secrets.MY_SECRET_KEY }}
          FOO: ${{ secrets.BAR }}
Everything should work as expected!
In this article, we covered CI/CD with React, GitHub actions, and Heroku. We also reviewed an alternate deployment using a Dockerfile. By automating integration and delivery, we can improve the speed and accuracy with which we deploy our applications to production. I hope you enjoyed this article. Happy coding!
Install LogRocket via npm or script tag. LogRocket.init() must be called client-side, not
server-side
$ npm i --save logrocket

// Code:

import LogRocket from 'logrocket';
LogRocket.init('app/id');
// Add to your HTML:

<script src="https://cdn.lr-ingest.com/LogRocket.min.js"></script>
<script>window.LogRocket && window.LogRocket.init('app/id');</script>
Hey there, want to help make our blog better?
Join LogRocket’s Content Advisory Board. You’ll help inform the type of content we create and get access to exclusive meetups, social accreditation, and swag.
Sign up now
A breakdown of the wrapper and container CSS classes, how they’re used in real-world code, and when it makes sense to use one over the other.

This guide walks you through creating a web UI for an AI agent that browses, clicks, and extracts info from websites powered by Stagehand and Gemini.

This guide explores how to use Anthropic’s Claude 4 models, including Opus 4 and Sonnet 4, to build AI-powered applications.

Which AI frontend dev tool reigns supreme in July 2025? Check out our power rankings and use our interactive comparison tool to find out.


2 Replies to "CI/CD pipelines using React, GitHub Actions, and Heroku"
Getting error in github actions…
Error: Command failed: git push heroku HEAD:refs/heads/main –force
fatal: ‘heroku’ does not appear to be a git repository
fatal: Could not read from remote repository.
Please make sure you have the correct access rights
and the repository exists.
Also getting warnings..
Unexpected input(s) ‘args’, valid inputs are [‘heroku_api_key’, ‘heroku_email’, ‘heroku_app_name’, ‘buildpack’, ‘branch’, ‘dontuseforce’, ‘dontautocreate’, ‘usedocker’, ‘docker_heroku_process_type’, ‘docker_build_args’, ‘appdir’, ‘healthcheck’, ‘checkstring’, ‘delay’, ‘procfile’, ‘rollbackonhealthcheckfailed’, ‘env_file’, ‘justlogin’, ‘region’, ‘stack’, ‘team’]
I’m getting this warnings:
Unexpected input(s) ‘args’, valid inputs are [‘heroku_api_key’, ‘heroku_email’, ‘heroku_app_name’, ‘buildpack’, ‘branch’, ‘dontuseforce’, ‘dontautocreate’, ‘usedocker’, ‘docker_heroku_process_type’, ‘docker_build_args’, ‘appdir’, ‘healthcheck’, ‘checkstring’, ‘delay’, ‘procfile’, ‘rollbackonhealthcheckfailed’, ‘env_file’, ‘justlogin’, ‘region’, ‘stack’, ‘team’]