Being able to write JavaScript on the server as well as the client can prove to be very good leverage for both small and large teams. However, building a production-ready Node.js Web API to power your already beautifully created, frontend, web, or mobile application is no easy task for the average developer. Some of the overheads you will encounter are:

In this article, we will learn how to build a production-ready Node.js web API using the Sails.js framework – an MVC framework for Node.js. We will be building the user management endpoints for a web API service. We will build endpoints to implement the following features:
We will use Postman to test our endpoints. Finally, we will deploy on Heroku. Let’s get started by first introducing Sails.js.
The Replay is a weekly newsletter for dev and engineering leaders.
Delivered once a week, it's your curated guide to the most important conversations around frontend dev, emerging AI tools, and the state of modern software.
This tutorial assumes the reader is fairly familiar with Node.js and server-side development.
Sails.js or Sails is a real-time MVC framework for building production-ready enterprise Node.js applications. It was built in the year 2015 by Mike McNeil and the Sails Company with inspirations from the Ruby on Rails MVC framework. Sails comes out of the box with websocket support making it suitable for building real-time chat apps, games, and more. Sails also ships with:
Sails is actively being used in the wild by companies like Postman, Paystack, and devmountain to build out their Web APIs to power their various clients.
Note: Sails was built on top of the popular Express Node.js framework so it should feel familiar if you have built Node.js applications with Express.
To get started building our web API in Sails, we will need to install the Sails CLI tool. We will do so by running the below command in the terminal.
I am assuming you have Node.js(version 13.12.0) installed
npm install -g sails
The above command will install the Sails CLI tool globally on your machine. To verify that Sails is installed run:
sails -v
The above command should return a version number if everything went successfully.
To create a new Sails application, run the sails new command passing in the name of your application. This command will both generate a new Sails app and run npm install to install all dependencies for you.
sails new <appname>
The new command also takes in optional flags and we will be using the --no-frontend flag to tell Sails to not generate “assets”, “views” or “task” folders. Which is what we want since we are building a web API. Let’s run the command like so:
sails new logrocket-sails-api --no-frontend
Pro tip: You can run the new command with the —fast flag to just generate the sails app and skip installation of dependencies
Now you can cd into the logrocket-sails-api directory and open the app in your editor. We will be using VS Code so we will just run code . to open the current directory in VS Code.
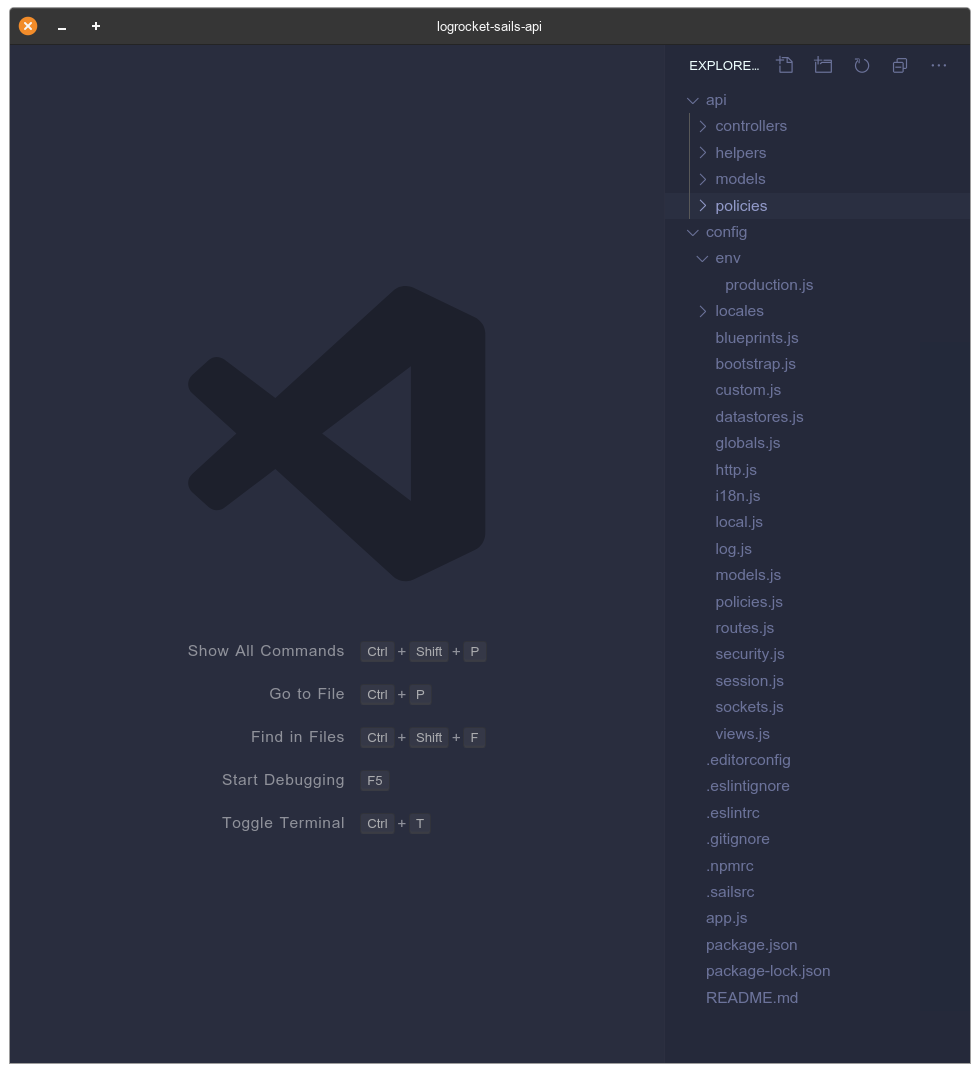
The above screenshot depicts the codebase structure the sails new command generated for us. Let’s go through what some of the files and folders are:
api/ – This directory is where you will spend most of your development time. It contains the controllers/, helpers/, models/, and policies/ subdirectories by defaultcontrollers/ – This directory will house all controllers in your Sails apphelpers/ – In Sails, helpers are a reusable piece of code that follows the node-machine spec. The helpers/ directory will contain all helpers you define in your applicationmodels/ – This directory will contain your application Waterline models. Waterline models are typically just a .js file containing database schema for your database tablepolicies/ – Policies are Sails mechanism for authorization and access control. You define them in this folderconfig/ – this directory contains all configuration files for your sails app. One particular file worthy of note is the routes.js config file which is used to declare routes your Sails applications will be handling requests throughconfig/datastore.js – In this config file you define your database adapter which Waterline will use(more on this later on)config/policies.js – In here you define policies and the actions or controllers the policies will be guardingYou can read more about the other files and folders in the Sails docs.
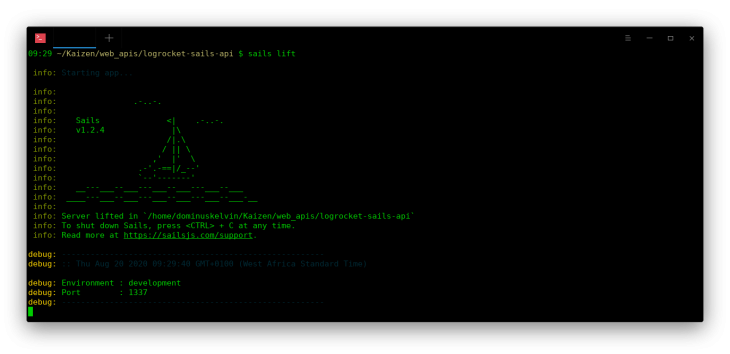
Right now if you start the Sails development server by running sails lift, and you visit localhost:1337, you will get a 404 because we haven’t defined any routes for our application just yet.

Pro tip: You can change the port sails that will be listening to by running
sails lift -- port <port-no>
Let’s create our first endpoint. Typically you will need to touch routes.js and add the endpoint. The routes.js file takes a dictionary/object where the key is the route endpoint like say / and the value is the controller action that will handle that route request. The route key must contain an HTTP verb supported by Sails(GET|POST|PATCH|DELETE) and then a space followed by the route.
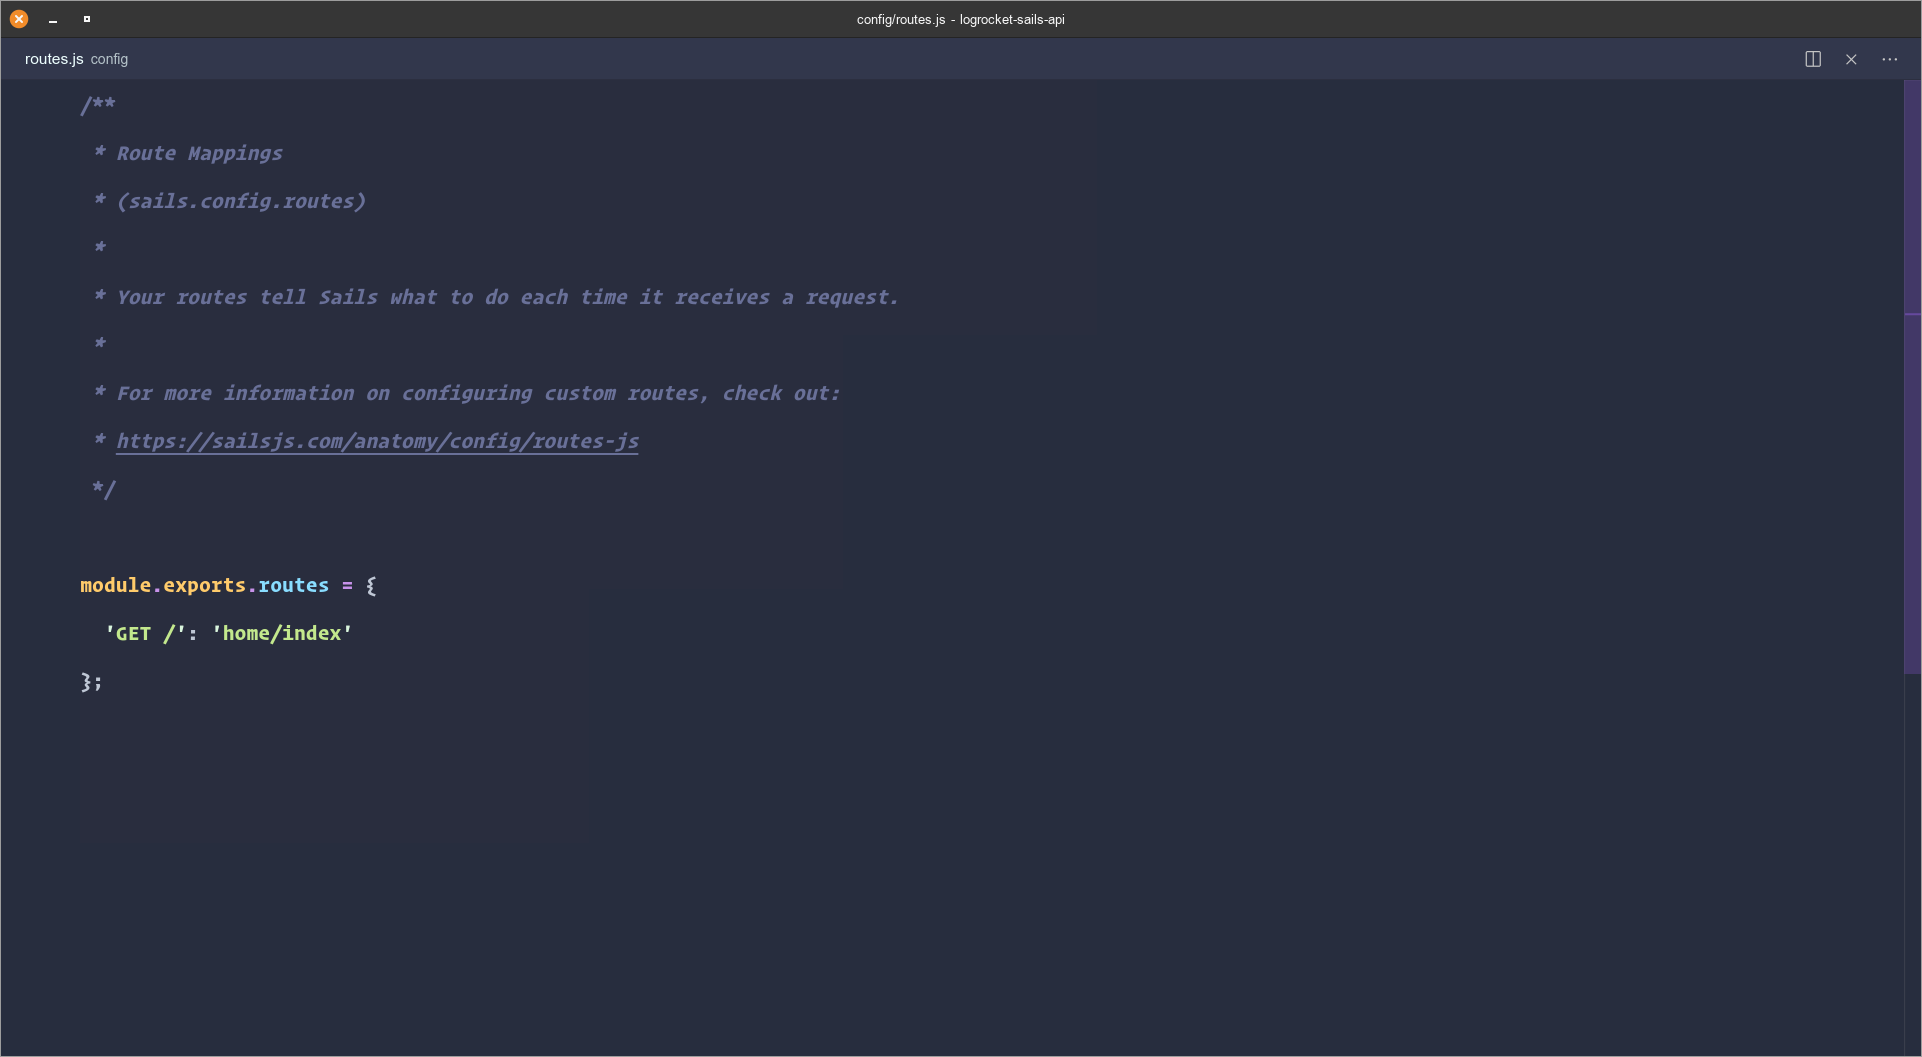
Let’s add the route for the / index of our application. Open config/routes.js and add the below code snippet:
"GET /": "home/index"
What the above route means is that for a GET request, the index action(method) in the home controller will handle that request.
This a good time to mention that in Sails you have the flexibility of having your controller actions(methods) in a separate file as opposed to defining them all in a single controller file. This approach makes the actions more readable so each action file is focused. We will be taking this approach of having the directory to represent the controller and the
.jsfiles inside as the actions.
Your routes.js file should look like this:
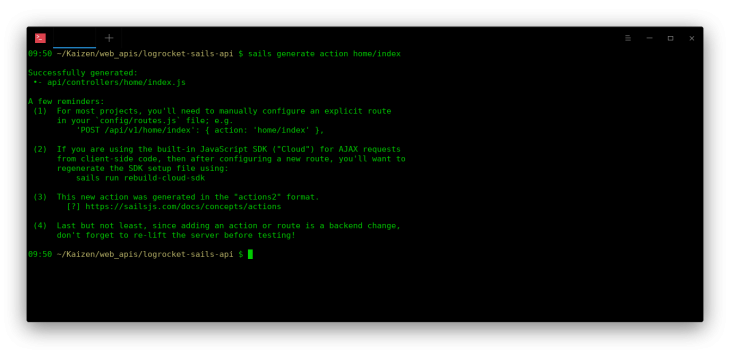
We are halfway done in creating our first endpoint. The next step is to create the index action. We will use the Sails CLI generate command to create the action in controllers/home directory. Run the below command:
sails generate action home/index
We are not passing in the file extension as Sails is smart enough to include that. So you typically pass in the argument as you did for the routes property in routes.js
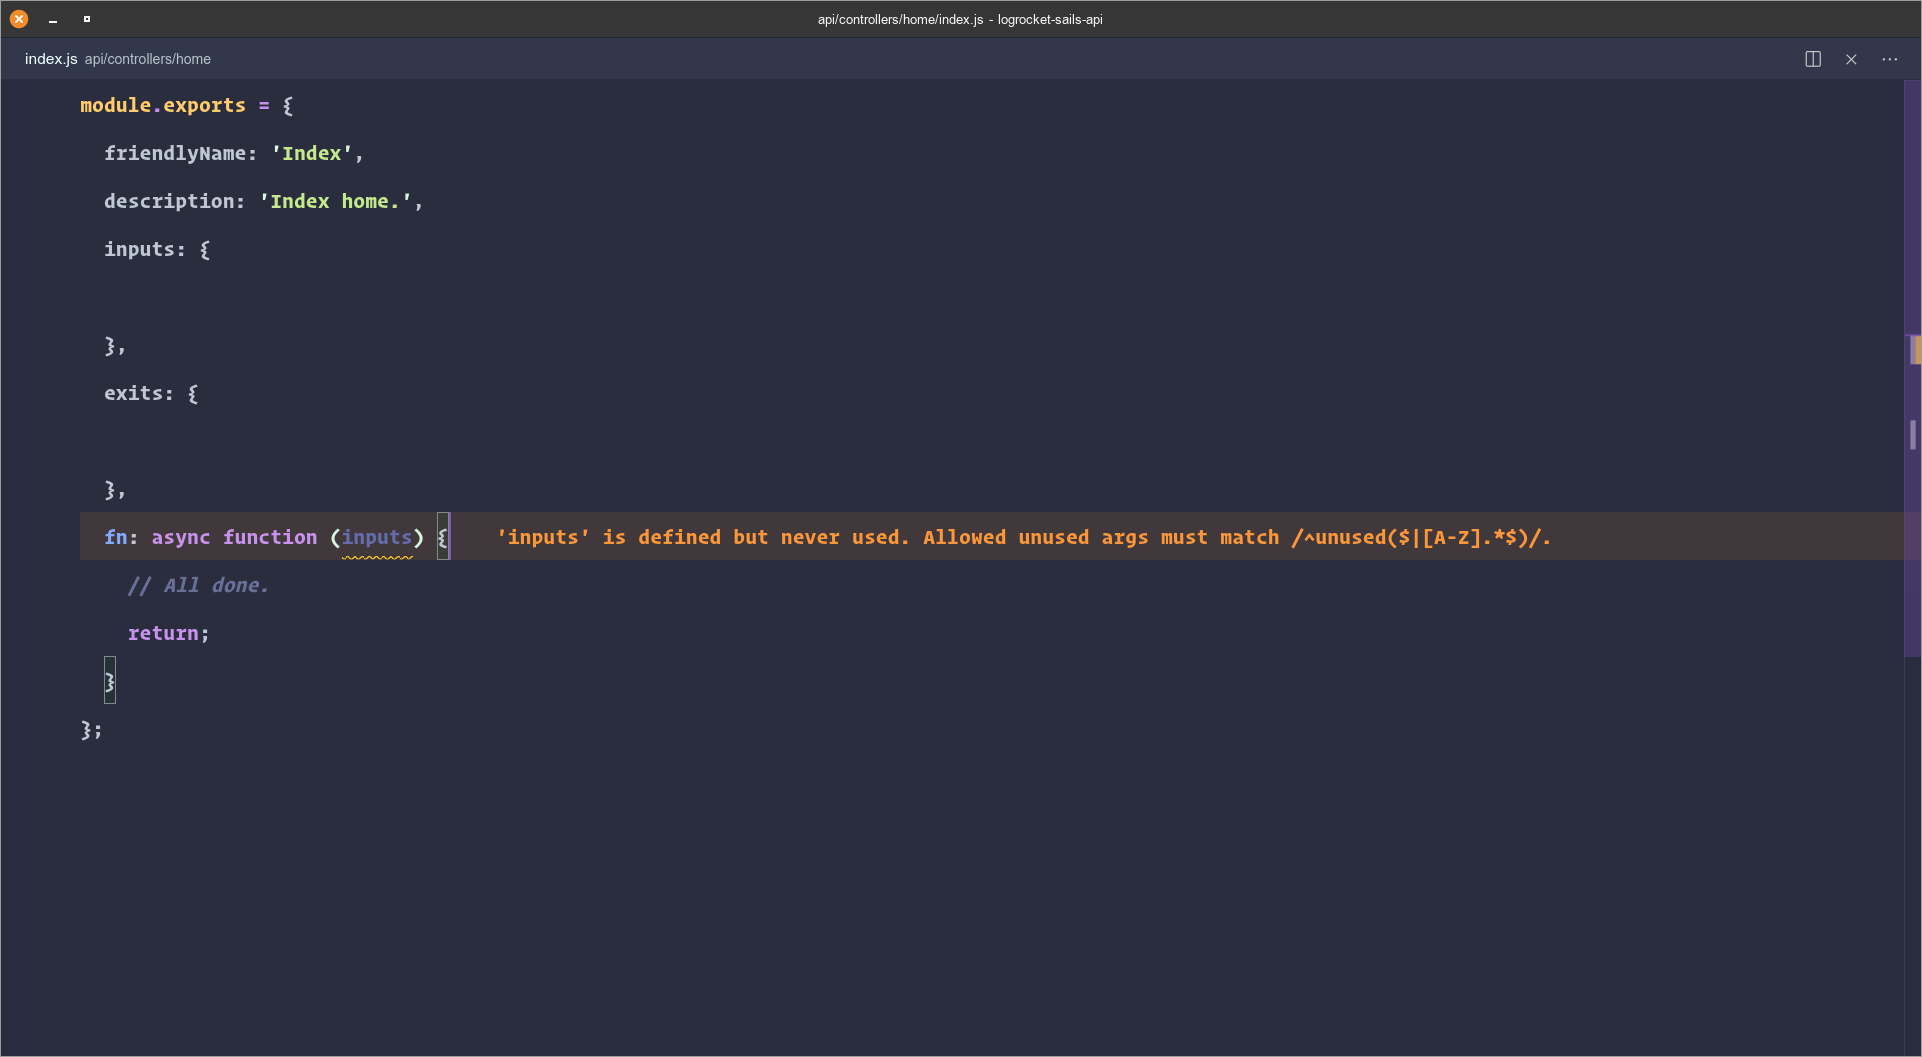
When we run the above command a new folder home will be added in controllers/ directory and the index.js action should be inside it. Below is the default content of the index.js action:
The format of actions and helpers in Sails follows the Node Machine spec. An article to help you understand this spec can be found here.
What we will want to do is to return a JSON response when a request is made to / endpoint. Modify home/index.js to look like this:
module.exports = {
  friendlyName: 'Index',
  description: 'Index home.',
  inputs: {
  },
  exits: {
  },
  fn: async function (_, exits) {
    // All done.
    exits.success({message: 'LogRocket Sails API'});
  }
};
By default, Sails actions uses exits.success to return a success response for every request. So when a user visits / or our Web API, a JSON payload with the property message will be sent back as the response.
Now we have gotten our feet wet, let’s go onward to implement our user management and authentication feature. We will begin with the registration endpoint.
To get started let’s state what we want to do with this endpoint:
We will be using PostgreSQL. You can follow this tutorial to install PostgreSQL for your machine.
Sails has an official PostgreSQL adapter for Waterline which we will install in the same way we install any npm package by running:
npm install sails-postgresql --save
After installing the adapter, you need to supply the adapter name and your local database connection URL in config/datastore.js.
You should have created your Postgres database before now. See here for help.
Modify config/datastore.js by uncommenting the line:
// adapter: 'sails-mysql',
// url: 'mysql://user:password@host:port/database',
And replacing with:
adapter: 'sails-postgresql',
url: 'postgres://logrocket_sails_api:logrocketsailsapi@localhost:5432/logrocket_sails_api', // Replace with your own connection URL
The connection URL for PostgreSQL usually takes the form:
"postgres://{user}:{password}@{hostname}:{port}/{database-name}"
If the Sails development server is still running, kill it, and re-lift Sails by running sails lift.
Pro tip: If you are on VS code you can install Sailboat– the Sails tooling for VS code and you can start the Sails development server from the Command Palette.
If Sails runs without any error then your database has been connected successfully.
Let’s move on to creating our user schema in the next step.
Since PostgreSQL is a schema-based database we won’t be able to create tables or new records on that those tables without an explicitly defined schema. Waterline takes care of defining that schema and provides us the API of just setting JavaScript objects to define them.
For our users’ table, we want the following columns, full_name, email, email_status, email_proof_token , email_proof_token_expires_at, password, password_reset_token, and password_reset_token_expires_at.
Let’s create the user model by running:
sails generate model user
Sails will proceed to create a model file named User.js in models/User.js. Open this file and add the following code inside the attributes property:
fullName: {
      type: 'string',
      required: true,
      columnName: 'full_name'
    },
    email: {
      type: 'string',
      required: true,
      unique: true,
    },
    emailStatus: {
      type: 'string',
      isIn: ['unconfirmed', 'confirmed'],
      defaultsTo: 'unconfirmed',
      columnName: 'email_status'
    },
    emailProofToken: {
      type: 'string',
      description: 'This will be used in the account verification email',
      columnName: 'email_proof_token'
    },
    emailProofTokenExpiresAt: {
      type: 'number',
      description: 'time in milliseconds representing when the emailProofToken will expire',
      columnName: 'email_proof_token_expires_at'
    },
    password: {
      type: 'string',
      required: true
    }
passwordResetToken: {
      type: 'string',
      description:
        'A unique token used to verify the user\'s identity when recovering a password.',
      columnName: 'password_reset_token',
    },
    passwordResetTokenExpiresAt: {
      type: 'number',
      description:
        'A timestamp representing the moment when this user\'s `passwordResetToken` will expire (or 0 if the user currently has no such token).',
      example: 1508944074211,
      columnName: 'password_reset_token_expires_at',
    },
Using Waterline attributes definition specification, we defined the model attributes which represent the columns in the user table.
Sails will use the attribute keys as the column names if you don’t specify a value for them with the
columnNameproperty
Check the documentation on Waterline attributes for more insight on setting model attributes in Sails.
Before we wrap this up we need to specify a table name for our model. This will tell Waterline what name the table would be. So we will modify User.js and add this property:
tableName: "users"
User.js should now look like this:
/**
 * User.js
 *
 * @description :: A model definition represents a database table/collection.
 * @docs        :: https://sailsjs.com/docs/concepts/models-and-orm/models
 */
module.exports = {
  tableName: "users",
  attributes: {
    fullName: {
      type: 'string',
      required: true,
      columnName: 'full_name'
    },
    email: {
      type: 'string',
      required: true,
      unique: true,
    },
    emailStatus: {
      type: 'string',
      isIn: ['unconfirmed', 'confirmed'],
      defaultsTo: 'unconfirmed',
      columnName: 'email_status'
    },
    emailProofToken: {
      type: 'string',
      description: 'This will be used in the account verification email',
      columnName: 'email_proof_token'
    },
    emailProofTokenExpiresAt: {
      type: 'number',
      description: 'time in milliseconds representing when the emailProofToken will expire',
      columnName: 'email_proof_token_expires_at'
    },
    password: {
      type: 'string',
      required: true
    }
  },
};
Sails allows you to customize the fields to be returned when you are returning a record as a response. We would use this functionality to remove the password field when returning the user record. Let’s add that. After the attributes:{} add the following:
customToJSON: function () {
    return _.omit(this, ["password"]);
  },
We are telling Sails that when converting instances of the User.js model to JSON it should always omit the password property.
One last thing we will do in User.js is to encrypt the password before storing it. You can do this in the controller action but we are going to use the Waterline lifecycle hook. Waterline provides a beforeCreate lifecycle hook on its models allowing you to perform some tasks before any record is created.
To encrypt our password we will install a Sails hook called sails-hooks-organics(hooks are sails mechanism for extending Sails abilities). These hooks provide helpers for hashing passwords, comparing password, and creating random strings(which we will need for our tokens). Let’s install it:
npm install sails-hook-organics --save
Once it is installed, add this code after the customToJSON property:
// LIFE CYCLE
beforeCreate: async function (values, proceed) {
  // Hash password
  const hashedPassword = await sails.helpers.passwords.hashPassword(
    values.password
  );
  values.password = hashedPassword;
  return proceed();
},
Let’s migrate our database! We can do this by restarting Sails by running sails lift. However, Sails will prompt you to enter a migration strategy which should be one of the following:
When you see the prompt enter “alter” which is recommended for development.
Pro tip: To avoid this prompt every time you lift Sails you should explicitly set the migration strategy in
config/models.jsby uncommenting this line:
// migrate: 'alter',
Also, uncomment in config/models.js:
// schema: true,
Finally, since we are using snake_case for our column names we will modify the auto-created attributes, createdAt and updatedAt in config/models.js by adding columnName to both of them. Here is how they should look:
createdAt: { type: 'number', autoCreatedAt: true, columnName: 'created_at'},
updatedAt: { type: 'number', autoUpdatedAt: true, columnName: 'updated_at'},
Finally, run sails lift for your changes to take effect in the database.
Now we have our user model all set up and ready for queries, let’s create the route and controller(action) for creating new users. We will begin by declaring the route in routes.js:
'POST /user/register': 'user/register'
Run the below command to create the register action:
sails generate action user/register
Open the user/register.js action file. In Sails, if your action is expecting any data i.e a POST request, you define that data in the inputs field of the action. The syntax of the definition is similar to the attributes definition we did earlier on the User.js model. Add the following code to inputs:{} so it looks like this:
inputs: {
    fullName: {
      type: 'string',
      required: true,
    },
    email: {
      type: 'string',
      required: true,
      unique: true,
      isEmail: true,
    },
    password: {
      type: 'string',
      required: true,
      minLength: 6,
    },
  },
You can see Sails allows you to validate each input in line by setting some validation properties. Next, we will set up some exits which are possible outcomes for the endpoint. Recall the success exit means the request was successful and our web API will respond with a 200. However, you can customize the status code since this will be creating a new record we want to return a 201. Also, we want to set up a response for when a user already exists with the email since the email is a unique field. Finally, we will have a generic error exit to serve as a catch-all for any other unforeseen errors. Add the following code to exits:{} so it looks like this:
success: {
     statusCode: 201,
     description: 'New muna user created',
   },
   emailAlreadyInUse: {
     statusCode: 400,
     description: 'Email address already in use',
   },
   error: {
     description: 'Something went wrong',
   },
Before you can use the exits in the fn async function always pass in exit as an argument or it won’t work.
Let’s move on to the fn async function. We will start off by declaring a try-catch block. In that block start off with making sure the email is all lowercase:
const newEmailAddress = inputs.email.toLowerCase();
Then we will create a token for this user which will be used for the email verification:
const token = await sails.helpers.strings.random('url-friendly');
Next using the model method create(). On the user model we will create a new record but before we do that we have to add the expiration time of our token in config/custom.js – you use this file to define the values you want to be able to access in your application during development. So go to config/custom.js and add this:
emailProofTokenTTL: 24 * 60 * 60 * 1000, // 24 hours
Then back in user/register.js you can now create the new user record:
let newUser = await User.create({
        fullName: inputs.fullName,
        email: newEmailAddress,
        password: inputs.password,
        emailProofToken: token,
        emailProofTokenExpiresAt:
          Date.now() + sails.config.custom.emailProofTokenTTL,
      }).fetch();
Next, we will need to construct the confirm link which will be sent to the user:
const confirmLink = `${sails.config.custom.baseUrl}/user/confirm?token=${token}`;
Seeing we haven’t defined baseUrl in config/custom.js our code will break:
baseUrl: 'http://localhost:1337'
Note: the confirm endpoint doesn’t exist yet
The next thing to do is to set up and send our email:
const email = {
        to: newUser.email,
        subject: 'Confirm Your account',
        template: 'confirm',
        context: {
          name: newUser.fullName,
          confirmLink: confirmLink,
        },
      };
await sails.helpers.sendMail(email);
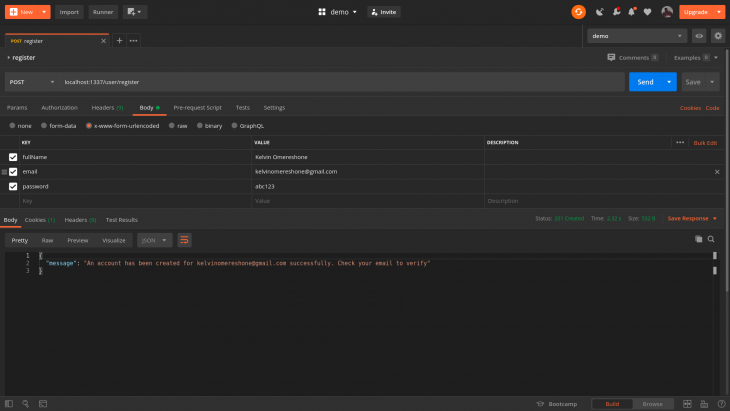
Finally, we will send a response to the user to show we’re all done creating a new user:
return exits.success({
      message: `An account has been created for ${newUser.email} successfully. Check your email to verify`,
    });
Let’s look at error-handling. In the catch block add the below code to first check if the error was caused as a result of trying to register with an existing email:
if (error.code === 'E_UNIQUE') {
        return exits.emailAlreadyInUse({
          message: 'Oops :) an error occurred',
          error: 'This email address already exits',
        });
}
Finally, we will respond to every other error with the exits.error:
return exits.error({
      message: 'Oops :) an error occurred',
      error: error.message,
});
We can’t test the above registration just yet because we haven’t set up sending emails for our app. Let’s do that.
We will be using nodemailer to power our email sending flow. We will also use SendGrid as the nodemail transport. To create our emails we will use the handlebar plugin for nodemailer to compile .hbs template files to emails. Let’s start off by installing these packages:
npm install nodemailer nodemailer-express-handlebars nodemailer-sendgrid --save
After installing we will generate a SendGrid API key which is essential to send these emails. We will add this API key in config/local.js.
local.js will only be available in development so you will need to create
local.jsif it does not exist and provide your SendGrid API key in order to test this app locally
Notice we are calling:
await sails.helpers.sendMail(email);
We haven’t created this helper yet. To do this we will run:
sails generate helper send-mail
This will create send-mail.js in helpers/ directory. Replace the content with this:
const nodemailer = require("nodemailer");
var nodemailerSendgrid = require("nodemailer-sendgrid");
const hbs = require("nodemailer-express-handlebars");
module.exports = {
  friendlyName: "Send mail",
  description: "",
  inputs: {
    options: {
      type: "ref",
      required: true,
    },
  },
  exits: {
    success: {
      description: "All done.",
    },
  },
  fn: async function (inputs) {
    const transporter = nodemailer.createTransport(
      nodemailerSendgrid({
        apiKey: sails.config.sendGridAPIkey || process.env.SENDGRID_API_KEY,
      })
    );
    transporter.use(
      "compile",
      hbs({
        viewEngine: {
          extName: ".hbs",
          partialsDir: "./views",
          layoutsDir: "./views",
          defaultLayout: "",
        },
        viewPath: "./views/",
        extName: ".hbs",
      })
    );
    try {
      let emailOptions = {
        from: "LogrocketSailsAPI <[email protected]>",
        ...inputs.options,
      };
      await transporter.sendMail(emailOptions);
    } catch (error) {
      sails.log(error);
    }
  },
};
This helper is taking option as it’s only arguments which will be an object containing information relevant to sending the email like the subject, template file, etc. In the transporter.use method we are telling nodemailer to look for .hbs files in the views directory to make sure this directory is created.
Finally, we will create the confirm email template .hbs file. Then add the following template:
<!DOCTYPE html>
<html lang="en">
<head>
    <meta charset="UTF-8" />
    <meta name="viewport" content="width=device-width, initial-scale=1.0" />
    <title>Document</title>
    <style>
        body {
            padding: 10px 20px;
            font-family: Arial, Helvetica, sans-serif;
        }
        .cta {
            text-decoration: none;
            background-color: rgb(76, 119, 175);
            color: #fff !important;
            font-weight: bold;
            padding: 10px 20px;
            border-radius: 5px;
            margin: 0 auto;
        }
        footer {
            margin-top: 2rem;
        }
        p {
            margin: 30px 0;
        }
    </style>
</head>
<body>
    <section class="hero">
        <h1 class="title">Welcome, {{ name }}</h1>
    </section>
    <main>
        <p>Please confirm your account by clicking the button below:</p>
        <a class="cta" href="{{confirmLink}}" target="_blank">Confirm email</a>
        <p>Once confirmed, you'll be able to log in.</p>
    </main>
    <footer>
        <p>🖤 Love,</p>
    </footer>
</body>
</html>
Notice we are using handlebars’ interpolation to make available the name and confirmLink to the user which we passed in as part of the email option when we called sendMail.
All done! So now we have completed the registration process. Run sails lift and open Postman to test this endpoint. Enter an active email and you should be registered and an email should be sent to you as well.
Open routes.js and add the following entry to the routes dictionary:
GET /user/confirm': 'user/confirm
Then run sails generate action user/confirm to scaffold the confirm action.
We want this route to take in a single query param called token which is the confirmation token for the email. So we will add a single input to inputs:{}. Let’s add that:
token: {
    type: 'string',
    description: "The confirmation token from the email.",
    example: "4-32fad81jdaf$329",
  },
We will also add two exits:
success: {
      description: "Email address confirmed and requesting user logged in.",
    },
  invalidOrExpiredToken: {
    statusCode: 400,
    description:
      "The provided token is expired, invalid, or already used up.",
  },
In the fn function we will start off by checking if the request does not contain a token parameter:
if (!inputs.token) {
      return exits.invalidOrExpiredToken({
        error: "The provided token is expired, invalid, or already used up.",
      });
    }
After that we will get the user who was given the token from the database:
var user = await User.findOne({ emailProofToken: inputs.token });
We will then check if there is no such user or if the token is expired already:
if (!user || user.emailProofTokenExpiresAt <= Date.now()) {
     return exits.invalidOrExpiredToken({
       error: "The provided token is expired, invalid, or already used up.",
     });
   }
Finally, we will check if the user has an emailStatus of unconfirmed and proceed to updating that to confirmed and send back a response to the caller:
if (user.emailStatus === "unconfirmed") {
      await User.updateOne({ id: user.id }).set({
      emailStatus: "confirmed",
      emailProofToken: "",
      emailProofTokenExpiresAt: 0,
  });
  return exits.success({
    message: "Your account has been confirmed",
  });
}
To test this out, run sails lift and then create a new user in Postman with a valid email address you have access to. Then check for the confirmation email and click on the confirm email button.

This should show the message Your account has been confirmed if everything was successful.

Our users can now create accounts and confirm their password but they can’t log in quite yet. Let’s fix that!
To implement the login feature, we will declare the below route in routes.js:
POST /user/login': 'user/login
We will then create the login action by running sails generate action user/login in the terminal.
For a user to be able to login, we want the following to be true:
To enforce this, we will write a policy called can-login.js in policies/ directory. Below is the content of this policy:
module.exports = async function (req, res, proceed) {
  const { email } = req.allParams();
  try {
    const user = await User.findOne({ email: email });
    if (!user) {
      res.status(404).json({
        error: `${email} does not belong to a user`,
      });
    } else if (user.emailStatus === 'unconfirmed') {
      res.status(401).json({
        error: 'This account has not been confirmed. Click on the link in the email sent to you to confirm.',
      });
    } else {
      return proceed();
    }
  } catch (error) {
    res.status(401).json({ error: error.message });
  }
};
Here, we are using the findOne method provided by Waterline on the user model to get the email provided in the login request. If the record wasn’t found we return a 404 with a message to the caller. Next, we check if the emailStatus is unconfirmed, if it is then the user hasn’t confirmed his/her account yet so we return a 401(not authorized). Finally, we allow the request to go through with return proceed() callback if none of the previous conditions were true.
Writing the policy is just one part of the process to add a guard to an action. The other part is to map the policy to the action in it will be action on in config/policies.js file. To do this, simply add the following code snippet as an entry to the object in the file:
"user/login": 'can-login'
Now flesh out the user/login.js action. First, we will add the inputs to the inputs: {} object:
email: {
    type: "string",
    required: true,
  },
password: {
  type: "string",
  required: true,
},
We will also add the following exits:
success: {
      description: "Login successful",
    },
  notAUser: {
    statusCode: 404,
    description: "User not found",
  },
  passwordMismatch: {
    statusCode: 401,
    description: "Password do not match",
  },
  operationalError: {
    statusCode: 400,
    description: 'The request was formed properly'
}
Then in the fn function we will start out with a try/catch block. In the try block we will attempt to find the user with the provided email:
const user = await User.findOne({ email: inputs.email });
We will check if a user was not found and then exit with the notAUser exit:
if (!user) {
   return exits.notAUser({
     error: `An account belonging to ${inputs.email} was not found`,
   });
}
Going on, we will check the password using the checkPassword method provided by the sails-hook-organics hooks we installed in part one:
await sails.helpers.passwords
    .checkPassword(inputs.password, user.password)
    .intercept('incorrect', (error) => {
      exits.passwordMismatch({ error: error.message });
});
Then we will generate a new JWT token(we haven’t implemented this just yet):
const token = await sails.helpers.generateNewJwtToken(user.email);
We will then set a me object with the user record on the req stream/object:
this.req.me = user;
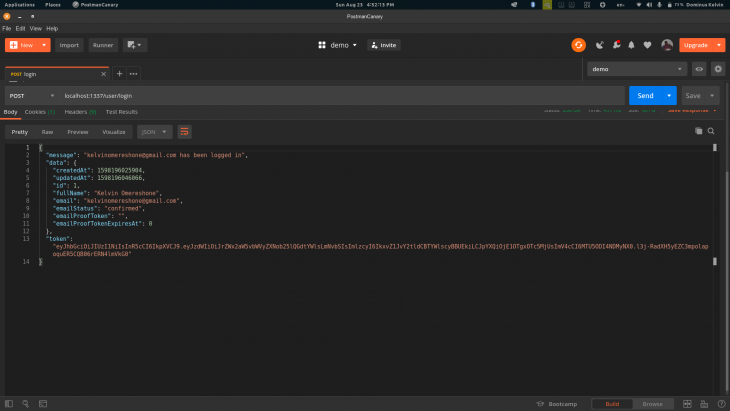
Lastly, we will return the success exit providing a message, the user properties as data, and the JWT token:
return exits.success({
      message: `${user.email} has been logged in`,
      data: user,
      token,
});
In the catch block we will first log any errors using Sails built-in logger:
sails.log.error(error);
Then we will check if the error was an operation error. If it is we will return a JSON with the raw message to the user:
if (error.isOperational) {
  return exits.operationalError({
    message: `Error logging in user ${inputs.email}`,
    error: error.raw,
  });
}
For every other error, we don’t know about we will return a 500 using the error exit:
return exits.error({
       message: `Error logging in user ${inputs.email}`,
       error: error.message,
 });
We can’t quite test the login feature because we have not created generateNewJwtToken helper.
We will install the jsonwebtoken package as a dependency by running:
npm install jsonwebtoken --save
We will then create generateNewJwtToken helper:
sails generate helper generate-new-jwt-token
Open up the file and require the jsonwebtoken package at the top:
const jwt = require("jsonwebtoken");
This helper will be taking in a single argument which is the user’s email(we are using the email as a unique identifier to create the JWT tokens). So in the inputs field we add:
subject: {
    type: "string",
    required: true
}
Now let’s look into the body of the helper. We will start off by creating the payload object required by JWT to issue a token:
const payload = {
     sub: inputs.subject, // subject
     iss: "LogRocket Sails API" // issuer
};
We will then, in config/local.js, add an entry called jwtSecret which should be a string.
We are not storing the secret directly in our code as that’s bad for security.
Since config/local.js won’t be available when we are in production, we will be adding an environment variable called JWT_SECRET in our server environment. So add the below line to the helper:
const secret = sails.config.jwtSecret || process.env.JWT_SECRET;
The above line simply will try to get the secret from config/local.js when in development and fall back to get the value from the environment variable JWT_SECRET when not in development (i.e production).
Finally, we will create the token and set it to expire in 24 hours:
const token = jwt.sign(payload, secret, { expiresIn: "1d" });
Lastly, we return the token to the caller:
return token;
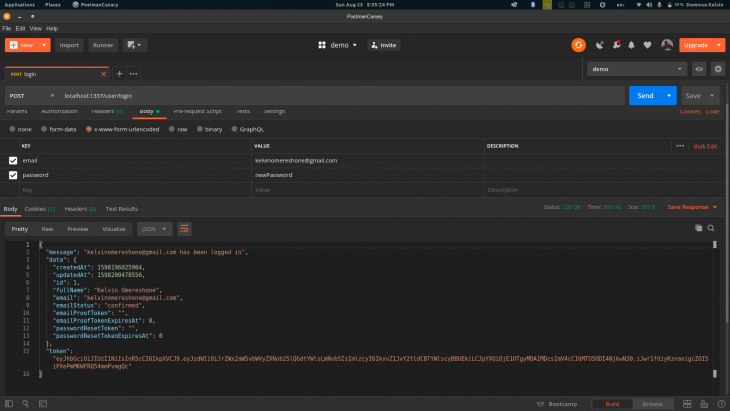
Let’s test the login feature in Postman using the user account we already created. Provide the endpoint with the email and password and you should get back a response from the API similar to the one in the screenshot below:
Here is a scenario, a user comes back to one of the clients consuming our API and can’t recall their account password. Let’s make sure we help to get back in. To implement the forgotten password feature we will start off with the route declaration in routes.js:
'POST /user/forgot-password': 'user/forgot-password'
Let’s also create the action file:
sails generate action user/forgot-password
We want to protect this endpoint to only those who can log in. We already implemented a policy called can-login so we can reuse it. In config/policies.js add the following entry:
'user/forgot-password': 'can-login'
The way we want the forgot-password to work is that a POST request with the email of the user claiming to have forgotten their password is sent to the endpoint and we will send a recovery link to the user’s inbox. To begin let’s declare the email input:
email: {
        description:
          "The email address of the user who wants to recover their password.",
        example: "[email protected]",
        type: "string",
        required: true,
    },
We add the success exit:
success: {
     description:
       "Email matched a user and a recovery email might have been sent",
 },
For fn we begin with trying to get the user matching that email address and we don’t proceed if there is not a match:
var user = await User.findOne({ email: inputs.email });
   if (!user) {
     return;
   }
We then create a recovery token that will be sent to the user:
const token = await sails.helpers.strings.random("url-friendly");
We then store the token in the database along with an expiration time on it:
await User.update({ id: user.id }).set({
      passwordResetToken: token,
      passwordResetTokenExpiresAt:
        Date.now() + sails.config.custom.passwordResetTokenTTL,
});
Presently there is passwordResetTokenTTL property in config/custom.js let’s add that and the value:
passwordResetTokenTTL: 24 * 60 * 60 * 1000, // 24 hours
Back in user/forgot-password.js action we will proceed to construct the reset link for now we will just make it point directly to the endpoint responsible for resetting the password.
This link is subjective to how you want the reset endpoint to be consumed by clients. Since we are not focused on the frontend we will simply copy the reset token and use it in Postman
Here is the snippet:
const recoveryLink = `${sails.config.custom.baseUrl}/user/reset-password?token=${token}`;
We will then send out the email using the email template called forgot-password.hbs which we haven’t created yet. So, create forgot-password.hbs in views/ directory. Add the following template to it:
<!DOCTYPE html>
<html lang="en">
<head>
    <meta charset="UTF-8" />
    <meta name="viewport" content="width=device-width, initial-scale=1.0" />
    <title>Document</title>
    <style>
        body {
            padding: 10px 20px;
            font-family: Arial, Helvetica, sans-serif;
        }
        .cta {
            text-decoration: none;
            background-color: rgb(76, 119, 175);
            color: #fff !important;
            font-weight: bold;
            padding: 10px 20px !important;
            border-radius: 5px;
            margin: 0 auto;
        }
        footer {
            margin-top: 2rem;
        }
        p {
            margin: 30px 0;
        }
    </style>
</head>
<body>
    <section class="hero">
        <h1 class="title">Forgot your password {{ name }}?</h1>
    </section>
    <main>
        <p>
            Someone requested a password reset for your account. If this was not
            you, please disregard this email. Otherwise, simply click the button
            below:
        </p>
        <a class="cta" href="{{recoverLink}}" target="_blank">Reset password</a>
    </main>
    <footer>
        <p>🖤 Love,</p>
    </footer>
</body>
</html>
Back in the forgot-password action you will construct the email option and send the email with it:
const email = {
      to: user.emailAddress,
      subject: "Reset Password",
      template: "forgot-password",
      context: {
        name: user.fullName,
        recoverLink: recoveryLink,
      },
    };
    try {
      await sails.helpers.sendMail(email);
    } catch (error) {
      sails.log(error);
    }
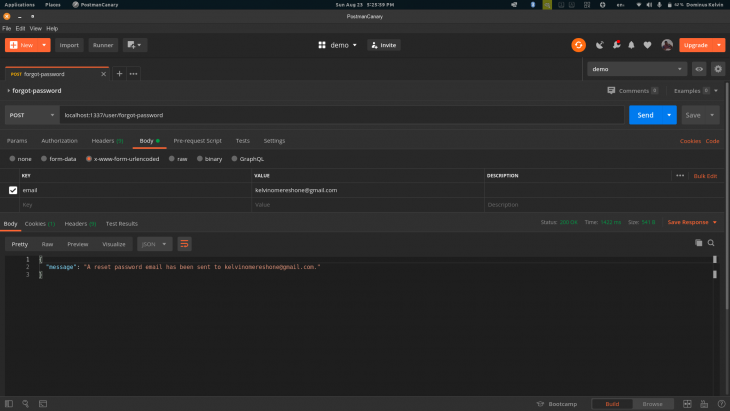
Finally, we will send back a response to the caller with the success exit:
return exits.success({
      message: `A reset password email has been sent to ${user.email}.`,
    });
Before we test out the forgot password feature let’s wrap up by implementing the reset password feature.
Add the below entry to routes.js file:
"POST /user/reset-password": "user/reset-password",
Create the action by running:
sails generate action user/reset-password
Open up reset-password.js and add the following two inputs as we would expect the reset token and the new token to be sent in the request:
password: {
     description: "The new, unencrypted password.",
     example: "myfancypassword",
     required: true,
   },
   token: {
     description:
       "The password token that was in the forgot-password endpoint",
     example: "gwa8gs8hgw9h2g9hg29",
     required: true,
   },
Also declare the following exits:
success: {
     description:
       "Password successfully updated, and requesting user agent automatically logged in",
   },
   invalidToken: {
     statusCode: 401,
     description:
       "The provided password token is invalid, expired, or has already been used.",
   },
In the fn we check to see if the request contains a token else we quickly bail via an invalidToken exit:
if (!inputs.token) {
     return exits.invalidToken({
       error: "Your reset token is either invalid or expired",
     });
}
If the token is valid we proceed to get the user record having that token:
var user = await User.findOne({ passwordResetToken: inputs.token });
We will also check if a user record was retrieved and if the token hasn’t expired yet:
if (!user || user.passwordResetTokenExpiresAt <= Date.now()) {
    return exits.invalidToken({
      error: "Your reset token is either invalid or expired",
    });
  }
We will then hash the plain password supplied by the caller:
const hashedPassword = await sails.helpers.passwords.hashPassword(
      inputs.password
    );
Then we update the user record with the hashedPassword and reset both the passwordResetToken and passwordResetTokenTTL fields:
await User.updateOne({ id: user.id }).set({
          password: hashedPassword,
          passwordResetToken: "",
          passwordResetTokenExpiresAt: 0,
    });
To authorize the user we will create a JWT token:
const token = await sails.helpers.generateNewJwtToken(user.email);
We finally add the user record to the req object and send back a 200 response via the success exit with a payload containing a message, user information, and the JWT token for authorization:
this.req.user = user;
return exits.success({
  message: `Password reset successful. ${user.email} has been logged in`,
  data: user,
  token,
});
Let’s test these two endpoints. Go back to Postman and hit the forgot password endpoint with the account email you created earlier. Go to your inbox then click on the link and copy the token. After that go back to Postman and hit the reset password endpoint with both the token and the new password. You should get the following responses from both endpoints:

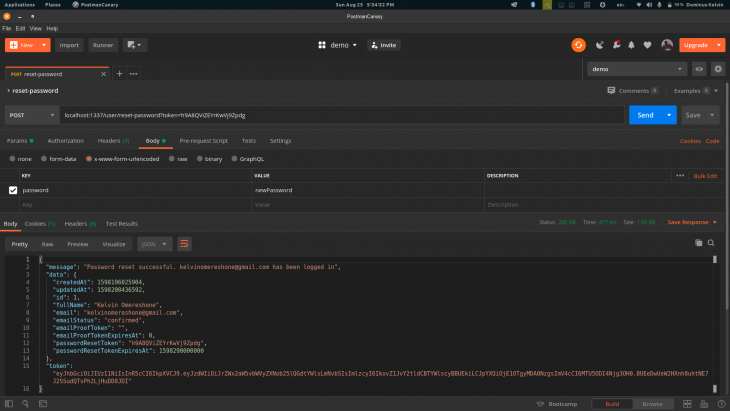
Try to login in with the new password and it should also work:
Now we successfully implemented all endpoints. You can take them all for a spin in Postman. To wrap up let’s make our web service available to the world.
We will deploy our API on the Heroku PaaS. Before we deploy we will need to do some house cleaning. Let’s get started opening config/production.js which will contain all the production settings for our API.
Look for the line under http property, // trustProxy: true and uncomment it to allow Sails to be served from Heroku.
Next, we will override our development database with our production database by replacing the following two entries in the default property of the datastore object:
adapter: "sails-postgresql",
url: process.env.DATABASE_URL,
Heroku will set a DATABASE_URL env variable when we you add a PostgreSQL database to your app
Remember also to replace the baseUrl in config/production.js with your Heroku app URL so emails will work as well.
After that’s done, create a Heroku account and you can deploy your API as you will deploy any Node.js app on Heroku.
Make sure you add the Heroku PostgreSQL add-on since you are depending on a database. Also, set the environment variables, JWT_SECRET and SENDGRID_API_KEY.
To get your database schema onto Heroku, you could copy the database URL and run sails lift that will migrate the tables unto the Heroku provisioned database. Heroku database will need SSL to connect to its database so add ssl: true to the adapter properties like so:
// config/datastore.js
  adapter: "sails-postgresql",
  url:"heroku-database-url",
  ssl: true
Lastly, for security you need to pass an array of URLs that will be allowed to connect to your app via sockets – this is because Sails comes with built-in websockets support by default. Although we are not using sockets. Just find the line under sockets in config/production.js and uncomment the line below:
// onlyAllowOrigins: [
    //   'https://example.com',
    //   'https://staging.example.com',
    // ],
Replace the line with your Heroku app URL:
onlyAllowOrigins: ['https://logrocketsailsapi.herokuapp.com'], // change to yours!
After this, you can deploy your Node.js web API powered by Sails on Heroku!
In this article, we have explored the power and ease of creating web APIs in Node.js using the Sails MVC framework. Here are a few more resources to help:
The source code for this article is on GitHub. Also here is a Postman collection for you to test the endpoints with.
 Monitor failed and slow network requests in production
Deploying a Node-based web app or website is the easy part. Making sure your Node instance continues to serve resources to your app is where things get tougher. If you’re interested in ensuring requests to the backend or third-party services are successful, try LogRocket.

LogRocket lets you replay user sessions, eliminating guesswork around why bugs happen by showing exactly what users experienced. It captures console logs, errors, network requests, and pixel-perfect DOM recordings — compatible with all frameworks.
LogRocket's Galileo AI watches sessions for you, instantly identifying and explaining user struggles with automated monitoring of your entire product experience.
LogRocket instruments your app to record baseline performance timings such as page load time, time to first byte, slow network requests, and also logs Redux, NgRx, and Vuex actions/state. Start monitoring for free.

Claude Code vs. OpenCode in a real Next.js refactor: benchmark results, mistakes, prompts, and when to use each CLI agent.

Every time you explain your team’s coding standards to Claude, you are doing work that should be reusable. The same […]

Learn how to move beyond one-shot prompting in Claude with structured workflows for AI-assisted coding, debugging, PR reviews, documentation, testing, and automation.

Learn how to build advanced Next.js forms with rule engines, client-side previews, Server Actions, and server-validated form logic.
Hey there, want to help make our blog better?
Join LogRocket’s Content Advisory Board. You’ll help inform the type of content we create and get access to exclusive meetups, social accreditation, and swag.
Sign up now

