Modern web applications are increasingly sensitive to when work happens, not just what work happens. User input, scroll events, analytics tracking, and API requests all compete for time on the main thread.

When timing is poorly managed, the result is often jank, duplicated requests, or subtle race conditions that are difficult to debug.
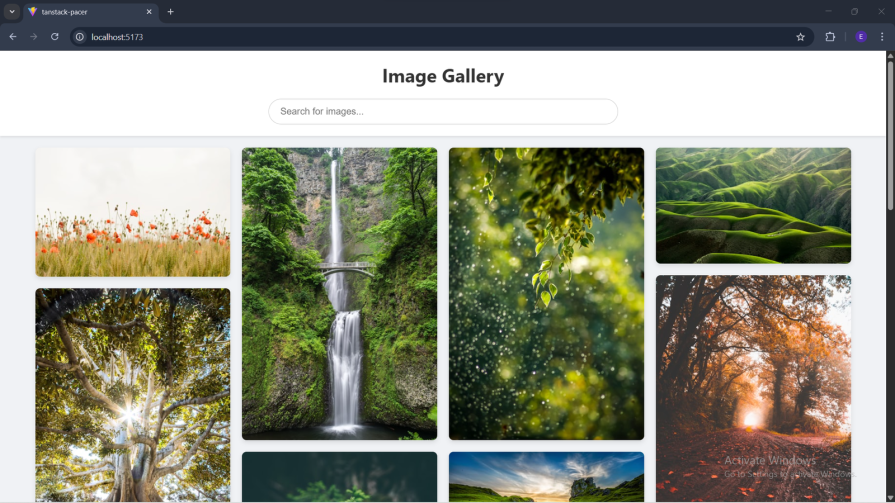
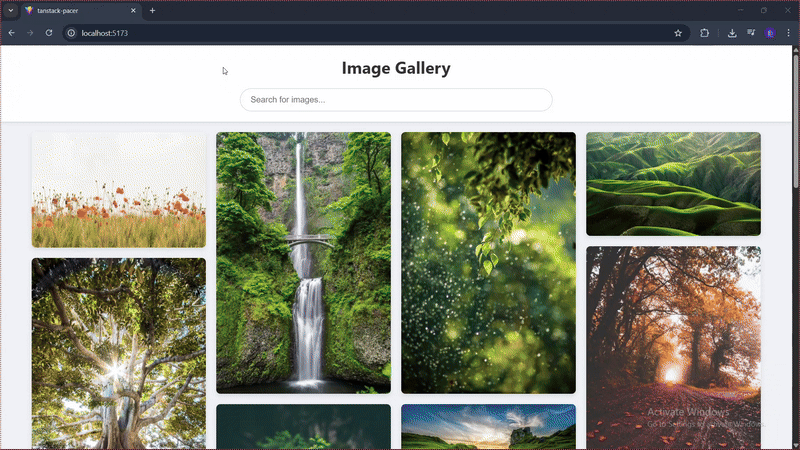
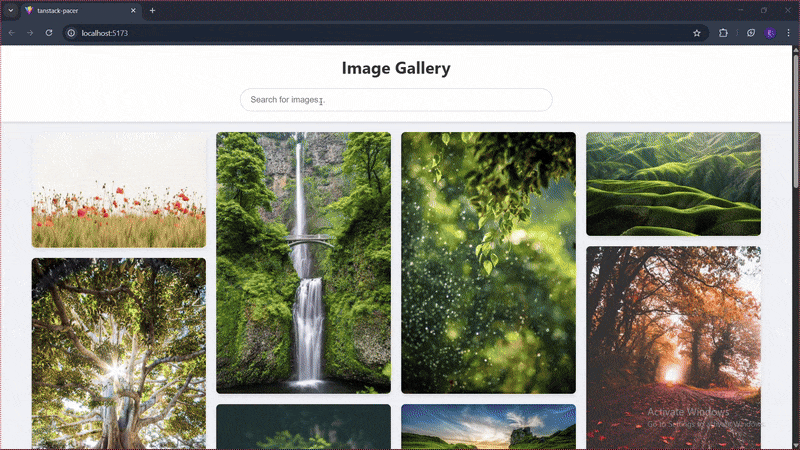
This guide walks through building a Pinterest-style infinite scroll image gallery using React and TanStack Pacer.
Along the way, we’ll apply Pacer’s core utilities (debouncing, throttling, batching, and rate limiting) to solve common UI performance problems without introducing reactive complexity.
By the end of this guide, you’ll understand how to choose the right Pacer utility for a given timing problem, how to integrate it cleanly into a React application, and how to avoid brittle edge cases that often come with hand-rolled timing logic.
The Replay is a weekly newsletter for dev and engineering leaders.
Delivered once a week, it's your curated guide to the most important conversations around frontend dev, emerging AI tools, and the state of modern software.
RxJS is a strong fit for modeling complex event streams, but many UI performance issues do not require a full reactive abstraction.
TanStack Pacer targets common timing problems in frontend apps and does so with a smaller mental and runtime footprint.
Key reasons to consider Pacer:
Before you start, make sure you have the following set up:
useState and useEffect, plus async JavaScript concepts like async/await and Promises.Pacer is a framework-agnostic, purpose-built library for frontend applications that need to control async event timing without the complexity of reactive programming patterns.
While solutions like RxJS provide powerful Observable streams for complex reactive scenarios, Pacer focuses on the timing primitives that show up most often in UI work: debouncing, throttling, rate limiting, and batching.
Rather than replacing reactive libraries, Pacer complements them by covering the majority of UI timing needs with minimal abstraction.
Getting started with TanStack Pacer is straightforward. We’ll create a React project, install the package, and set up a simple folder structure for the demo.
If you haven’t already, create a new React project (Vite example):
npm create vite@latest my-image-gallery -- --template react-ts
cd my-image-gallery
Install TanStack Pacer:
npm install @tanstack/react-pacer
For this Pinterest-style app, create the following folders:
componentshooksservicesInside the components folder, create these files:
ImageCard.tsxImageGrid.tsxSearchBar.tsxInside the hooks folder, create:
useImageSearch.tsInside the services folder, create:
analytics.tsFinally, create a .env file in the project root and add your Unsplash API key:
VITE_UNSPLASH_API_KEY=YOUR_UNSPLASH_API_KEY_HERE
Choosing the right Pacer utility depends on the timing problem you’re solving. Each utility controls execution in a different way and is optimized for different UI scenarios.
The quick-reference table below maps each Pacer utility to a common use case to help you identify the best fit before diving into the implementation details.
| Utility | Best for | Common use case | What it solves |
|---|---|---|---|
| Debounce | Waiting for inactivity | Search input, autocomplete, resize events | Delays execution until the user stops triggering the action |
| Throttle | Limiting execution frequency | Infinite scroll, scroll/resize listeners | Ensures a function runs at most once in a given interval |
| Batch | Grouping multiple actions | Analytics events, logging, bulk updates | Combines many calls into a single operation |
| Rate limit | Enforcing strict limits | API requests, background jobs | Caps how many executions can happen over time |
Let’s get into building the app.
We’ll use AsyncBatcher from TanStack Pacer to collect multiple like events in the app and send them to the server in a single batch.
This is a common pattern for analytics where you want to reduce network chatter without losing event fidelity.
In analytics.ts, paste the following code:
import { AsyncBatcher } from '@tanstack/pacer';

const analyticsBatcher = new AsyncBatcher(
  async (events: { eventName: string; payload: any }[]) => {
    console.log('Sending batch of analytics events to the server:', events);
    await new Promise((resolve) => setTimeout(resolve, 500));
    console.log('Batch of analytics events sent successfully!');
  },
  {
    wait: 2000,
    maxSize: 10,
  }
);

export default {
  track: (eventName: string, payload: any) => {
    analyticsBatcher.addItem({ eventName, payload });
  },
};
In this code, we used AsyncBatcher to create a queue for analytics events. The first argument is an async function that defines what to do when a batch is ready to be processed.
It receives an array of events collected since the last flush.
The configuration options determine when a batch is processed. This batcher flushes every two seconds, and it also flushes immediately if 10 events arrive before that timer elapses.
Finally, the file exports a simple track method that the rest of the application can use without needing to know anything about batching.
ImageCardNext, we’ll use the analytics service from the image card component to record likes.
Paste the following code into ImageCard.tsx:
import React from 'react';
import analyticsService from '../services/analytics';

interface ImageCardProps {
  image: {
    id: string;
    urls: {
      small: string;
    };
    alt_description: string;
  };
}

const ImageCard: React.FC<ImageCardProps> = ({ image }) => {
  const handleLike = () => {
    analyticsService.track('like_image', { imageId: image.id });
    alert(
      'You liked the image! The "like" event has been added to a batch and will be sent to the server shortly.'
    );
  };

  return (
    <div className="image-card">
      <img src={image.urls.small} alt={image.alt_description} />
      <div className="image-card-overlay">
        <button onClick={handleLike}>❤️ Like</button>
      </div>
    </div>
  );
};

export default ImageCard;
This component renders an image with a Like button. When the user clicks Like, the handler calls analyticsService.track(), which adds a like_image event to the batcher queue instead of sending it immediately.
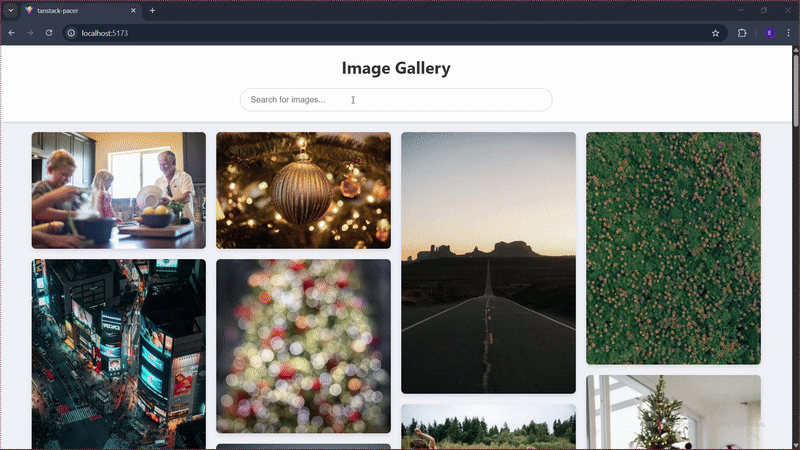
Next, we’ll use the useDebouncedCallback hook to debounce the search input.
This ensures the onSearch callback only fires once the user pauses typing, which reduces redundant API calls and stabilizes UI behavior.
In SearchBar.tsx, paste the following:
import React from 'react';
import { useDebouncedCallback } from '@tanstack/react-pacer';
import analyticsService from '../services/analytics';

interface SearchBarProps {
  onSearch: (query: string) => void;
}

const SearchBar: React.FC<SearchBarProps> = ({ onSearch }) => {
  const handleSearch = useDebouncedCallback(
    (query: string) => {
      onSearch(query);
      analyticsService.track('search_initiated', { query });
    },
    { wait: 500 }
  );

  return (
    <div className="search-bar">
      <input
        type="search"
        onChange={(e) => handleSearch(e.target.value)}
        placeholder="Search for images..."
      />
    </div>
  );
};

export default SearchBar;
Here, useDebouncedCallback wraps the search logic and returns a debounced function (handleSearch). With wait: 500, the callback only runs after 500ms of inactivity.
Inside the debounced function, we call onSearch(query) (passed from App.tsx), which updates the search term and triggers the data-fetching hook.
We also record a search_initiated analytics event so that user intent is tracked without spamming the analytics pipeline.
Now let’s create a custom hook to manage fetching images from the Unsplash API.
This hook will also include rate limiting to help you enforce usage policy constraints and fail gracefully under rapid user input.
Copy and paste this into useImageSearch.ts:
import { useState, useEffect, useCallback } from 'react';
import { useAsyncRateLimiter } from '@tanstack/react-pacer/async-rate-limiter';

const API_URL = 'https://api.unsplash.com';

export const useImageSearch = () => {
  const [query, setQuery] = useState('nature');
  const [images, setImages] = useState<any[]>([]);
  const [page, setPage] = useState(1);
  const [hasMore, setHasMore] = useState(true);
  const [isLoading, setIsLoading] = useState(false);
  const [error, setError] = useState<string | null>(null);

  const fetchFn = useCallback(
    async ({ searchQuery, pageNum }: { searchQuery: string; pageNum: number }) => {
      const API_KEY = import.meta.env.VITE_UNSPLASH_API_KEY;

      const url =
        searchQuery.trim() === ''
          ? `${API_URL}/photos?page=${pageNum}&per_page=20&client_id=${API_KEY}`
          : `${API_URL}/search/photos?page=${pageNum}&per_page=20&query=${searchQuery}&client_id=${API_KEY}`;

      const response = await fetch(url);
      if (!response.ok) {
        throw new Error('Failed to fetch images from Unsplash');
      }

      const data = await response.json();
      return searchQuery.trim() === '' ? data : data.results;
    },
    []
  );

  const rateLimiter = useAsyncRateLimiter(fetchFn, {
    limit: 4,
    window: 2 * 60 * 1000, // 2 minutes
    onReject: (_args, limiter) => {
      const remaining = limiter.getMsUntilNextWindow();
      const errorMsg = `API rate limit exceeded. Try again in ${Math.ceil(
        remaining / 1000 / 60
      )} minutes.`;
      setError(errorMsg);
    },
  });
In useImageSearch, we define the state needed for querying, pagination, and error handling.
To interact with the Unsplash API responsibly, we wrap our fetch function with useAsyncRateLimiter.
The rate limiter caps how many executions can happen within a time window. If a request is blocked, onReject fires and we surface a user-facing message that includes how long until the window resets.
Add the second part of useImageSearch.ts below:
  const fetchAndSetImages = useCallback(
    async (searchQuery: string, pageNum: number) => {
      setIsLoading(true);
      setError(null);

      try {
        const newImages = await rateLimiter.maybeExecute({ searchQuery, pageNum });

        if (newImages) {
          setImages((prevImages) =>
            pageNum === 1 ? newImages : [...prevImages, ...newImages]
          );
          setHasMore(newImages.length > 0);
        }
      } catch (err: any) {
        setError(err.message);
      } finally {
        setIsLoading(false);
      }
    },
    [rateLimiter]
  );

  useEffect(() => {
    setImages([]);
    setPage(1);
    setHasMore(true);
    fetchAndSetImages(query, 1);
  }, [query, fetchAndSetImages]);

  const loadMore = () => {
    if (hasMore && !isLoading) {
      const newPage = page + 1;
      setPage(newPage);
      fetchAndSetImages(query, newPage);
    }
  };

  return { query, setQuery, images, loadMore, hasMore, isLoading, error };
};
Next, we’ll build ImageGrid.tsx, which renders results and implements throttled infinite scroll.
Throttling ensures scroll-position checks run at a controlled cadence, preventing excessive handler work during fast scrolling.
Paste the following into ImageGrid.tsx:
import React, { useEffect } from 'react';
import ImageCard from './ImageCard';
import { useThrottledCallback } from '@tanstack/react-pacer';

interface ImageGridProps {
  images: any[];
  onLoadMore: () => void;
  hasMore: boolean;
  isLoading: boolean;
}

const ImageGrid: React.FC<ImageGridProps> = ({
  images,
  onLoadMore,
  hasMore,
  isLoading,
}) => {
  const handleScroll = useThrottledCallback(
    () => {
      const { scrollTop, clientHeight, scrollHeight } = document.documentElement;

      if (scrollTop + clientHeight >= scrollHeight - 500 && hasMore && !isLoading) {
        onLoadMore();
      }
    },
    { wait: 200 }
  );

  useEffect(() => {
    window.addEventListener('scroll', handleScroll);
    return () => {
      window.removeEventListener('scroll', handleScroll);
    };
  }, [handleScroll]);

  return (
    <div>
      <div className="image-grid">
        {images.map((image) => (
          <ImageCard key={image.id} image={image} />
        ))}
      </div>

      {isLoading && <p>Loading more images...</p>}
      {!hasMore && <p>You've reached the end!</p>}
    </div>
  );
};

export default ImageGrid;
Now we’ll wire everything together in App.tsx and apply basic styling.
Replace the contents of App.tsx with the following:
import React from 'react';
import SearchBar from './components/SearchBar';
import ImageGrid from './components/ImageGrid';
import { useImageSearch } from './hooks/useImageSearch';
import './index.css';

const App = () => {
  const { query, setQuery, images, loadMore, hasMore, isLoading, error } = useImageSearch();

  return (
    <div className="App">
      <header className="app-header">
        <h1>Image Gallery</h1>
        <SearchBar onSearch={setQuery} />
        {error && <p className="error-message">{error}</p>}
      </header>

      <main>
        <ImageGrid
          images={images}
          onLoadMore={loadMore}
          hasMore={hasMore}
          isLoading={isLoading}
        />
      </main>
    </div>
  );
};

export default App;
Add the following CSS to index.css to make the gallery presentable:
:root {
  --primary-color: #007bff;
  --background-color: #f0f2f5;
  --text-color: #333;
  --card-background: #fff;
  --shadow-color: rgba(0, 0, 0, 0.1);
}

body {
  font-family: -apple-system, BlinkMacSystemFont, 'Segoe UI', Roboto, Helvetica, Arial, sans-serif;
  background-color: var(--background-color);
  color: var(--text-color);
  margin: 0;
}

.App {
  display: flex;
  flex-direction: column;
  min-height: 100vh;
}

.app-header {
  background-color: var(--card-background);
  padding: 20px;
  box-shadow: 0 2px 4px var(--shadow-color);
  position: sticky;
  top: 0;
  z-index: 10;
}

.app-header h1 {
  text-align: center;
  margin: 0 0 20px 0;
}

.search-bar input {
  width: 100%;
  max-width: 600px;
  display: block;
  margin: 0 auto;
  padding: 12px 20px;
  font-size: 16px;
  border-radius: 24px;
  border: 1px solid #ccc;
}

main {
  padding: 20px;
  flex-grow: 1;
}

.image-grid {
  column-count: 4;
  column-gap: 20px;
  max-width: 1400px;
  margin: 0 auto;
}

@media (max-width: 1200px) {
  .image-grid {
    column-count: 3;
  }
}

@media (max-width: 900px) {
  .image-grid {
    column-count: 2;
  }
}

@media (max-width: 600px) {
  .image-grid {
    column-count: 1;
  }
}

.image-card {
  position: relative;
  overflow: hidden;
  border-radius: 8px;
  box-shadow: 0 4px 8px var(--shadow-color);
  background-color: #ddd;
  break-inside: avoid;
  margin-bottom: 20px;
}

.image-card img {
  width: 100%;
  height: auto;
  object-fit: cover;
  display: block;
  transition: transform 0.3s ease;
}

.image-card:hover img {
  transform: scale(1.05);
}

.image-card-overlay {
  position: absolute;
  top: 0;
  left: 0;
  right: 0;
  bottom: 0;
  background-color: rgba(0, 0, 0, 0.4);
  opacity: 0;
  transition: opacity 0.3s ease;
  display: flex;
  align-items: center;
  justify-content: center;
  pointer-events: none;
}

.image-card:hover .image-card-overlay {
  opacity: 1;
  pointer-events: auto;
}

.image-card-overlay button {
  background-color: var(--primary-color);
  color: white;
  border: none;
  padding: 10px 20px;
  font-size: 16px;
  border-radius: 20px;
  cursor: pointer;
  transition: background-color 0.3s;
}

.image-card-overlay button:hover {
  background-color: #0056b3;
}

.error-message {
  color: #d93025;
  text-align: center;
  margin-top: 10px;
}

p {
  text-align: center;
}
With the core UI wired up, the next step is validating that each timing utility behaves as expected in the running application.
Start the app:
npm run dev
For demonstrations, it can help to exaggerate configuration values so each behavior is visually obvious.
The sections below show what to change and what you should observe.
To make debouncing clearly visible, temporarily set the debounce delay to 5 seconds in SearchBar.tsx (for example, { wait: 5000 }).
With that change, the search request should only fire once you stop typing for five seconds:
To test batching, temporarily reduce maxSize in analytics.ts to 4.
With this configuration, the batch should flush as soon as the fourth like is recorded:
To test throttling, temporarily set the throttle delay to 10 seconds in ImageGrid.tsx (for example, { wait: 10000 }).
With that configuration, infinite scroll should only trigger a load at most once every 10 seconds, even if you scroll rapidly:
To test rate limiting, keep the limiter configured to allow 4 calls in a two-minute window.
After enough searches, the application should surface an “API rate limit exceeded” message and block additional requests until the window resets:
You can see the full demo project here.
Pacer is designed for common UI timing problems. RxJS remains a strong fit for complex stream composition.
Hand-rolled timing logic can work for one-off cases, but tends to accumulate edge cases and inconsistencies as an application grows.
| Approach | Best for | Strengths | When it’s not a great fit |
|---|---|---|---|
| TanStack Pacer | Common async timing needs in UI | Lightweight, tree-shakeable, purpose-built utilities (debounce, throttle, batch, rate limit), React-friendly | Complex event streams, advanced async composition |
| RxJS | Complex reactive workflows | Powerful operators, stream composition, advanced async control | Overkill for simple timing needs, steeper learning curve, larger bundle impact |
| Hand-rolled logic | One-off cases | Full control, no dependencies | Easy to get wrong, hard to maintain, inconsistent behavior across the app |
In this guide, we explored how TanStack Pacer can be used to build responsive and efficient applications.
We implemented AsyncBatcher, useDebouncedCallback, rate limiting, and throttling in a Pinterest-style infinite scroll gallery to demonstrate how these utilities address common performance and correctness issues in UI code.
For teams building React apps that need predictable timing behavior with minimal overhead, Pacer offers a focused, pragmatic alternative to more complex reactive tooling.

This article showcases a curated list of open source mobile applications for Flutter that will make your development learning journey faster.

Discover what’s new in The Replay, LogRocket’s newsletter for dev and engineering leaders, in the April 1st issue.
This post walks through a complete six-step image optimization strategy for React apps, demonstrating how the right combination of compression, CDN delivery, modern formats, and caching can slash LCP from 8.8 seconds to just 1.22 seconds.

Learn what vinext is, how Cloudflare rebuilt Next.js on Vite, and whether this experimental framework is worth watching.
Hey there, want to help make our blog better?
Join LogRocket’s Content Advisory Board. You’ll help inform the type of content we create and get access to exclusive meetups, social accreditation, and swag.
Sign up now
