
Code comments play a vital role in software development. They:
While some argue that well-written code should be self-explanatory, others emphasize the importance of comments in capturing the reasoning behind certain implementations. The idea of automating comment generation has sparked discussion about whether AI can truly capture the human insight that makes comments valuable.
AI-powered coding assistants like GitHub Copilot are continuing to gain popularity, but the community is grappling with questions about data privacy and the risks of becoming dependent on proprietary platforms. Despite these concerns, tools like Ollama offer a way to benefit from AI capabilities while addressing worries about data privacy and platform lock-in.
Ollama isn’t a coding assistant itself, but rather a tool that allows developers to run large language models (LLMs) to enhance productivity without sharing your data or paying for expensive subscriptions.
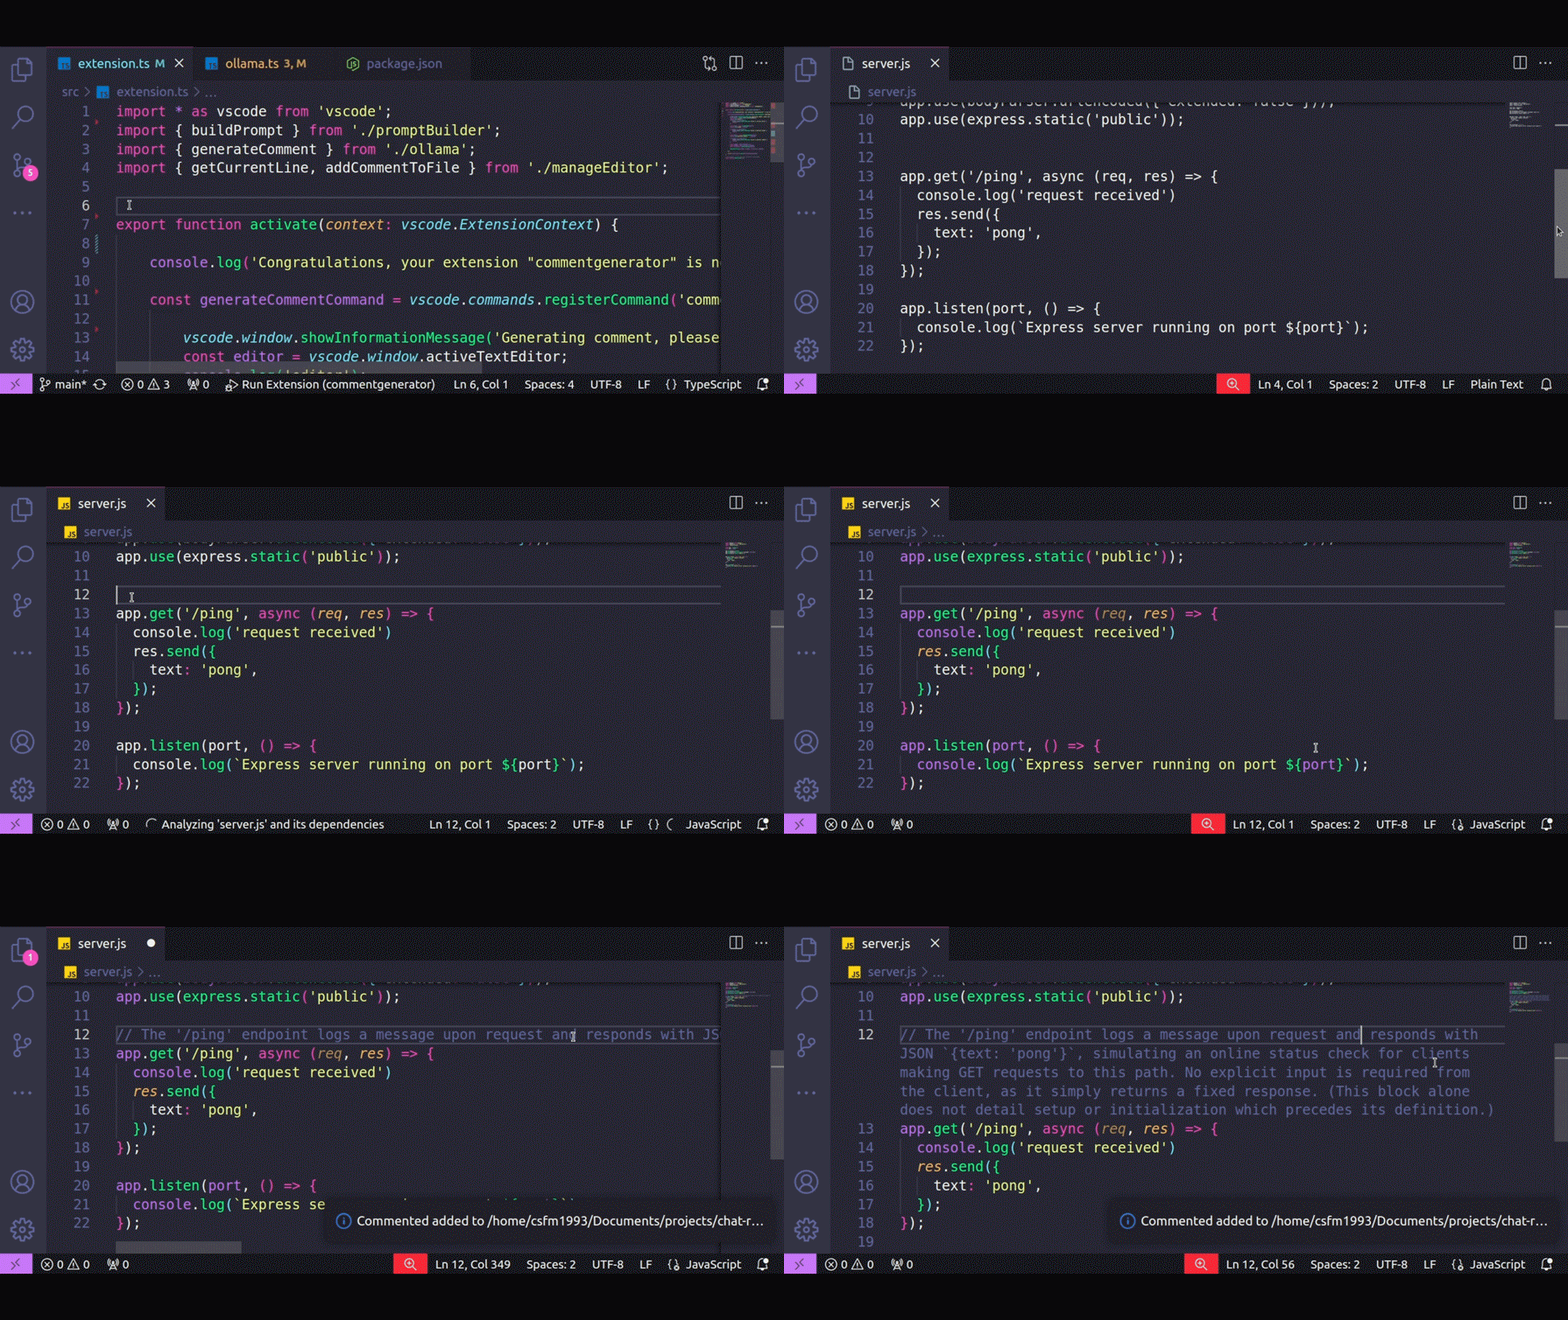
In this tutorial, you’ll learn how to create a VS Code extension that uses Ollama to automate comment generation. This project will demonstrate how to use an LLM model to boost productivity without sharing your data or paying for expensive subscriptions.
By the end of the tutorial, you will have an extension that looks similar to the following:
To follow along, you will need:
The Replay is a weekly newsletter for dev and engineering leaders.
Delivered once a week, it's your curated guide to the most important conversations around frontend dev, emerging AI tools, and the state of modern software.
To set up Ollama, begin by downloading the appropriate installer for your operating system from Ollama’s official website:
Ollama.app folder into your Applications folder. The installation will be complete once you move the appcurl -fsSL https://ollama.com/install.sh | sh
Once the Ollama installation is complete, you can start interacting with LLMs. Before running any commands, you’ll need to launch Ollama by opening the app or running the following command in the terminal:
ollama serve
This command starts the Ollama app, allowing you to use the available commands. It also starts the Ollama server running on port 11434. You can check if the server is running by opening a new browser window and navigating to http://localhost:11434/
To pull a model from the Ollama registry without running it, use the ollama pull command. For example, to pull the phi3.5 model, run the following:
ollama pull phi3.5
This command fetches the model and makes it available for later use.
You can list all the models that have been pulled using the following command:
ollama list
This will display a list of models along with their size and modification time:
NAME                 ID                  SIZE          MODIFIED
phi3.5:latest        61819fb370a3        2.2 GB        11 days ago
llava:latest         8dd30f6b0cb1        4.7 GB        2 weeks ago
phi3:latest          64c1188f2485        2.4 GB        3 months ago
csfm1993:~$
To both pull and execute a model immediately, use the ollama run command. For example, to run phi3.5, run:
ollama run phi3.5
This command pulls the model — if it hasn’t been pulled yet — and begins execution so you can start querying it immediately.
You should see the following in your terminal:
csfm1993:~$ ollama run phi3.5
>>> Send a message (/? for help)
In this tutorial, you will use the phi3.5 model to generate comments for a given code block. This language model was selected for its balance between size and performance — while it’s compact, it delivers strong results, making it ideal for building a proof-of-concept app.
The phi3.5 model is lightweight enough to run efficiently on computers with limited RAM and no GPU. If you have a GPU, feel free to run a larger LLM.
Send the following prompt to the model:
complete code:
"
const express = require('express')
const app = express()
const port = 3000
app.get('/', (req, res) => {
  res.send('Hello World!')
})
app.listen(port, () => {
  console.log(`Example app listening on port ${port}`)
})
"
Given the code block below, write a brief, insightful comment that explains its purpose and functionality within the script. If applicable, mention any inputs expected in the code block.
Keep the comment concise (maximum 2 lines). Wrap the comment with the appropriate comment syntax (//). Avoid assumptions about the complete code and focus on the provided block. Don't rewrite the code block.
code block:
"
app.get('/', (req, res) => {
  res.send('Hello World!')
})
"
The prompt asks the phi3.5 model to explain what’s happening in a given code block. You should get an answer similar to the following:
// This Express.js route handler responds to GET requests at the root URL
('/'), sending back a plain text 'Hello World!' message as an HTTP
response. No additional inputs are required for this specific block of
code, which serves as a basic setup example within a web server context.
The model returns a comment with the specified comment syntax followed by the explanation. Once you are done interacting with the model, send the command /bye to end the chat.
In this section, you will create a new VS Code extension project and install the required modules to interact with Ollama. You will use Yeoman and the VS Code Extension Generator to scaffold a TypeScript project.
In your terminal, run the following command to create a new VS Code extension project:
npx --package yo --package generator-code -- yo code
Select TypeScript as the language used for the project, and then fill in the remaining fields:
? What type of extension do you want to create? New Extension (TypeScript)
? What's the name of your extension? commentGenerator
? What's the identifier of your extension? commentgenerator
? What's the description of your extension? Leave blank
? Initialize a git repository? Yes
? Which bundler to use? unbundled
? Which package manager to use? npm
? Do you want to open the new folder with Visual Studio Code? Open with `code`
Now, run the following command to install the modules required to interact with the Ollama server:
npm install ollama cross-fetch
With the command above, you installed the following packages:
Open the package.json file and make sure that the vscode version in engines property matches the VS Code version installed in your system:
"engines": {
  "vscode": "Your VS Code version"
},
In the package.json file, notice how the main entry point of your extension is a file named extension.js file, located in the out directory, even though this is a TypeScript project. This is because the TypeScript code is compiled to JavaScript by executing the npm compile command before running the project:
"main": "./out/extension.js",
...
"scripts": {
  "vscode:prepublish": "npm run compile",
  "compile": "tsc -p ./",
  "watch": "tsc -watch -p ./",
  "pretest": "npm run compile && npm run lint",
  "lint": "eslint src",
  "test": "vscode-test"
},
...
Also, notice how the commands that your extension should run are declared in the commands property:
...
"contributes": {
  "commands": [
    {
      "command": "commentgenerator.helloWorld",
      "title": "Hello World"
    }
  ]
},
...
At the moment, there is only one command declared named Hello World with the ID commentgenerator.helloWorld. This is the default command that comes with a scaffolded project.
Next, navigate to the src directory and open the extension.ts file:
// The module 'vscode' contains the VS Code extensibility API
// Import the module and reference it with the alias vscode in your code below
import * as vscode from 'vscode';
// This method is called when your extension is activated
// Your extension is activated the very first time the command is executed
export function activate(context: vscode.ExtensionContext) {
    // Use the console to output diagnostic information (console.log) and errors (console.error)
    // This line of code will only be executed once when your extension is activated
    console.log('Congratulations, your extension "commentgenerator" is now active!');
    // The command has been defined in the package.json file
    // Now provide the implementation of the command with registerCommand
    // The commandId parameter must match the command field in package.json
    const disposable = vscode.commands.registerCommand('commentgenerator.helloWorld', () => {
        // The code you place here will be executed every time your command is executed
        // Display a message box to the user
        vscode.window.showInformationMessage('Hello World from commentGenerator!');
    });
    context.subscriptions.push(disposable);
}
// This method is called when your extension is deactivated
export function deactivate() {}
The extension.ts file is the entry point for a VS Code extension. The code inside this file first imports the vscode module and declares two functions named activate and deactivate.
The activate function will be called when the extension is activated. This function logs a message and registers Hello World command, which is defined in the package.json file. Every time this command is executed, a notification window showing a “Hello World” message will be displayed.
The deactivate function is called when the extension is deactivated (for example, when VS Code is closed). It is currently empty because no cleanup is required, but it can be used to release resources.
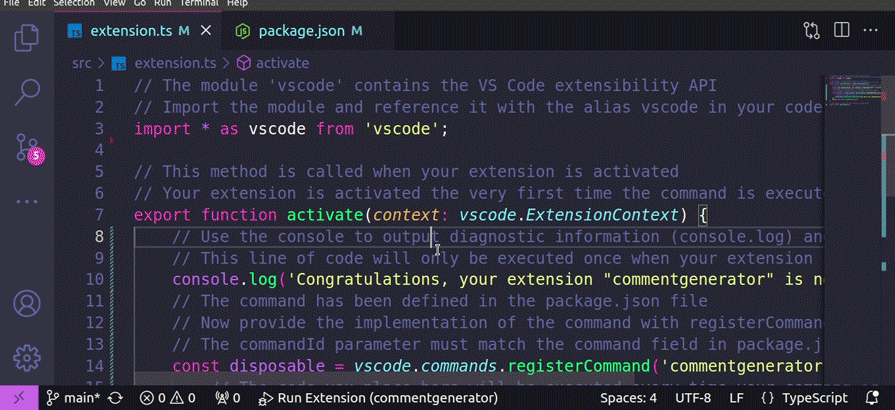
Inside the editor, open src/extension.ts and press F5 or run the command Debug: Start Debugging from the Command Palette (Ctrl+Shift+P). This will compile and run the extension in a new Extension Development Host window.
Run the Hello World command from the Command Palette (Ctrl+Shift+P) in the new window.
In the editor, navigate to src/extension.ts and either press F5 or use the “Debug: Start Debugging” option from the Command Palette (Ctrl+Shift+P). This action will compile the extension and launch it in a separate Extension Development Host window.
In this new window, open the Command Palette (Ctrl+Shift+P) and execute the Hello World command:
To continuously monitor your project for changes and automatically compile it, return to your terminal and run the following command:
npm run watch
This will start the TypeScript compiler in watch mode, ensuring your project is recompiled whenever you make changes.
Generate Comment commandIn this section, you will replace the default Hello World command with a command named Generate Comment. This command will be triggered when — you guessed it — the user wants to generate a comment. You will define the command and ensure it is properly registered within the extension.
Open the package.json file and replace the Hello World command as shown below:
"contributes": {
  "commands": [
    {
      "command": "commentgenerator.generateComment",
      "title": "Generate Comment"
    }
  ]
},
Open the file named extension.ts and replace the code inside the activate function with the following:
import * as vscode from 'vscode';

export function activate(context: vscode.ExtensionContext) {

    console.log('Congratulations, your extension "commentgenerator" is now active!');

    const generateCommentCommand = vscode.commands.registerCommand('commentgenerator.generateComment', async () => {
        vscode.window.showInformationMessage('Generating comment, please wait');
    });

    context.subscriptions.push(generateCommentCommand);
}
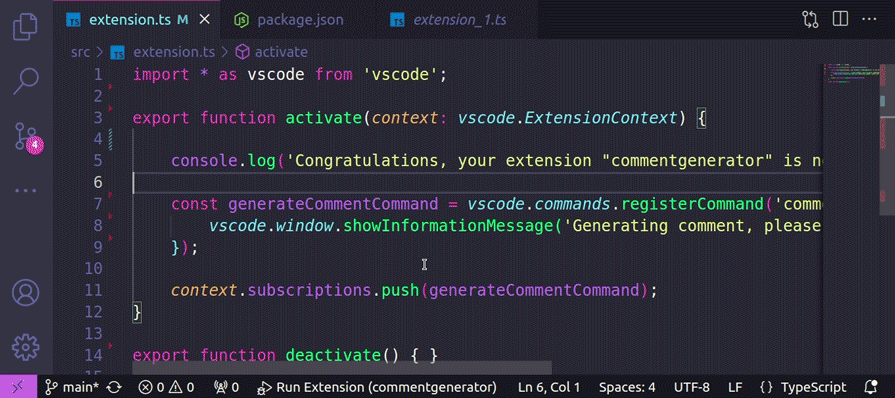
This code replaces the Hello Command with the Generate Comment command with the ID commentgenerator.generateComment. The Generate Comment command also displays an information message when triggered.
The command is then pushed to the context.subscriptions array to ensure it is disposed of properly when the extension is deactivated or when it is no longer needed.
Press F5 or run the Debug: Start Debugging command from the Command Palette (Ctrl+Shift+P). This will run the extension in a new Extension Development Host window.
Run the Generate Comment command from the Command Palette (Ctrl+Shift+P) in the new window:
In this section, you will build the prompt that will be sent to the Ollama server. The prompt will contain the code block and its context, as well as instructions for the LLM. This step is crucial for guiding the LLM to generate meaningful comments based on the provided code.
To generate a comment for a specific code block, the user first needs to copy the block to the clipboard, place the cursor on the line where the comment should appear, and then trigger the Generate Comment command. The entire code from the file containing that block will serve as the context for the prompt.
Create a file named promptBuilder.ts in the src directory and add the following code to it:
import * as vscode from 'vscode';

function getScriptContext(editor: vscode.TextEditor) {
  let document = editor.document;
  const codeContext = document.getText();
  return codeContext;
}

async function getCodeBlock() {
  const codeBlock = await vscode.env.clipboard.readText().then((text) => {
    return text;
  });

  return codeBlock;
}

function selectCommentSyntax(editor: vscode.TextEditor) {
  const fileExtension = editor.document.fileName.toLowerCase().split('.').at(-1);
  const commentSyntax = fileExtension === 'js' ? '//' : '#';
  return commentSyntax;
}
This code defines three functions: getScriptContext, getCodeBlock, and getCodeBlock.
getScriptContext accepts the current text editor as an argument and returns the entire text of the currently focused file, providing the relevant code contextgetCodeBlock reads the text from the clipboard and returns it as the code blockselectCommentSyntax takes the current text editor as an argument and returns the appropriate comment syntax for the file extension. Please note that, in this function, you can only handle JavaScript and Python comment syntaxes; to handle more languages, you will have to modify the functionNow, let’s build the prompt using the code context, code block, and comment syntax. Add the following code to the promptBuilder.ts file:
...

export async function buildPrompt(editor: vscode.TextEditor) {
  const codeBlock = await getCodeBlock();
  const codeContext = getScriptContext(editor);
  const commentSyntax = selectCommentSyntax(editor);

  if (codeBlock === undefined || codeContext === undefined) {
    return;
  }

  let prompt = `
    complete code:
    "
    {CONTEXT}
    "

    Given the code block below, write a brief, insightful comment that explains its purpose and functionality within the script. If applicable, mention any inputs expected in the code block.
    Keep the comment concise (maximum 2 lines). Wrap the comment with the appropriate comment syntax ({COMMENT-SYNTAX}). Avoid assumptions about the complete code and focus on the provided block. Don't rewrite the code block.

    code block:
    "
    {CODE-BLOCK}
    "
    `;

  prompt = prompt
    .replace('{CONTEXT}', codeContext)
    .replace('{CODE-BLOCK}', codeBlock)
    .replace('{COMMENT-SYNTAX}', commentSyntax);
  return prompt;
}
This code defines a function named buildPrompt, which takes the current text editor as an argument and returns the prompt string.
It first retrieves the code block, code context, and comment syntax using the previously defined functions. Then, it constructs the prompt string using template literals and replaces the placeholders with the actual values.
The prompt string instructs the LLM to write a brief, insightful comment that explains the purpose and functionality of the code block within the script, keeping it concise (maximum two lines) and wrapped with the correct comment syntax. The LLM is directed to focus solely on the provided block, ensuring the comment is relevant and accurate.
Now, let’s update the extension.ts file to use the buildPrompt function. Go to the import block of the extension.ts file and import the buildPrompt function:
import { buildPrompt } from './promptBuilder';
Next, update the generateCommentCommand with the following code:
export function activate(context: vscode.ExtensionContext) {
    ...

    const generateCommentCommand = vscode.commands.registerCommand('commentgenerator.generateComment', async () => {

        vscode.window.showInformationMessage('Generating comment, please wait');

        const editor = vscode.window.activeTextEditor;
        if (editor === undefined) {
            vscode.window.showErrorMessage('Failed to retrieve editor');
            return;
        }

        const prompt = await buildPrompt(editor);
        console.log('prompt', prompt);

        if (prompt === undefined) {
            vscode.window.showErrorMessage('Failed to generate prompt');
            return;
        }
    });

    ...
}
This code updates the generateCommentCommand to retrieve the active text editor and build the prompt using the buildPrompt function. It then logs the prompt and displays an error message if the prompt cannot be generated.
Press F5 or run the Debug: Start Debugging command from the Command Palette (Ctrl+Shift+P). This will run the extension in a new Extension Development Host window.
Run the Generate Comment command from the Command Palette (Ctrl+Shift+P) in the new window.
Go back to the original window where you have the extension code, open the integrated terminal, click the Debug Console, and look for the generated prompt:
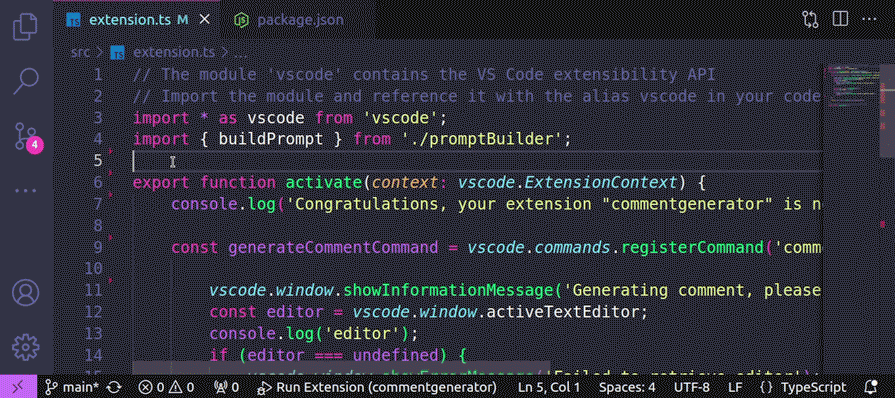
In this section, you’ll use the Ollama.js library to generate comments from prompts. You’ll set up the necessary functions to communicate with the Ollama server, sending prompts to the server, interacting with the LLM, and receiving the generated comments.
Create a file named ollama.ts in the src directory and add the following code:
import { Ollama } from 'ollama';
import fetch from 'cross-fetch';

const ollama = new Ollama({ host: 'http://127.0.0.1:11434', fetch: fetch });
This code imports the Ollama class from the ollama module and the fetch function from the cross-fetch module. It then creates a new instance of the Ollama class with the specified host and fetch function.
Here you are using the cross-fetch module to create an Ollama instance to avoid a timeout error that the Ollama server might throw when an LLM takes too long to generate a response.
Now, let’s define the generateComment function, which takes the prompt as an argument and returns the generated comment. Add the following code to the ollama.ts file:
...

export async function generateComment(prompt: string) {
  const t0 = performance.now();
  const req = await ollama.generate({
    model: 'phi3.5',
    prompt: prompt,
  });

  const t1 = performance.now();
  console.log('LLM took: ', t1 - t0, ', seconds')
  return req.response;
}
This code defines the generateComment function, which takes the prompt as an argument and returns the generated comment.
It first records the start time using the performance.now function. Then, it sends a request to the Ollama server using the generate method of the ollama instance, passing in phi3.5 as the model name and prompt.
Next, it records the end time and logs the time it took the LLM to generate a response.
Finally, it returns the generated comment stored in the response.
Now, let’s update the extension.ts file to use the generateComment function. First, go to the import block of the extension.ts file and import the generateComment function:
import { generateComment } from './ollama';
Next, update the code inside generateCommentCommand:
export function activate(context: vscode.ExtensionContext) {
    ...

    const generateCommentCommand = vscode.commands.registerCommand('commentgenerator.generateComment', async () => {

    ...
    const comment = await generateComment(prompt);
        console.log('generated comment: ', comment);

        if (comment === undefined) {
            vscode.window.showErrorMessage('Failed to generate comment');
            return;
        }
    });

    ...
}
This code updates generateCommentCommand to generate the comment using the generateComment function. It then logs the generated comment and displays an error message if the comment can’t be generated.
Press F5 or run the Debug: Start Debugging command from the Command Palette (Ctrl+Shift+P). This will compile and run the extension in a new Extension Development Host window.
Open the file where you would like to generate comments, navigate to the desired code block, copy it, and place the cursor in the line where you would like the comment to be added. Next, run the Generate Comment command from the Command Palette (Ctrl+Shift+P) in the new window.
Go back to the original window where you have the extension code, open the integrated terminal, click the Debug Console, and look for the generated comment:

Keep in mind that the time it takes for the LLM to generate a response may vary depending on your hardware.
In this section, you will add the generated comment to the script at the line where the user invoked the Generate Comment command. This step involves managing the editor to insert the comment at the appropriate location within the code.
In the src directory, create a file named manageEditor.ts and add the following code:
import * as vscode from 'vscode';

export function getCurrentLine(editor: vscode.TextEditor) {
  const currentLine = editor.selection.active.line;
  console.log('currentLine: ', currentLine);

  return currentLine;
}

export async function addCommentToFile(fileURI: vscode.Uri, fileName: string, line: number, generatedComment: string,) {
  console.log('adding comment', line, generatedComment);
  const edit = new vscode.WorkspaceEdit();
  edit.insert(fileURI, new vscode.Position(line, 0), generatedComment.trim());
  await vscode.workspace.applyEdit(edit);
  vscode.window.showInformationMessage(`Commented added to ${fileName} at line ${line + 1}`);
}
This code first imports the entire Visual Studio Code API into the current module and then defines two functions named getCurrentLine and addCommentToFile.
The getCurrentLine function takes the current text editor as an argument and returns the current line number.
The addCommentToFile function takes the file URI, file name, line number, and generated comment as arguments and adds the comment to the file at the specified line. It first creates a new WorkspaceEdit object and inserts the comment at the specified position. It then applies the edit and displays an information message.
Now, let’s update the extension.ts file to use the addCommentToFile function.
Go to the import block of the extension.ts file and import the getCurrentLine and addCommentToFile functions:
import { getCurrentLine, addCommentToFile } from './manageEditor';
Next, update the code inside the generateCommentCommand:
export function activate(context: vscode.ExtensionContext) {
    ...

    const generateCommentCommand = vscode.commands.registerCommand('commentgenerator.generateComment', async () => {

    ...
        const fileURI = editor.document.uri;
        const fileName = editor.document.fileName;
        const currentLine = getCurrentLine(editor);

        addCommentToFile(fileURI, fileName, currentLine, comment);
    });

    ...
}
This code updates the generateCommentCommand to retrieve the file URI, file name, and current line number using the getCurrentLine function. It then adds the comment to the file at the current line using the addCommentToFile function.
Press F5 or run the Debug: Start Debugging command from the Command Palette (Ctrl+Shift+P). This will run the extension in a new Extension Development Host window.
Open the file where you would like to generate comments, navigate to the desired code block, copy it, and place the cursor in the line where you would like the comment to be added.
Next, run the Generate Comment command from the Command Palette (Ctrl+Shift+P) and after a couple of seconds (or minutes, depending on your hardware), the comment will be placed on the specified line (you can press Alt+Z to wrap the comment line if it is too long):
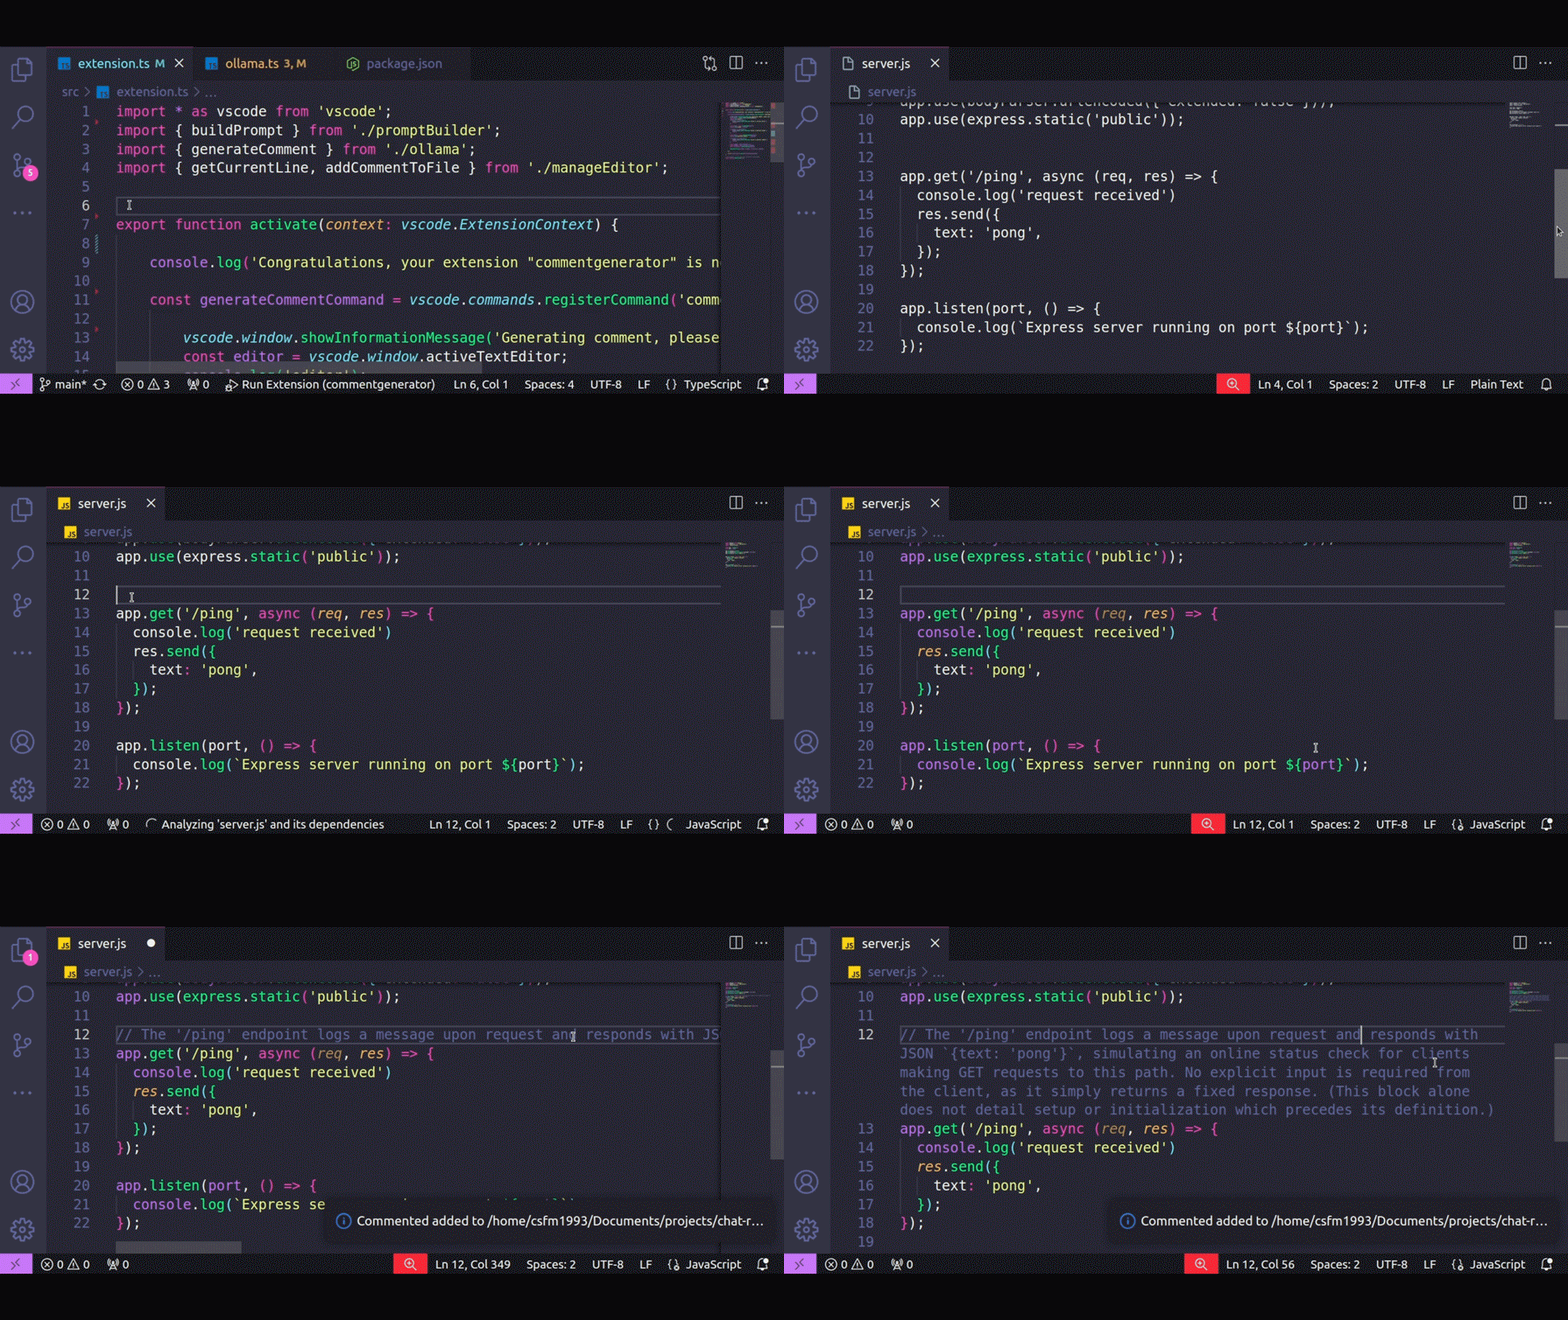
The world of software development is filled with discussions about using AI to assist in coding tasks, including generating code comments.
In this tutorial, we walked through building a VS Code extension to automate code commenting using the Ollama.js library and a local LLM. We demonstrated how some AI coding tools can streamline your documentation process without compromising data privacy or requiring paid subscriptions.

@container scroll-state: Replace JS scroll listeners nowCSS @container scroll-state lets you build sticky headers, snapping carousels, and scroll indicators without JavaScript. Here’s how to replace scroll listeners with clean, declarative state queries.

Explore 10 Web APIs that replace common JavaScript libraries and reduce npm dependencies, bundle size, and performance overhead.

Russ Miles, a software development expert and educator, joins the show to unpack why “developer productivity” platforms so often disappoint.

Discover what’s new in The Replay, LogRocket’s newsletter for dev and engineering leaders, in the February 18th issue.
Would you be interested in joining LogRocket's developer community?
Join LogRocket’s Content Advisory Board. You’ll help inform the type of content we create and get access to exclusive meetups, social accreditation, and swag.
Sign up now