Hotkeys, also known as keyboard shortcuts, are an essential feature of software products that significantly enhance user productivity.

The GitHub Hotkey library is an open source JavaScript library that allows you to integrate keyboard shortcuts into your web application.
In this tutorial, we’ll explore the process of integrating keyboard shortcuts into your application. Although our demonstration will focus on incorporating hotkeys in a Vue.js application, the techniques can be adapted to suit various applications according to your needs.
Hotkeys are important because they help improve user productivity by allowing users to access application features directly from their keyboards. This eliminates the need to constantly switch between the mouse and keyboard. This seamless interaction streamlines workflow and saves valuable time.
Consider a scenario where you’re working on a project in the VS Code editor and need to repeatedly copy and paste code snippets. Relying solely on the mouse for these tasks can be tedious and time-consuming. However, by employing keyboard shortcuts like Ctrl+C for copying and Ctrl+V for pasting, you can execute these actions swiftly and efficiently, significantly improving your workflow.
You can implement similar shortcuts in your web app by using the GitHub Hotkeys library. Now, let’s delve into the process of implementing keyboard shortcuts in Vue.js.
To illustrate how to implement keyboard shortcuts in a web application, let’s set up a Vue.js application.
To follow along with this tutorial, make sure you have the following tools installed:
Then, run the command below to clone a demo Vite-based Vue application and navigate to the demo app root directory:
git clone https://github.com/ezesundayeze/hotkey-vue && cd hotkey-vue
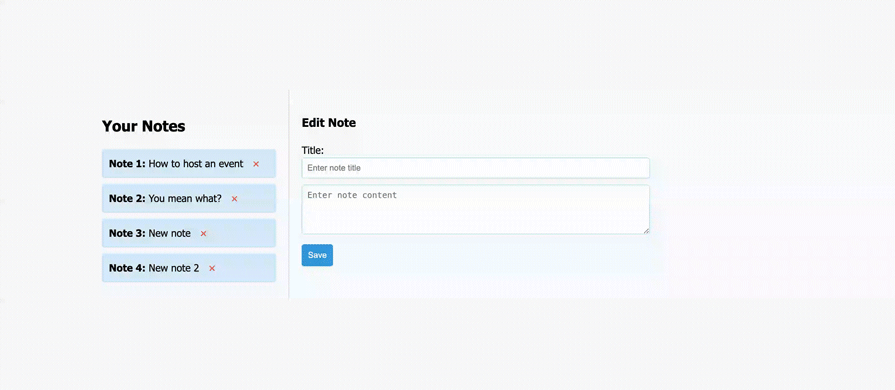
The repository you’ll clone contains the source code for a simple note-taking application we’ll use to explore the hotkeys.
The example below demonstrates how the application will allow users to write notes and save them by pressing Ctrl+S even though there is a dedicated button for saving. This provides users with the flexibility to use either method to save their notes:
Now, install the GitHub Hotkey library by running the command below:
npm install @github/hotkey
Once the installation is complete, launch the development server using the command npm run dev. Then, navigate to the generated localhost address as shown below:
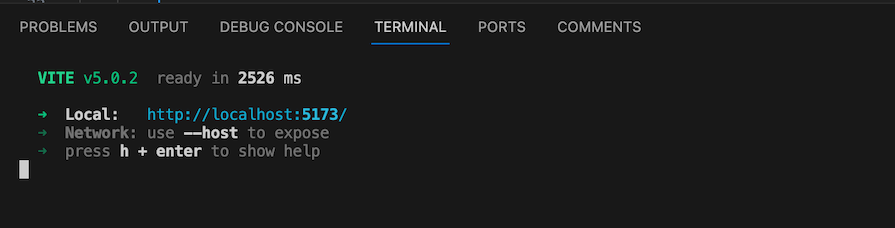
You’ll now see the demo application that we saw earlier.
Next, open the src/components/NoteEdit.vue file. This is the component that controls the Edit Note section of the application. We’ll be adding our examples to it. It should look like this:
<template>
    <div id="note-edit">
        <h3>Edit Note</h3>
        <label for="title-input">Title:</label>
        <input @hotkey-fire="sayMessage" type="text" id="title-input" placeholder="Enter note title" v-model="editedNote.title">
        <textarea id="edit-text" rows="4" placeholder="Enter note content" v-model="editedNote.content"
            data-hotkey="t"
            ></textarea>
        <button @click="saveNote" data-hotkey="Control+s">Save</button>
    </div>
</template>

<script>
import { install } from '@github/hotkey';
export default {
    props: {
        editedNote: Object,
    },
    methods: {
        saveNote(e) {
            e.preventDefault();
            this.$emit("save-click");
        },
        hotkeyFired(e) {
            e.preventDefault();
            if(e.ctrlKey==true && e.key=="s"){
                this.$emit("save-click");
            }
        },
        mount() {
            for (const el of document.querySelectorAll('[data-hotkey]')) {
                install(el, el.dataset.hotkey);
            }
        },
    },
    mounted() {
        this.mount(); // Call the mount method when the component is mounted
    },
};
</script>
There are three steps for integrating the GitHub Hotkeys library into active keyboard shortcuts:
First, import the library into the current page:
import { install } from '@github/hotkey';
Then, we’ll define the hotkeys.
Assign hotkeys to specific HTML elements using the data-hotkey attribute. For instance, to assign the Ctrl+S shortcut to a button element, you would write:
<button @click="saveNote" data-hotkey="Control+s">Save</button>
Finally, register all the hotkeys on the page.
To register all hotkeys on the page/component, iterate over all elements with the data-hotkey attribute and invoke the install function from the library:
for (const el of document.querySelectorAll('[data-hotkey]')) {
    install(el, el.dataset.hotkey);
}
Notice that we added the code to register the hotkeys in the Vue mount lifecycle method. This is so we can be sure that they will be registered after the elements have been rendered:
  mount() {
      for (const el of document.querySelectorAll('[data-hotkey]')) {
          install(el, el.dataset.hotkey);
      }
  },
You can also use other attributes like id or class, just stay consistent with it.
The Hotkey library doesn’t invent new keypress combinations; instead, it simplifies using existing browser keyboard events to enhance interactivity in your web app. You can find more information about browser key events in the MDN documentation.
You can use hotkeys in various ways, ranging from single-character hotkeys (data-hotkey="a") to multiple-character combinations, and even assigning different key combinations for a single task, as shown in the example below:
<a href="/about-us" data-hotkey="j k,Control+y">
When triggered, the hotkey in the anchor tag above will navigate the user to the /about-us page. To activate it, you can either press the j and k keys in that sequence or hold down the Control key and then press y.
Here are a few quick notes on the structure of a hotkey using the GitHub Hotkey library:
a, then ba or press Ctrl+NCtrl, Alt, and S keys at the same timemod +S will be interpreted as Command+S on Mac and Ctrl+S on Windows and UbuntuHotkeys work with events and event handlers to infuse interactivity into your application. Let’s explore how to achieve this interactive behavior.
So far, we’ve mainly discussed using hotkeys with anchor tags, which inherently have a default behavior — when clicked, they take you to the specified page in the href attribute.
Aside from contenteditable HTML elements like input, textarea, and select, which trigger focus on the element with the hotkey, every other element defaults to triggering a click.
Here’s an example where we add a hotkey to a textarea element and activate it like the one in the Vue.js example we shared earlier:
<textarea id="edit-text" rows="4" placeholder="Enter note content" v-model="editedNote.content"
    data-hotkey="t"
    ></textarea>
The hotkey in this textarea element is t. When we click on t, the focus moves to the textarea input box and we can start typing immediately.
To have a custom behavior for any element, you’ll need to override the default behavior. The hotkey library provides a hotkey-fire event you can listen to, which allows you to add custom behaviors for any element when a hotkey is triggered for it.
Following our Vue.js example, we can simply pass the @hotkey-fire="sayMessage" event to the element as shown below:
<input @hotkey-fire="sayMessage" data-hotkey="o" type="text" id="title-input" placeholder="Enter note title"
    v-model="editedNote.title">
Then, implement the method:
<script>
import { install } from '@github/hotkey';
export default {
    props: {
        editedNote: Object,
    },
    methods: {
        sayMessage(e) {
            console.log(e.target.value);
        },
.....
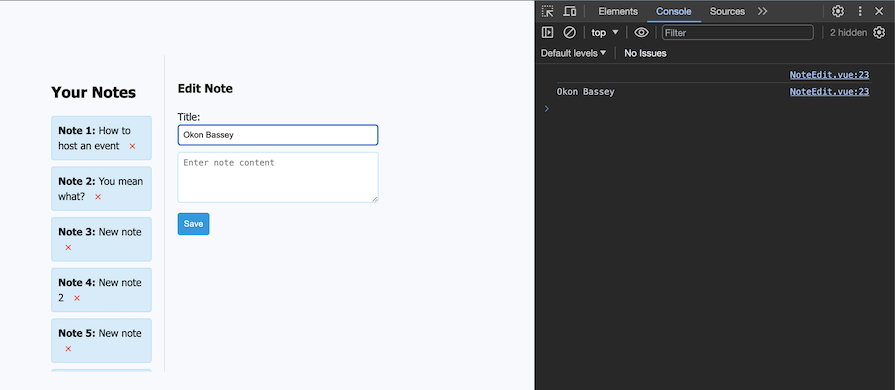
Now, when users press the O key as specified in the data-hotkey attribute, the sayMessage method will be fired and it will log the typed data as shown below:
Alternatively, you can implement the event handler in the installation for loop in the vanilla JavaScript format like so:
        mount() {
            for (const el of document.querySelectorAll('[data-hotkey]')) {
                install(el, el.dataset.hotkey);
                if (el.matches('#title-input')) {
                    el.addEventListener('hotkey-fire', event => {
                        event.preventDefault() // prevent the click or focus default behavior from happening.
                        // Use a custom behaviour instead
                        console.log("Hello world again")
                    })
                }
            }
        },
Note that in the event handler, “prevent default” will mean preventing the click or focus default behavior we previously mentioned from happening.
There is no doubt that hotkeys are amazing, but they are not for everyone. Find a balance between using hotkeys and allowing your users to use their mouse. It is important to make sure to provide a way for users to disable hotkeys on your app.
One way you can disable hotkeys is by providing a toggle on your website that activates or deactivates hotkeys, as shown below:
mount() {
if (this.$data.hotkeysEnabled) {
    for (const el of document.querySelectorAll('[data-hotkey]')) {
            install(el, el.dataset.hotkey);
            if (el.matches('#title-input')) {
                el.addEventListener('hotkey-fire', event => {
                    event.preventDefault();
                    // Ensure the default `focus()`/`click()` is prevented:
                    // Use a custom behavior instead
                    console.log("Hello world again");
                });
            }
        }
    }
},
According to the code above, if hotkeysEnabled is set to true, then the application will activate the hotkeys for this page. Setting it to false turns off the hotkeys.
The GitHub Hotkey library is a great tool, but other libraries also allow you to add interactivity to your application using hotkeys. Consider checking them out to figure out which works best for your project:
In this article, we explored hotkeys and how to use them to add interactivity to your application. Using hotkeys is a strategy to enhance user productivity and enrich their experience with your application. Hotkeys are especially beneficial for visually-rich products, where it’s important to provide users with an easy way to access features through shortcuts.
I look forward to seeing what you’ll build with what you’ve learned so far.
Happy hacking!
Install LogRocket via npm or script tag. LogRocket.init() must be called client-side, not
server-side
$ npm i --save logrocket

// Code:

import LogRocket from 'logrocket';
LogRocket.init('app/id');
// Add to your HTML:

<script src="https://cdn.lr-ingest.com/LogRocket.min.js"></script>
<script>window.LogRocket && window.LogRocket.init('app/id');</script>

Learn how to protect full-stack projects from NPM supply chain attacks with a practical security checklist.

Explore 15 essential MCP servers for web developers to enhance AI workflows with tools, data, and automation.

Learn how contrast-color() automatically picks accessible text colors using native CSS, without JavaScript.

Learn how to build a harness-style AI workflow using Claude Code with specialized Dev, QE, and Ops subagents, gated handoffs, MCP telemetry, and LEARNING.md.
Would you be interested in joining LogRocket's developer community?
Join LogRocket’s Content Advisory Board. You’ll help inform the type of content we create and get access to exclusive meetups, social accreditation, and swag.
Sign up now

