Laravel 8 was released on September 8th, 2020. This release continues the improvements made in the previous release (version 7), as well as new features that include support for Jetstream, job batching, dynamic blade component, model factory classes, improved artisan serve, and many others.

In the course of this article, we will take a look at 13 new features introduced in this new release as listed below:
The Replay is a weekly newsletter for dev and engineering leaders.
Delivered once a week, it's your curated guide to the most important conversations around frontend dev, emerging AI tools, and the state of modern software.
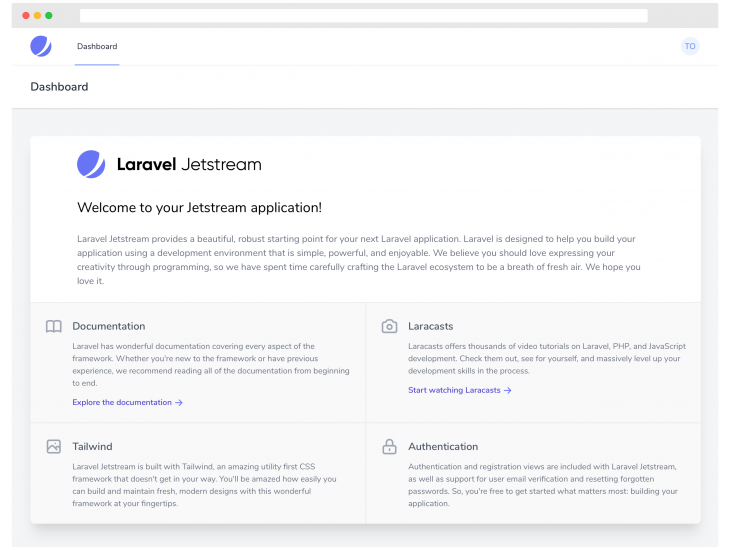
Laravel Jetstream is a beautifully crafted application for scaffolding Laravel applications. Jetstream, which was designed using Tailwind CSS, provides a perfect starting point for new projects with features such as authentication, profile management, security, and API support using Laravel Sanctum.

Also, Jetstream offers two options for frontend scaffolding with either Livewire and Inertia.
Laravel Livewire — is a library that makes it possible to build full-stack applications on Laravel without the need to pull in other frontend libraries/frameworks such as React and Vue.js. Since Livewire uses the already familiar blend templating engine, Laravel developers can easily build dynamic interfaces without leaving the comfort of Laravel.
Inertia.js — is a package bundled with Laravel Jetstream which lets you quickly build client-side templates with Vue.js. What makes this cool is you get to enjoy the full power of Vue without the complexity of frontend routing because you get to use the standard Laravel router you’re familiar with.
Jetstream installation — if you have the Laravel installer installed, you easily install Jetstream with your Laravel installation by adding the --jet flag like this
$ laravel new project-name --jet
Complete the setup by running migrations:
$ php artisan migrate
Alternatively, you can use composer to install Jetstream into a new Laravel application. Installing Jetstream via composer will require you to run the jetstream:install artisan command which accepts the name of your preferred frontend stack e.g livewire or Inertia.js. This is can be done by running the commands below:
$ php artisan jetstream:install livewire

$ php artisan migrate

$ npm install && npm run dev
You can visit the Jetstream official documentation to learn more.
There have always been suggestions that Laravel should have the Model directory as the default for storing models. In 2016 Taylor Otwell made a poll about it and the results showed a higher percentage of people want a default model directory. Four years later and the people’s request has been granted.
Taylor Otwell on Twitter: “Should Laravel have a “models” directory? / Twitter”
Should Laravel have a “models” directory?
In the previous versions of Laravel, all model files were stored in the /app directory by default if you didn’t specify a path when generating a model. However, since the new update, Laravel now includes the app/Models directory by default.
So, when you run the $ php artisan make:model ModelName command, ModelName.php will be saved in the app/Models. However, if the directory doesn’t exist, Laravel will assume the application models are already in the app/ directory.
Eloquent model factories let us define patterns used in generating fake data when testing our application. In previous versions, Laravel provides a $factory global object which we can extend to define our factories. Starting in Laravel 8, factories are now class-based with improved support for relationships between factories (i.e. a user has many posts).
Defining a factory previously looks something like this:
// database/factories/UserFactory.php

use Faker\Generator as Faker;
use Illuminate\Support\Str;

$factory->define(App\User::class, function (Faker $faker) {
    return [
        'name' => $faker->name,
        'email' => $faker->unique()->safeEmail,
        'email_verified_at' => now(),
        'password' => '$2y$10$92IXUNpkjO0rOQ5byMi.Ye4oKoEa3Ro9llC/.og/at2.uheWG/igi', // password
        'remember_token' => Str::random(10),
    ];
});
We can then use the defined factory like so:
public function testDatabase()
{
    $user = factory(App\User::class)->make();

    // Use model in tests...
}
Since the new version, factory will now be defined as a class, like this:
// database/factories/UserFactory.php

namespace Database\Factories;
use App\Models\User;
use Illuminate\Database\Eloquent\Factories\Factory;
use Illuminate\Support\Str;

class UserFactory extends Factory
    {
        /**
         * The name of the factory's corresponding model.
         *
         * @var string
         */
        protected $model = User::class;

        /**
         * Define the model's default state.
         *
         * @return array
         */
        public function definition()
        {
            return [
                'name' => $this->faker->name,
                'email' => $this->faker->unique()->safeEmail,
                'email_verified_at' => now(),
                'password' => '$2y$10$92IXUNpkjO0rOQ5byMi.Ye4oKoEa3Ro9llC/.og/at2.uheWG/igi', // password
                'remember_token' => Str::random(10),
            ];
        }
    }
With the new HasFactory trait available on generated models, the model factory may be used like so:
use App\Models\User;
public function testDatabase()
{
    $user = User::factory()->make();
    // Use model in tests...
}
Say goodbye to bloated migration folders with the new migration squashing feature which lets you squash large migration files into one SQL file. The generated file will be executed first when you run migrations, Laravel then executes any other migration files that are not part of the squashed schema file. You can squash your migration files using the artisan command below:
$ php artisan schema:dump

// Dump the current database schema and prune all existing migrations...
$ php artisan schema:dump --prune
When you run the command Laravel will write a schema file to your database/schema directory.
The new release of Laravel also comes with a nifty feature that allows you to dispatch a group of jobs to be executed in parallel. To monitor the progress of grouped/batched jobs, you can use the then, catch, and finally methods to define completion callbacks like this:
use App\Jobs\ProcessPodcast;
use App\Podcast;
use Illuminate\Bus\Batch;
use Illuminate\Support\Facades\Batch;
use Throwable;

$batch = Bus::batch([
    new ProcessPodcast(Podcast::find(1)),
    new ProcessPodcast(Podcast::find(2)),
    new ProcessPodcast(Podcast::find(3)),
    new ProcessPodcast(Podcast::find(4)),
    new ProcessPodcast(Podcast::find(5)),
])->then(function (Batch $batch) {
    // All jobs completed successfully...
})->catch(function (Batch $batch, Throwable $e) {
    // First batch job failure detected...
})->finally(function (Batch $batch) {
    // The batch has finished executing...
})->dispatch();

return $batch->id;
You can check out the Laravel documentation to learn more about the new job batching feature.
With the new improved rate limiting, you can now do more using the RateLimiter facade e.g limiting requests dynamically. First, let’s take a look at how request throttling was handled in the previous version.
In Laravel 7, to limit an API request you’ll need to edit the Kernel.php file in the app/Http folder:
// app/Http/Kernel.php
...

protected $middlewareGroups = [
    'web' => [
        \App\Http\Middleware\EncryptCookies::class,
        \Illuminate\Cookie\Middleware\AddQueuedCookiesToResponse::class,
        \Illuminate\Session\Middleware\StartSession::class,
        \Illuminate\View\Middleware\ShareErrorsFromSession::class,
        \App\Http\Middleware\VerifyCsrfToken::class,
        \Illuminate\Routing\Middleware\SubstituteBindings::class,
    ],
    'api' => [
        'throttle:60,1', // Here the API request limit is set to 60 request per minute
        \Illuminate\Routing\Middleware\SubstituteBindings::class,
    ],
];

...
In Laravel 8, the above configuration now looks like this:
// app/Http/Kernel.php
...
protected $middlewareGroups = [
        'web' => [
            \App\Http\Middleware\EncryptCookies::class,
            \Illuminate\Cookie\Middleware\AddQueuedCookiesToResponse::class,
            \Illuminate\Session\Middleware\StartSession::class,
            // \Illuminate\Session\Middleware\AuthenticateSession::class,
            \Illuminate\View\Middleware\ShareErrorsFromSession::class,
            \App\Http\Middleware\VerifyCsrfToken::class,
            \Illuminate\Routing\Middleware\SubstituteBindings::class,
        ],
        'api' => [
            'throttle:api', // Request limit is now defined in RouteServiceProvider
            \Illuminate\Routing\Middleware\SubstituteBindings::class,
        ],
    ];
...
API request limits are now being defined in RouteServiceProvider.php in the app/Providers/ directory. Let’s see how:
// app/Providers/RouteServiceProvider.php
use Illuminate\Cache\RateLimiting\Limit;
use Illuminate\Support\Facades\RateLimiter;
...
public function boot()
{
    $this->configureRateLimiting();
    ...
}
// Configure the rate limiters for the application.
protected function configureRateLimiting()
{
    RateLimiter::for('api', function (Request $request) {
    return Limit::perMinute(60); // 60 Request per minute
    });
}
In the boot method, the configureRateLimiting() is being called. And as the name implies, it holds the configuration for rate limiting.
Rate limiters are defined using the RateLimiter facade’s for method. The for method accepts two parameters, a rate limiter name (i.e api) and a closure that returns the limit configuration which should only apply to routes that are assigned this rate limiter.
As you can see, the for method takes the HTTP request instance, giving us full control over limiting requests dynamically.
Say we want to set a limit of ten requests per minute for an unauthenticated user and an unlimited request limit for authenticated users. We would do it like so:
// app/Providers/RouteServiceProvider.php

protected function configureRateLimiting()
{
    ...
    RateLimiter::for('guest', function (Request $request) {
    return $request->user()
                ? Limit:none()
                : Limit::perMinute(10); // 10 Request per minute
    });
}
The configured rate can also be directly applied to a route using a middleware like this:
// routes/api.php
...
Route::get('posts', 'PostController@store')->middleware('throttle:guest');
...
You can learn more about rate-limiting in the Laravel routing documentation.
In previous Laravel versions, bypassing maintenance mode can be done by setting a list of whitelisted IP addresses that are allowed to access the application, this feature has been removed in favor of secret/token. Let see how that works:
When setting your application to maintenance mode you can now specify the secret which can be used to access the site like so:
$ php artisan down --secret="my-secret"
While the application is in maintenance mode you can access it by specifying your secret like so:
https://your-website.com/my-secret
Laravel then sets a cookie to your browser with the key laravel_maintenance which will be used to check if the visitor has access or not.
Another improvement to maintenance mode is the ability to prerender maintenance views of your choice. In previous versions of Laravel, while your application is down for maintenance, updating dependencies running composer install is likely to make your visitors get an actual server error.
This is because much of Laravel has to be booted up in order to check if the application is in maintenance or not. Maintenance prerendering comes in handy by allowing you to specify a view that will be returned at the very beginning of the request cycle. This view is then rendered before any of your application’s dependencies have loaded.
You can prerender a default view with the --render option of the artisan down command like so:
$ php artisan serve
// Starting Laravel development server: http://127.0.0.1:8000
...

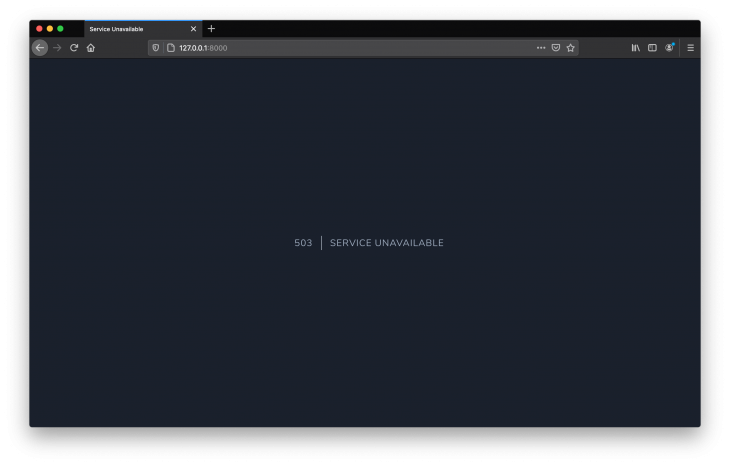
$ php artisan down --render="errors::503"
// Application is now in maintenance mode.
Running the above command will show the screen below:

With the new catch method, you can now provide a closure that should be executed if a queued closure fails to complete successfully after exhausting all of the queues configured and retry its attempts like so:
use Throwable;

dispatch(function () use ($podcast) {
    $podcast->publish();
})->catch(function (Throwable $e) {
    // This job has failed...
});
There are instances where you may want to render a component which is dependent on actions carried out in your view at runtime. With dynamic blade components, you can render components by passing in the component name as a variable like this:
<x-dynamic-component :component="$componentName" class="mt-4" />
With inspiration from Ruby on Rails, time modifications via the carbon PHP library have gone a step further in terms of traveling when testing.
When writing test cases, you may occasionally need to modify the time returned by helpers such as now or Illuminate\Support\Carbon::now(). Laravel’s base feature test class now includes helper methods that allow you to manipulate the current time like this:
public function testTimeCanBeManipulated()
{
    // Travel into the future...
    $this->travel(5)->milliseconds();
    $this->travel(5)->seconds();
    $this->travel(5)->minutes();
    $this->travel(5)->hours();
    $this->travel(5)->days();
    $this->travel(5)->weeks();
    $this->travel(5)->years();

    // Travel into the past...
    $this->travel(-5)->hours();

    // Travel to an explicit time...
    $this->travelTo(now()->subHours(6));

    // Return back to the present time...
    $this->travelBack();
}
In the previous versions of Laravel, when you start your application with the php artisan serve command, modifying the .env requires you to manually restart the application. Since the new version, modifying the .env will automatically reload the application so you don’t have to manually restart your application.
The Laravel’s paginator has been updated to use the Tailwind CSS framework by default. While still in support of Bootstrap 3 and 4.
To configure your pagination view to use Bootstrap instead of default Tailwind, you can call the paginator useBootstrap method within your AppServiceProvider:
// app/Providers/AppServiceProvider.php

...
use Illuminate\Pagination\Paginator;
...
public function boot()
{
    Paginator::useBootstrap();
    ...
}
In previous Laravel versions, the RouteServiceProvider contained a $namespace property which is automatically prefixed onto controller route definitions and calls to the action helper URL::action method.
// app/Providers/RouteServiceProvider.php

...

class RouteServiceProvider extends ServiceProvider
{
    protected $namespace = 'App\Http\Controllers';

    ...

}
This default value then allows you to define a route controller like so:
// routes/web.php
...
Route::post('login', 'UserController@login')
...
In Laravel 8, the $namespace property is null by default which means that no automatic namespace prefixing will be done by Laravel. Controller route definitions should be defined using standard PHP callable syntax like so:
// routes/web.php

use App\Http\Controllers\UserController;

Route::post('/login', [UserController::class, 'login']);
If you prefer the previous version style, you’ll have to specify your controller namespace in the RouteServiceProvider.
In this article, we have looked at the new features of Laravel 8. To upgrade your current application to version 8, you can check out the upgrade guide as well as the release notes.
Install LogRocket via npm or script tag. LogRocket.init() must be called client-side, not
server-side
$ npm i --save logrocket

// Code:

import LogRocket from 'logrocket';
LogRocket.init('app/id');
// Add to your HTML:

<script src="https://cdn.lr-ingest.com/LogRocket.min.js"></script>
<script>window.LogRocket && window.LogRocket.init('app/id');</script>

Compare mem0 and Supermemory to learn how modern AI apps manage long-term memory beyond RAG and stateless LLM chats.

Animate SVGs with pure CSS: hamburger toggles, spinners, line-draw effects, and new scroll-driven animations, plus tooling tips and fallbacks.

Tailwind CSS is more popular than ever. This guide breaks down v4’s biggest changes, real-world usage, migration paths, and where it fits in the AI future.

Evaluate the top React animation libraries for ease of use, developer experience, and bundle size.
Hey there, want to help make our blog better?
Join LogRocket’s Content Advisory Board. You’ll help inform the type of content we create and get access to exclusive meetups, social accreditation, and swag.
Sign up now