If you’re a designer looking to speed up your design process, AI-powered wireframe generators might just be the secret sauce you need. These powerful tools can simplify the early stages of interface design and change how you communicate ideas.

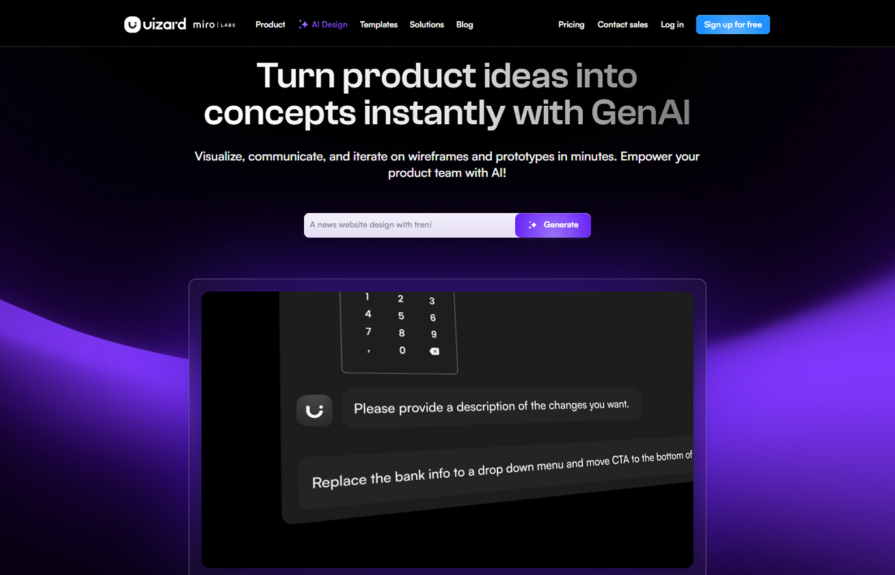
Uizard Autodesigner 2.0 is one such generator that uses AI to create wireframes in seconds. With a simple text prompt, you can save hours of manual sketching and a whole lot of back-and-forth between your team members.
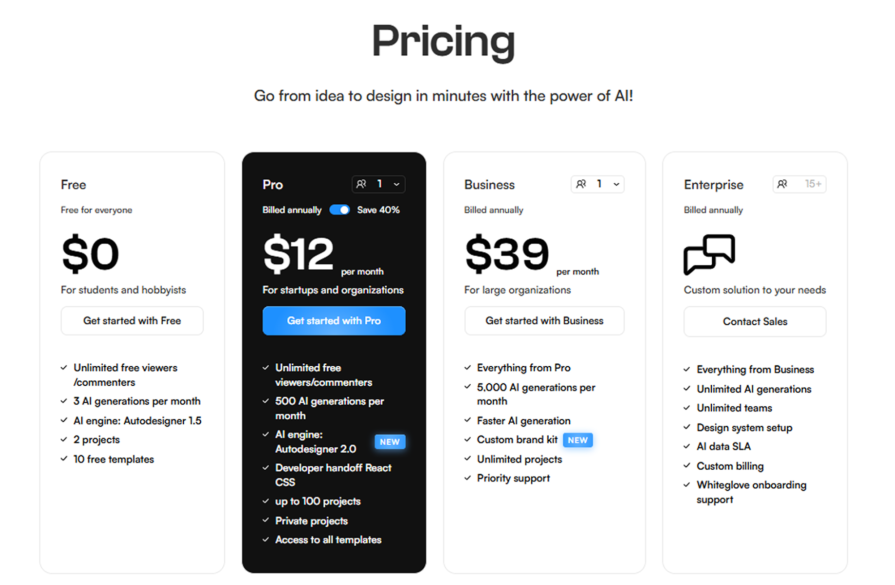
Since launching the first version of Autodesigner in 2023, Uizard has continued to evolve. It built on it with Autodesigner 1.5, which has some cool features and is available on the free plan. After that, it rolled out Autodesigner 2.0, its latest, most powerful version, available on the pro plan.
In this guide, I’ll show you how to create quick wireframes with Uizard’s Autodesigner 2.0 and explain what you can access for free versus what you unlock with the pro tier.
Editor’s note: This blog was updated 1 May 2025 by the author to provide steps that reflect the new 2.0 version of Autodesigner.
Uizard is an AI-powered tool that lets you design wireframes, websites, mobile apps, and prototypes in minutes. With its Autodesigner feature, you can create mobile, tablet, and web mockups from a simple text prompt.
While Uizard used to require a paid subscription to access Autodesigner, the freemium tier now includes Autodesigner 1.5, with essential features like screen, theme, and image generators. Autodesigner 2.0, available on the pro plan or through a free trial, takes it up a notch with advanced tools like smarter UI suggestions, component editing, and design review capabilities.
Now, let’s go through a step-by-step process for designing wireframes with Uizard’s Autodesigner 2.0, shall we?
To create a Uizard account, head over to the Uizard Autodesigner homepage. Click the “Sign up for free” button and follow the steps to complete your onboarding. Once you’re all set up, upgrade your account to a paid plan to gain access to Autodesigner 2.0, Uizard’s AI-powered design generator.
To upgrade your account, navigate to the Billing page by clicking your profile name on the left panel and selecting Billing from the pop-up menu.
Choose the payment plan that works best for you and follow the necessary steps to complete payment:
You can unlock a free month of Uizard Pro by getting five people to sign up. Go to the Billing page, select “Try Pro for Free,” copy your referral code, and share it with your network.
Once up to five people sign up using your link, you can activate Uizard’s premium features for a month at no cost. You’ll need to enter your payment details to complete this step, but you won’t be charged until the free month ends.
With payments sorted, it’s time to move on to the next step.

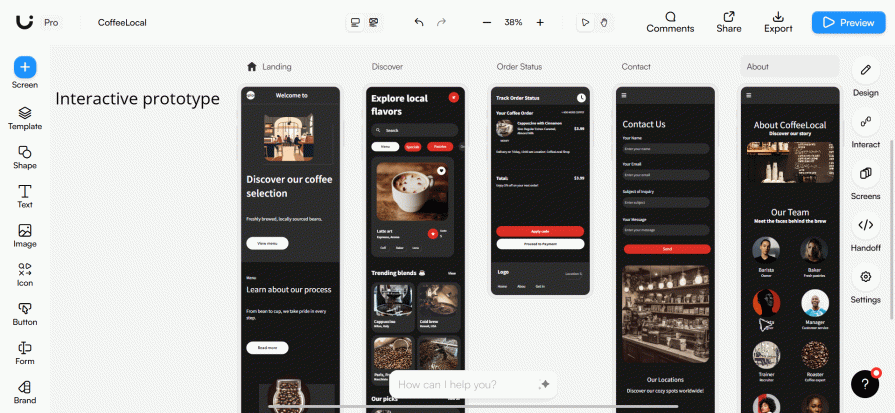
And in no time, you’ll have high-fidelity mockups of your key screens:
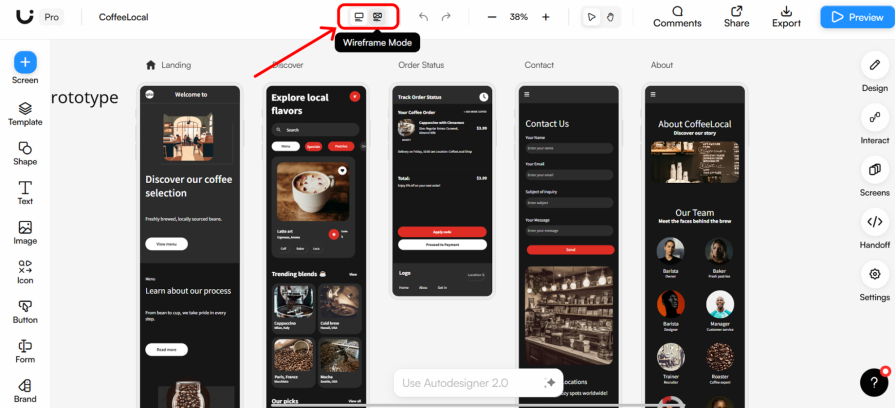
But hi-fi mockups are a few steps ahead of what we want. So, let’s take things back to the basic wireframe format we desire.
To switch to low-fidelity designs, go to the toolbar at the top of the screen, and from the mode selector options (Mockup mode and Wireframe mode), choose Wireframe Mode:
And just like magic, you’ll have fully editable wireframes of your design concept:
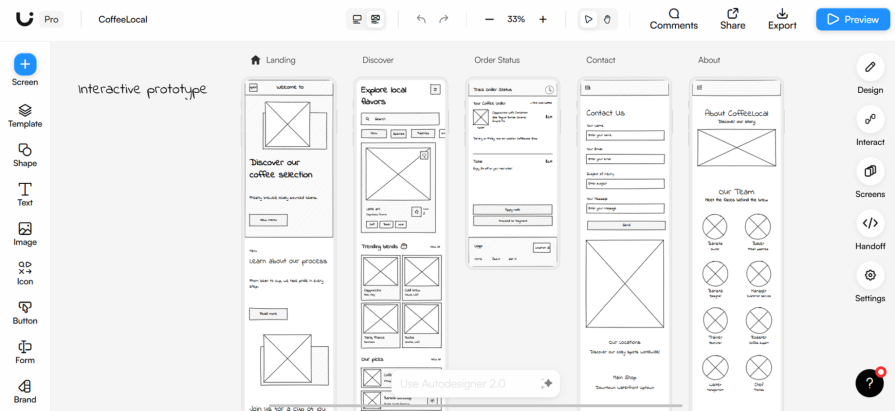
Easy right?
Now, let’s take things up a notch by creating wireframes for an ecommerce platform.
To do that, head to the Uizard dashboard and select Generate with Autodesigner. Choose the device you want to design for and briefly describe what you want to create, as in the previous example:
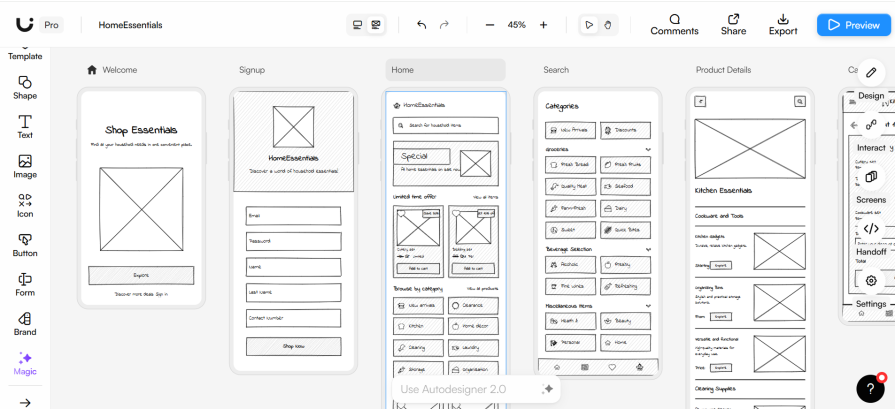
Here’s our text prompt in this case: An ecommerce platform where users can shop for all household items
Finally, click Generate my project, and you’ll have the hi-fi mockups of your design in no time:
Once you have your hi-fi mockups, you can switch to wireframe mode by following the steps we outlined earlier:
And just in case you’re not satisfied with the designs, you can modify the components or even add more screens. If you’re not sure how to do that, fret not. I’m about to show you how to edit your wireframes in Uizard.
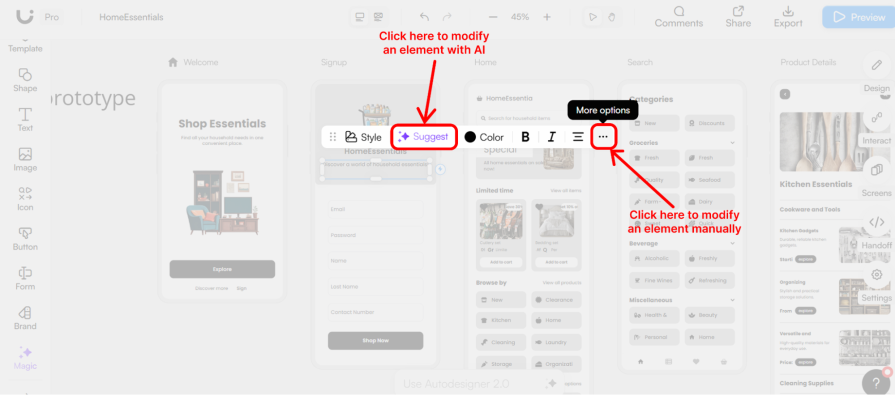
While in mockup mode, you can modify your designs manually or with the help of AI. To modify an element, click on it, and a tools menu will appear. Select “More Options” by clicking the three dots on the menu.
A toolbar will appear with options to adjust properties like layout, text, alignment, or styling, allowing you to customize the element as needed. Alternatively, click “Suggest” and let AI do the work for you by providing automated design recommendations or adjustments:
You can also incorporate more UI components, update placeholder text, adjust the design layout, or add new screens from the tools on the left sidebar:
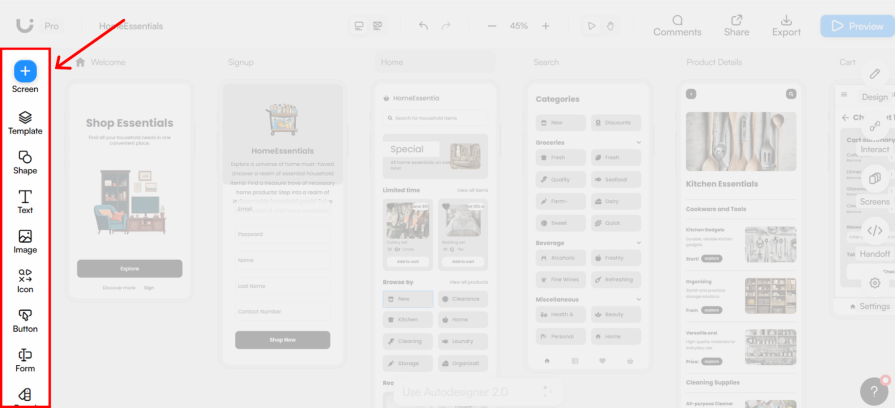
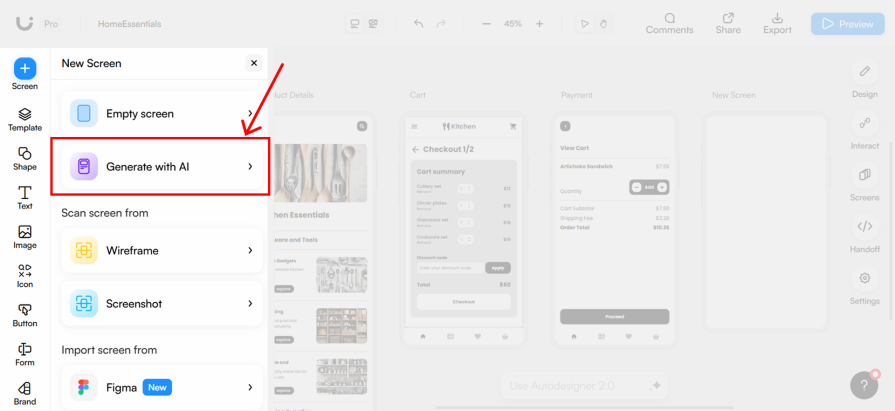
To add a new screen, click the plus (new screen) icon at the top of the sidebar. Select Generate with AI:
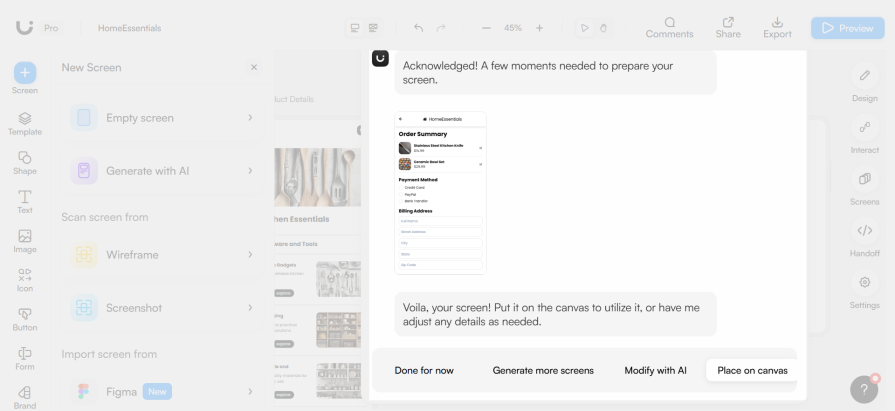
The AI design chatbot will appear, allowing you to input instructions and specify whether the AI should follow your prompts precisely or take a more creative approach. Once you’re satisfied with the design, click “Place on canvas” to add it to your project.
Our text prompt: A payment screen
After modifying your designs, you can switch back to Wireframe mode from the toolbar at the top of the screen. And just like that, you’ve gone from a basic idea to tangible wireframe sketches that you can share with your team and gather feedback.
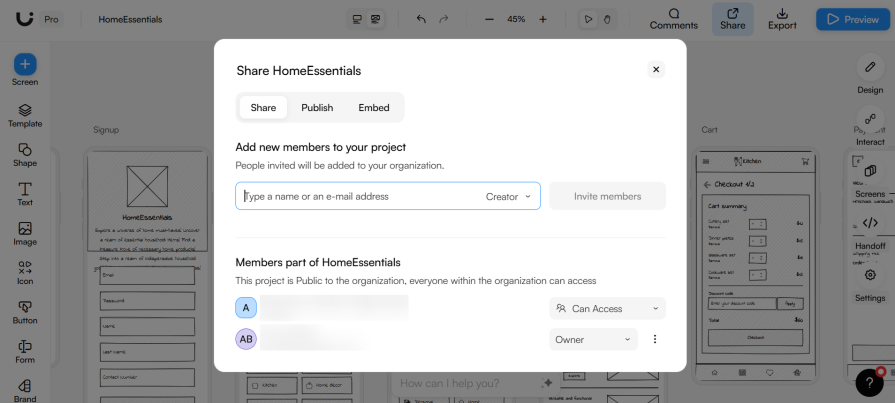
Once your wireframes are ready, you can export your project and invite your team members to collaborate in real time.
To invite team members, click the Share button in the top right corner of the Uizard interface and follow the steps:
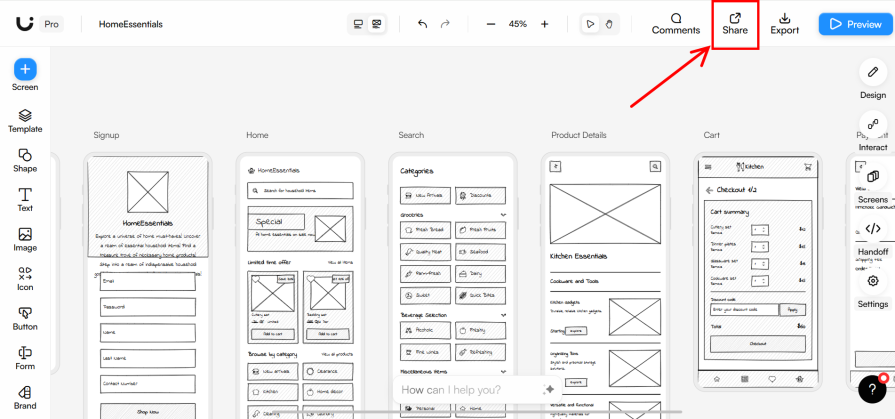
You can find the Share button at the top right-hand corner of Uizard’s interface:
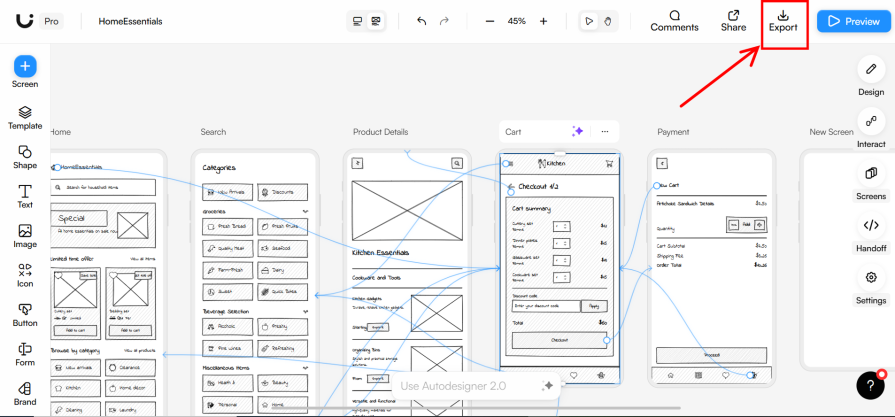
You can also export your wireframes as PNG, SVG, PDF, or JPG files, or even as code. To do this, select the screen you want to export, then click “Export” at the top corner of the interface:
And it’s a wrap! That’s how Uizard’s Autodesigner 2.0 can help take your design concept from a simple idea to tangible wireframes your team can collaborate on.
If you’re looking to try Uizard without a financial commitment, you can access Autodesigner 1.5 on Uizard’s freemium tier. Once you’re signed up to Uizard, you’re placed on the free plan by default. This gives you access to:
This guide has shown you how to use Autodesigner, Uizard’s AI-powered wireframe generator, to speed up your design process. We went through a step-by-step process that takes you from onboarding to sharing your wireframes with your team.
If you’re feeling inspired, why not dive right in and explore the magic of Uizard’s Autodesigner? Take advantage of the free plan to explore it risk-free and see if it’s the right fit for you before making any financial commitment.

LogRocket's Galileo AI watches sessions and understands user feedback for you, automating the most time-intensive parts of your job and giving you more time to focus on great design.
See how design choices, interactions, and issues affect your users — get a demo of LogRocket today.

When AI made generating design concepts almost effortless, I realized the most valuable part of a critique was no longer the interface itself. It was understanding the context, tradeoffs, and judgment behind the final design. Here’s how AI has changed the way I run design critiques—and why I think that’s making them better.

The Double Diamond design process helps UX teams balance exploration with decision-making, guiding projects from problem discovery to solution delivery. Learn how each phase works, which tools to use, when the reverse Double Diamond makes sense, and why the framework remains relevant for modern product development.

Explore the core principles of GUI design and learn how consistency, simplicity, feedback, accessibility, and user testing contribute to better digital experiences.

After five years in UX, I revisited the Daily UI challenge to reconnect with hands-on design. Along the way, I learned that great interfaces come from thoughtful briefs, sound judgment, and user feedback, not just better AI tools.


