When large language models first became widely available, you could only send text and get a text response back. But in just a few years, these models have become multimodal, meaning they can now process images, audio, and even real-time video streams. You can bring the same capabilities into your own LLM-powered apps and go beyond plain text.

In this article, you’ll learn how to build multimodal AI interactions using Next.js and Gemini. We’ll cover how to handle audio, images, video, and different file uploads with the Gemini LLM. To get a sneak peek, you can interact with the final output here.
The Replay is a weekly newsletter for dev and engineering leaders.
Delivered once a week, it's your curated guide to the most important conversations around frontend dev, emerging AI tools, and the state of modern software.
In AI, a modality refers to the kind of input or data you’re dealing with, such as text, images, audio, video, or even sensor data. Traditional models were built to handle only one type at a time. For example, a text model processes only text, and an image model only sees pixels.
Multimodal AI is different. It can understand and work with multiple types of input together. You can feed it a photo and ask a question about it. Or give it a transcript and an audio clip and ask if they match. It’s more flexible and closer to how humans actually communicate.
Popular multimodal models include those from OpenAI, Google’s Gemini, Claude, and DeepSeek. All of them can process combinations of text, images, audio, and, in some cases, video. For this tutorial, we’ll use the Gemini API because it’s easier to set up and offers a generous free trial.
Head over to Google AI Studio and click the Create API key button as shown below: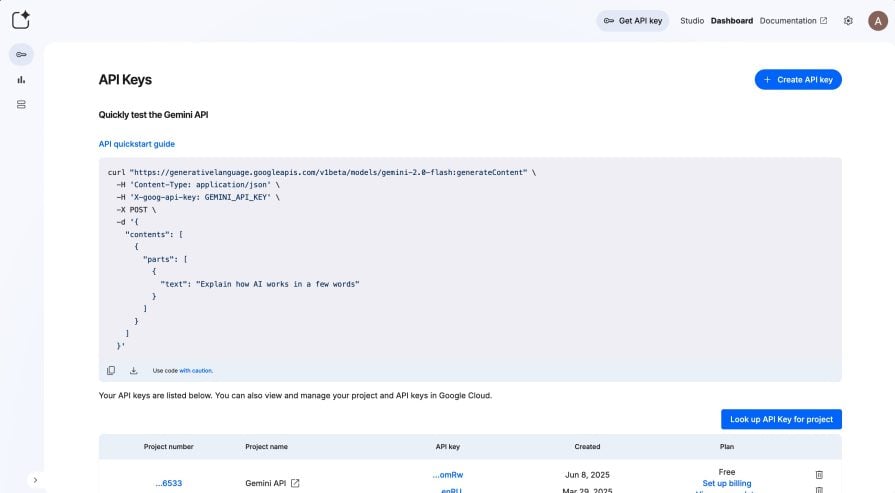
Once created, copy the key and store it somewhere safe for now.
To save time, I’ve created a starter repo with basic Tailwind styling, layout components, and minimal logic. This way, we can focus on the actual multimodal features instead of scaffolding UI from scratch.
Run the following commands to clone the repo and install dependencies:
git clone -b base https://github.com/AsaoluElijah/multimodal-ai
cd multimodal-ai
npm install
Open the project in your editor, and you’ll see a standard Next.js setup using the pages directory structure. It comes with a few key dependencies already installed: @google/genai for interacting with the Gemini API, axios for making HTTP requests, and lucide-react for icons.
You’ll also find some new components and modified files already set up to handle the core functionality:
Next, rename .env.example to .env, and replace the placeholder value with the Gemini credential you created earlier:
GEMINI_API_KEY=your-real-api-key
Then start the dev server by running:
npm run dev
Visit the URL in your terminal, and you should see a basic chat interface with a text box, mic button, and file upload option, as shown below: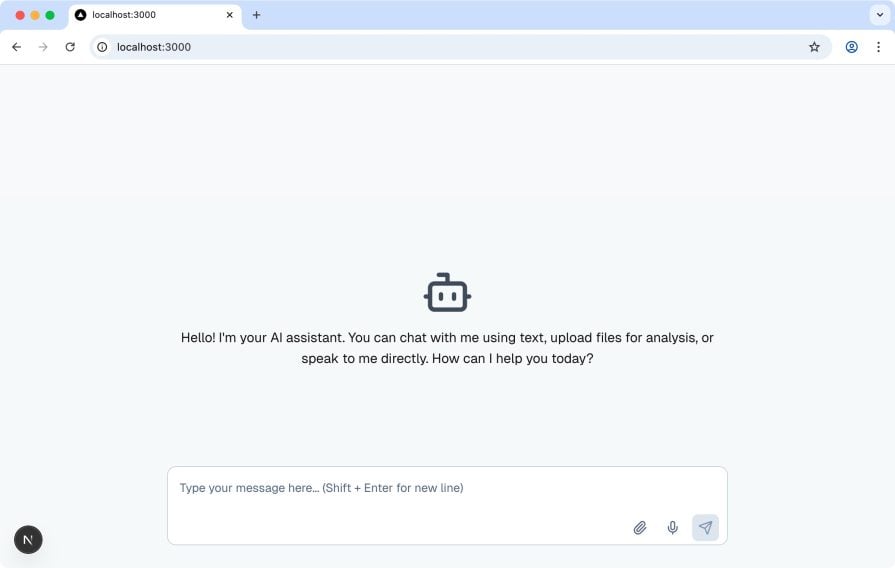
Try typing a message or clicking the mic, and you’ll get a dummy AI response for now. We’ll wire it up properly in the next steps.
To get the voice recording working, we’ll use the browser’s Speech Recognition API to convert speech into text. Open index.js and update the toggleRecording() function with the following:
 const toggleRecording = () => {
  if (!("webkitSpeechRecognition" in window || "SpeechRecognition" in window)) {
    alert("Speech recognition is not supported in this browser.");
    return;
  }

  const SpeechRecognition =
    window.SpeechRecognition || window.webkitSpeechRecognition;
  const recognition = new SpeechRecognition();

  recognition.continuous = false;
  recognition.interimResults = false;
  recognition.lang = "en-US";

  if (!isRecording) {
    recognition.start();
    console.log("Recording started...");

    recognition.onresult = (event) => {
      const transcript = event.results[0][0].transcript;
      setInputText((prevText) => `${prevText} ${transcript}`.trim());
    };

    recognition.onerror = (event) => {
      console.log(`Speech recognition error detected: ${event.error}`);
      console.log(`Additional information: ${event.message}`);
    };

    recognition.onend = () => {
      console.log("Recording ended.");
      setIsRecording(false);
    };

    // Store the instance globally to be able to stop it later
    window._recognition = recognition;
    setIsRecording(true);
  } else {
    console.log("Stopping recording...");
    window._recognition?.stop();
    setIsRecording(false);
  }
};
This code checks if the browser supports voice recognition and then starts listening. Once you stop talking, it takes the recognized text and automatically drops it into the message input field. It also handles toggling the mic state so the UI stays in sync.
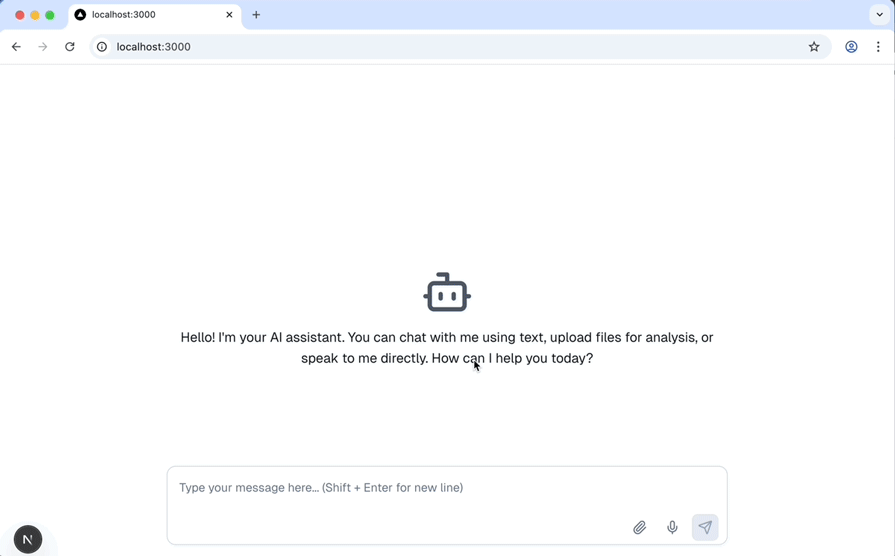
Try it out by clicking the mic button, saying a few words, and stopping the recording. You should see the text appear in the input box, as shown below:
 Now that recording works, let’s actually send messages and files to the server and have Gemini respond.
Up to this point, we’ve only been simulating message sending with a hardcoded response. Let’s replace that with actual logic to send user input and any uploaded files to the Gemini API. Start by opening index.js and updating the handleSubmit() function with the following:
const handleSubmit = async (e) => {
  e.preventDefault();

  const hasText = inputText.trim();
  const hasFiles = uploadedFiles.length > 0;

  if (!hasText && !hasFiles) return;

  setIsLoading(true);

  const timestamp = new Date().toLocaleTimeString();

  const userMessage = {
    text: hasText ? inputText : null,
    files: hasFiles ? uploadedFiles.map((file) => file.name) : [],
    isAI: false,
    timestamp,
  };

  setMessages((prev) => [...prev, userMessage]);

  // Prepare form data
  const formData = new FormData();
  formData.append("text", inputText);

  uploadedFiles.forEach((file, index) => {
    formData.append("files", file); // If your API accepts multiple files with same field name
  });

  try {
    const res = await axios.post("/api/message", formData, {
      headers: {
        "Content-Type": "multipart/form-data",
      },
    });

    const aiMessage = {
      text: res.data?.response || "AI responded, but no text was returned.",
      isAI: true,
      timestamp: new Date().toLocaleTimeString(),
    };

    setMessages((prev) => [...prev, aiMessage]);
  } catch (error) {
    console.error("Error sending message:", error);
    const errMessage = {
      text: "Something went wrong while sending your message.",
      isAI: true,
      timestamp: new Date().toLocaleTimeString(),
    };
    setMessages((prev) => [...prev, errMessage]);
  } finally {
    setIsLoading(false);
    setInputText("");
    setUploadedFiles([]);
  }
};
This updated function packages the input text and uploaded files using FormData, then sends a POST request to /api/message, which acts as our backend handler for Gemini. Once the response comes back, the chat UI is updated with the real result.
Now let’s build that /api/message endpoint. Create a new file called message.js inside the pages/api folder. Then paste in the following:
import { IncomingForm } from "formidable";

import {
  GoogleGenAI,
  createPartFromUri,
  createUserContent,
} from "@google/genai";
import mime from "mime-types";

export const config = {
  api: {
    bodyParser: false,
  },
};

const ai = new GoogleGenAI({
  apiKey: process.env.GEMINI_API_KEY,
});

export default async function handler(req, res) {
  if (req.method !== "POST") {
    return res.status(405).end("Method Not Allowed");
  }

  const form = new IncomingForm({
    multiples: true,
    uploadDir: "/tmp",
    keepExtensions: true,
  });

  form.parse(req, async (err, fields, files) => {
    if (err) {
      console.error("Form parse error:", err);
      return res.status(500).json({ error: "Failed to parse form data" });
    }

    const userText = fields.text?.toString().trim() || "";
    const uploadedFiles = Array.isArray(files.files)
      ? files.files
      : files.files
      ? [files.files]
      : [];

    const contentParts = [];

    // 1. Attach file(s) if any
    for (const file of uploadedFiles) {
      const filePath = file.filepath || file.path;
      const mimeType = mime.lookup(filePath) || "application/octet-stream";

      try {
        let uploaded = await ai.files.upload({
          file: filePath,
          config: { mimeType },
        });

        // If the file is a video, poll until it's ACTIVE
        if (mimeType.startsWith("video/")) {
          while (!uploaded.state || uploaded.state.toString() !== "ACTIVE") {
            console.log(
              `Waiting for video to process (state: ${uploaded.state})...`
            );
            await new Promise((r) => setTimeout(r, 5000));
            uploaded = await ai.files.get({ name: uploaded.name });
          }
        }

        contentParts.push(createPartFromUri(uploaded.uri, mimeType));
        contentParts.push("\n\n");
      } catch (uploadErr) {
        console.error("File upload to Gemini failed:", uploadErr);
        return res
          .status(500)
          .json({ error: "Failed to upload file to Gemini." });
      }
    }

    // 2. Append user prompt
    if (userText) contentParts.push(userText);

    // 3. Send to Gemini
    try {
      const result = await ai.models.generateContent({
        model: "gemini-2.0-flash",
        contents: createUserContent(contentParts),
      });

      res.status(200).json({ response: result.text });
    } catch (geminiErr) {
      console.error("Gemini API error:", geminiErr);
      res.status(500).json({ error: "Failed to get response from Gemini." });
    }
  });
}
The code above starts by parsing the incoming form data using formidable, which lets us extract both the text input and any uploaded files.
For each file, it uses ai.files.upload() from the @google/genai package to upload it to Gemini’s file API. If the file is a video, the code automatically waits for Gemini to finish processing it by polling its state until it becomes ACTIVE. Once the file is ready, createPartFromUri() wraps the file reference in a format Gemini understands, and both the files and the user’s text input are assembled into a structured message using createUserContent().
That final payload is passed into ai.models.generateContent(), which sends the full input, including any text, images, audio, or video, to the Gemini 2.0 Flash model. The response is then extracted from result.text and sent back to the client.
This way, we can pass different modalities into Gemini in a single request. It can handle .jpg, .png, .mp3, .mp4, and .txt files. You can mix and match inputs, like uploading an image and asking a question about it, attaching an audio clip for transcription, or passing in a video and asking it to describe the scene.
If you haven’t already, start the application by running:
npm run dev
Then head over to the provided URL to interact with your new multimodal AI assistant. Start with a simple text input, and you should see a response generated by Gemini, like the one shown below: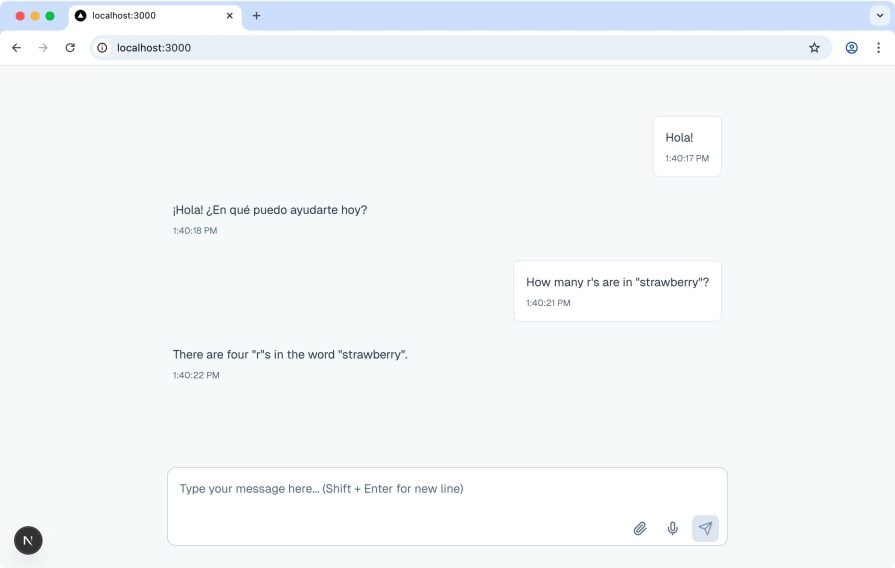
Images work well, too. Upload a .jpg or .png, ask a question about it, and Gemini will return a relevant answer:
You can also upload other input types, such as videos, a .txt file for text generation, or an .mp3 audio clip for transcription or analysis. All of these should work smoothly with no extra setup.
Multimodal AIs are changing how we interact with machines. This tutorial shows you how to build a multimodal interface in Next.js using the Gemini API, with support for text, images, audio, video, and file uploads. You can explore the complete code in this GitHub repo or interact with the live version here.
From here, you can take things even further. Try streaming video input in real time, building a voice-only assistant, or combining multiple files into a single prompt for more complex reasoning. The possibilities are limitless. Excited to see what you build.
Thanks for reading!

AI-generated tests can speed up React testing, but they also create hidden risks. Here’s what broke in a real app.re

Why the future of DX might come from the web platform itself, not more tools or frameworks.

A hands-on test of Claude Code Review across real PRs, breaking down what it flagged, what slipped through, and how the pipeline actually performs in practice.

CSS art once made frontend feel playful and accessible. Here’s why it faded as the web became more practical and prestige-driven.
Hey there, want to help make our blog better?
Join LogRocket’s Content Advisory Board. You’ll help inform the type of content we create and get access to exclusive meetups, social accreditation, and swag.
Sign up now

