
The Replay is a weekly newsletter for dev and engineering leaders.
Delivered once a week, it's your curated guide to the most important conversations around frontend dev, emerging AI tools, and the state of modern software.
Portable Document Format, commonly known as PDF, is one of the most popular document formats. PDFs are popular because:

Despite the popularity of PDF documents, the JavaScript ecosystem lacks robust support for PDF manipulation. One of the relatively new, popular, and feature-rich packages you can use to manage PDF documents is pdf-lib.
The pdf-lib package can run in Node, Deno, React Native, and Browser. This article will guide you on managing PDF documents in the Node runtime environment using pdf-lib.
pdf-lib is a third-party package that runs in Node.js, Deno, React Native, and the browser. The features that make pdf-lib better than most of the other similar JavaScript packages include:
It is relatively popular on GitHub with over 3.5k stars. We shall look at some of its notable features in the section below.
As mentioned in the preceding sections, pdf-lib is one of the feature-rich packages in the JavaScript ecosystem for managing PDF documents. We shall implement its core features in the sub-sections below.
Since this is a third-party package, you will have to install it from the npm package registry like so:
# With npm
npm install pdf-lib

# With yarn
yarn add pdf-lib
If you have initialized a Node project and installed pdf-lib using one of the commands above, follow the sub-sections below to implement some of its primary features. It supports both CommonJS and ES Modules.
We shall use CommonJS syntax throughout this article. The examples should work if you switch to ESM syntax.
Before taking a deep dive into the pdf-lib package, let us get a taste of it by creating a simple blank document using the code below. It is one of the basic features.
const { PDFDocument } = require("pdf-lib");
const { writeFileSync } = require("fs");

async function createPDF() {
  const PDFdoc = await PDFDocument.create();
  const page = PDFdoc.addPage([300, 400]);
  writeFileSync("blank.pdf", await PDFdoc.save());
}

createPDF().catch((err) => console.log(err));
The PDFDocument class has most of the methods and properties you will need for document manipulation. After importing it, you can use the create method to create a document.
In the example above, we passed the dimensions of the page as an array of integers to the addPage method. The addPage method also takes other types of parameters, which you can read about in the pdf-lib documentation.
After executing the code above, you will see a blank.pdf file.

A blank PDF document is not useful without some text. Let us add a simple “hello world” text to the document we have just created.
The code below is an illustration of how you can add text to a PDF document. It adds a simple “hello world” text to the blank PDF document we created in the previous sub-section. Ordinarily, you add text using the drawText method. It takes up to two arguments.
The first argument is the text you want to add, and the second argument is an object, which takes various properties you can look up in the pdf-lib documentation. At the moment, we shall pass the properties x and y for positioning the text. By default, pdf-lib places the text at the bottom left corner.
The pdf-lib package comes with a couple of built-in standard fonts. In this example, we shall use the built-in Helvetica font. We shall also use built-in properties to calculate the text width and height, which we need for centering the text:
const { PDFDocument, StandardFonts } = require("pdf-lib");
const { writeFileSync } = require("fs");

async function createPDF() {
  const document = await PDFDocument.create();

  const page = document.addPage([300, 400]);

  const text = "Hello World";
  const helveticaFont = await document.embedFont(StandardFonts.Helvetica);
  const textWidth = helveticaFont.widthOfTextAtSize(text, 24);
  const textHeight = helveticaFont.heightAtSize(24);

  page.drawText(text, {
    x: page.getWidth() / 2 - textWidth / 2,
    y: page.getHeight() / 2 - textHeight / 2,
  });

  writeFileSync("hello.pdf", await document.save());
}

createPDF().catch((err) => console.log(err));
When you run the code above, it will create a hello.pdf file with the text “Hello World” at the center. If you change the values of x and y, the position of the text will change as well.
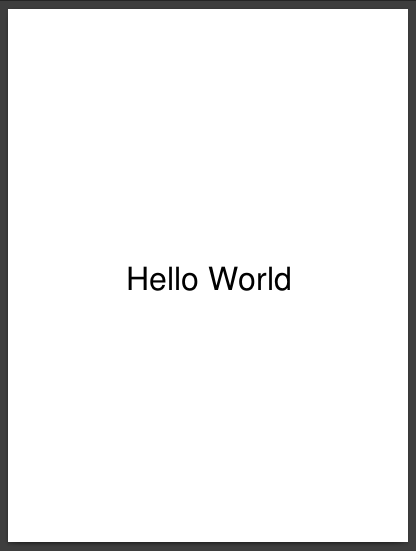
As already mentioned, x and y are not the only properties of the object you pass to the drawText method. You can also include properties like color, opacity, font, and rotate.
The pdf-lib package can modify existing PDF documents. We shall use the readFileSync method of the fs module to read the file into memory. It is worth mentioning that readFileSync returns a buffer if you don’t pass the encoding argument.
The image below shows a simple PDF document we are going to modify.
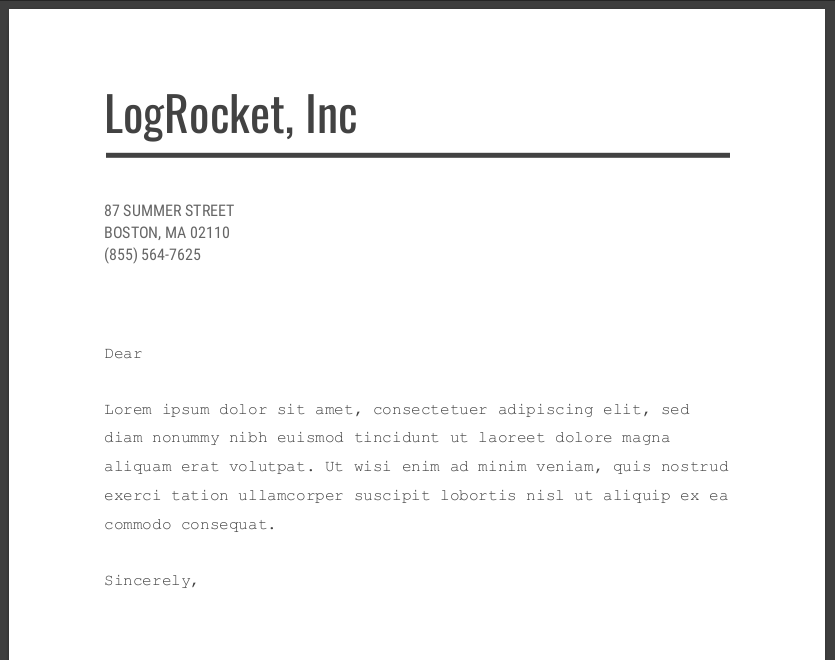
Let us use the code below to modify the above letter. We shall add the current date, the name of the addressee, and the writer’s name:
const { PDFDocument, StandardFonts, rgb } = require("pdf-lib");
const { writeFileSync, readFileSync } = require("fs");

async function createPDF() {
  const document = await PDFDocument.load(readFileSync("./letter.pdf"));

  const courierBoldFont = await document.embedFont(StandardFonts.Courier);
  const firstPage = document.getPage(0);

  firstPage.moveTo(72, 570);
  firstPage.drawText(new Date().toUTCString(), {
    font: courierBoldFont,
    size: 12,
  });

  firstPage.moveTo(105, 530);
  firstPage.drawText("Ms. Jane,", {
    font: courierBoldFont,
    size: 12,
  });

  firstPage.moveTo(72, 330);
  firstPage.drawText("John Doe \nSr. Vice President Engineering \nLogRocket", {
    font: courierBoldFont,
    size: 12,
    lineHeight: 10,
  });

  writeFileSync("jane-doe.pdf", await document.save());
}

createPDF().catch((err) => console.log(err));
The code above will modify the previous PDF document to look like the image below. It adds the date, the person to whom you are addressing the letter, and the writer of the letter. Make sure to have the letter.pdf file in the same directory.
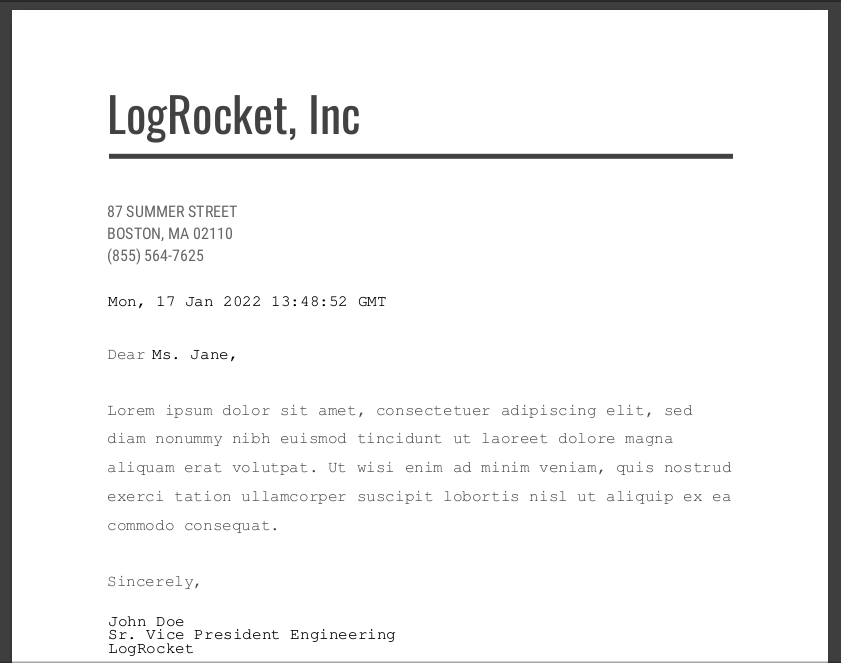
You can use this feature to modify the contents of a document dynamically. Like in the above example, you may have a letter with the same content, but you want to address it to different people. You can query your database and modify the document dynamically as we did.
Unfortunately, as illustrated above, you need to get the exact location on the document to add the text.
The pdf-lib package comes with the functionality you can use to merge PDF documents. We have a two-page PDF document in the image below. We shall append the document we created in the previous sub-section to it.
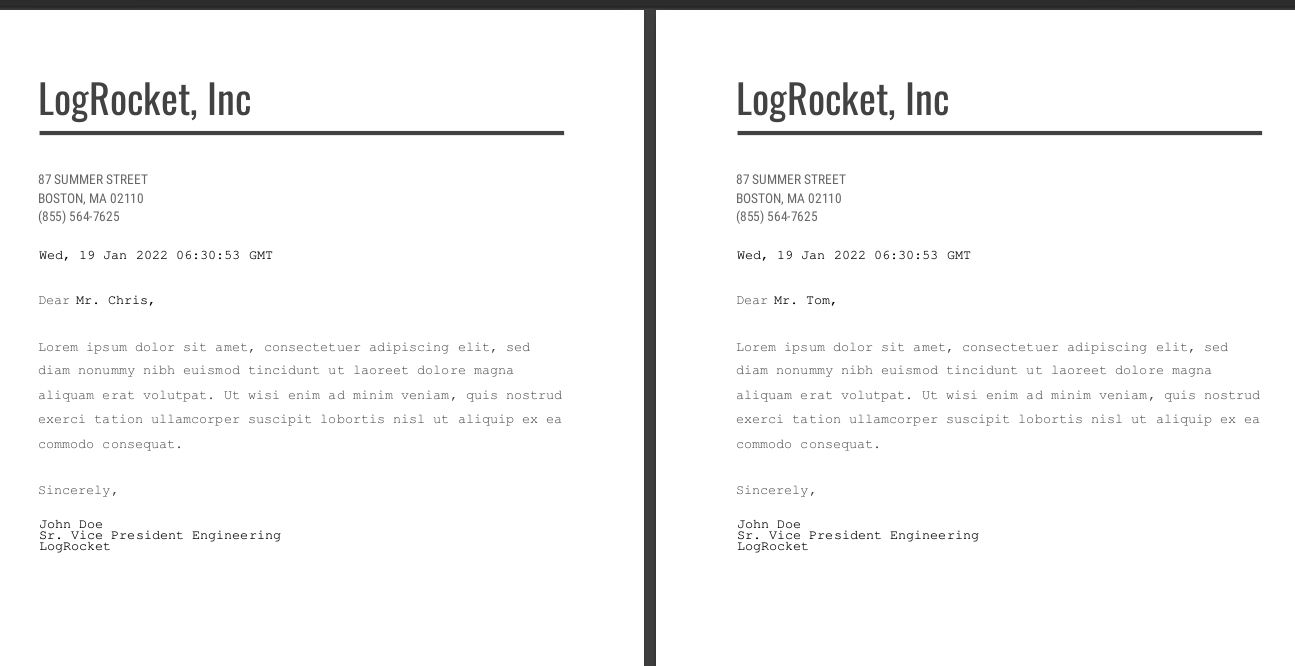
In the code below, we are appending Jane Doe’s letter to the rest of the letters. We are reading both PDF documents from files. You can also fetch the documents from a server via an HTTP client:
const { PDFDocument } = require("pdf-lib");
const { writeFileSync, readFileSync } = require("fs");

async function appendPDF() {
  const janeDoe = await PDFDocument.load(readFileSync("./jane-doe.pdf"));
  const letters = await PDFDocument.load(readFileSync("./letters.pdf"));

  const pagesArray = await letters.copyPages(janeDoe, janeDoe.getPageIndices());

  for (const page of pagesArray) {
    letters.addPage(page);
  }

  writeFileSync("all-letters.pdf", await letters.save());
}

appendPDF().catch((err) => console.log(err));
The copyPages method returns an array of pages. In the above example, we are looping through the array and appending pages to the document within the loop. If you are appending a single page, you can do so without looping through the array. You can instead replace the loop with the code below:
letters.addPage(pagesArray[0]);
Running the code above will create the all-letters.pdf file with Jane Doe’s letter appended to the rest of the letters. If you want to merge multiple PDF documents, this feature can be very useful. For example, if you have book chapters in different PDF files, you can merge them using a few lines of code.
Instead of appending pages at the end of a document, you might want to insert them between two pages. In that case, you will have to use the insertPage method. The code below is a modification of the previous code to insert a page at a specific index. The index you pass to the insertPage method should be zero-based:
const { PDFDocument } = require("pdf-lib");
const { writeFileSync, readFileSync } = require("fs");

async function insertPage() {
  const janeDoe = await PDFDocument.load(readFileSync("./jane-doe.pdf"));
  const letters = await PDFDocument.load(readFileSync("./letters.pdf"));

  const pagesArray = await letters.copyPages(janeDoe, janeDoe.getPageIndices());

  letters.insertPage(1, pagesArray[0]);
  writeFileSync("insert-page.pdf", await letters.save());
}

insertPage().catch((err) => console.log(err));
Instead of adding pages to a document as we did in the previous sub-sections, you might want to remove pages. You can do so using the removePage method, which takes the index of the page you want to remove. You will get an error if you pass an index that is out of range.
The code below is an illustration of how to use the removePage method. It loads the document into memory, removes the page at a specific index, and writes the modified document to file:
const { PDFDocument } = require("pdf-lib");
const { writeFileSync, readFileSync } = require("fs");

async function removePage() {
  const letters = await PDFDocument.load(readFileSync("./insert-page.pdf"));
  letters.removePage(1);
  writeFileSync("remove-page.pdf", await letters.save());
}

removePage().catch((err) => console.log(err));
Running the code above will remove the page we added in the previous sub-section.
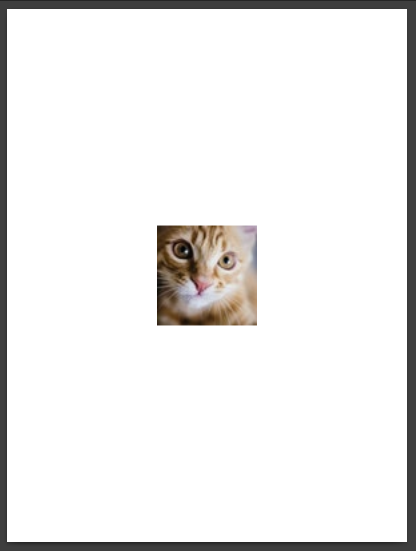
I illustrate how to add an image to a PDF document in the code below. Before executing it, make sure to have the cat.jpg file in the same directory. You can also pass the image path to the readFileSync method if you intend to use a different image:
const { PDFDocument } = require("pdf-lib");
const fs = require("fs");

async function createPDFDocument() {
  const document = await PDFDocument.create();
  const page = document.addPage([300, 400]);

  const imgBuffer = fs.readFileSync("./cat.jpg");
  const img = await document.embedJpg(imgBuffer);

  const { width, height } = img.scale(1);
  page.drawImage(img, {
    x: page.getWidth() / 2 - width / 2,
    y: page.getHeight() / 2 - height / 2,
  });

  fs.writeFileSync("./image.pdf", await document.save());
}

createPDFDocument().catch((err) => console.log(err));
The code above will create an image.pdf file that looks like the image below. It will add the image at the center of the page.
PDF documents usually have metadata that provides additional information about the document. The metadata, among others, comprises the document title, author, date of creation, and copyright information.
The code below illustrates how you set and retrieve metadata for a PDF document:
const { PDFDocument } = require("pdf-lib");
const { readFileSync } = require("fs");

async function removePage() {
  const PDFdoc = await PDFDocument.load(readFileSync("./jane-doe.pdf"), {
    updateMetadata: false,
  });

  PDFdoc.setTitle("Letter");
  PDFdoc.setAuthor("Jane Doe");
  PDFdoc.setSubject("pdf-lib example");
  PDFdoc.setCreationDate(new Date());
  PDFdoc.setModificationDate(new Date());

  console.log(`Title: ${PDFdoc.getTitle()}`);
  console.log(`Author: ${PDFdoc.getAuthor()}`);
  console.log(`Subject: ${PDFdoc.getSubject()}`);
  console.log(`Creation Date: ${PDFdoc.getCreationDate()}`);
  console.log(`Modification date: ${PDFdoc.getModificationDate()}`);
}

removePage().catch((err) => console.log(err));
It may be necessary to add page numbers after modifying an existing PDF document. You can do so using the functionality for adding text described in one of the previous subsections.
You need to read the entire document into memory and access each page in a loop. In the code below, after reading the PDF document, we use the getPageIndices method to retrieve the array of page indices and loop through it. You can retrieve the corresponding page for each array index using the getPage method. You need to pass the array index to getPage as an argument:
const { PDFDocument, StandardFonts } = require("pdf-lib");
const { writeFileSync, readFileSync } = require("fs");

async function addPageNumbers() {
  const document = await PDFDocument.load(readFileSync("./letters.pdf"));

  const courierBoldFont = await document.embedFont(StandardFonts.Courier);
  const pageIndices = document.getPageIndices();

  for (const pageIndex of pageIndices) {
    const page = document.getPage(pageIndex);

    page.drawText(`${pageIndex + 1}`, {
      x: page.getWidth() / 2,
      y: 20,
      font: courierBoldFont,
      size: 12
    });
  }

  writeFileSync("paged-letters.pdf", await document.save());
}

addPageNumbers().catch((err) => console.log(err));
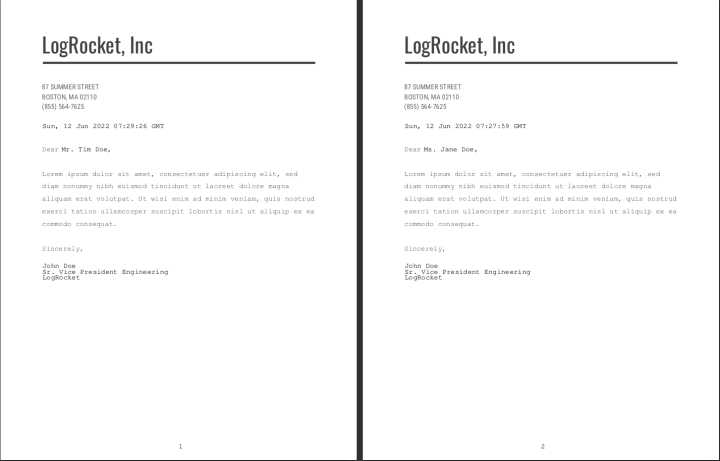
The indices are zero-based. Therefore, you should increment each page index by one when setting it as a page number. It wouldn’t make sense to start counting the page numbers from zero. After running the code above, you will get a PDF document with page numbers at the bottom, similar to the image below.
Instead of retrieving the page indices using the getPageIndices method as we did in the above example, you can retrieve the pages with the getPages method. It will return an array of pages that you can loop through similarly.
As hinted above, you need to know the precise location of the text on the page. Be sure to carefully choose the location of the page numbers to avoid overlapping with other content on the page. You can add the page number at the top or bottom of the page.
To add the page number at the top of a page instead of at the bottom as we did in the above example, use the getHeight method to get the page height and use it for setting the y coordinate like so:
page.drawText(`${pageIndex + 1}`, {
  x: page.getWidth() / 2,
  y: page.getHeight() - 20,
  font: courierBoldFont,
  size: 12,
});
It is common to apply different page formatting for the different sections of an ebook or academic document. In academic writings, it is a common practice to label the introductory pages with roman numerals while other pages with the usual numbering system. pdf-lib makes it easy to apply such formatting. You need to identify the pages that need different page number formatting and apply it appropriately.
Hopefully, you have learned how to create and manipulate PDF documents in the Node runtime environment using pdf-lib. The pdf-lib package will most likely meet your basic PDF document manipulation needs. It has more features than what we have covered in this article.
You can check the documentation if you are yearning for more. Some features of pdf-lib that we haven’t covered here include embedding PDF documents, creating forms, and drawing SVG paths.
Despite the features highlighted above, pdf-lib has its limitations. Notable ones include a lack of support for manipulating encrypted documents and adding HTML and CSS content. An attempt at loading an encrypted document will throw an error.
Our focus in this article is on running pdf-lib in the Node runtime environment. You can also run it in other JavaScript environments such as Deno, React Native, and the browser without significant modification to your source code.
 Monitor failed and slow network requests in production
Deploying a Node-based web app or website is the easy part. Making sure your Node instance continues to serve resources to your app is where things get tougher. If you’re interested in ensuring requests to the backend or third-party services are successful, try LogRocket.

LogRocket lets you replay user sessions, eliminating guesswork around why bugs happen by showing exactly what users experienced. It captures console logs, errors, network requests, and pixel-perfect DOM recordings — compatible with all frameworks.
LogRocket's Galileo AI watches sessions for you, instantly identifying and explaining user struggles with automated monitoring of your entire product experience.
LogRocket instruments your app to record baseline performance timings such as page load time, time to first byte, slow network requests, and also logs Redux, NgRx, and Vuex actions/state. Start monitoring for free.

@container scroll-state: Replace JS scroll listeners nowCSS @container scroll-state lets you build sticky headers, snapping carousels, and scroll indicators without JavaScript. Here’s how to replace scroll listeners with clean, declarative state queries.

Russ Miles, a software development expert and educator, joins the show to unpack why “developer productivity” platforms so often disappoint.

Discover what’s new in The Replay, LogRocket’s newsletter for dev and engineering leaders, in the February 18th issue.

Learn how to recreate Claude Skills–style workflows in GitHub Copilot using custom instruction files and smarter context management.
Hey there, want to help make our blog better?
Join LogRocket’s Content Advisory Board. You’ll help inform the type of content we create and get access to exclusive meetups, social accreditation, and swag.
Sign up now