Editor’s note: This article was last reviewed and updated on 23 September 2024.
Chocolatey is a Windows package manager that you can use to automatically install packages and packages directly from the terminal — all without having to manually jump through hoops to install and set them up. It works similarly to tools like apt-get or Homebrow.
Chocolatey also includes built-in virus detection, which means that you can be confident that packages remain secure when you use it.
Chocolatey is free to use and can be used to install Node.js, which we will cover in the following sections of this tutorial.
To follow along with this tutorial, you will need:
Consider using Chocolatey over package managers like Winget, RuckZuck, and Yarn because of the great benefits it offers, including:
To install Chocolatey, navigate to the command line (CMD) and open it as an admin, running the following PowerShell scripts:
@"%SystemRoot%\System32\WindowsPowerShell\v1.0\powershell.exe" -NoProfile -InputFormat None -ExecutionPolicy Bypass -Command "[System.Net.ServicePointManager]::SecurityProtocol = 3072; iex ((New-Object System.Net.WebClient).DownloadString('https://community.chocolatey.org/install.ps1'))" && SET "PATH=%PATH%;%ALLUSERSPROFILE%\chocolatey\bin"
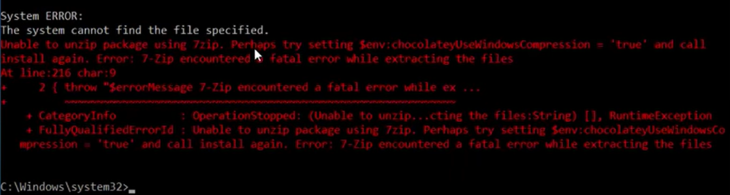
While installing Chocolatey, you may run into the following error shown in the code snippet image here:
Open PowerShell as an admin and set the required rights, as shown below:
Get-ExecutionPolicy
If this response returns…
Restricted
…then run the following code snippet:
Get-ExecutionPolicy AllSigned
After running the code snippet above, you will be prompted to respond “Yes” to secure your system against scripts you don’t trust. Once you’ve done so, rerun the code snippet and you should see this:

Currently, an added security check has been set for scripts. Let’s go back to the command-line interface and continue from where we left off.
If you look closely at the error message that was encountered earlier, a suggestion to set the environment variable for Chocolatey was made. So, let’s set the environment variable, as shown below:
![]()
Now that we’ve set the variable with the above code snippet, let’s try to install Chocolatey again, as demonstrated here:
@"%SystemRoot%\System32\WindowsPowerShell\v1.0\powershell.exe" -NoProfile -InputFormat None -ExecutionPolicy Bypass -Command "[System.Net.ServicePointManager]::SecurityProtocol = 3072; iex ((New-Object System.Net.WebClient).DownloadString('https://community.chocolatey.org/install.ps1'))" && SET "PATH=%PATH%;%ALLUSERSPROFILE%\chocolatey\bin"
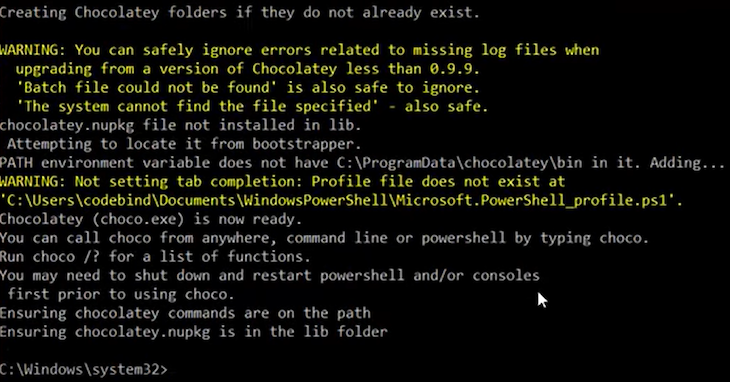
If the code snippet above was successful, the command-line interface should look like this:
To see the version of Chocolatey that was installed, you can run the following code snippet:

To execute Chocolatey, all you need to do is to open the command line and run:
choco
To start installing packages, close the CMD and reopen it as an admin once again. Now, let’s see how Chocolatey can be used to install NVM (Node Version Manager), as shown here:
choco install nvm.portable
NVM is a package used to manage the installation of different versions of Node.js and npm. There are also many more packages that are available to install. To install a package, use the choco command followed by install, and then specify the package name.
Every installed package is saved in one location and can be found in the following path:
'C:\ProgramData\chocolatey\lib'
To locate a single package, you must add the package name to the lib path, like this:
'C:\ProgramData\chocolatey\lib\yourPackageName'
Let’s go into the terminal and run the following code snippet:
nvm install lts
The snippet above will install the latest stable version of Node.js and npm. A specific version of Node can also be installed by running the following:
nvm install 16.18.0
To see the list of Node versions that can be selected, run the following:
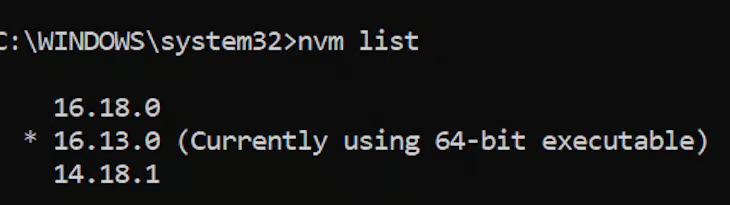
This is a list of Node versions that have been installed, including the one I am currently using on my Windows machine. Now, let’s see how a specific Node version is selected — take a look here:
nvm use 16.18.0
Run the code snippet to check the version of Node and npm we are currently using:

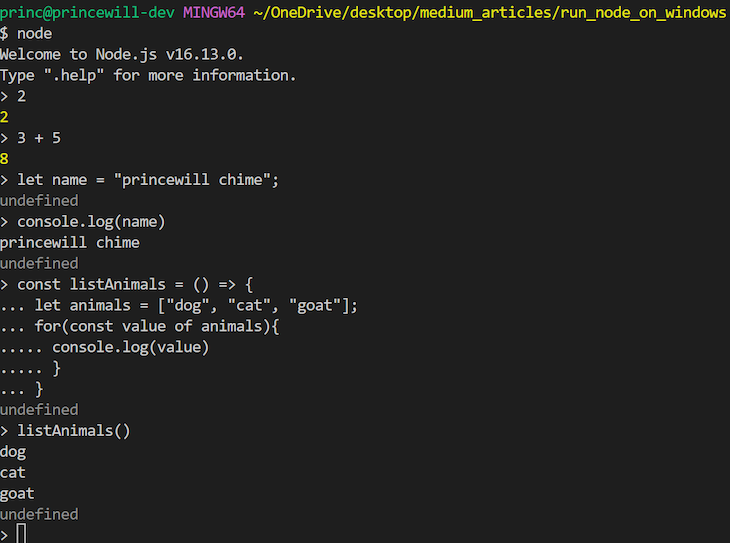
In the code snippet above, I was able to write normal JavaScript code directly in the Node environment. This allows me to perform calculations, create loops and functions, and access variables directly from the terminal.
N.B., all that is necessary is to write node and hit enter to start up the Node environment on the terminal.
To uninstall Node, you just need to specify the Node version to uninstall, as shown here:
nvm uninstall node 16.18.0
To upgrade a package that has been installed using Chocolatey, run the following code snippet:
choco upgrade nvm.portable
The code snippet above will search for the NVM package inside the lib location. Once it finds it, it will look for a possible stable release and upgrade to the relevant version.
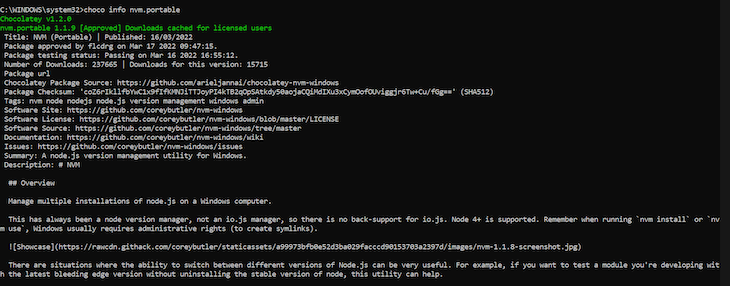
To get all available information about a package using Chocolatey, we can run the following code snippet:
choco info nvm.portable
In the response displayed below, you will find pertinent information regarding the package you queried:
To install multiple packages using Chocolatey, simply run the following code snippet:
choco install nvm.portable firefox
In the snippet above, you can see that, just as multiple files work with npm, the same applies to Chocolatey — we simply stack each package after the other.
To uninstall a package installed using choco, run the following code snippet:
choco uninstall nvm.portable
Using Chocolatey to install Node.js on Windows is free and efficient, making it an excellent choice for devs looking to manage packages. This guide detailed how to install Node.js using Chocolatey, which allows you to install, manage, and update packages using simple commands like choco install. Whether you need to install multiple packages, upgrade them, or even uninstall Node.js, consider using Chocolately to do so thanks to its great features and ease of use.
 Monitor failed and slow network requests in production
Deploying a Node-based web app or website is the easy part. Making sure your Node instance continues to serve resources to your app is where things get tougher. If you’re interested in ensuring requests to the backend or third-party services are successful, try LogRocket.

LogRocket lets you replay user sessions, eliminating guesswork around why bugs happen by showing exactly what users experienced. It captures console logs, errors, network requests, and pixel-perfect DOM recordings — compatible with all frameworks.
LogRocket's Galileo AI watches sessions for you, instantly identifying and explaining user struggles with automated monitoring of your entire product experience.
LogRocket instruments your app to record baseline performance timings such as page load time, time to first byte, slow network requests, and also logs Redux, NgRx, and Vuex actions/state. Start monitoring for free.
Would you be interested in joining LogRocket's developer community?
Join LogRocket’s Content Advisory Board. You’ll help inform the type of content we create and get access to exclusive meetups, social accreditation, and swag.
Sign up now
Discover how to use Gemini CLI, Google’s new open-source AI agent that brings Gemini directly to your terminal.

This article explores several proven patterns for writing safer, cleaner, and more readable code in React and TypeScript.

A breakdown of the wrapper and container CSS classes, how they’re used in real-world code, and when it makes sense to use one over the other.

This guide walks you through creating a web UI for an AI agent that browses, clicks, and extracts info from websites powered by Stagehand and Gemini.


