As a musician, I spent a non-trivial amount of time in my DAW (Digital Audio Workstation). And as a programmer, I’ve often felt tempted to improve my music-making environment by writing audio plugins — the standard way of expanding a DAW supported by all major manufacturers.

However, the barrier to entry has always seemed too much for a frontend developer such as myself to stomach. The need for mastering C++ audio programming in addition to an audio plugin framework such as JUCE has been a turn off. Not anymore. Say hello to Elementary, a JavaScript framework for audio coding.
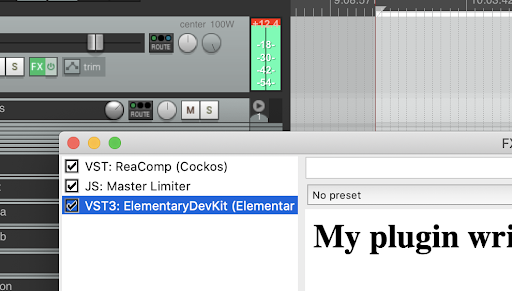
A TL;DR spoiler before we dive in: did Elementary fulfill my needs completely? In an ideal universe, I want to write and distribute (read: charge for) my plugins to other DAW users. This is not (yet) possible. But did I manage to get my JavaScript code to run and do what I want inside my preferred DAW of choice? You bet! A picture says a thousand words, so here’s a screenshot.
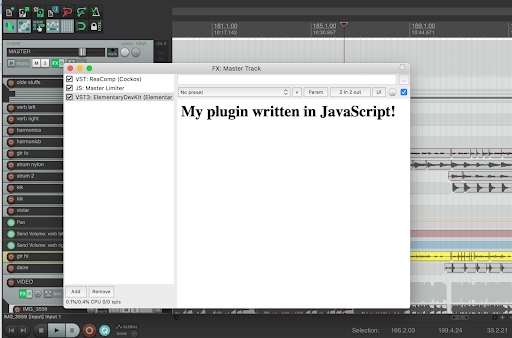
If you have spent time in any DAW, I hope this whets your appetite. So let’s dive in!
First things first, head out to the getting started instructions. It’s pretty much your usual npm i business except you need access to a private repo, and for that you need to register for a free account.
You also need to install a command line utility called elementary by running a shell script. The instructions didn’t work for me (probably a temporary SSL certificate issue):
$ curl -fsSL https://www.elementary.audio/install.sh | sh
$ curl: (60) SSL certificate problem: certificate has expired
However, grabbing the install.sh from elementary.audio or from GitHub and running it locally should work just fine. Making sure the CLI installed successfully:
$ elementary -h

Usage: elementary [options] [node_options] file.js

    Run the given file with elementary.
At this point, you’re ready to begin exploring.
Elementary can run your code (a.k.a. render) in three environments: in the Node command line, in a WebAudio web application, and natively as a DAW plugin.
Let’s skip the WebAudio renderer as the most obvious and self-explanatory, though not to be dismissed. If, like me, you’ve done any amount of digging into WebAudio, you know it’s a pretty low-level API and you really need a framework to spare you a lot of details.
In this regard, Elementary is a welcome addition because it looks like it can help a lot with your DSP (Digital Signal Processing) needs.
The Node renderer is a great way to explore what Elementary has to offer and quickly test ideas without the burden of a UI, right on the command line. Let’s do just that.
Elementary comes with a public GitHub repo of examples to get you started. Grab them like so:
$ git clone https://github.com/nick-thompson/elementary.git
$ cd elementary/examples
$ npm i
$ ls
00_HelloSine 04_Sampler   node_modules
01_FMArp     05_Grains    package-lock.json
02_BigSaw    06_Ratchet   package.json
03_Synth     07_DelayFX
Now you’re ready to start running some Elementary code. The first (or rather the zero-th) example is a demonstration of a sine wave:
$ elementary 00_HelloSine
Turn up your volume (not too loud) and you should hear a gentle sine wave. If you look at the code, you can see it looks very familiar to a web developer. There’s a load event (like window.onload or DOMContentLoaded), which is when you decide what happens next:
core.on('load', function() {
  core.render(
    el.mul(0.3, el.cycle(440)),
    el.mul(0.3, el.cycle(441)),
  );
});
Here, el is a bag of Elementary library’s audio processing tools and core is one of the three renderers — in this case, the Node renderer — as you can see by checking out the imports in the example:
import {ElementaryNodeRenderer as core, el} from '@nick-thompson/elementary';
The render() method takes a number of channel arguments — in this case left and right for stereo, but they can be as many as your system supports (e.g., 5.1 surround sound or 7.1 and so on).
In this example, el.cycle(440) creates a 440Hz (the note A) sine wave on the left speaker and 441Hz (ever so slightly above the note A) on the right. el.mul() multiplies the result by 0.3, which means it turns down the volume (gain). Play with these values to see what happens — e.g., put 880 in the right channel, which is another A note an octave higher.
Another interesting example is 03_Synth. It takes a MIDI signal and creates a synth sound. Amazingly, you can test this in the Node console even if you don’t have a MIDI instrument plugged in. You can use a simple page that uses WebMIDI to send MIDI messages so long as you take care of routing the messages with a virtual MIDI bus.
Okay, enough playing with examples. Let’s create something of our own: a pink noise generator. Not only can you turn it on and go to sleep, but you can use it in mixing music too.
There’s a simple mixing technique to help with initial balances of instruments: take one instrument at a time and mix it with pink noise until you can barely hear it.
At the end, you’ll have a subjectively equal balance of all instruments. This is subjective because pink noise mimics human hearing, unlike white noise that is equal noise across the audio spectrum. TMI? It’s okay, let’s see some code:
$ mkdir pink
$ touch pink/index.js
$ open pink/index.js
Add this code to the pink/index.js:
import {ElementaryNodeRenderer as core, el} from '@nick-thompson/elementary';

core.on('load', function() {
  const pink = el.pink(el.noise());
  core.render(
    pink, pink
  );
});

core.initialize();
Start the script and enjoy the noise:
$ elementary pink/index.js
It’s pretty loud, isn’t it? You can always turn it down with el.mul() as we saw above.
Next, let’s run this code in a DAW. In my case that’s Reaper, but ProTools, Logic, and Ableton should all work just fine.
First, a bit more setup is required. You can follow the instructions to download plugin binaries and copy them where your audio plugins usually live, e.g., ~/Library/Audio/Plug-Ins/VST.
Next, you need to set up a local web server to serve your plugin. The docs recommend create-react-app as an easy choice, but let’s ignore that and keep everything closer to DIY without introducing too many more dependencies.
The plugin development is still an experimental technology and there are limitations: it works only on MacOS, and it requires a local web server to serve on a selected address and port (127.0.0.1:3000).
This means you cannot run two different plugins at the same time, although you can always build a single plugin that does several things that you turn on/off in the plugin UI. Speaking of UIs…
The UI development in C++ is notoriously cumbersome. Frameworks such as JUCE help, but nothing compares to the web where we can build amazing stuff with or without a UI framework such as React or Vue. The great news is you can use your web skills to do all the UI your heart desires with Elementary plugins.
Now before we get to the audio programming, let’s take care of loading the plugin-to-be in our DAW. Instead of create-react-app, let’s use a simple old index.html. You heard right: we’re going old school, as simple as web development can be.
Create a new directory and put an index.html in it:
$ mkdir pinkplugin
$ touch pinkplugin/index.html
$ open pinkplugin/index.html
Add this simple HTML in your index.html:
<h1>My plugin written in JavaScript!</h1>
Now Elementary needs to load this index.html from a local server. And use HTTPS to complicate things. In this day and age, this is easily solved with the right npm package. Using the number of weekly downloads as a proxy for quality, https-localhost seems to fit the bill.
Some more setup using Homebrew and NPM:
$ brew install nss
$ npm i -g --only=prod https-localhost
Now we’re ready to start the server exactly the way Elementary expects it:
$ PORT=3000 HOST=127.0.0.1 serve pinkplugin

Serving static path: pinkplugin
Server running on port 3000.
Now fire up your DAW and find the new plugin:
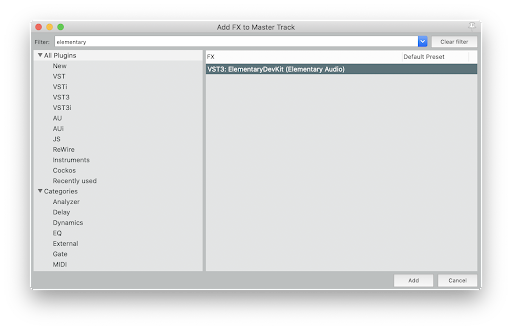
Adding the plugin reminds you once again where Elementary expects to find your web code:
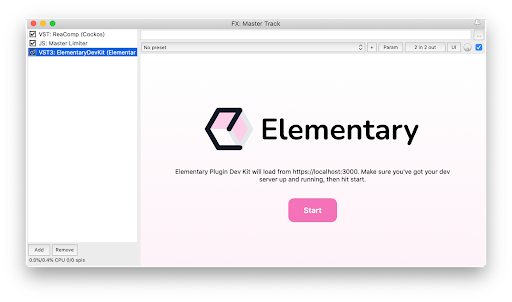
Your server is running, you plugin is loaded, just click Start to see the result:
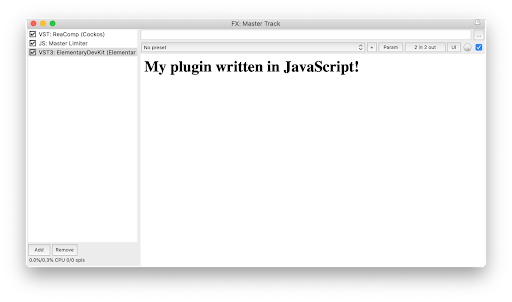
Success: your web web code running in a native DAW plugin! Now let’s add the audio part of the code.
From an index.html, you go as complicated or as simple as you want. Let’s go simple and put the audio code inline in the HTML. Here’s how:
<script type="module">
  import {ElementaryPluginRenderer as core, el} from './node_modules/@nick-thompson/elementary/dist/elementary.min.js';

  core.on('load', function() {
    const pink = el.pink(el.noise());
    core.render(
      pink, pink
    );
  });

  core.initialize();
</script>
<h1>My plugin written in JavaScript!</h1>
You can recognize the audio portion of the code, the now-familiar core.on() event listener. What may look funky is the import. Since this is DIY HTML code and there’s no build step, you need to point the import to the exact file.
Luckily, it’s all a single, prebuilt, minified JS file that you can npm install or just copy from the examples directory. In fact, you can keep it simple and lose the whole node_modules directory structure in favor of just copying elementary.min.js next to your index.html and importing like so:
import {ElementaryPluginRenderer as core, el} from './elementary.min.js';
Note that we now use ElementaryPluginRenderer as opposed to the ElementaryNodeRenderer since we’re working inside a plugin, not the Node CLI.
Now to test the new code you need to remove the plugin and add it again. Sigh, no “reload,” but compared to compiling C++ code in JUCE, this is a walk in the park.
Here’s the final version of our index.html pink noise native audio plugin:
<script type="module">
  import {ElementaryPluginRenderer as core, el} from './elementary.min.js';
  core.on('load', function() {
    const pink = el.pink(el.noise());
    core.render(
      pink, pink
    );
  });
  core.initialize();
</script>
<h1>My plugin written in JavaScript!</h1>
And here it is in action, added to the Master track in Reaper and making pretty loud pink noise. Again, you can use el.mul() to turn the gain down in the code or use Reaper to turn it down there.
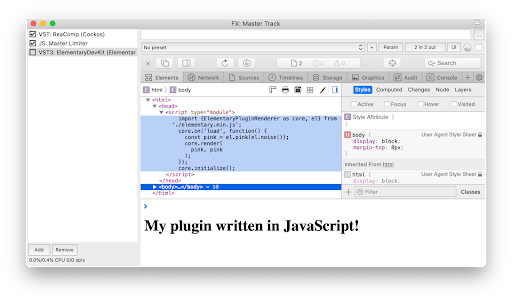
One more thing to blow your mind before we move on: right click the plugin and access the whole Safari web developer debugging power available to you.
This was fun; let’s create another plugin before we say goodbye.
The thing about mixing audio is it takes time, and we humans are adaptive animals. What catches our attention once gets added to the background processing later and we stop noticing it.
As a famous mixer puts it, “The more we listen, the less we hear.” In other words, you can become accustomed to what you’re working on and may miss obvious things after a while.
One technique to fight this phenomenon, especially when working on stereo spread (which instruments or sounds go more to the right ear and which more to the left) is to flip the left and right channels and suddenly gain new perspective. People switch channels on their monitoring setup (if they have one) or go old school and turn their back to the computer screen. But wouldn’t it be nice to be able to flip left and right with a single click? Let’s do this with a new plugin.
Set up a new directory and copy the elementary.min.js dependency:
$ mkdir flipp
$ cp pinkplugin/elementary.min.js flipp/
$ touch flipp/index.htm
$ open flipp/index.html
Then add the code to index.html:
<script type="module">
import {ElementaryPluginRenderer as core, el} from './elementary.min.js';
core.on('load', function() {
core.render(
el.in({channel: 1}),
el.in({channel: 0})
)
});
core.initialize();
</script>
<h1>My plugin written in JavaScript!</h1>
Start the server:
$ PORT=3000 HOST=127.0.0.1 serve flipp
And finally, add the plugin. Now the two channels are flipped. Simply bypass the plugin from your DAW to restore the normal channels.
As you can probably guess, el.in() reads incoming audio. And channel: 0 tells it to read only one channel. Then we render() channel 0 where 1 is expected and vice versa. Simple but effective and does the job.
Elementary is a game-changer when it comes to providing us mere JavaScript mortals with a way to create native audio plugins. Personally, I miss a few things:
But Elementary is a relatively new offering under active development. I can’t wait to see what’s next. Meanwhile we can dig into its API and get even more excited by all the DSP goodness it has to offer!
Debugging code is always a tedious task. But the more you understand your errors, the easier it is to fix them.
LogRocket allows you to understand these errors in new and unique ways. Our frontend monitoring solution tracks user engagement with your JavaScript frontends to give you the ability to see exactly what the user did that led to an error.

LogRocket records console logs, page load times, stack traces, slow network requests/responses with headers + bodies, browser metadata, and custom logs. Understanding the impact of your JavaScript code will never be easier!
Hey there, want to help make our blog better?
Join LogRocket’s Content Advisory Board. You’ll help inform the type of content we create and get access to exclusive meetups, social accreditation, and swag.
Sign up now
A breakdown of the wrapper and container CSS classes, how they’re used in real-world code, and when it makes sense to use one over the other.

This guide walks you through creating a web UI for an AI agent that browses, clicks, and extracts info from websites powered by Stagehand and Gemini.

This guide explores how to use Anthropic’s Claude 4 models, including Opus 4 and Sonnet 4, to build AI-powered applications.

Which AI frontend dev tool reigns supreme in July 2025? Check out our power rankings and use our interactive comparison tool to find out.